1.服务注册
在上一篇的鉴权和登录服务中分别通过NuGet引用Consul这个包,同时新增AppBuilderExtensions类:
    public static class AppBuilderExtensions
    {
        public static IApplicationBuilder RegisterConsul(this IApplicationBuilder app,IApplicationLifetime lifetime,ServiceEntity serviceEntity)
        {
            var consulClient = new ConsulClient(x => x.Address = new Uri($"http://{serviceEntity.ConsulIP}:{serviceEntity.ConsulPort}"));//请求注册的Consul地址
            var httpCheck = new AgentServiceCheck()
            {
                DeregisterCriticalServiceAfter=TimeSpan.FromSeconds(5),//服务启动多久后注册
                Interval=TimeSpan.FromSeconds(10),//健康检查时间间隔,或者成为心跳间隔
                HTTP=$"http://{serviceEntity.IP}:{serviceEntity.Port}/api/health",//健康检查地址
                Timeout=TimeSpan.FromSeconds(5)
            };

            //Register service with consul
            var registration = new AgentServiceRegistration()
            {
                Checks = new[] {httpCheck},
                ID=Guid.NewGuid().ToString(),
                Name=serviceEntity.ServiceName,
                Address=serviceEntity.IP,
                Port=serviceEntity.Port,
                Tags = new[] { $"urlprefix-/{serviceEntity.ServiceName}"} //添加urlprefix-/servicename格式的tag标签,以便Fabio识别
            };

            consulClient.Agent.ServiceRegister(registration).Wait();//服务启动时注册,内部实现其实就是使用Consul API进行注册(HttpClient发起)
            lifetime.ApplicationStopping.Register(() =>
            {
                consulClient.Agent.ServiceDeregister(registration.ID).Wait();//服务停止时取消注册
            });

            return app;
        }
    }

    public class ServiceEntity
    {
        public string IP { get; set; }
        public int Port { get; set; }
        public string ServiceName { get; set; }
        public string ConsulIP { get; set; }
        public int ConsulPort { get; set; }
    }
通过这个类可以提供服务注册的基本参数。
修改Startup启动项中的Configure方法:
public void Configure(IApplicationBuilder app, IHostingEnvironment env, IApplicationLifetime lifetime)
        {
            if (env.IsDevelopment())
            {
                app.UseDeveloperExceptionPage();
            }

            #region Consul 服务注册
            ServiceEntity serviceEntity = new ServiceEntity
            {
                IP = "127.0.0.1",   //服务运行地址
                Port = Convert.ToInt32(Configuration["Consul:ServicePort"]), //服务运行端口
                ServiceName = Configuration["Consul:Name"], //服务标识,Ocelot中会用到
                ConsulIP = Configuration["Consul:IP"], //Consul运行地址
                ConsulPort = Convert.ToInt32(Configuration["Consul:Port"])  //Consul运行端口(默认8500)
            };
            app.RegisterConsul(lifetime, serviceEntity);
            #endregion

            app.UseIdentityServer();
            //app.UseAuthentication();
            app.UseStaticFiles();
            app.UseMvcWithDefaultRoute();
        }
看下配置文件需要新增的东西:
{
  "Service": {
    "Name": "MI.Service",
    "Port": "7001",
    "DocName": "Account Service",
    "Version": "v1",
    "Title": "Account Service API"
  },
  "Identity": {
    "IP": "localhost",
    "Port": "7000",
    "Scheme": "Bearer"
  },
  "ConnectionStrings": {
    "SqlConnection": "server=.;uid=sa;pwd=sa;database=MI"
  },
  "Consul": {
    "Name": "MI.Service.Account",
    "ServiceProt": "7001",
    "IP": "localhost",
    "Port": "8500"
  }
}
蓝色标识的Consul部分是我们这里需要用到的,这里我把项目名称当作服务注册标识。
然后还需要为两个服务添加两个方法,一个是用来做健康检查的,一个是用来测试的:
    [Route("api/Health")]
    public class HealthController : Controller
    {
        [HttpGet]
        public IActionResult Get() => Ok("ok");
    }
public class MiUserController : Controller
    {
        public MIContext _context;
        public MiUserController(MIContext _context)
        {
            this._context = _context;
        }


        public string Index()
        {
            return "Successful";
        }

        。。。。。。
}
通过“consul agent -dev”命令运行Consul,访问127.0.0.1:8500我们可以看到Consul的UI界面:
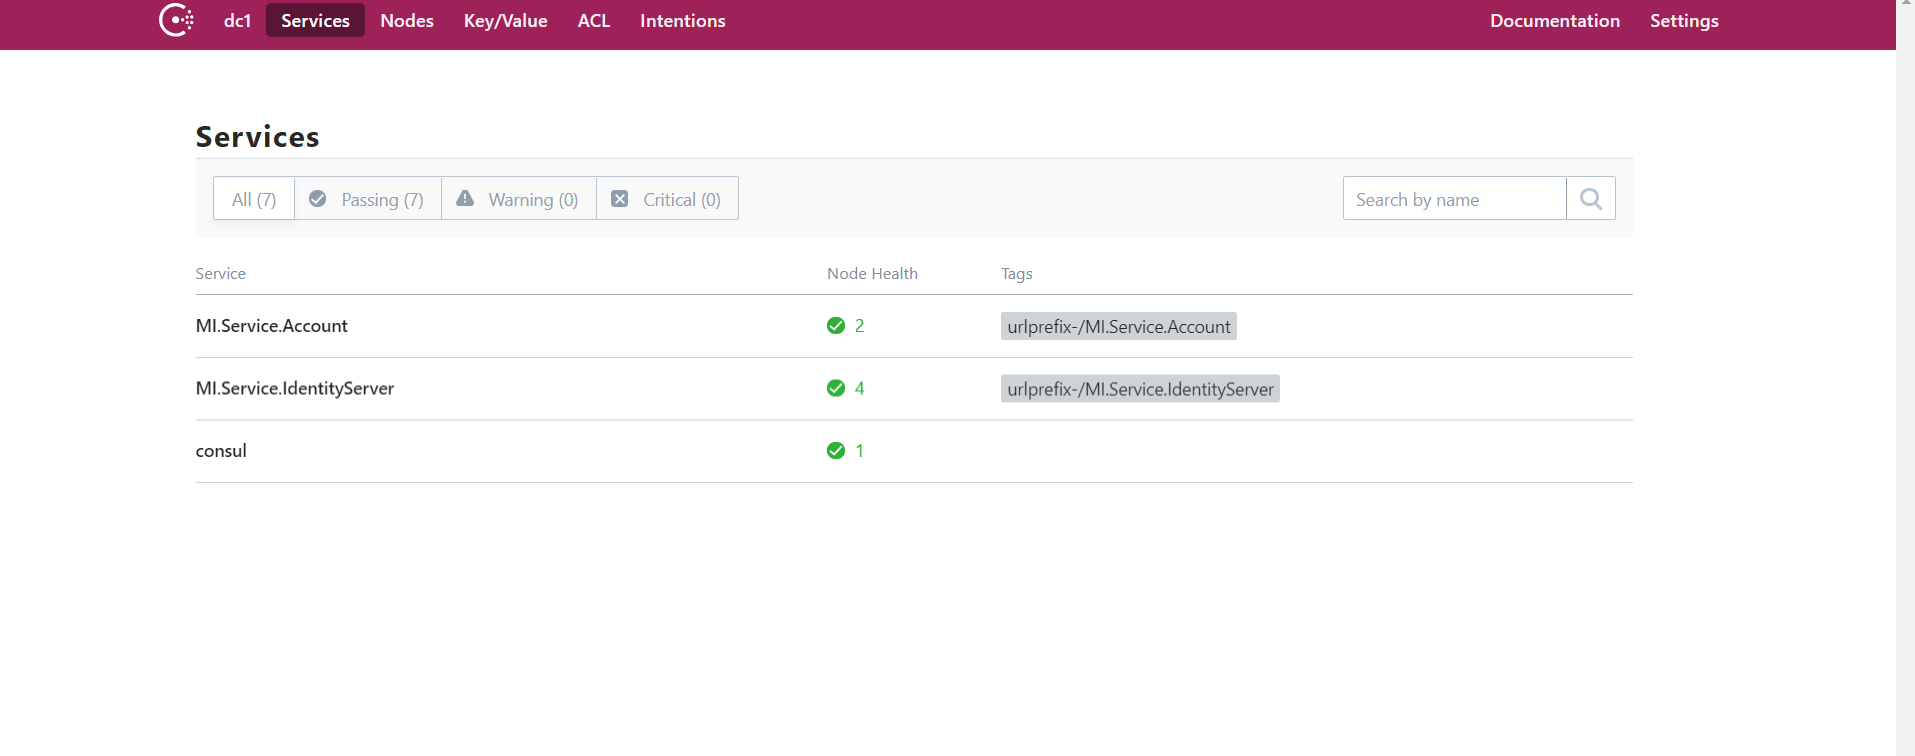
这里可以看到我们已经注册的两个服务。
2.服务发现
新建API项目MI.Ocelot,通过NuGet引用Ocelot和Ocelot.Provider.Consul两个包,并修改启动项注册Ocelot和Consul:
public void ConfigureServices(IServiceCollection services)
        {
            //services.AddMvc();
            services.AddOcelot(Configuration)
                .AddConsul();
        }

        // This method gets called by the runtime. Use this method to configure the HTTP request pipeline.
        public void Configure(IApplicationBuilder app, IHostingEnvironment env)
        {
            if (env.IsDevelopment())
            {
                app.UseDeveloperExceptionPage();
            }

            app.UseOcelot();

            //app.UseMvc();
        }
然后添加配置文件consul.json:
{
  "ReRoutes": [
    {
      "UseServiceDiscovery": true, //启用服务发现
      "DownstreamPathTemplate": "/Account/{url}", //下游转发路由
      "DownstreamScheme": "http", //标识头
      "ServiceName": "MI.Service.Account", //服务注册标识
      "LoadBalancer": "RoundRobin", //服务均衡:轮询
      "UpstreamPathTemplate": "/Account/{url}", //上游请求路由
      "UpstreamHttpMethod": [ "Get", "Post" ], //请求的方法类型
      "ReRoutesCaseSensitive": false //不区分大小写
    },
    {
      "UseServiceDiscovery": true,
      "DownstreamPathTemplate": "/Identity/{url}",
      "DownstreamScheme": "http",
      "ServiceName": "MI.Service.IdentityServer",
      "LoadBalancer": "RoundRobin",
      "UpstreamPathTemplate": "/Identity/{url}",
      "UpstreamHttpMethod": [ "Get", "Post" ],
      "ReRoutesCaseSensitive": false
    }
  ],
  "GlobalConfiguration": {
    //"BaseUrl": "http://localhost:7003",
    "ServiceDiscoveryProvider": {
      "Host": "127.0.0.1", // Consul Service IP
      "Port": 8500, // Consul Service Port
      "Type": "PollConsul",
      "PollingInterval": 100 //健康检查时间端
    }
  }
}
在Program中启用这个配置文件:
        public static IWebHost BuildWebHost(string[] args) =>
            WebHost.CreateDefaultBuilder(args)
                .UseStartup<Startup>()
                .ConfigureAppConfiguration((hostingContext,builder)=> {
                    builder.AddJsonFile("consul.json");
                })
                .Build();
到此,网关配置完毕。现在我将网关项目MI.Gateway部署在7003端口,登录服务MI.Service.Account部署在7001端口,鉴权服务部署在7000端口,我会通过访问网关服务来请求登录服务:

这里的流程是这样的,Ocelot通过“/Account/MiUser/Index”匹配到了“/Account/{url}”这个路由,进而拿到了“MI.Service.Account”这个服务注册标识,然后通过Consul拿到了对应的地址,并转发了请求,同时返回结果。
到此,具备服务注册和发现的简单网关服务就搭建完毕了,后面有时间会继续优化,添加限流、熔断,同时身份验证会在Ocelot中进行,而不是再去访问单独的鉴权服务。