piManager 作为一个Api 文档管理工具,而且是开源的,作为开发者使用,还是蛮不错的,整体的界面也很友好,下面就来看一下吧。

下面就来介绍下ApiManager在centos 6下的搭建过程吧。
1.安装apache
yum install httpd
重启服务命令:
service httpd start
2.安装mysql
yum install mysql-server
service mysqld start
需要配置账号和密码,并且创建一个数据库,以便下面使用。
3.安装php
yum install php php-gd php-fpm
4.安装数据库连接插件
yum install php-mysql
service php-fpm start
5.浏览器访问apache
http://127.0.0.1/
可能会出现的问题2: Could not reliably determine the server’s fully qualified domain name, using 127.0.1.1 for ServerName
解决:
$ vim /etc/httpd/conf/httpd.conf,在文件中添加:
ServerName localhost:80,再次重启apache2,就可以使用127.0.0.1来访问web服务器啦!
一切配置完后,你就会在浏览器上看到 It works!: 
6.拉取ApiManager开源项目
在centos目录下:/var/www/html$,克隆项目,git clone https://github.com/dqchouyang/ApiManager.git
7.还原数据库
登录mysql数据库,首先设置好编码问题,然后创建好一个空的数据库(字符集utf-8),将源码里的数据库文件还原到数据库中,可以用source /var/www/html/ApiManager/db.sql命令还原。
8.修改项目配置文件
修改./MinPHP/core/config.php 数据库配置段
'db'=>array(
        'host' => 'localhost',   //数据库地址
        'dbname' => 'api_manager',   //数据库名
        'user' => 'root',    //帐号
        'passwd' => '123456',    //密码
        'linktype' => 'mysqli',    //数据库连接类型 支持mysqli与pdo两种类型
),- 1
- 2
- 3
- 4
- 5
- 6
- 7
主要是数据库名和密码,改成自己创建的数据库的名称和密码就好了。
9.访问项目
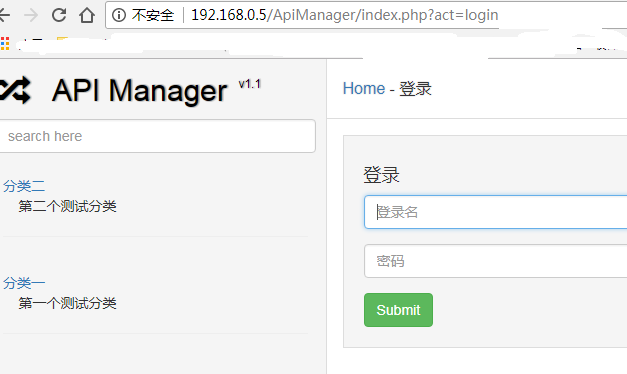
http://127.0.0.1/ApiManager/index.php, 可以在浏览器里看到界面了。
遇到问题:浏览器看到提示 Mysqli unable to connect:2002 - Can't connect to local MySQL server through socket '/var/lib/mysql/mysql.sock' (2)
解决方法:
/etc/my.cnf 里面的 /tmp/mysql.sock 修改成 /var/lib/mysql/mysql.sock ,或者 ln -s /var/lib/mysql/mysql.sock /tmp/mysql.sock
service mysql restart
遇到问题:index.php 没有解析
解决方法:
在配置文件httpd.conf中,找到DirectoryIndex index.html,改为
DirectoryIndex index.html index.htm index.php 即可
换成nginx web服务器后的配置:
yum remove httpd
yum install epel-release
yum install nginx
service nginx start
[root@linux64 ~]# cd /etc/nginx/conf.d/
[root@linux64 conf.d]# vim default.conf
server {
listen 80 default_server;
listen [::]:80 default_server;
server_name _;
root /usr/share/nginx/html;
# Load configuration files for the default server block.
include /etc/nginx/default.d/*.conf;
location ~ .*.php$ {
root /usr/share/nginx/html/ApiManager/index.php;
include fastcgi_params;
fastcgi_param SCRIPT_FILENAME /usr/share/nginx/html$fastcgi_script_name;
fastcgi_pass 127.0.0.1:9000;
fastcgi_index index.php;
}
location / {
index index.html index.htm index.php;
}
error_page 404 /404.html;
location = /40x.html {
}
error_page 500 502 503 504 /50x.html;
location = /50x.html {
}
}
拉取ApiManager开源项目
在centos目录下:/usr/share/nginx/html 下克隆项目,git clone https://github.com/dqchouyang/ApiManager.git
还原数据库
登录mysql数据库,首先设置好编码问题,然后创建好一个空的数据库(字符集utf-8),将源码里的数据库文件还原到数据库中,可以用
source /usr/share/nginx/html/ApiManager/db.sql命令还原。
修改项目配置文件
修改./MinPHP/core/config.php 数据库配置段
'db'=>array(
        'host' => 'localhost',   //数据库地址
        'dbname' => 'api_manager',   //数据库名
        'user' => 'root',    //帐号
        'passwd' => '123456',    //密码
        'linktype' => 'mysqli',    //数据库连接类型 支持mysqli与pdo两种类型
),- 1
service nginx restart
打开浏览器 http://ip/ApiManager/index.php 可查看页面
参考文章:http://blog.csdn.net/dqchouyang/article/details/49907637