属性
| XML属性 | java代码 | 说明 |
| android:adjustViewBounds | setAdjustViewBounds(boolean adjustViewBounds) |
调整自己的边界来来保持所显示图片的长宽比 好像没效果 |
| android:cropToPadding | setCropToPadding(boolean cropToPadding) | 组件将会被裁剪到保留该imageview的padding |
| android:maxWidth | 最大宽度 | |
| android:maxHeight | setMaxHeight(int maxHeight) | 最大高低 |
| android:src | setMaxWidth(int maxWidth) | 图片ID |
| android:scaleType | setScaleType(ScaleType scaleType)
ImageView.ScaleType.MATRIX |
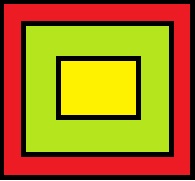
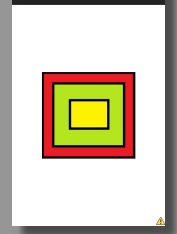
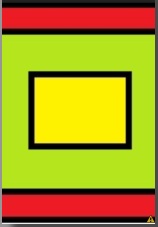
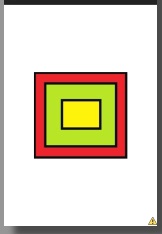
图片缩放样式 原始图片
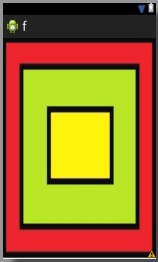
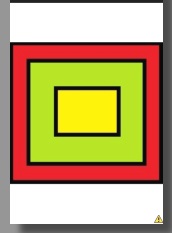
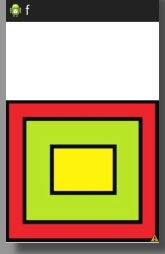
种类 matrix:好想是可以对图片进行缩放、旋转等一些操作,用到了再说 fitXY:按imageview的长度、宽度拉伸,并填充,不会保持长宽比例
fitStart:保持长宽比例缩放,并显示在左上角(好像默认的就是这个)
fitCenter:保持长宽比例缩放,并显示在中间
fitEnd:保持长宽比,并显示在右下角
center:图片放在中间位置,不进行任何缩放
centerCrop: 说不清,反正就是按长宽比放到到所有的都显示下,图片有可能会被截
centerInside:网上说保持长宽比,缩放到使完全显示图片,图是完整的 和center不是一样吗?是我弄得不对?
|
例子
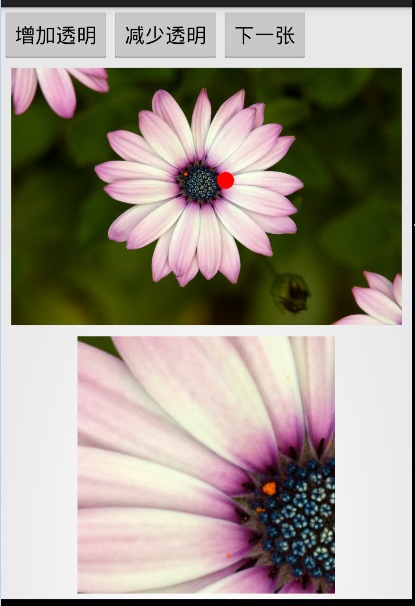
图片浏览器,可以设置图片的透明度、浏览图片的局部位置。稍微扩展了下ImageView,点击放大位置会生成个红点(具体可以自己扩展)
主要是演示功能,图片什么的都没释放
XML

 1 <LinearLayout xmlns:android="http://schemas.android.com/apk/res/android"
 2     android:layout_width="fill_parent"
 3     android:layout_height="fill_parent"
 4     android:orientation="vertical" >
 5
 6     <TableLayout
 7         android:layout_width="match_parent"
 8         android:layout_height="wrap_content"
 9         android:layout_weight="1" >
10
11         <TableRow
12             android:id="@+id/tableRow1"
13             android:layout_width="wrap_content"
14             android:layout_height="wrap_content" >
15
16             <Button
17                 android:id="@+id/button1"
18                 android:layout_width="wrap_content"
19                 android:layout_height="wrap_content"
20                 android:text="增加透明" />
21
22             <Button
23                 android:id="@+id/button2"
24                 android:layout_width="wrap_content"
25                 android:layout_height="wrap_content"
26                 android:text="减少透明" />
27
28             <Button
29                 android:id="@+id/button3"
30                 android:layout_width="wrap_content"
31                 android:layout_height="wrap_content"
32                 android:text="下一张" />
33
34         </TableRow>
35
36
37
38         <LinearLayout
39             android:layout_width="match_parent"
40             android:layout_height="match_parent"
41             android:orientation="vertical" >
42
43             <RelativeLayout
44                 android:layout_width="match_parent"
45                 android:layout_height="wrap_content"
46                 android:layout_weight="1"
47                 >
48
49                 <com.example.f.MyImageView
50                     android:id="@+id/imageView1"
51                     android:layout_width="match_parent"
52                     android:layout_height="match_parent"
53                     android:padding="5dp"
54                     />
55
56             </RelativeLayout>
57
58             <RelativeLayout
59                 android:layout_width="match_parent"
60                 android:layout_height="wrap_content"
61                  android:layout_weight="1"
62                  >
63
64                 <ImageView
65                     android:id="@+id/imageView2"
66                     android:layout_width="match_parent"
67                     android:layout_height="match_parent"
68                     android:padding="5dp"
69                      />
70             </RelativeLayout>
71
72         </LinearLayout>
73
74     </TableLayout>
75
76 </LinearLayout>
MyImageView.java

 1 public class MyImageView extends ImageView{
 2
 3     public MyImageView(Context context, AttributeSet attrs) {
 4         super(context, attrs);
 5         // TODO 自动生成的构造函数存根
 6     }
 7
 8
 9     //定义一个画笔
10     private Paint paint=new Paint();
11     private float cx=0;
12     private float cy=0;
13
14     @Override
15     protected void onDraw(Canvas canvas) {
16         super.onDraw(canvas);
17
18         //设置画笔颜色,这里制定红色
19         paint.setColor(Color.RED);
20         //绘制一个位置在cx,cy的半径15,的圆
21         canvas.drawCircle(cx, cy, 15, paint);
22
23     }
24
25     @Override
26     public boolean onTouchEvent(MotionEvent event) {
27         cx=event.getX();
28         cy=event.getY();
29         //重绘
30         invalidate();
31
32         return true;
33     }
34
35 }
MainActivity.java

 1 public class MainActivity extends Activity {
 2
 3     Button btn1;
 4     Button btn2;
 5     Button btn3;
 6     MyImageView iv1;
 7     ImageView iv2;
 8
 9     //定义图片资源
10     int[] imageIDS=new int[]{
11             R.drawable.pic1,
12             R.drawable.pic2,
13             R.drawable.pic3,
14             R.drawable.pic4
15     };
16     //当前显示第几张图片,默认第一张
17     int index=0;
18
19     protected void onCreate(Bundle savedInstanceState) {
20         super.onCreate(savedInstanceState);
21         setContentView(R.layout.activity_main);
22
23         btn1=(Button)findViewById(R.id.button1);
24         btn2=(Button)findViewById(R.id.button2);
25         btn3=(Button)findViewById(R.id.button3);
26         iv1=(MyImageView)findViewById(R.id.imageView1);
27         iv2=(ImageView)findViewById(R.id.imageView2);
28
29         //设置第一张
30         iv1.setImageResource(imageIDS[index]);
31         btn3.setOnClickListener(new OnClickListener() {
32             public void onClick(View v) {
33                 //下一张
34                 index=index+1;
35                 iv1.setImageResource(imageIDS[index%4]);
36             }
37         });
38
39         //增加透明度
40         btn1.setOnClickListener(new OnClickListener() {
41             @Override
42             public void onClick(View v) {
43                 if((iv1.getImageAlpha()+10)>255){
44                     iv1.setImageAlpha(255);
45                 }else{
46                     iv1.setImageAlpha(iv1.getImageAlpha()+10);
47                 }
48             }
49         });
50
51         //减少透明度
52         btn2.setOnClickListener(new OnClickListener() {
53             @Override
54             public void onClick(View v) {
55                 if((iv1.getImageAlpha()-10)<0){
56                     iv1.setImageAlpha(0);
57                 }else{
58                     iv1.setImageAlpha(iv1.getImageAlpha()-10);
59                 }
60             }
61         });
62
63         iv1.setOnTouchListener(new OnTouchListener() {
64
65             public boolean onTouch(View v, MotionEvent event) {
66                 //获取图片
67                 BitmapDrawable bd=(BitmapDrawable)iv1.getDrawable();
68                 Bitmap bitmap=bd.getBitmap();
69
70                 float scale=bitmap.getWidth()/720;
71                 //获取手指点的位置
72                 float x=event.getX()*scale;
73                 float y=event.getY()*scale;
74                 if((x+240)>bitmap.getWidth()){
75                     x=bitmap.getWidth()-240;
76                 }
77                 if((y+240)>bitmap.getHeight()){
78                     x=bitmap.getHeight()-240;
79                 }
80
81                 Bitmap bitmap1=Bitmap.createBitmap(bitmap,(int)x, (int)y, 240,240);
82                 iv2.setImageBitmap(bitmap1);
83
84                 return false;
85             }
86         });
87
88
89     }
90
91
92 }
