Python中Flask-RESTful编写API接口(小白入门)
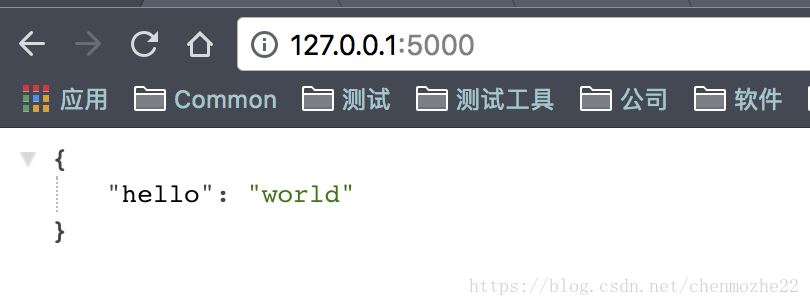
1.API接口:hello world 案例
|
1
2
3
4
5
6
7
8
9
10
11
12
13
14
|
from flask import Flaskfrom flask_restful import Api, Resourceapp = Flask(__name__)api = Api(app)class HelloWorld(Resource): def get(self): return {'hello': 'world'}api.add_resource(HelloWorld, '/')if __name__ == '__main__': app.run(debug=True) |
2.API接口:Resource充当路由的角色
官方文档的说法:
Flask-RESTful 提供的最主要的基础就是资源(resources)。资源(Resources)是构建在 Flask 可拔插视图 之上,只要在你的资源(resource)上定义方法就能够容易地访问多个 HTTP 方法.
其实就是想表达,在资源路由上(resources)定义多个方法(get,post,put等),就可以实现多种效果
|
1
2
3
4
5
6
7
8
9
10
11
12
13
14
15
16
17
18
19
20
|
from flask import Flask, requestfrom flask_restful import Api, Resourceapp = Flask(__name__)api = Api(app)todos = {}class TodoSimple(Resource): def get(self, todo_id): return {todo_id: todos[todo_id]} def put(self, todo_id): todos[todo_id] = request.form['data'] return {todo_id: todos[todo_id]}api.add_resource(TodoSimple, '/<string:todo_id>')if __name__ == '__main__': app.run(debug=True) |
解释:
(1)TodoSimple类定义了2种方法,最终地址/string:todo_id'下面,就可以实现2种请求方法
(2)add_resource方法中第一个参数:视图函数名;第二个参数:路由的具体地址,以及string:todo_id代表传递的是一个字符串,且是必要参数。
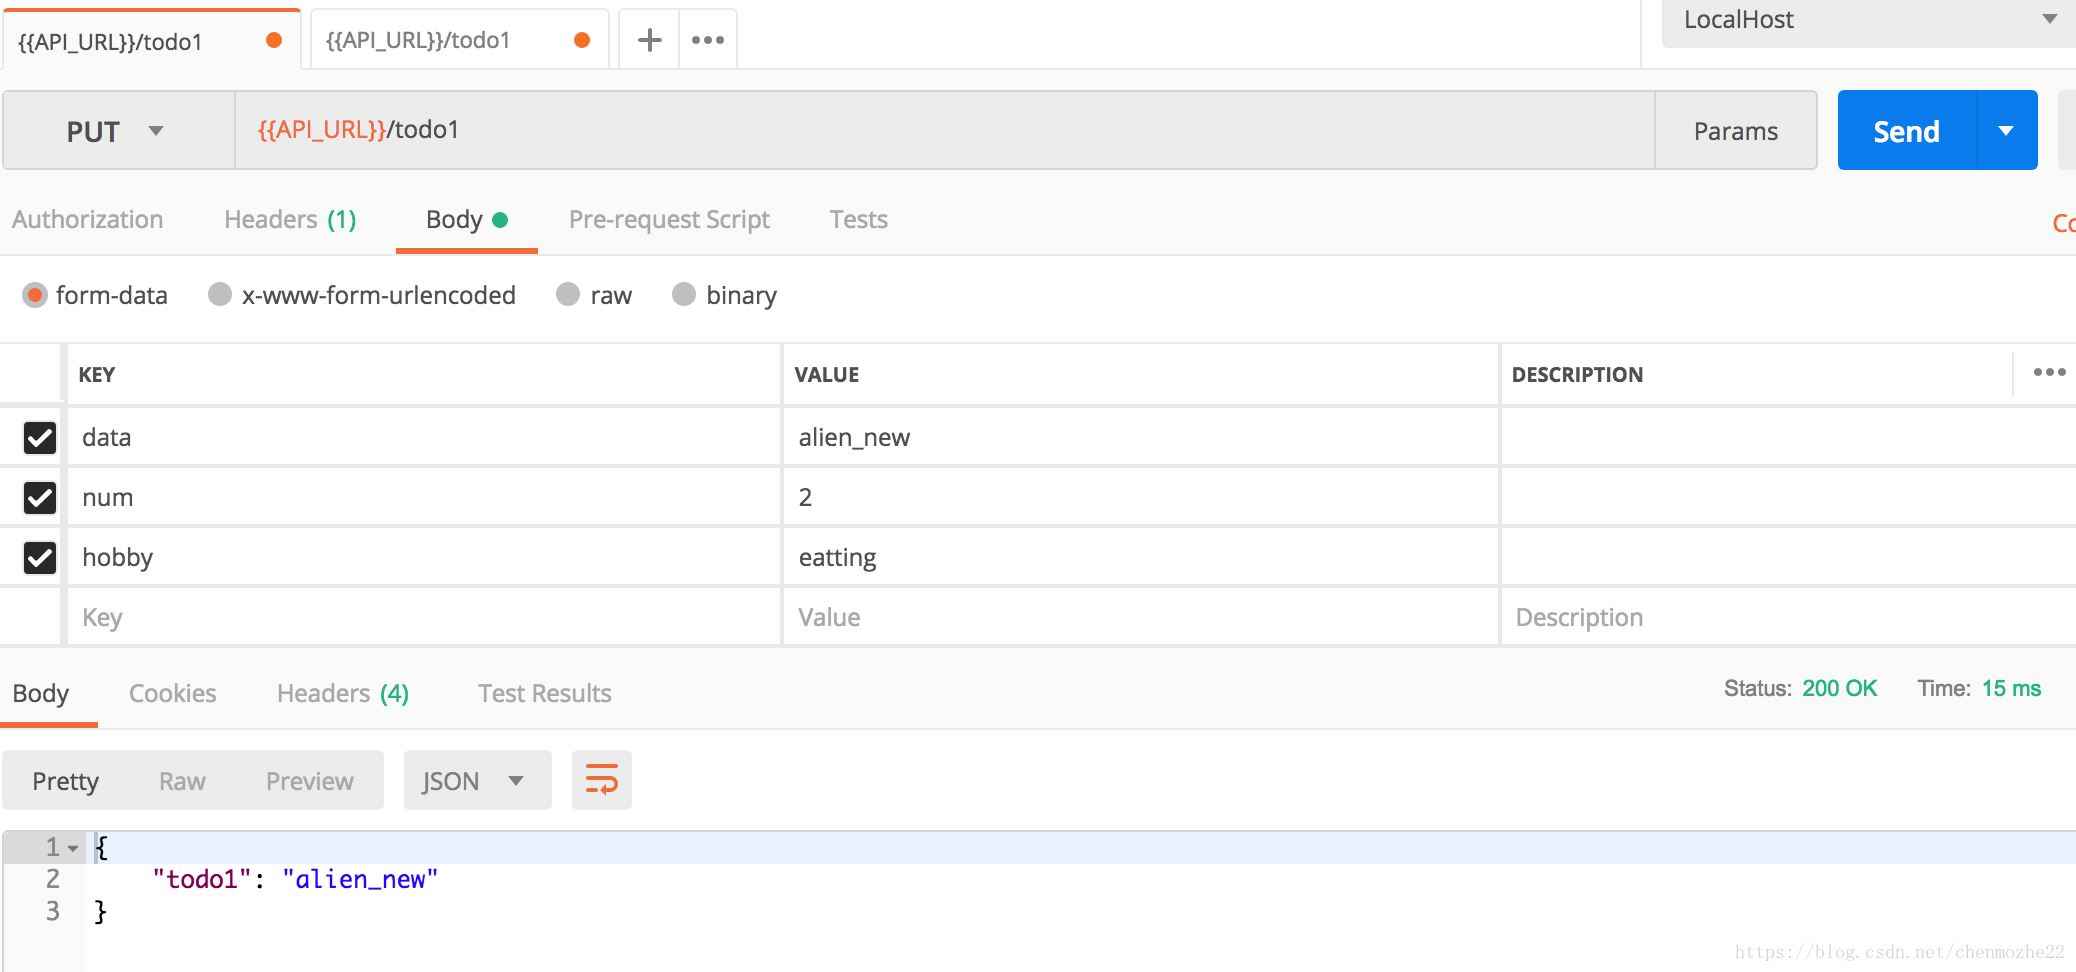
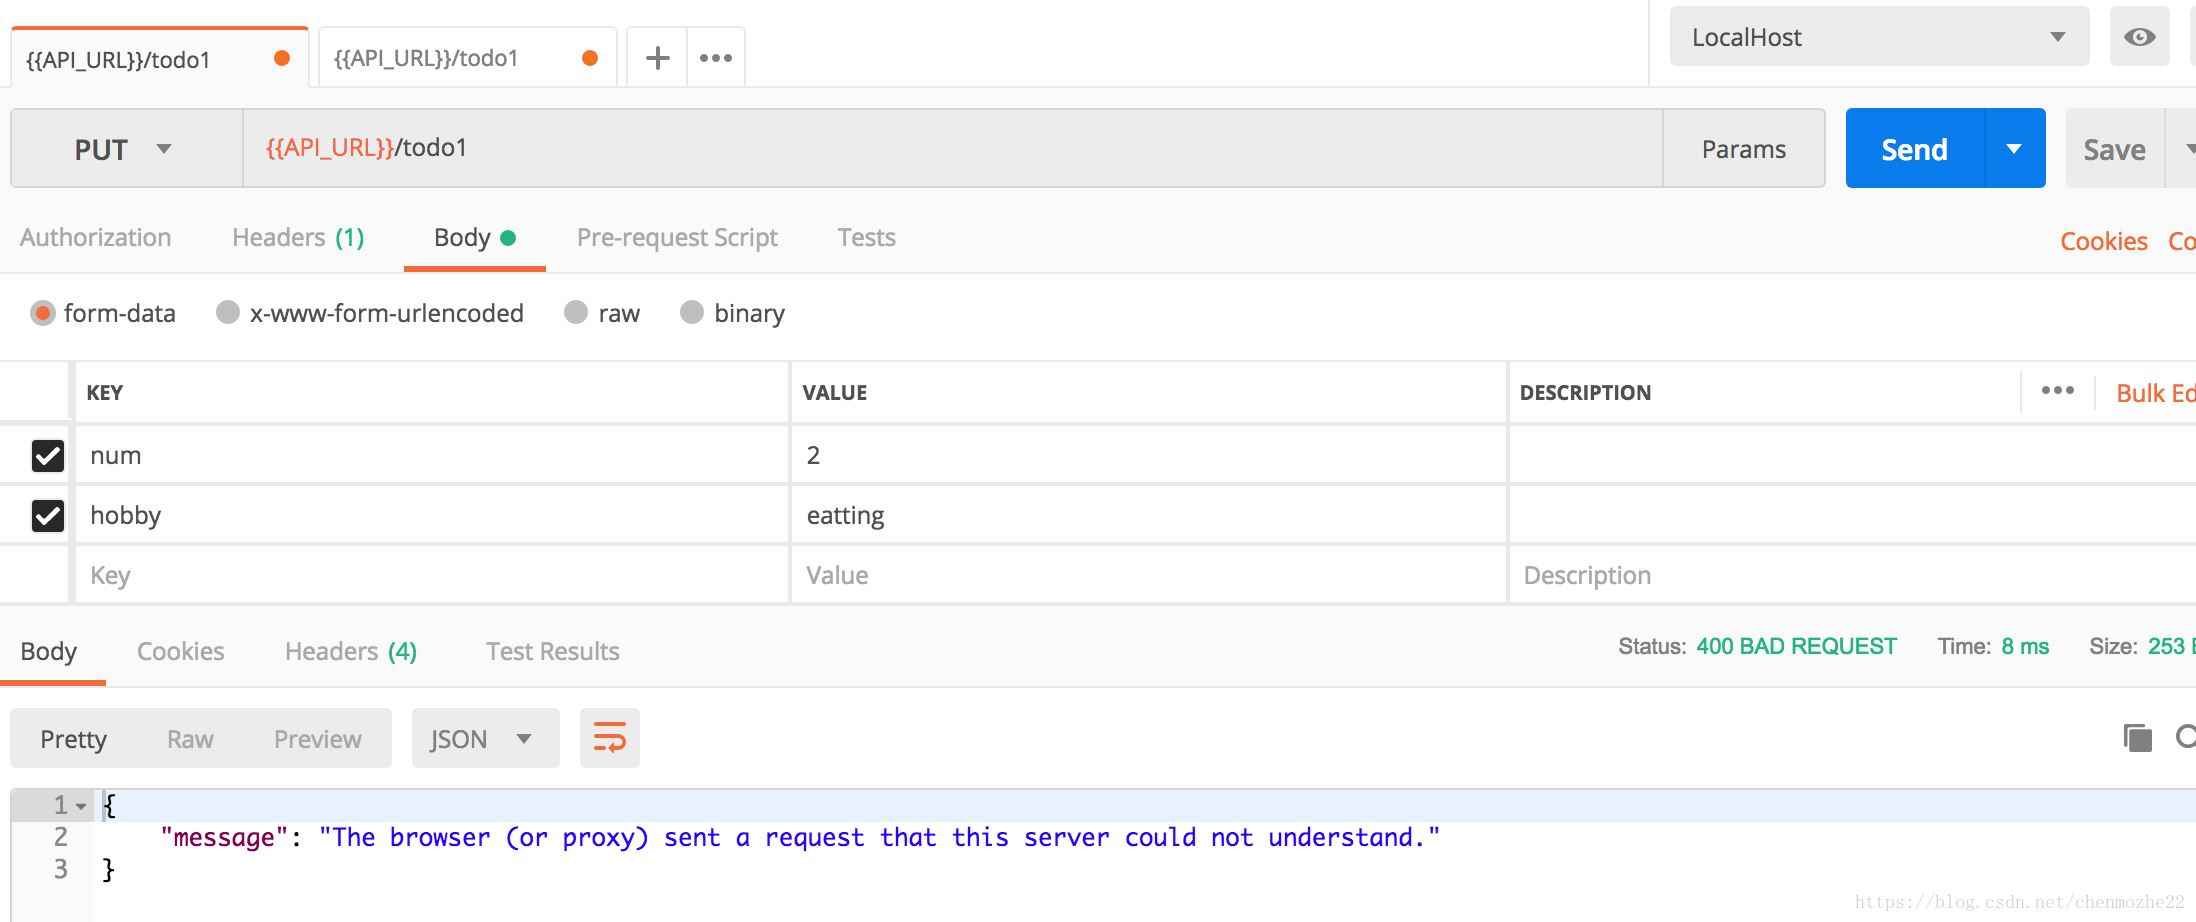
(3)request.form[‘data']获取request里面,form表单的key为data的参数,如果request里面,没有data参数,那报错。如果有包含data的多个参数,那也只会取data这一个参数
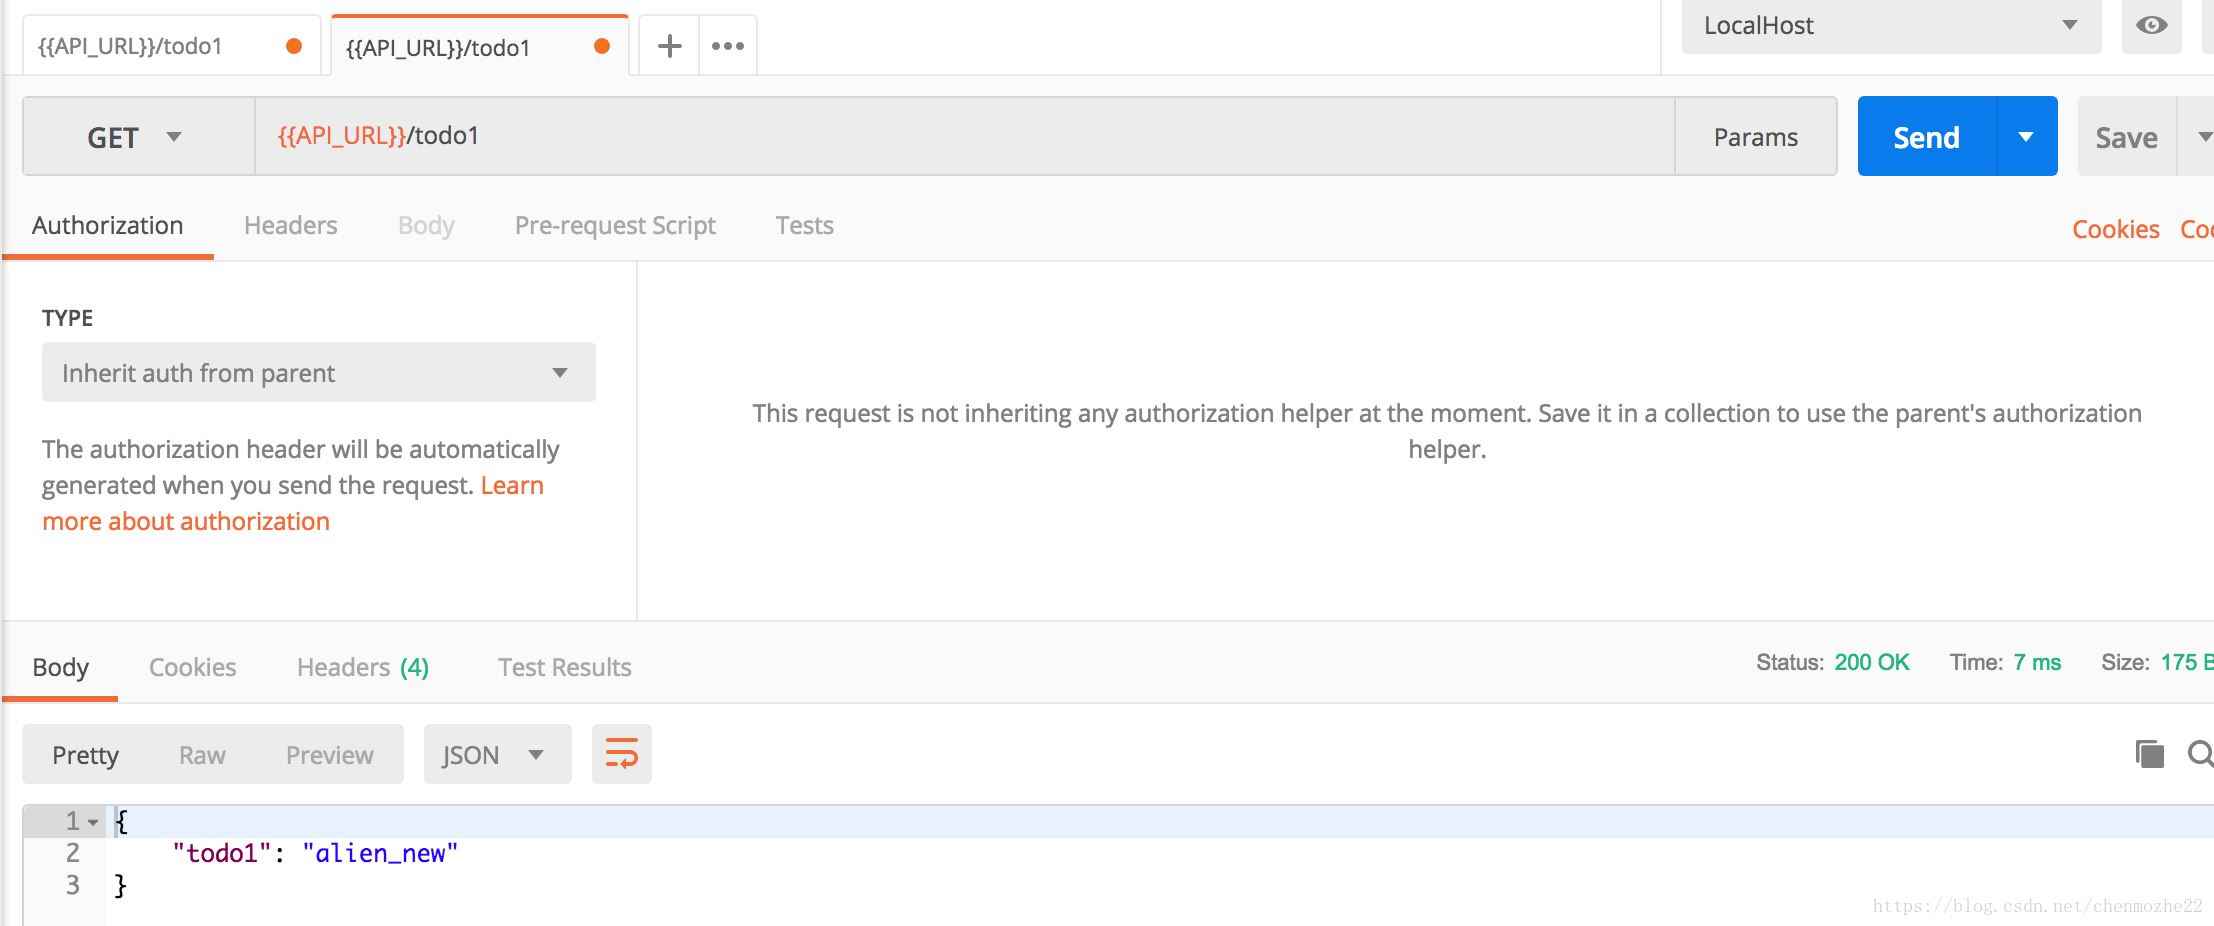
step1:为字典todos定义参数,key为todo1
step2:获取todos里面的todo1的参数
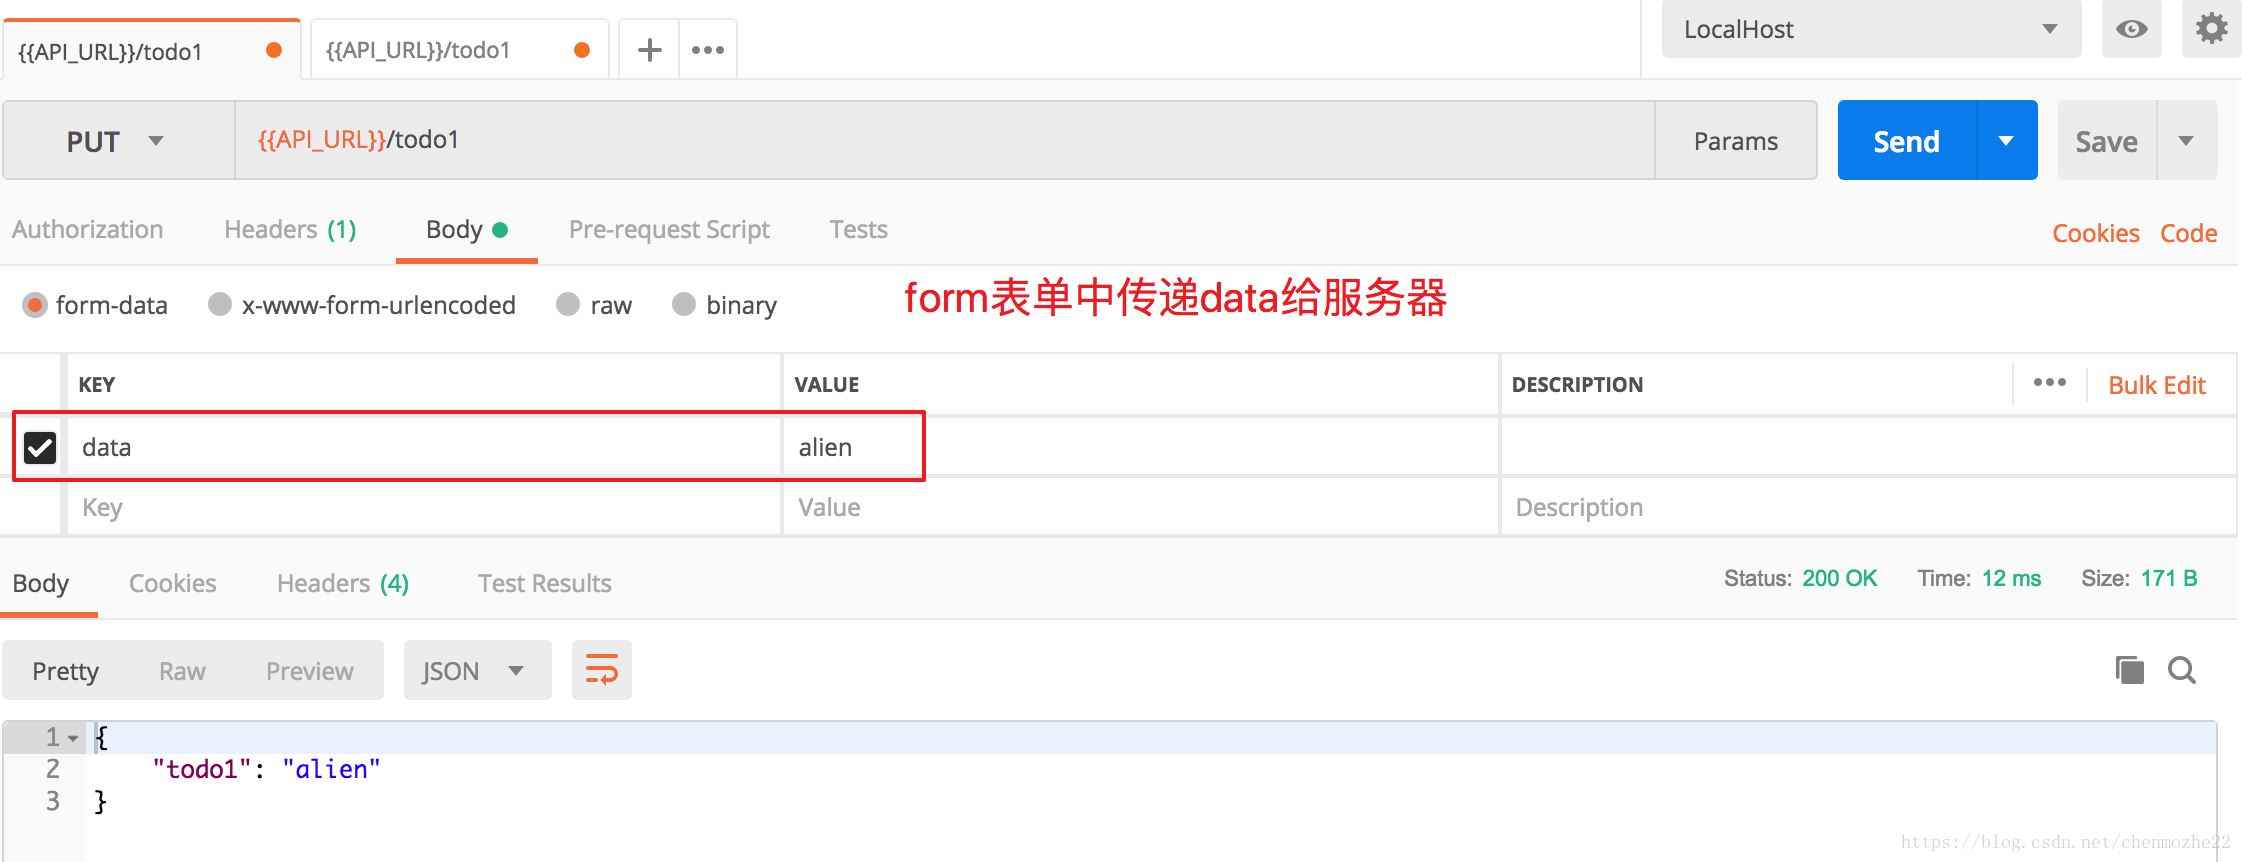
step3:更新老的数据,多传递其他参数
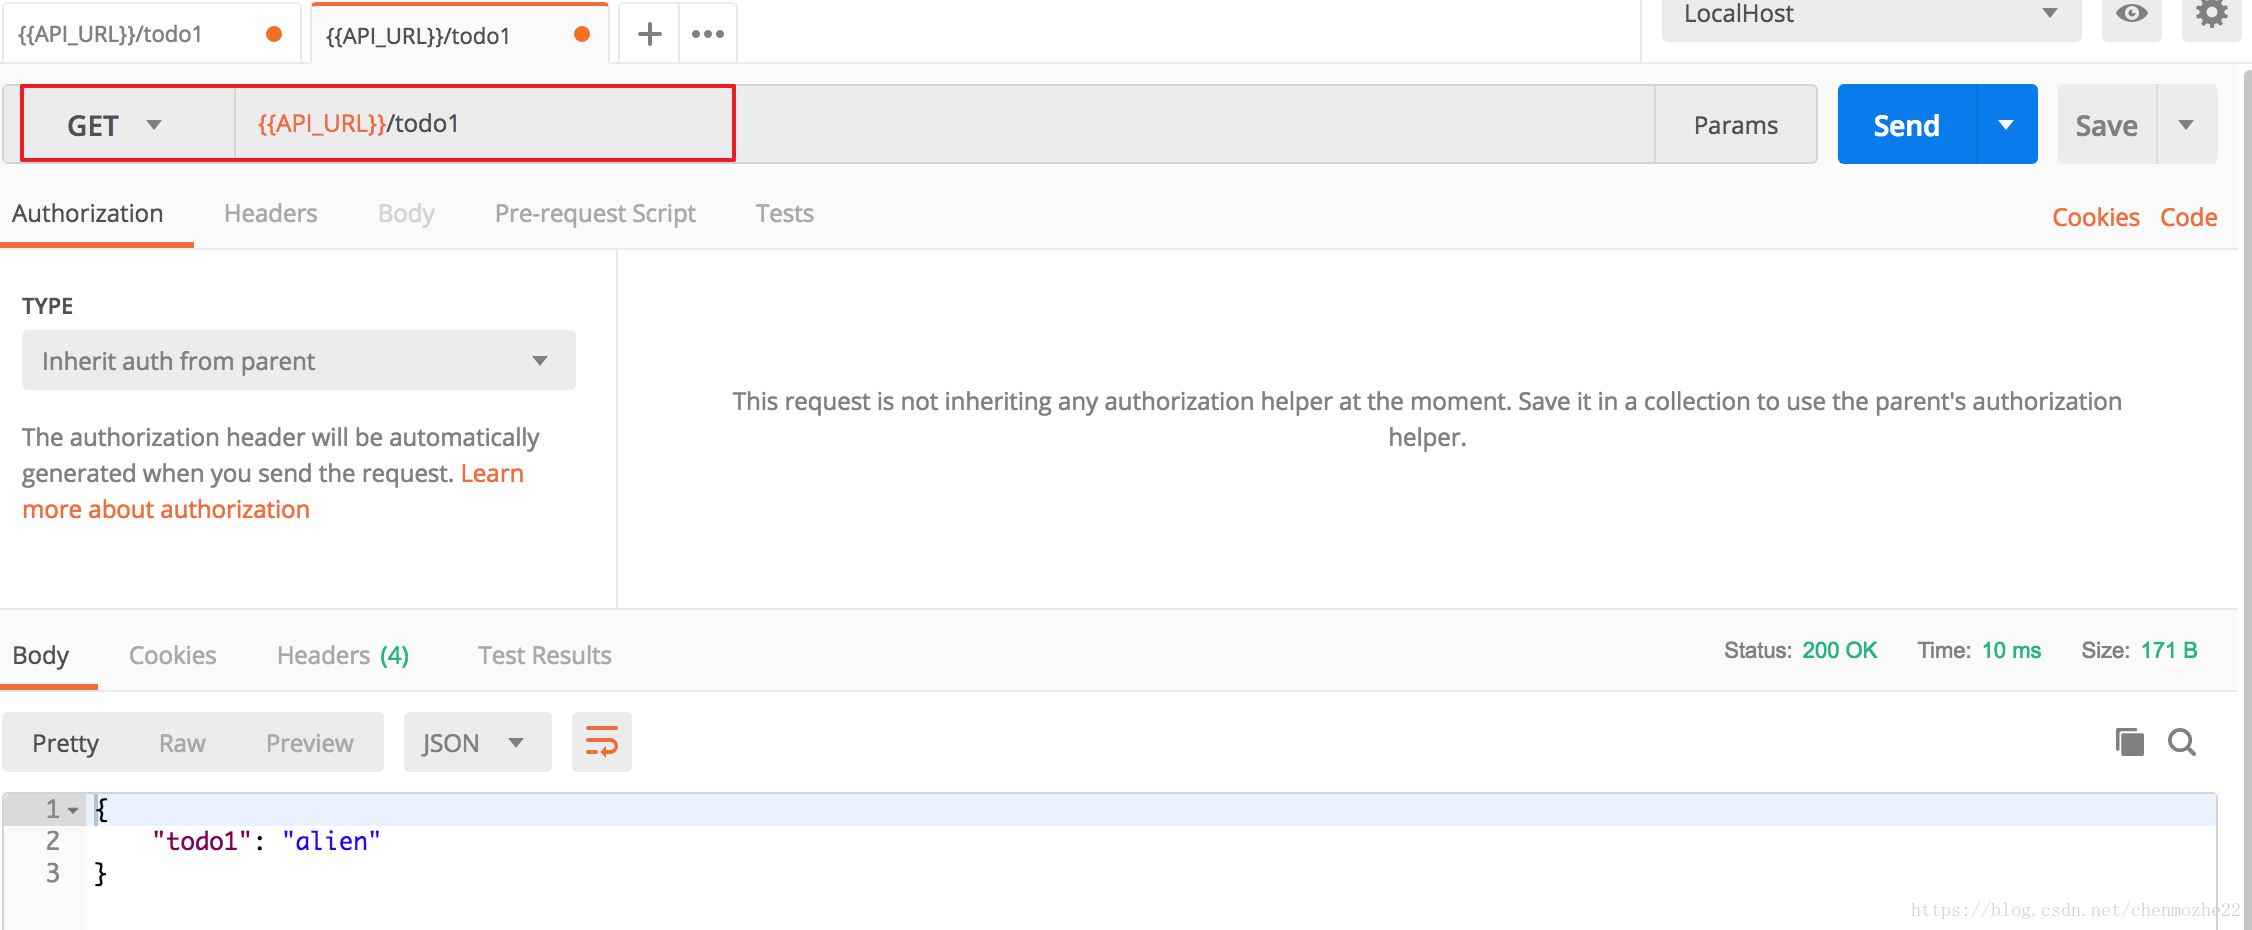
step4:获取最新的参数:
step5:不传递data参数,查看报错情况:
3.API接口:endpoint(端口)的理解:
这个问题详情可以参考如下博文,已经解释很详细了:
https://www.jb51.net/article/176173.htm
简单理解是:
url通过endpoint来去查找视图函数(通常endpoint的名字与视图函数名一致),但是如果不一致的时候,就需要有针对性的指定某个视图函数去执行,也或者多个蓝图里面有一样的视图函数的场景下,需要指定具体的endpoint
4.API接口:参数解析
官方文档:
(1)尽管 Flask 能够简单地访问请求数据(比如查询字符串或者 POST 表单编码的数据),验证表单数据仍然很痛苦。Flask-RESTful 内置了支持验证请求数据,它使用了一个类似 argparse 的库。
(2)需要注意地是与 argparse 模块不同,reqparse.RequestParser.parse_args() 返回一个 Python 字典而不是一个自定义的数据结构。
|
1
2
3
4
5
6
7
8
9
10
11
12
13
14
15
16
17
18
19
20
21
22
23
|
from flask import Flaskfrom flask_restful import reqparse, abort, Api, Resourceapp = Flask(__name__)api = Api(app)parser = reqparse.RequestParser()parser.add_argument('task', type=str)parser.add_argument('name', type=str)# 获取 & 更新class Get_Modify(Resource): def post(self): args = parser.parse_args() print(args) return args, 201api.add_resource(Get_Modify, '/get_modify')if __name__ == '__main__': app.run(debug=True) |
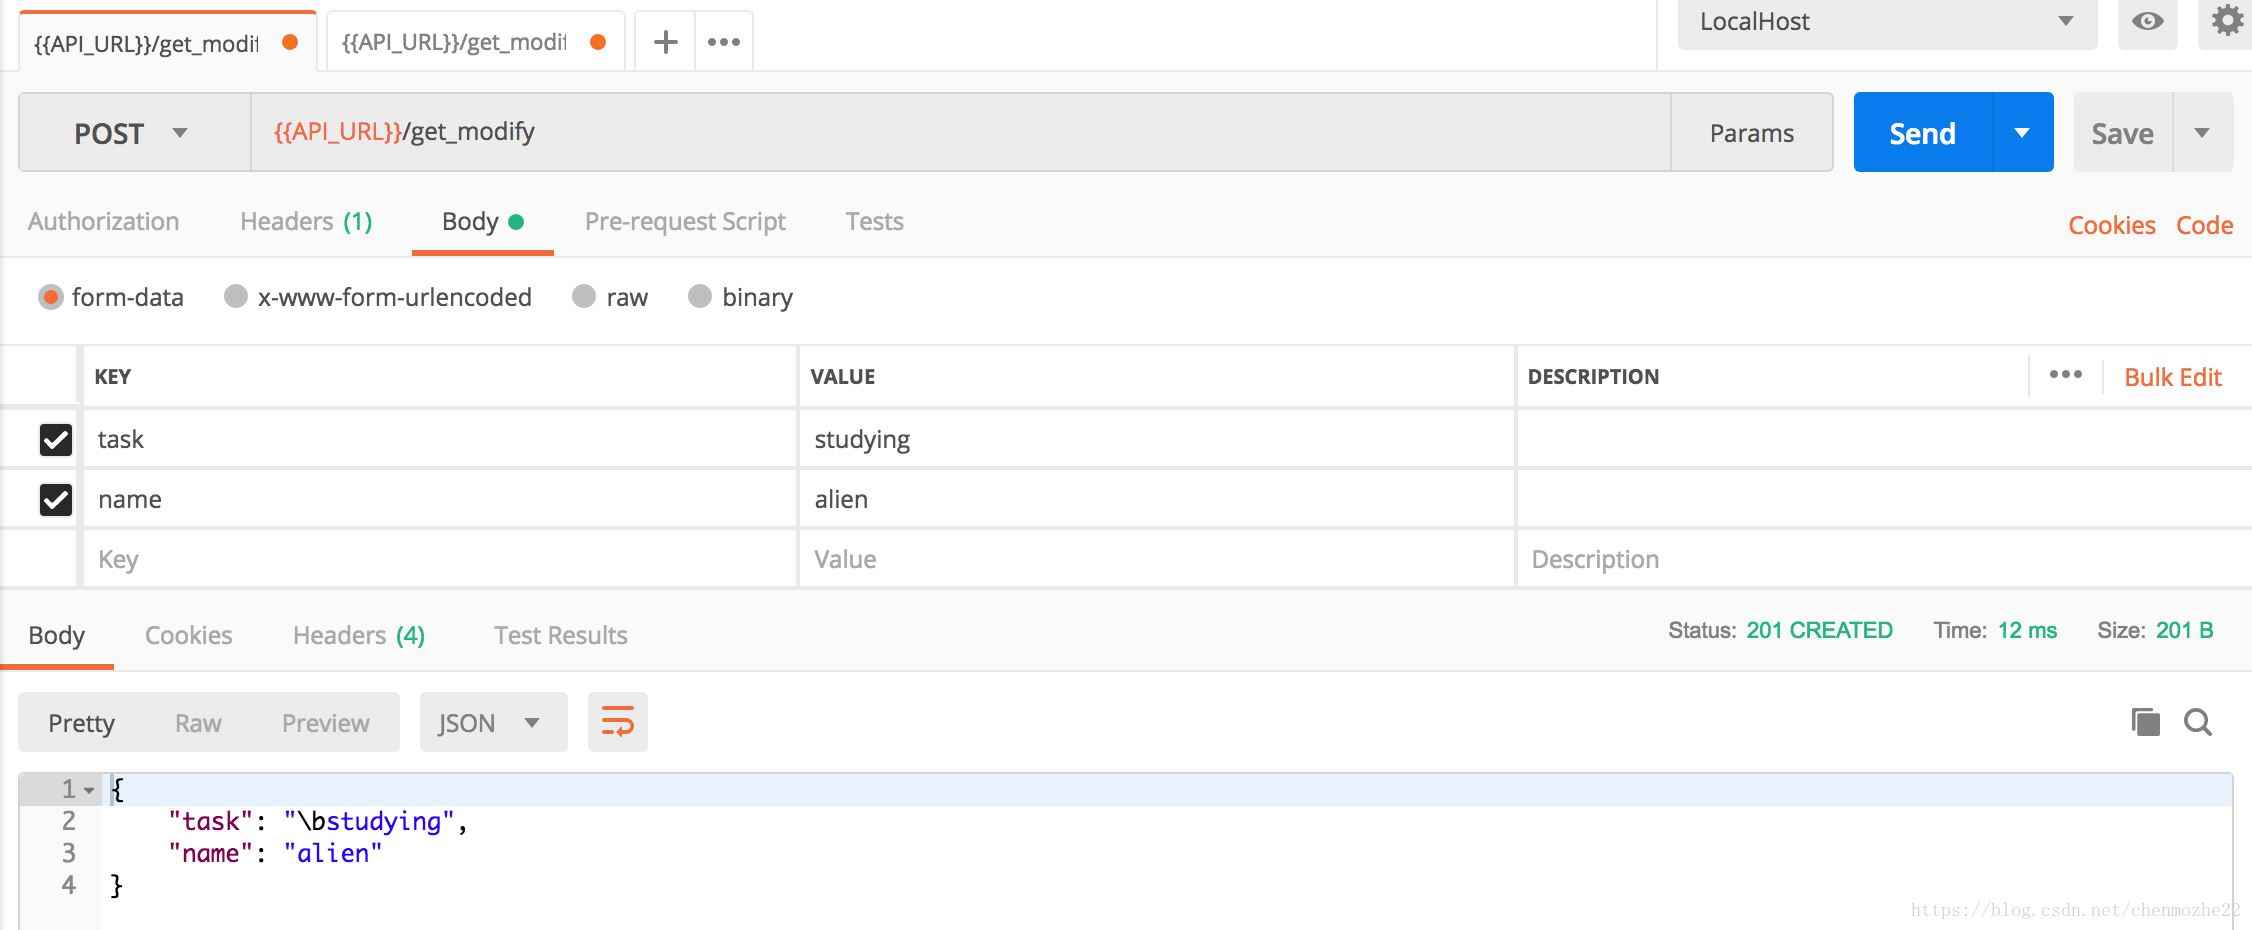
step1:从form表单里面获取定义的参数
解释:
即使传递其他参数,最终也只会读取定义的2个参数的值
通过如上代码说明:reqparse.RequestParser.parse_args(),即如上的args可以获取到request的form表单的参数,最终是一个字典
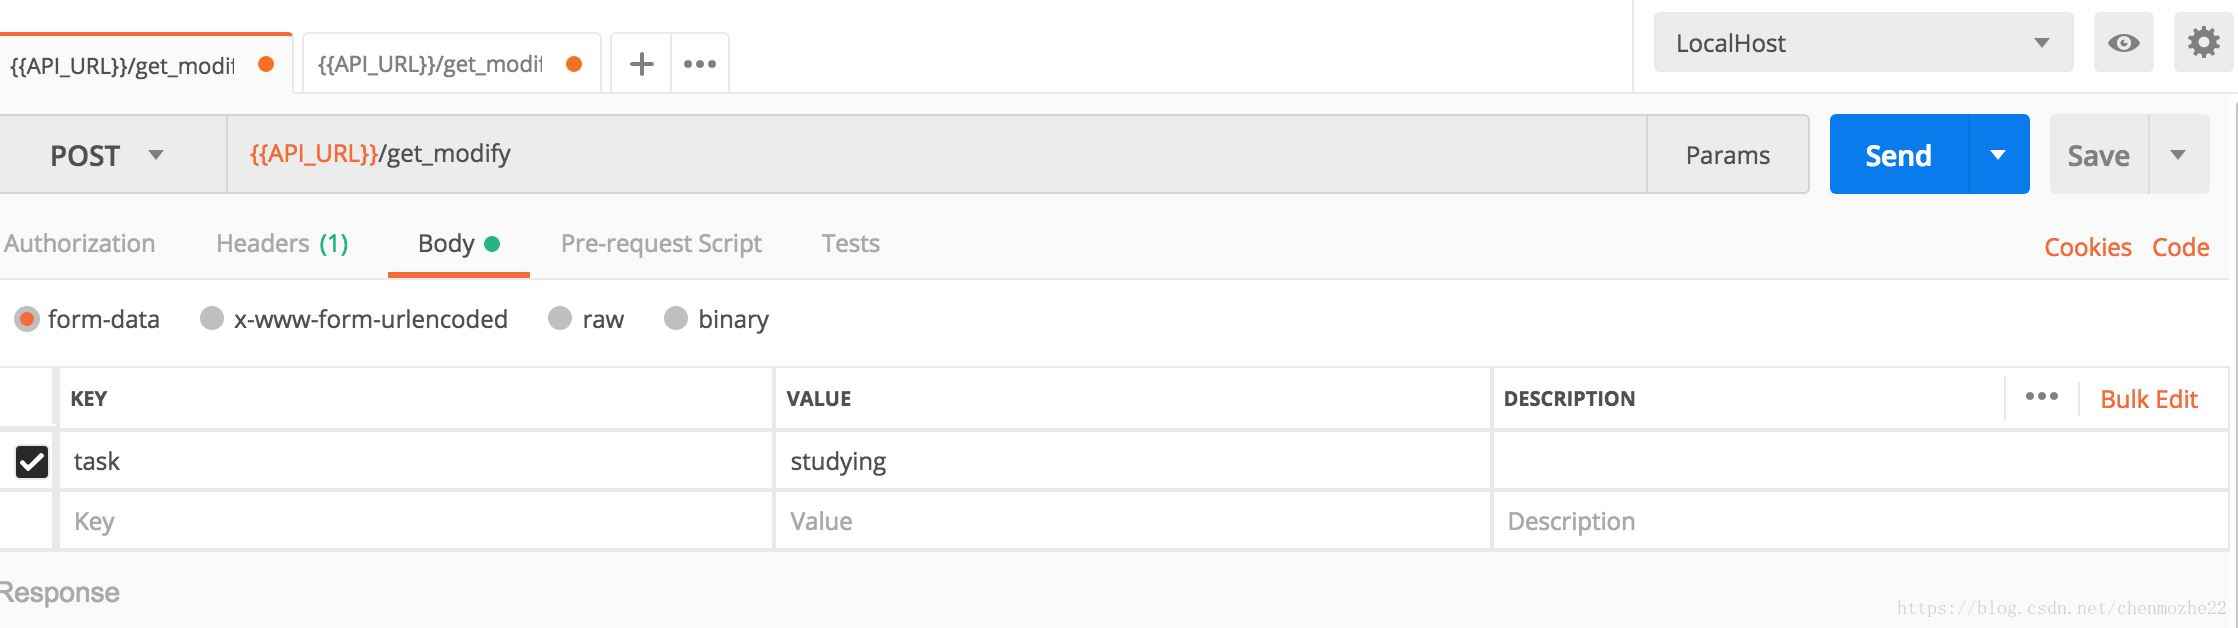
5.API接口:案例一(在form表单里面传递参数)
|
1
2
3
4
5
6
7
8
9
10
11
12
13
14
15
16
17
18
19
20
21
22
23
24
25
26
27
28
29
30
31
32
33
34
35
36
37
38
39
|
from flask import Flaskfrom flask_restful import reqparse, abort, Api, Resourceapp = Flask(__name__)api = Api(app)Tasks = { 't1': {'task': 'eat an app'}, 't2': {'task': 'play football'}, 't3': {'task': 'watching TV'},}def abort_if_todo_doesnt_exist(t_id): if t_id not in Tasks: abort(404, message="Todo {} doesn't exist".format(t_id))parser = reqparse.RequestParser()parser.add_argument('task', type=str)# 获取 & 更新class Get_Modify(Resource): def get(self): return Tasks def post(self): args = parser.parse_args() t_id = int(max(Tasks.keys()).lstrip('t')) + 1 t_id = 't%i' % t_id Tasks[t_id] = {'task': args['task']} return Tasks[t_id], 201# 设置每个视图函数的访问格式api.add_resource(Get_Modify, '/get_modify')if __name__ == '__main__': app.run(debug=True) |
解释:
(1)如上的函数,get是获取总的列表Tasks
(2)post是添加最新的一个key的值,且key的值是以“t”开头,数字自增的一种形式
(3)max(Tasks.keys())这个可以获取到Tasks列表里面,索引最大的key值,在没添加的时候,索引最大为t3
(4)x_string.lstrip(‘t'),这个可以截取x_string字符串里面以't'开始的剩余字符串。例如t3最终得到3,最终int(max(Tasks.keys()).lstrip(‘t')) + 1这一行的意思是,得到列表最大的一个key的索引,然后自增到下一个。
(5)在希望在form表单里面传递参数,需要在函数里面,使用args = parser.parse_args()接收传递的参数,具体key值通过add_argument函数设置
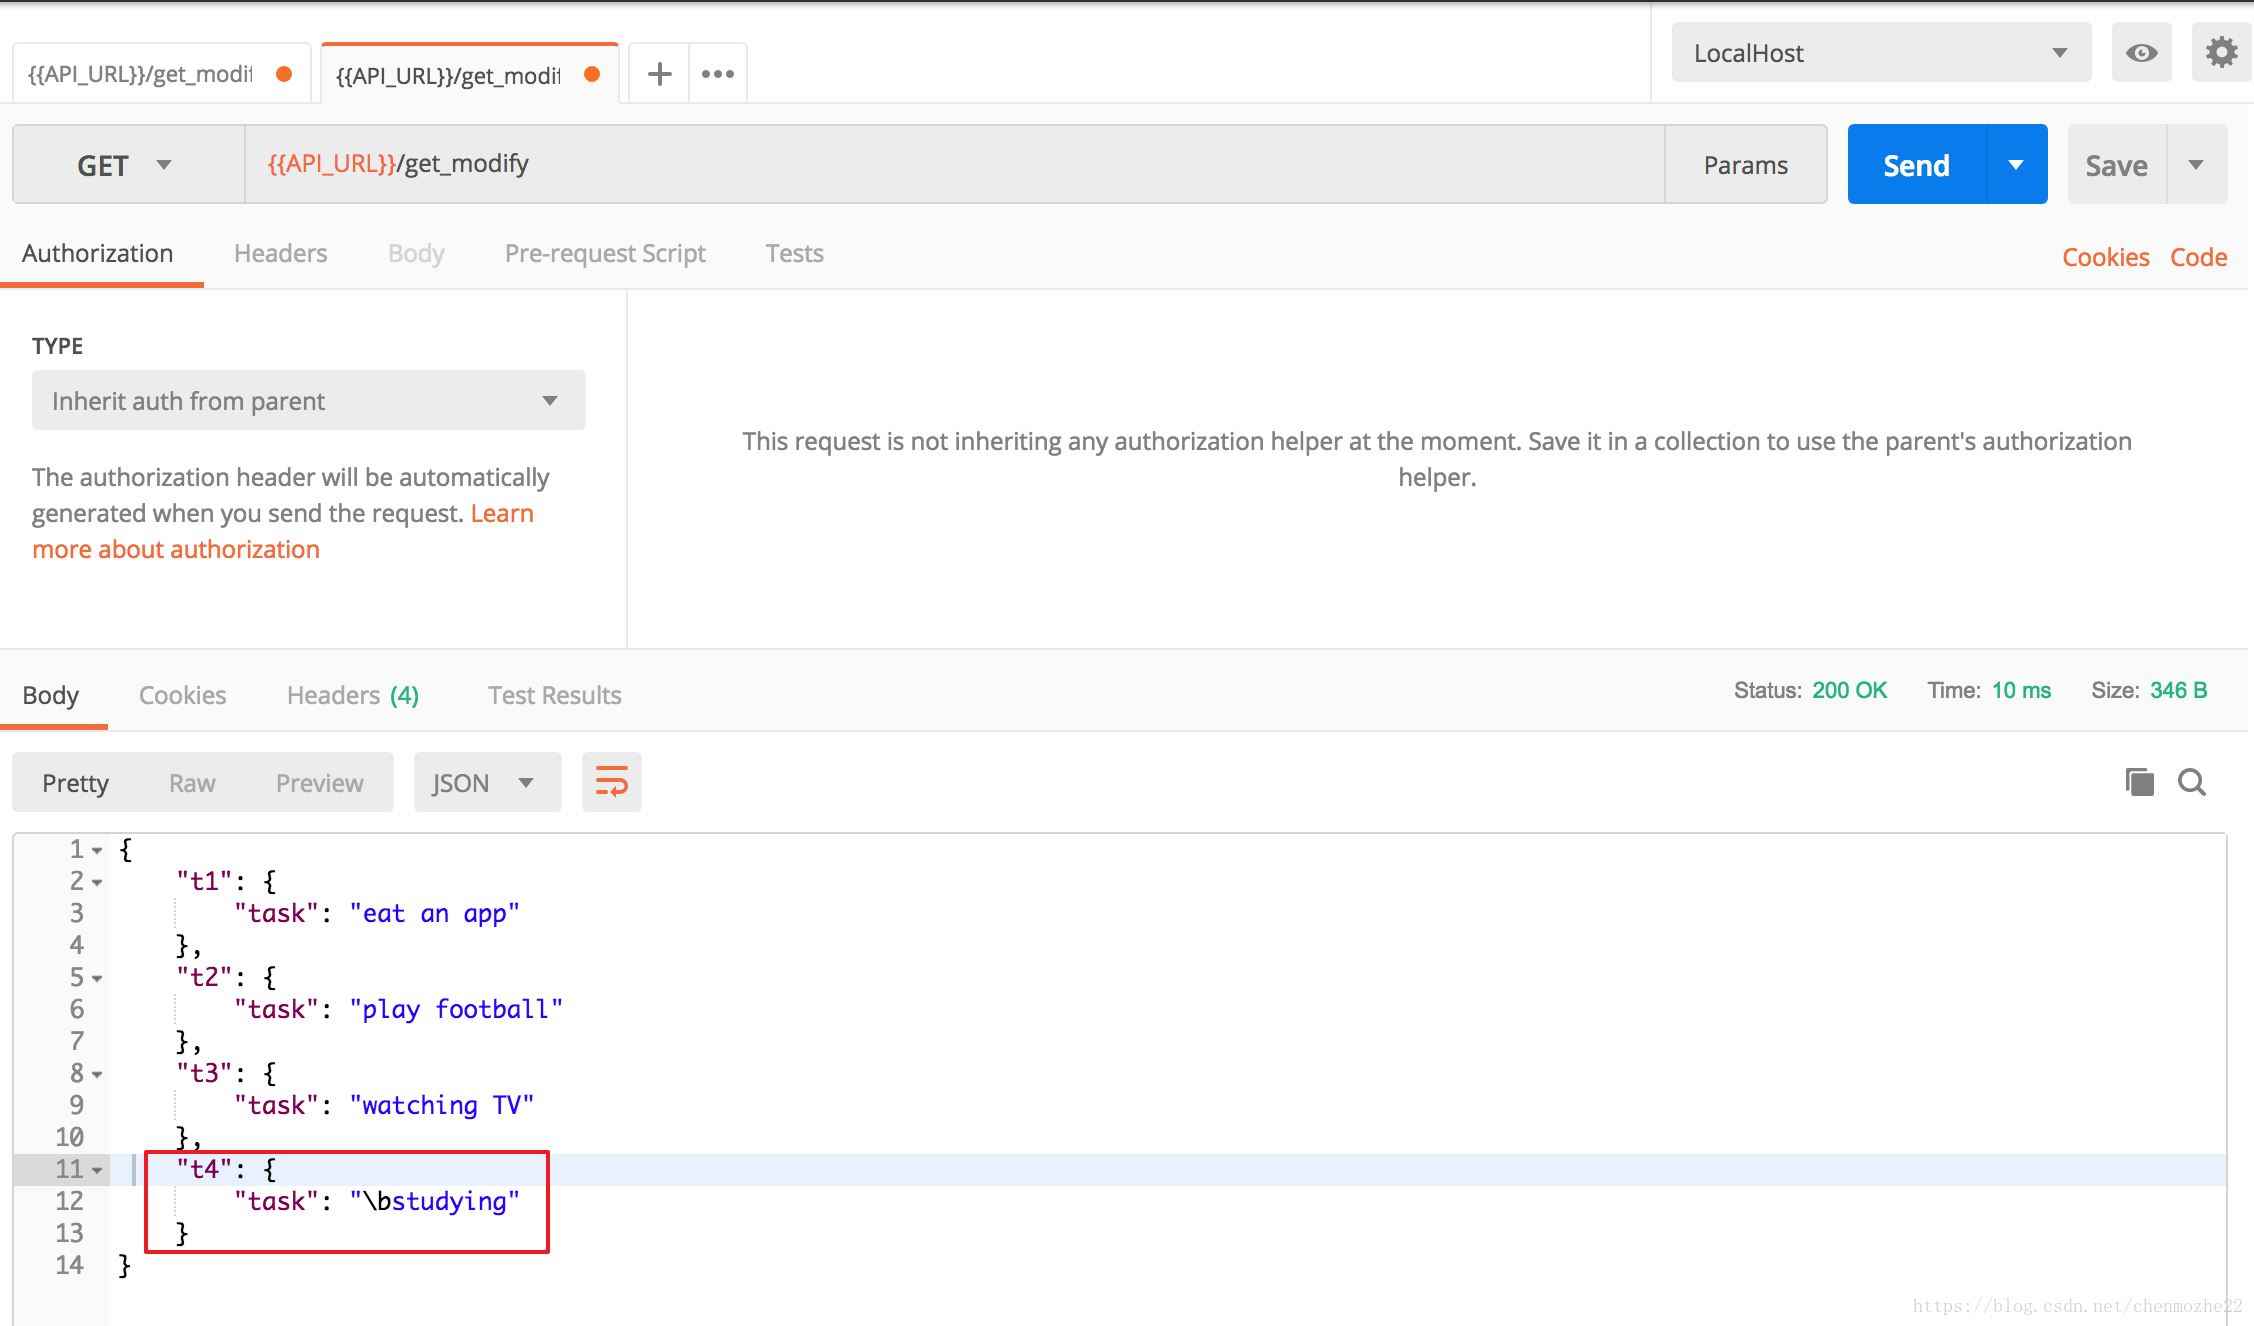
step1:第一次get请求,获取原始的Tasks列表
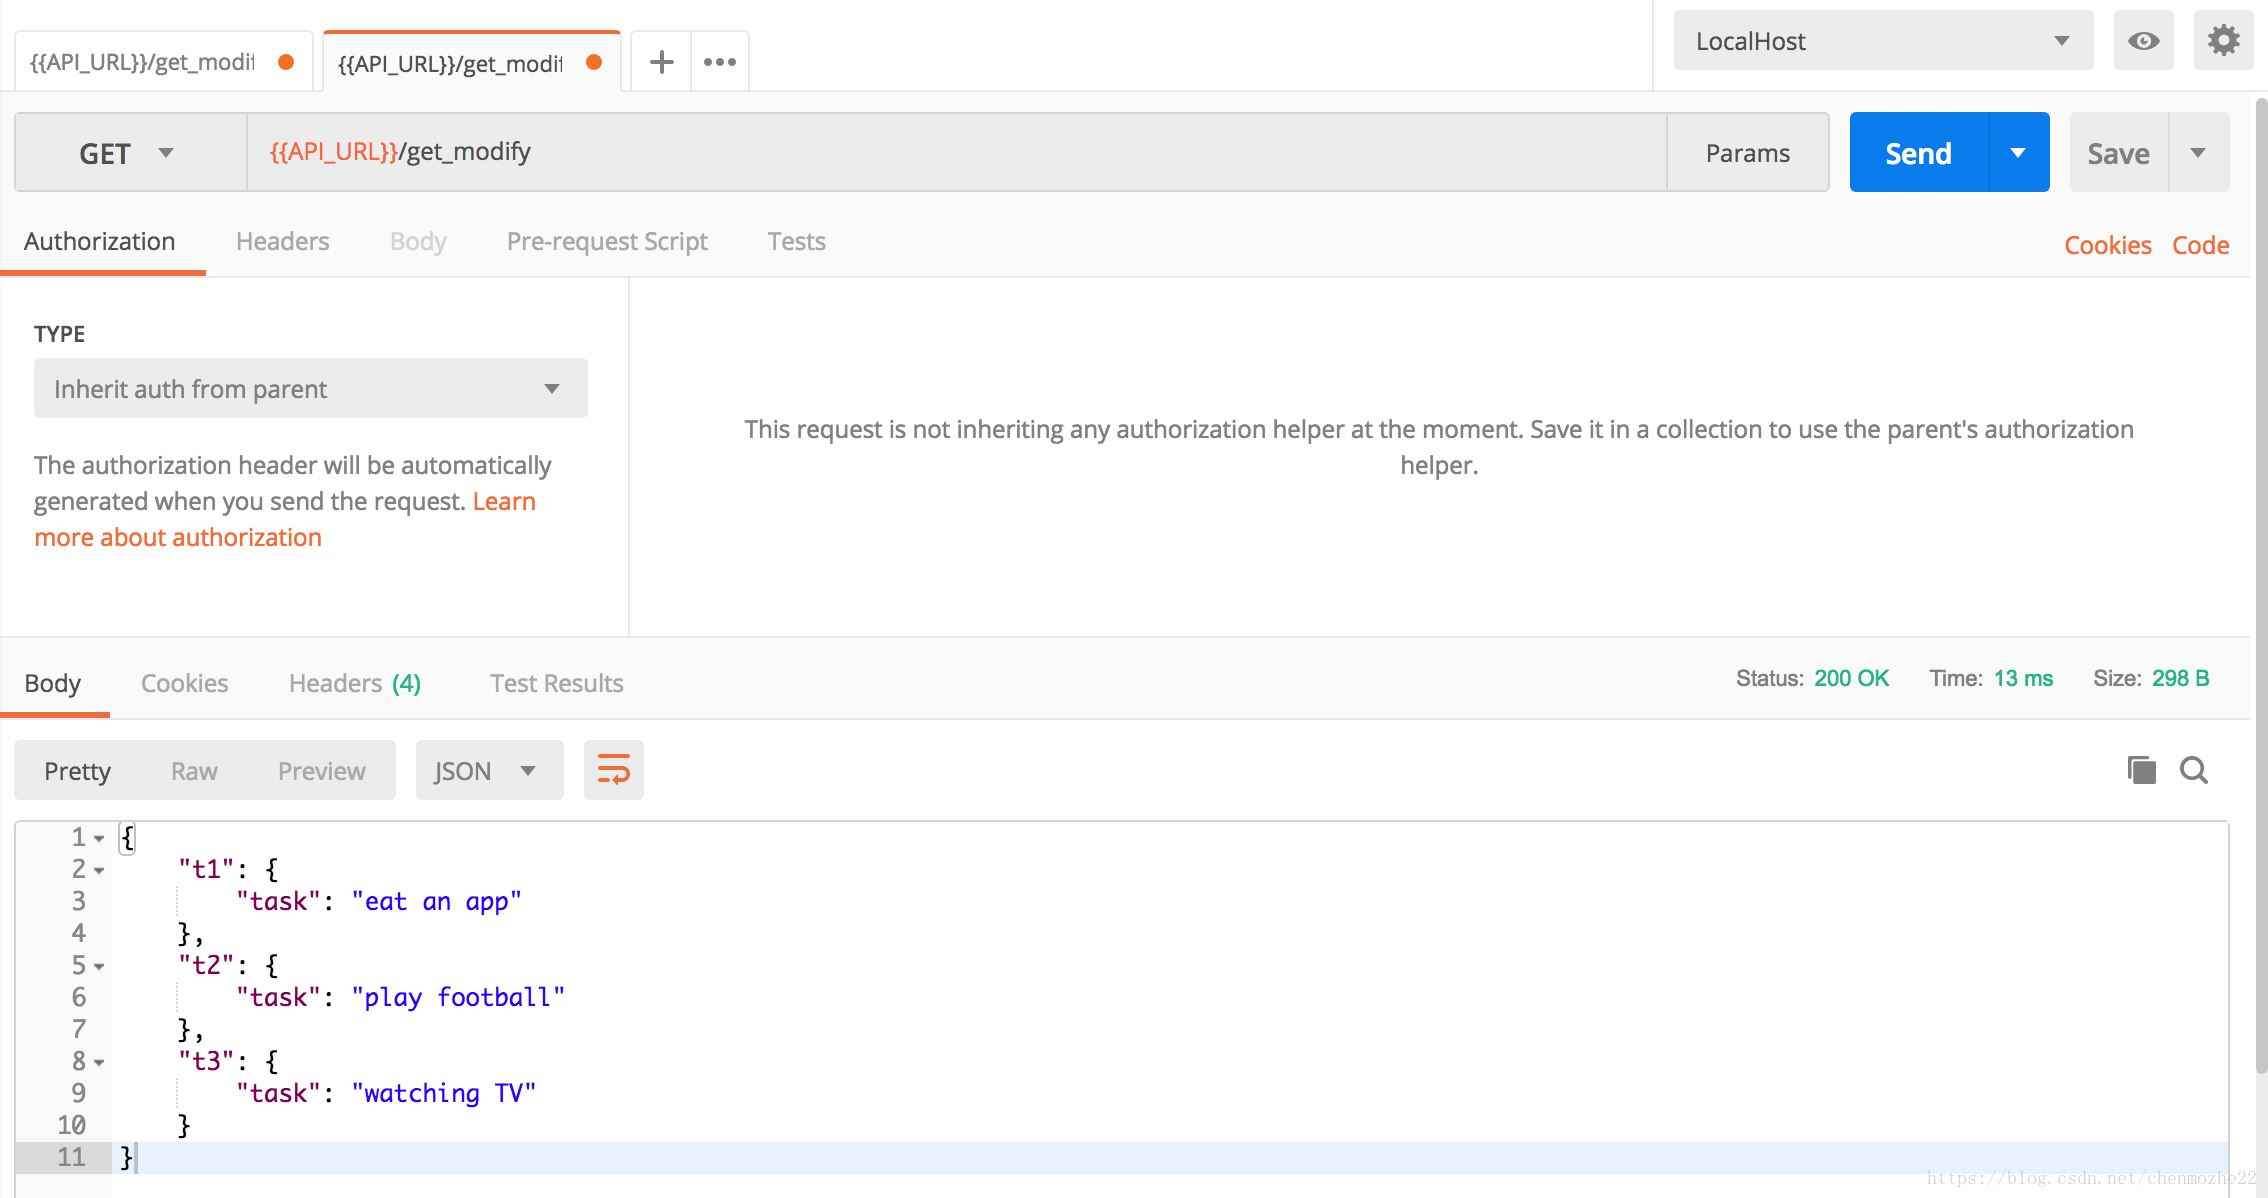
step2:第二次post请求,添加value的值为studying,且第三次get请求,查看最新Tasks
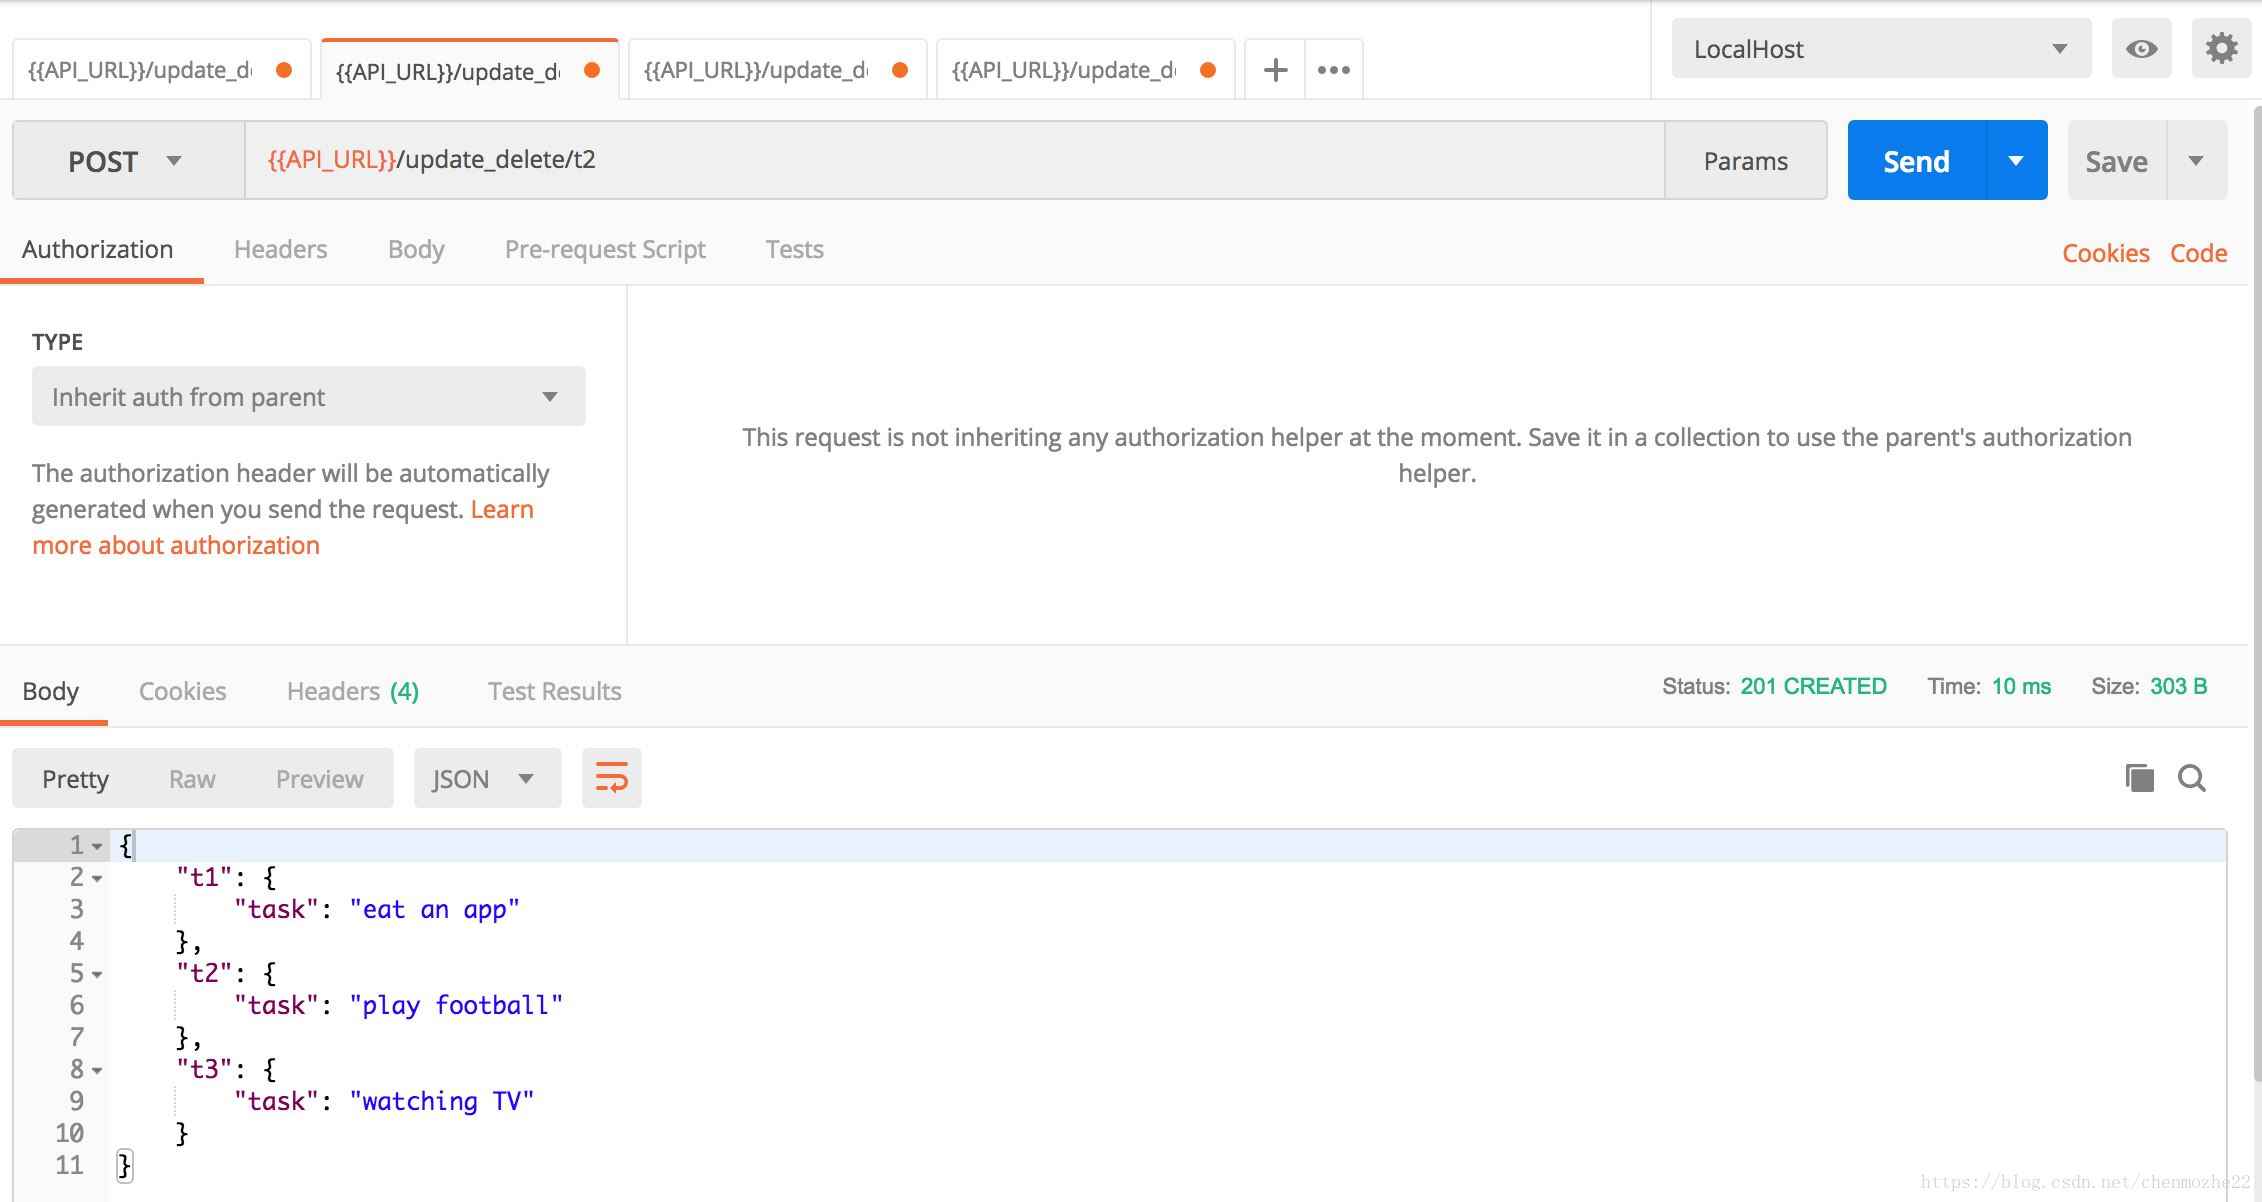
6.API接口:案例二(通过url里面的参数作为查询的参数)
|
1
2
3
4
5
6
7
8
9
10
11
12
13
14
15
16
17
18
19
20
21
22
23
24
25
26
27
28
29
30
31
32
33
34
35
36
37
38
39
40
41
42
43
44
45
46
47
48
|
from flask import Flaskfrom flask_restful import reqparse, abort, Api, Resourceapp = Flask(__name__)api = Api(app)Tasks = { 't1': {'task': 'eat an app'}, 't2': {'task': 'play football'}, 't3': {'task': 'watching TV'},}def abort_if_todo_doesnt_exist(t_id): if t_id not in Tasks: abort(404, message="Todo {} doesn't exist".format(t_id))parser = reqparse.RequestParser()parser.add_argument('task', type=str)# 更新 & 删除 任务class Updata_Delete(Resource): def get(self, t_id): # 根据t_id获取对应的value abort_if_todo_doesnt_exist(t_id) return Tasks[t_id] def delete(self, t_id): # 根据t_id删除对应的value abort_if_todo_doesnt_exist(t_id) del Tasks[t_id] return 'delete success', 204 def post(self, t_id): # 判断t_id是否存在,并返回Tasks整个列表 abort_if_todo_doesnt_exist(t_id) return Tasks,201 def put(self, t_id): # 根据t_id添加对应的value,并返回所有值 args = parser.parse_args() task = {'task': args['task']} Tasks[t_id] = task return Tasks, 201api.add_resource(Updata_Delete, '/update_delete/<t_id>')if __name__ == '__main__': app.run(debug=True) |
step1:查看Tasks完整信息
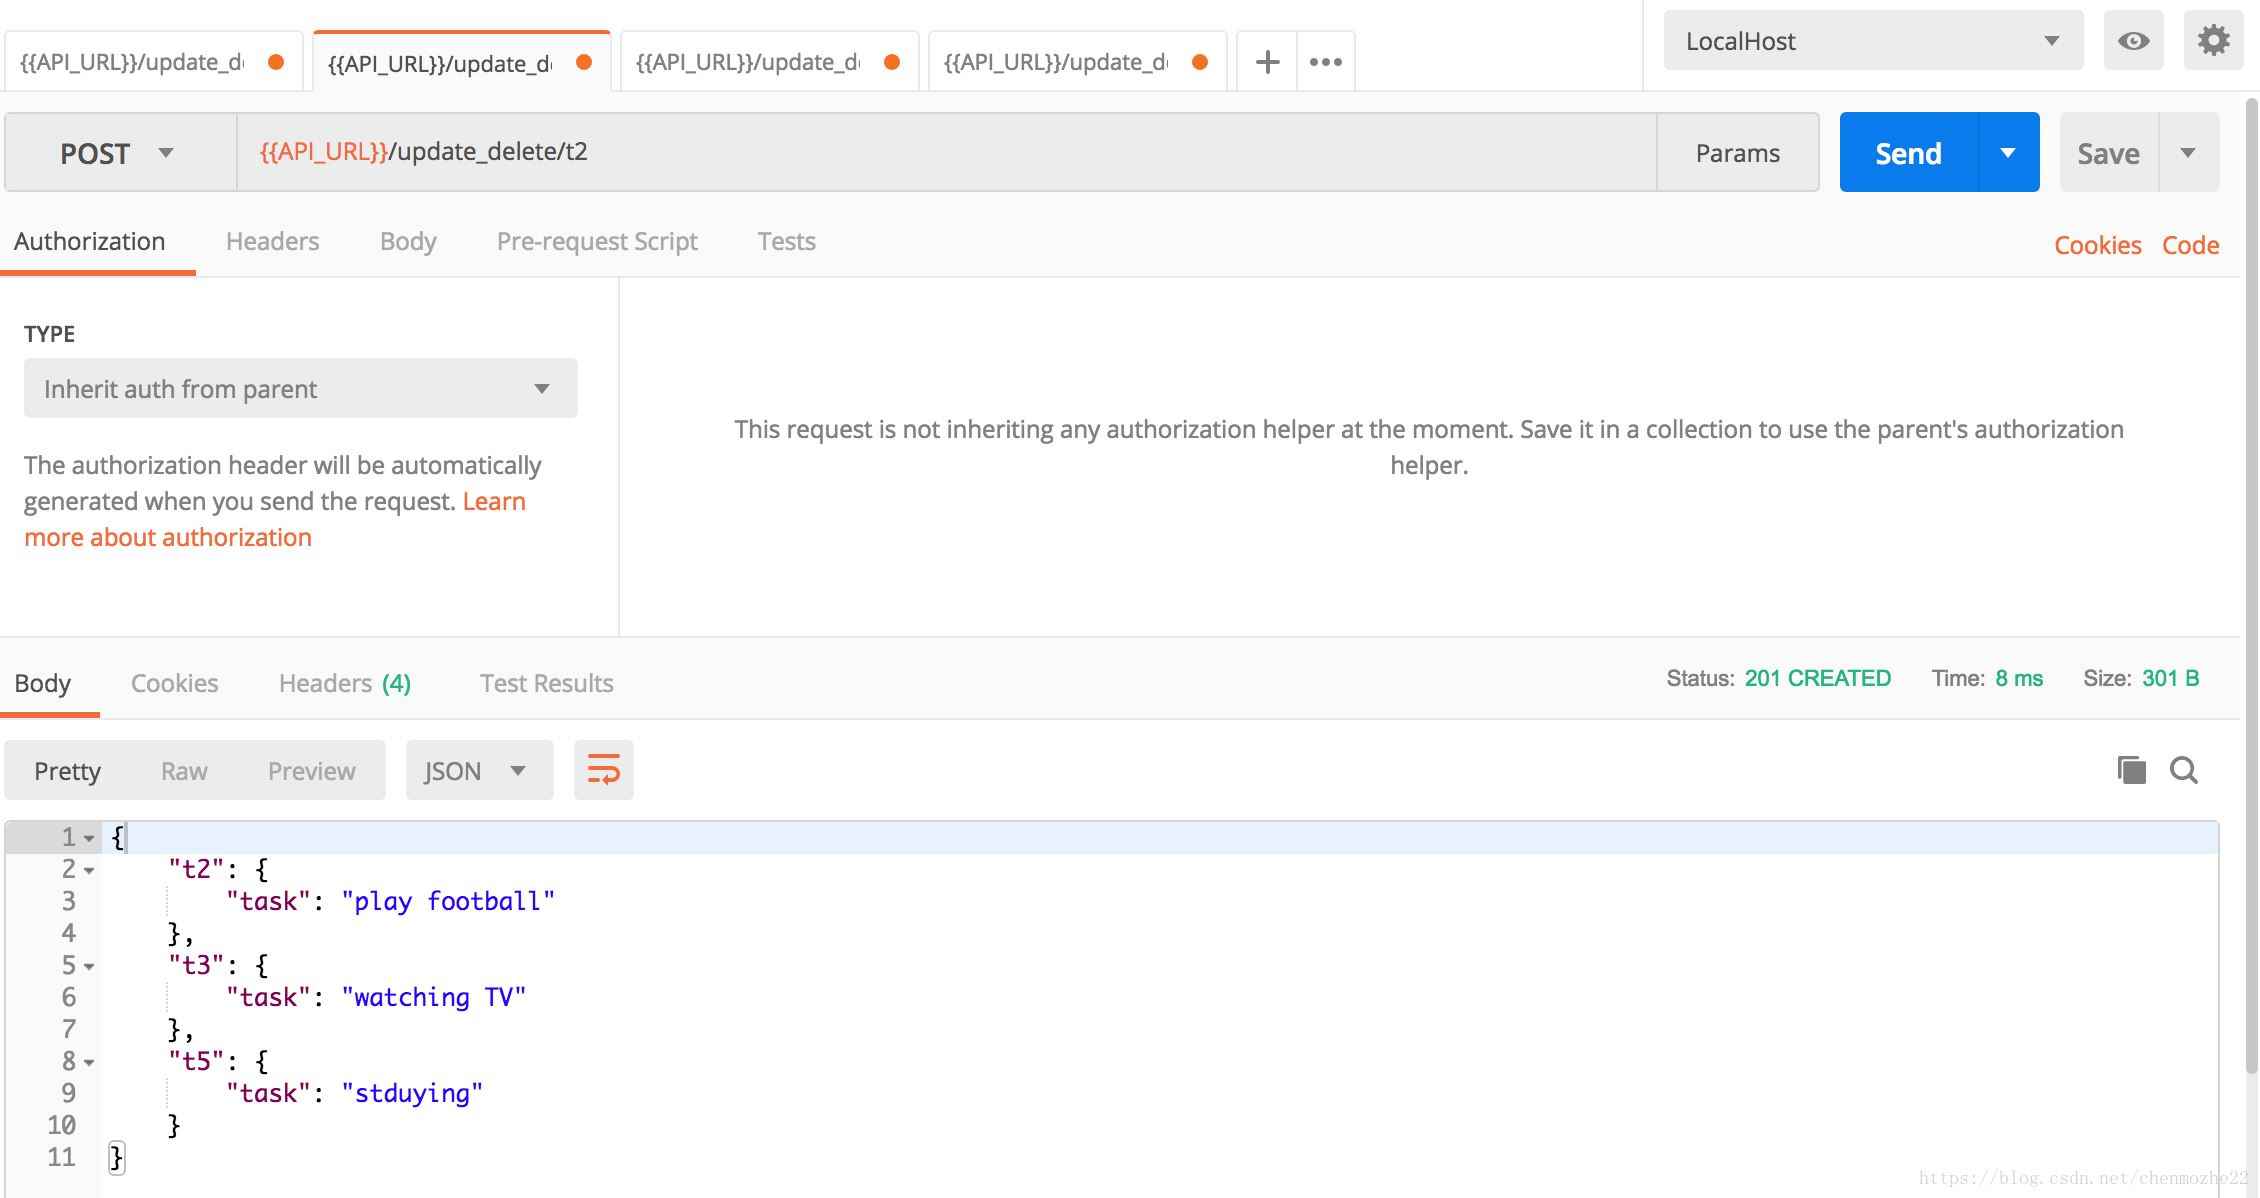
step2:添加信息key值为:t5,内容为:studying
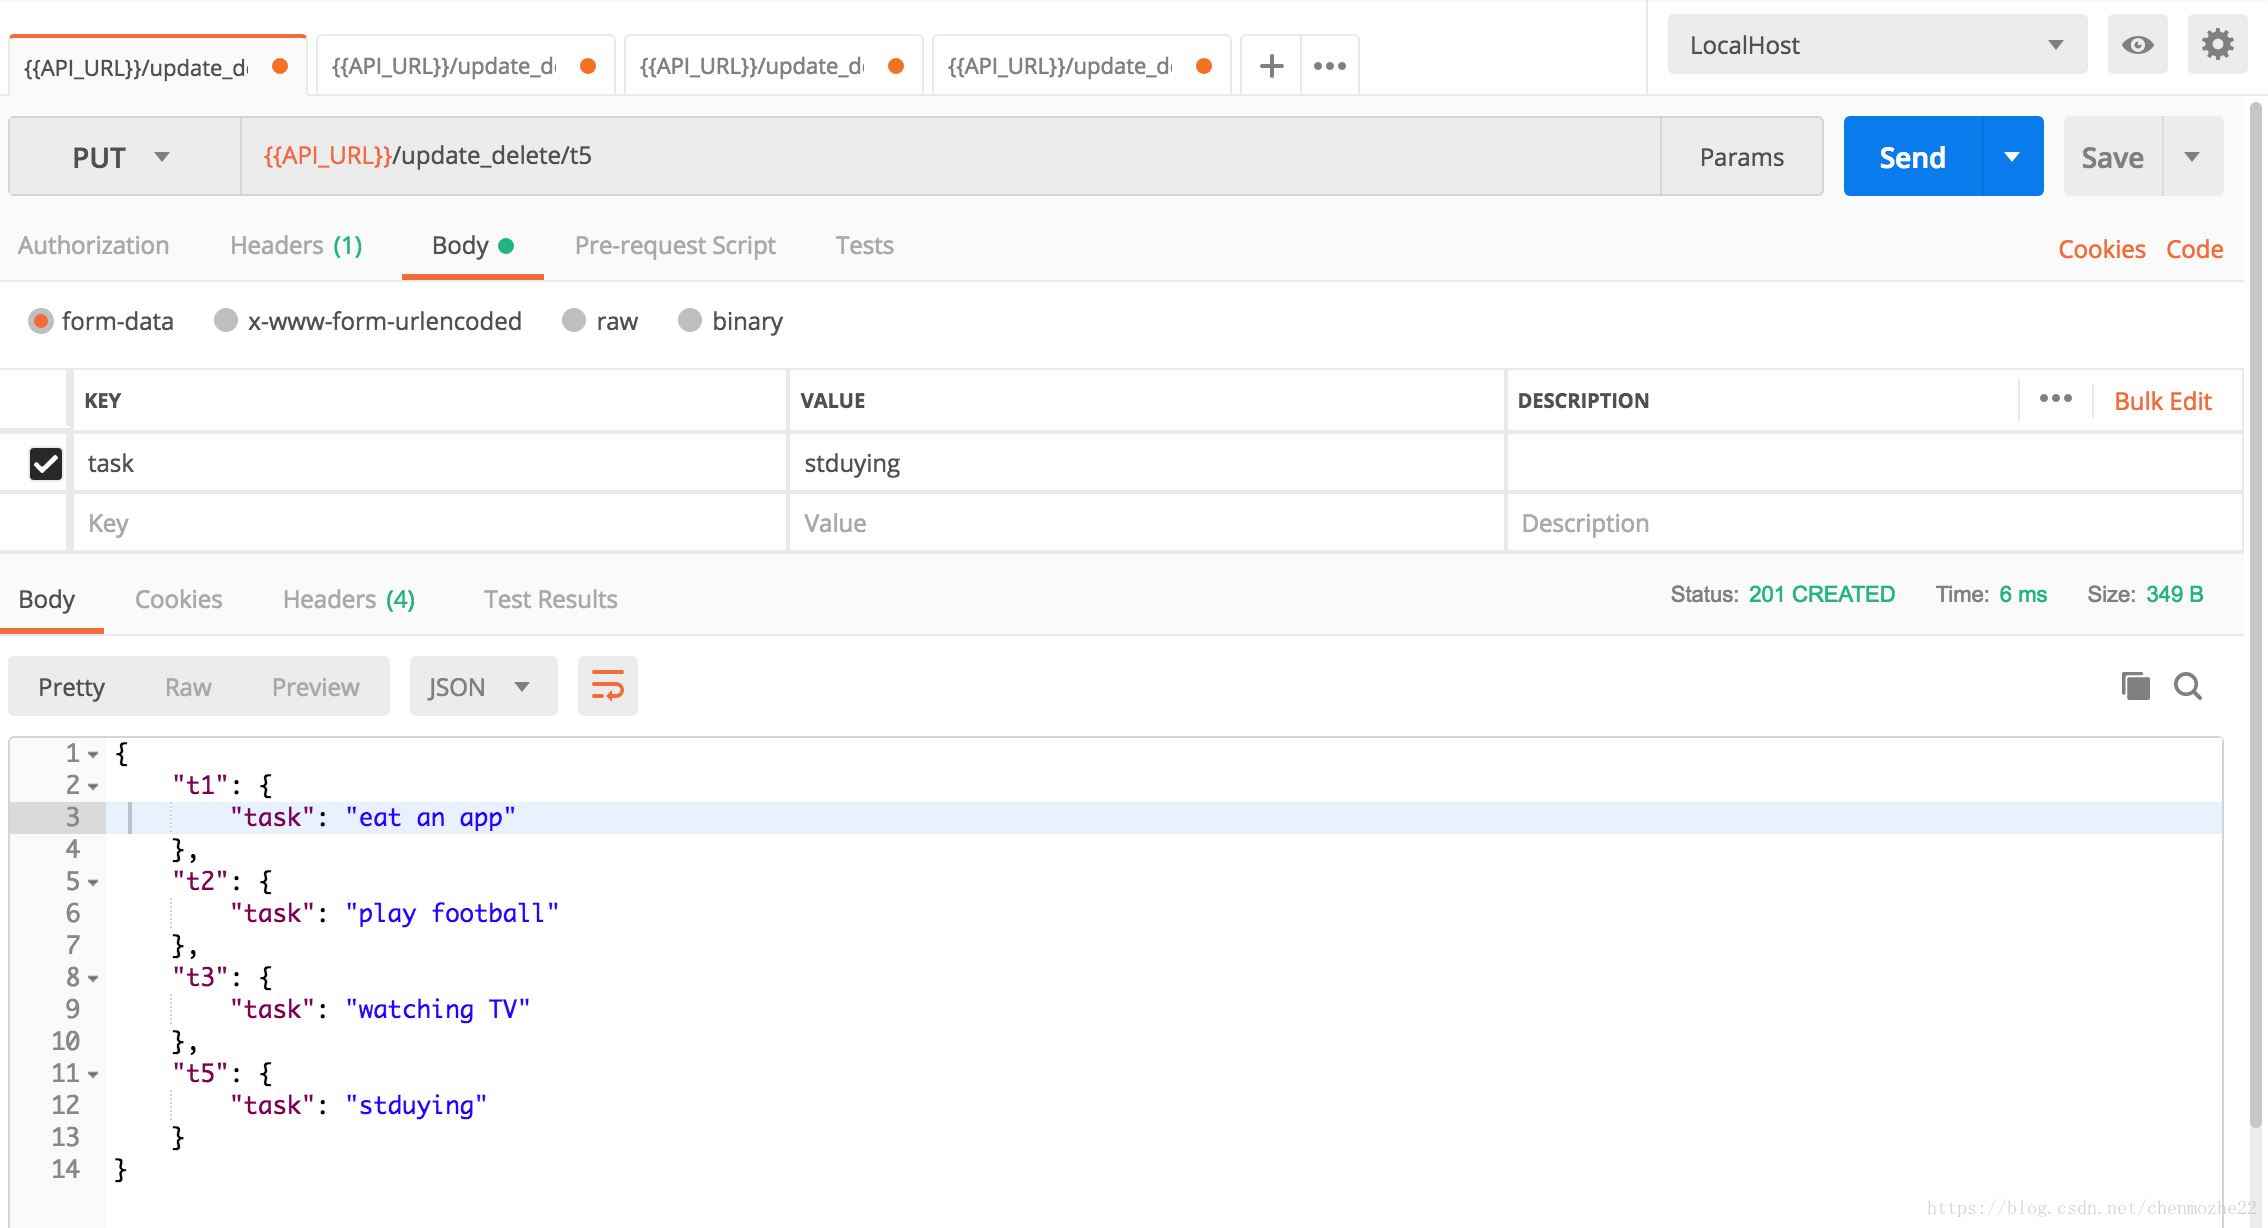
step3:查看t5值的情况

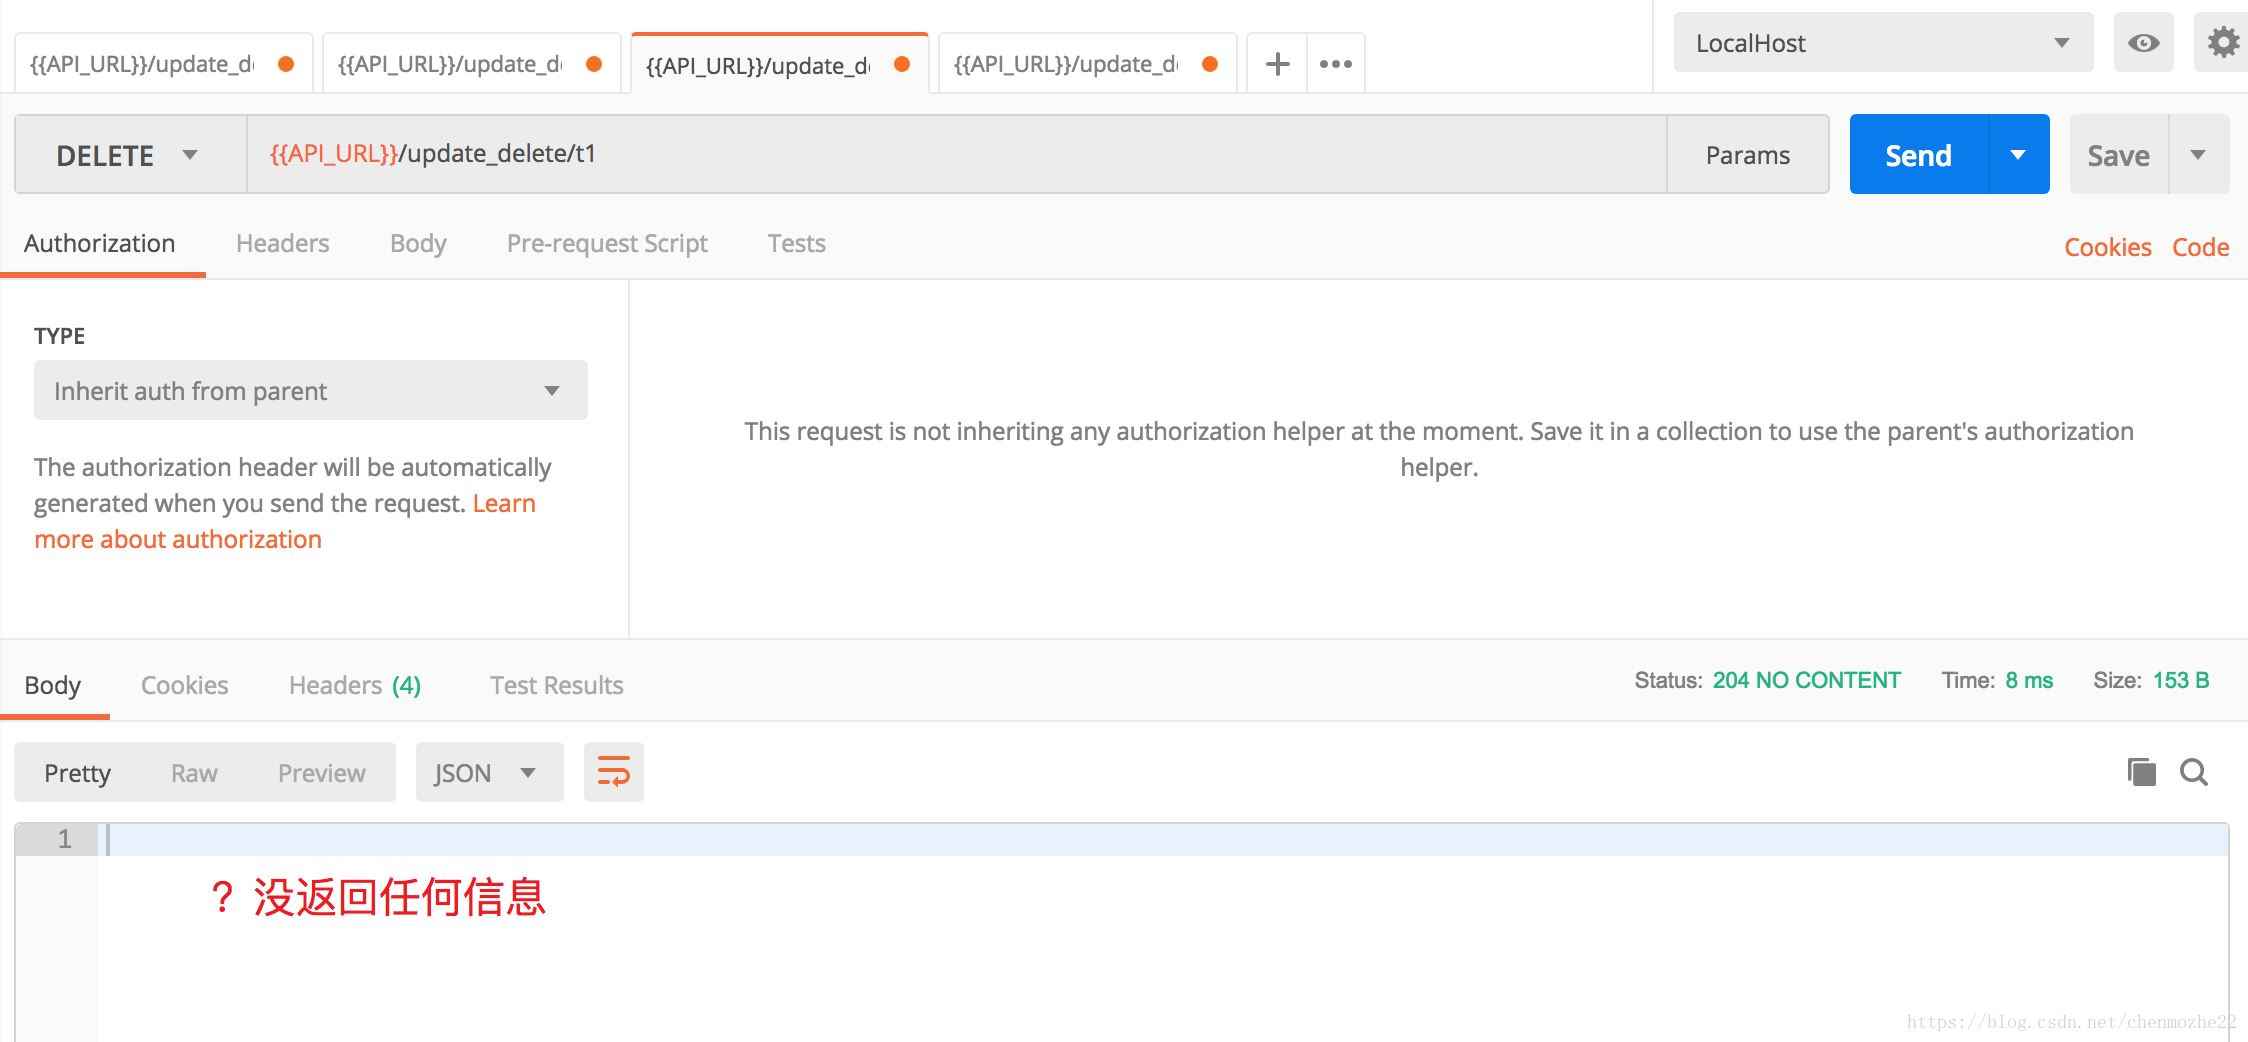
step4:删除t1的值,然后查看Tasks的完整信息
解释:
(1)通过url传递参数,给视图函数,这种方式一般用在get请求,post请求通过form表单形式比较实用
(2)通过url传递参数,需要定义函数时候,使用形参t_id,且在使用add_resource()函数的使用,url参数形式最后添加<t_id>变量,例如'/update_delete/<t_id>'这个形式。
(3)delete这个函数,最终执行删除是成功的,但是最终并没有返回return的字符串"delete success",具体原因不详,可能是用法不对,后续再更新中说明.
(return ‘delete success', 204 将 204去掉即可)
本文主要介绍python中调用REST API的几种方式,下面是python中会用到的库。
- - urllib2
- - httplib2
- - pycurl
- - requests
urllib2
- Sample1
|
1
2
3
4
5
6
7
8
9
10
|
import urllib2, urllibpassword_manager = urllib2.HTTPPasswordMgrWithDefaultRealm()password_manager.add_password(None, github_url, 'user', '***')auth = urllib2.HTTPBasicAuthHandler(password_manager) # create an authentication handleropener = urllib2.build_opener(auth) # create an opener with the authentication handlerurllib2.install_opener(opener) # install the opener... request = urllib2.Request(github_url, urllib.urlencode({'name':'Test repo', 'description': 'Some test repository'})) # Manual encoding requiredhandler = urllib2.urlopen(request)print handler.read() |
- Sample2
|
1
2
3
4
5
6
7
8
9
10
11
|
import urllib2req = urllib2.Request(url)req.add_header('IAF',abc.token_authiaas)try: resp = urllib2.urlopen(req)except urllib2.HTTPError, error: print "Cannot remove service instance!", error sys.exit(1)response = resp.read()print response |
- Sample3
|
1
2
3
4
5
6
7
8
9
10
11
12
13
14
15
16
17
18
19
|
import urllib2, urllib, base64data = urllib.urlencode({ 'reservedResource':'RR-Hadoop', 'resourceCapability':'Production', 'movetoironic':'False', 'output':'json' })print "Bootstrap Asset jobs starting .............."base64string = base64.encodestring('%s:%s' % (user, passwd)).replace('
', '')request = urllib2.Request(url, data, headers={"Authorization" : "Basic %s" % base64string})response = urllib2.urlopen(request).read()response_json = json.loads(response)response_status = response_json['status']status_code = response_status['statusCode']status = response_status['status']message = response_status['message'] print status_code , status, message |
2. httplib2
|
1
2
3
4
5
6
7
|
import urllib, httplib2github_url = 'h = httplib2.Http(".cache")h.add_credentials("user", "******", "data = urllib.urlencode({"name":"test"})resp, content = h.request(github_url, "POST", data)print content |
3. pycurl
|
1
2
3
4
5
6
7
8
9
10
|
import pycurl, jsongithub_url = "user_pwd = "user:*****"data = json.dumps({"name": "test_repo", "description": "Some test repo"})c = pycurl.Curl()c.setopt(pycurl.URL, github_url)c.setopt(pycurl.USERPWD, user_pwd)c.setopt(pycurl.POST, 1)c.setopt(pycurl.POSTFIELDS, data)c.perform() |
4. requests
|
1
2
3
4
5
|
import requests, jsongithub_url = "data = json.dumps({'name':'test', 'description':'some test repo'}) r = requests.post(github_url, data, auth=('user', '*****'))print r.json |
以上几种方式都可以调用API来执行动作,但requests这种方式代码最简洁,最清晰,建议采用。