Fastlane是一套使用Ruby写的自动化工具集,用于iOS和Android的自动化打包、发布等工作,可以节省大量的时间。
Github:https://github.com/fastlane/fastlane
文档:https://docs.fastlane.tools/
安装
1、首先要安装正确的 Ruby 版本。在终端窗口中用下列命令来确认:
ruby -v
2、然后检查 Xcode 命令行工具是否安装。在终端窗口中输入命令:
xcode-select --install
如果未安装,终端会开始安装,如果报错误:command line tools are already installed, use "Software Update" to install updates.代表已经安装。
3、以上依赖配置好之后就可以通过 rubygem 进行安装了:
$ sudo gem install fastlane
安心等待一会,fastlane就安装完成了。
初始化
进入到工程目录执行:
fastlane init
中间需要输入开发者账号、密码。
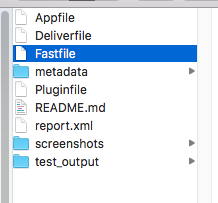
初始化之后目录下多了一个fastlane目录,内容:

Appfile
Appfile用来存放app_identifier,apple_id和team_id。 了解详情,它的格式是这样的:
app_identifier "com.xxx.xxx" # app的bundle identifier
apple_id "xxx@xxx.com" # 你的Apple ID

team_id "XXXXXXXXXX" # Team ID
你也可以为每个lane(后面会讲到)提供不同的 app_identifier, apple_id 和 team_id,例如:
app_identifier "com.aaa.aaa"
apple_id "aaa@aaa.com"
team_id "AAAAAAAAAA"

for_lane :inhouse do
  app_identifier "com.bbb.bbb"
  apple_id "bbb@bbb.com"
  team_id "AAAAAAAAAA"
end
这里就是为Fastfile中定义的:inhouse设置单独的信息。
Fastfile
Fastfile管理你所创建的 lane ,了解详情。它的格式是这样的:
···
# 自动更新fastlane 工具
# update_fastlane

#需要的fastlane的最小版本,在每次执行之后会检查是否有新版本,如果有会在最后末尾追加新版本提醒
fastlane_version "2.30.1"

#默认使用平台是 ios,也就是说文件可以定义多个平台
default_platform :ios

platform :ios do
  before_all do
    # ENV["SLACK_URL"] = "https://hooks.slack.com/services/..."
    cocoapods

  end

  desc "Runs all the tests"
  lane :test do
    scan
  end

  desc "提交一个新的Beta版本到 Apple TestFlight"
  desc "This will also make sure the profile is up to date"
  lane :beta do
    # match(type: "appstore") # more information: https://codesigning.guide
    gym(scheme: "Docment") # Build your app - more options available
    pilot

    # sh "your_script.sh"
  end

  desc "部署一个新版本到App Store"
  lane :release do
    # match(type: "appstore")
    # snapshot
    gym(scheme: "Docment") # Build your app - more options available
    deliver(force: true)
    # frameit
  end

  # 你可以定义自己的lane

  #执行lane成功后的回调
  after_all do |lane|
    # slack(
    #   message: "Successfully deployed new App Update."
    # )
  end

  # 如果流程发生异常会走这里并终止
  error do |lane, exception|
    # slack(
    #   message: exception.message,
    #   success: false
    # )
  end
end
我们也可以定义一个自己的lane:
 desc "企业版"
  lane :inHouse do
  gym(scheme: "XXX",
      export_method:"enterprise",
      output_directory "./build", # 打包后的 ipa 文件存放的目录
      output_name "XXX"  # ipa 文件名
   )
  end
其中一个lane就是一个任务,里面是一个个的action组成的工作流。
修改项目版本号:
修改Build Settings中的Versioning配置,Current Project Version随便填一个,Versioning System选择Apple Generic。
def prepare_version(options)
    increment_version_number(
       version_number: options[:version]
     )

     increment_build_number(
       build_number: options[:build]
    )
  end
利用目前支持的工具可以做所有包含自动化和可持续化构建的每个环节,例如:
-
scan 自动化测试工具,很好的封装了 Unit Test
-
sigh 针对于 iOS 项目开发证书和 Provision file 的下载工具
-
match 同步团队每个人的证书和 Provision file 的超赞工具
-
gym 针对于 iOS 编译打包生成 ipa 文件
-
deliver 用于上传应用的二进制代码,应用截屏和元数据到 App Store
-
snapshot 可以自动化iOS应用在每个设备上的本地化截屏过程
执行
定义完lane之后怎么执行呢?打开终端,切换到项目的根目录:执行fastlane lane'name就可以了。成功之后会在相应的路径下生成ipa文件,如果报错的话就根据错误信息好好查看文档。
其他
1、这里是官方提供的一些例子。
2、想了解fastlane命令的话可以执行$ fastlane --help
3、查看可用任务的列表,可以执行命令$ fastlane lanes
4、fastlane也提供了很多插件方便我们使用,例如pgyer(发布app到蒲公英)。我们也可以打完包直接传到蒲公英上,具体的可以看蒲公英提供的文档。
如果你感觉有些插件不符合自己的情况,你甚至可以自定义插件
5、多个 lane 的话实际上是可以相互调用的,这个其实特别实用。例如:
default_platform :ios

platform :ios do

  lane :prepare do
    cocoapods
    match
  end


  desc 'fastlane build'   'fastlane build type:adhoc'
  lane :build do |options|
    # 调用上面的 prepare 任务
    prepare

    case options[:type]
    when 'adhoc'
      adhoc
    else
      appstore
    end
  end


  lane : adhoc do
  ···
  end

  lane : appstore do
  ···
  end

end
6、我们可以在 Fastfile 文件中添加一个函数来设置version号和build号。
default_platform :ios

def prepare_version(options)
    increment_version_number(
        version_number: options[:version]
    )

    increment_build_number(
        build_number: options[:build]
    )
end
然后可以在一个lane中使用这个函数:
lane :appstore do |options|
   ···
    prepare_version(options)
   ···
end
然后执行这个lane的时候:
$ fastlane appstore version:2.4.0 build:2.0
Fastlane能做的事情还有很多,大家可以去好好看看文档,研究一些高级的用法吧!