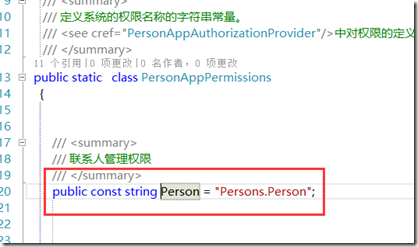
经过之前的准备目前我们的项目,终于可以搞正式的开发工作了。
创建实体Person
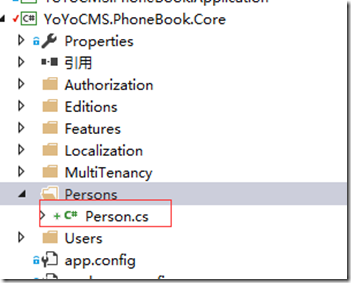
在Core类库中添加Person类
/// <summary>
    /// 联系人
    /// </summary>
    public class Person : FullAuditedEntity
    {
        /// <summary>
        /// 姓名
        /// </summary>
        [Required]
        [MaxLength(PhoneBookConsts.MaxNameLength)]
        public virtual string Name { get; set; }


        /// <summary>
        /// 邮箱地址
        /// </summary>
        [MaxLength(PhoneBookConsts.MaxEmailAddressLength)]
        public virtual string EmailAddress { get; set; }
    }
然后在PhoneBookConsts类中添加几个常量:
/// <summary>
    /// 电话薄项目的使用常量
    /// </summary>
    public static class PhoneBookConsts
    {
        public const string LocalizationSourceName = "PhoneBook";

        /// <summary>
        /// 名字最大长度
        /// </summary>
        public const int MaxNameLength = 32;

        /// <summary>
        /// 邮件地址最大长度
        /// </summary>
        public const int MaxEmailAddressLength = 255;
    }
提示:
person的主键为INT类型。
他集成了FullAuditedEntity,它包含了创建、修改、删除、审核属性。这里的删除是指“软删除”。
当我们删除一个人的时候,他不是从数据库中删除,而是被标记为删除状态。我们创建了一个常量为MaxNameLength的属性,这么做有一个好处,因为稍后我们可以将相同的值用不到不同的实体属性上。
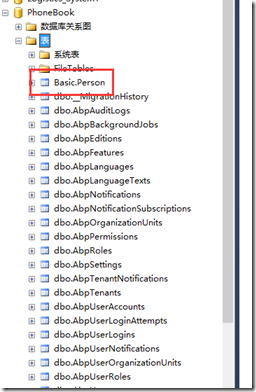
然后这个时候就可以进行数据库迁移了会在数据库生成Person这个表。
但是我偏不。为嘛呢。我可是一个有代码生成器的男人*(实力硬广)
使用代码生成器
下载地址:https://visualstudiogallery.msdn.microsoft.com/b1364d50-a445-433f-971c-373b402b6694
使用之前的准备工作
ABP的代码生成器是为了让大家更好的工作,所以在有些地方是做了处理的。我们就先来准备点东西吧
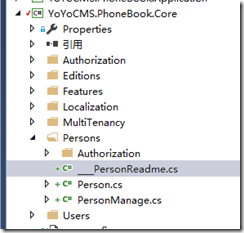
首先准备个常量类,放到Core项目中的根目录
/// <summary>
    /// 一些程序中会使用到的通用常量
    /// </summary>
    public static class YoYoCMSConsts
    {


     /// <summary>
     /// 显示名称的最大长度
     /// </summary>
        public const int MaxDisplayNameLength = 64;

    /// <summary>
    /// 用户名的最大长度
    /// </summary>
        public const int MaxUserNameLength = 32;

        /// <summary>
        /// 数据库架构名
        /// </summary>
        public static class SchemaName
        {
            /// <summary>
            /// 基础设置
            /// </summary>
            public const string Basic = "Basic";

            /// <summary>
            /// 模块管理
            /// </summary>
            public const string Moudle = "Moudle";

            /// <summary>
            /// 网站设置
            /// </summary>
            public const string WebSetting = "WebSetting";
            /// <summary>
            /// 用于对多对表关系的结构
            /// </summary>
            public const string HasMany = "HasMany";

            /// <summary>
            /// 业务
            /// </summary>
            public const string Business = "Business";

        }

    }
创建一个PagedAndSortedInputDto.cs类
public class PagedAndSortedInputDto : IPagedResultRequest, ISortedResultRequest
{
public string Sorting { get; set; }
public PagedAndSortedInputDto()
{
MaxResultCount = PhoneBookConsts.DefaultPageSize;
}
[Range(1, PhoneBookConsts.MaxPageSize)]
public int MaxResultCount { get; set; }
[Range(0, int.MaxValue)]
public int SkipCount { get; set; }
}
打开nuget管理器
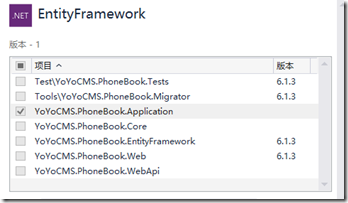
将ef、System.Linq.Dynamic安装到application中
然后生成代码
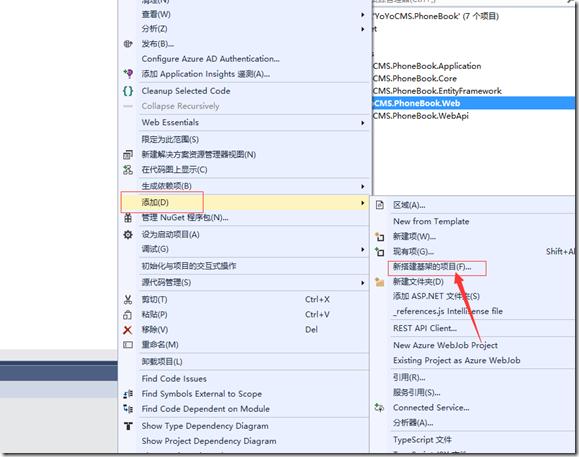
怎么使用呢。找到我们的web项目。
然后如下图所示:
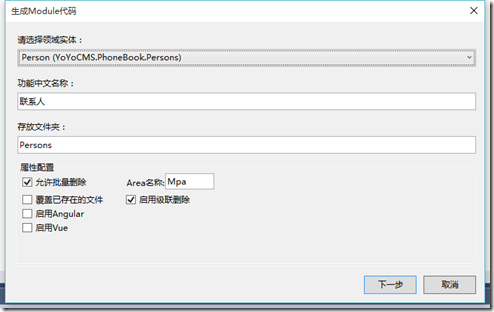
右键web项目,添加、新建基建项目
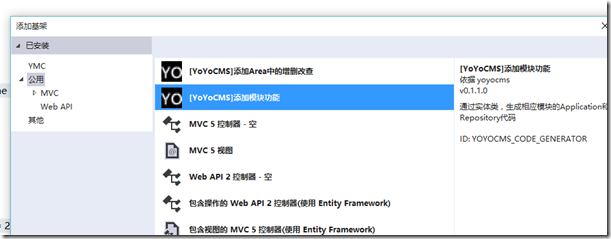
选择”添加模块功能“
然后选择Person实体
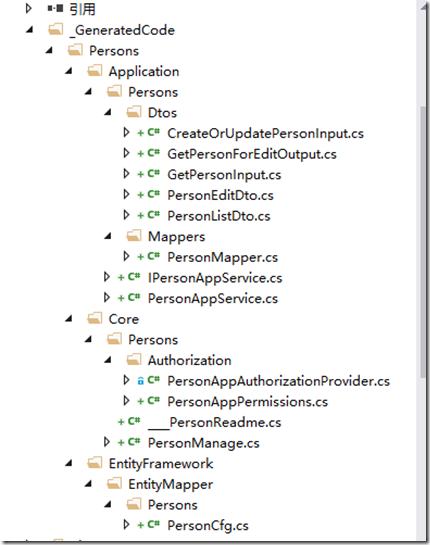
然后可以看到生成出来的代码:
首先将EntityFramework中的EntityMapper剪切到YoYoCMS.PhoneBook.EntityFramework中。
然后根据PersonCfg.cs中的todo:提示
public class PersonCfg : EntityTypeConfiguration<Person>
    {
        public PersonCfg ()
        {
                    ToTable("Person", YoYoCMSConsts.SchemaName.Basic);

      //todo: 需要将以下文件注入到YoYoCMS.PhoneBook.PersonsDbContext中

    //  public IDbSet<Person> Persons { get; set; }
 //   modelBuilder.Configurations.Add(new PersonCfg());


            // 姓名
            Property(a => a.Name).HasMaxLength(32);
            // 邮箱地址
            Property(a => a.EmailAddress).HasMaxLength(255);
        }
    }
将public IDbSet<> Person> Persons { get; set; }和modelBuilder.Configurations.Add(new PersonCfg());
打开”PhoneBookDbContext.cs”文件在//TODO: Define an IDbSet for your Entities...下面粘贴上
public IDbSet<> Person> Persons { get; set; }
手动创建方法,
protected override void OnModelCreating(DbModelBuilder modelBuilder)
        {
modelBuilder.Configurations.Add(new PersonCfg());
base.OnModelCreating(modelBuilder);
}最后的效果:
public class PhoneBookDbContext : AbpZeroDbContext<Tenant, Role, User>
    {
        //TODO: Define an IDbSet for your Entities...

        public IDbSet<Person> Persons { get; set; }

        /* NOTE:
         *   Setting "Default" to base class helps us when working migration commands on Package Manager Console.
         *   But it may cause problems when working Migrate.exe of EF. If you will apply migrations on command line, do not
         *   pass connection string name to base classes. ABP works either way.
         */
        public PhoneBookDbContext()
            : base("Default")
        {

        }

        /* NOTE:
         *   This constructor is used by ABP to pass connection string defined in PhoneBookDataModule.PreInitialize.
         *   Notice that, actually you will not directly create an instance of PhoneBookDbContext since ABP automatically handles it.
         */
        public PhoneBookDbContext(string nameOrConnectionString)
            : base(nameOrConnectionString)
        {

        }

        //This constructor is used in tests
        public PhoneBookDbContext(DbConnection connection)
            : base(connection, true)
        {

        }


        protected override void OnModelCreating(DbModelBuilder modelBuilder)
        {
            modelBuilder.Configurations.Add(new PersonCfg());

         }
    }
然后再次打开
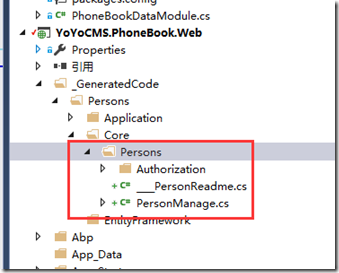
将以上代码剪切到Core类库中。
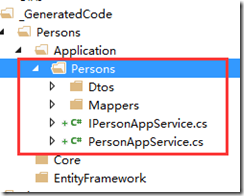
将下图的代码,剪切到application类库中
然后我们再一步步的解释这些分别怎么用
本地化多语言
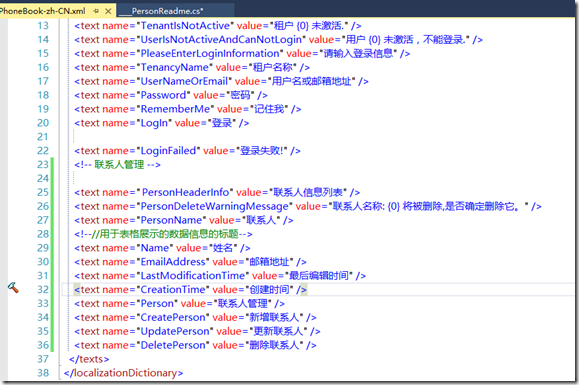
将PersonReadMe.cs中的文件
复制粘贴到“PhoneBook-zh-CN.xml”文件中.
注意这个文件中不能有重复的name,否则会报错
其他的提示信息同理,放到对应的文件中。
//TODO:多页面后端的导航栏目设计

    /*
    //无次级导航属性
       var person=new MenuItemDefinition(
                PersonAppPermissions.Person,
                L("Person"),
                url:"Mpa/PersonManage",
                icon:"icon-grid",
                 requiredPermissionName: PersonAppPermissions.Person
                );

*/
                //有下级菜单
            /*

               var person=new MenuItemDefinition(
                PersonAppPermissions.Person,
                L("Person"),
                icon:"icon-grid"
                );

                person.AddItem(
            new MenuItemDefinition(
            PersonAppPermissions.Person,
            L("Person"),
            "icon-star",
            "person",
            requiredPermissionName: PersonAppPermissions.Person));


            */

    //配置权限模块初始化


 //TODO:★需要到请将以下内容剪切到YoYoCMSApplicationModule
 //   Configuration.Authorization.Providers.Add<PersonAppAuthorizationProvider>();


//TODO:★请将以下内容剪切到CORE类库的Localization/Source/zh-cn.xml
/*
    <!-- 联系人管理 -->


        <text name="    PersonHeaderInfo" value="联系人信息列表" />
            <text name="PersonDeleteWarningMessage" value="联系人名称: {0} 将被删除,是否确定删除它。" />

                <text name="PersonName" value="联系人" />

<!--//用于表格展示的数据信息的标题-->
                    <text name="Name" value="姓名" />
                     <text name="EmailAddress" value="邮箱地址" />
                     <text name="LastModificationTime" value="最后编辑时间" />
                     <text name="CreationTime" value="创建时间" />


    <text name="Person" value="联系人管理" />
    <text name="CreatePerson" value="新增联系人" />
    <text name="UpdatePerson" value="更新联系人" />
    <text name="DeletePerson" value="删除联系人" />
*/

/*
    <!-- 联系人english管理 -->
            <text name="    PersonHeaderInfo" value="联系人List" />


    <text name="Person" value="ManagementPerson" />
    <text name="CreatePerson" value="CreatePerson" />
    <text name="UpdatePerson" value="UpdatePerson" />
    <text name="DeletePerson" value="DeletePerson" />
*/
文中涉及权限一块的内容,因为没有做权限页面左右我就删除掉了。保证他不出错就可以了。
生成迁移数据库
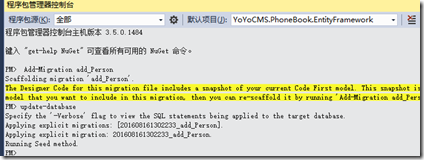
迁移命令:Add-Migration add_Person
然后进行update-database,数据库的表应该就正常的ok了
然后我们要添加菜单打开“PhoneBookNavigationProvider”
然后添加
var person = new MenuItemDefinition(
              PersonAppPermissions.Person,
              L("Person"),
              url: "PersonManage",
              icon: "fa fa-user-md"
              );
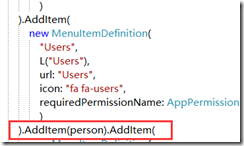
添加到users后面,这里的添加顺序是受菜单的影响的说。
添加控制器,生成视图文件
运行项目
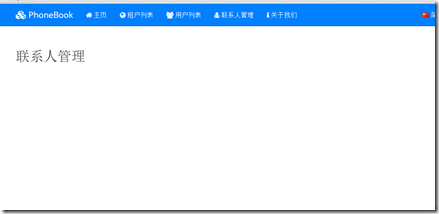
可以看到我们的联系人管理。这个时候呢,我们的联系人管理缺没有被选中,下一步就开始改造视图的CSS效果
制作选中效果
回到我们的菜单导航页面
var person = new MenuItemDefinition(
              PersonAppPermissions.Person,
              L("Person"),
              url: "PersonManage",
              icon: "fa fa-user-md"
              );
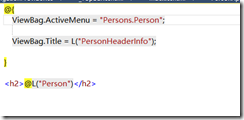
然后回到视图页面
刷新后,发现ok了。
the end
