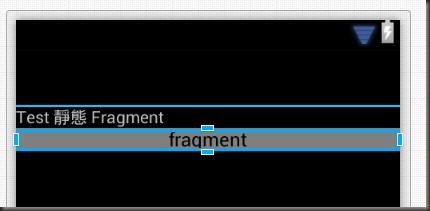
新的Android 開發,非常會使用到Fragment,不過官方範例有點小複雜,對初學者來說有點難消化,所以就記錄一下心得,這邊部落格將使用靜態的方法使用Fragment,Fragment 有自己的生命周期,如果之後有機會再說到,這邊文章只有簡單講解使用。之前有篇文章提到 使用LayoutInflater.Inflate載入預先設計好的Layout並使用 說到將一個畫面給打氣給呼叫起來,但是因為這樣就必須要在主要的MainActivity中控制每一個被呼叫起的Layout元件,在Android 3.0 之後,很多開發元件的廠商都改版了,並且都採用Fragmnet的方式包裝,因為他對於螢幕解析度的議題會有比較好的解決方法,當然這就不是此篇的重點了,現在我們來看看今天案例。
我設計了一個Layout名為 Fragment1 ,我希望由MainActivity 給愈一個DisplayContext 然後 該Fragment中的按鈕按下後會顯示在TextView上面 
我希望這我設計的元件,能夠在主要的Activity 中可以載入 預覽:
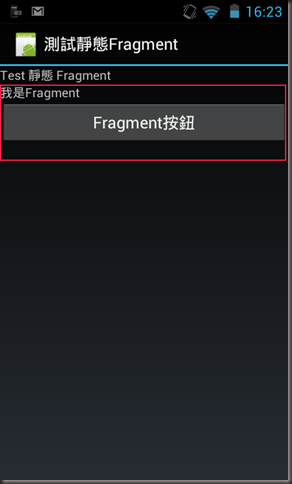
1.首先,因為這是Android 3.0 才加入的東西,基本上2.x 要支援要用其他方法這邊就先不提了,重點就先把專案調整成為4.0以上版本吧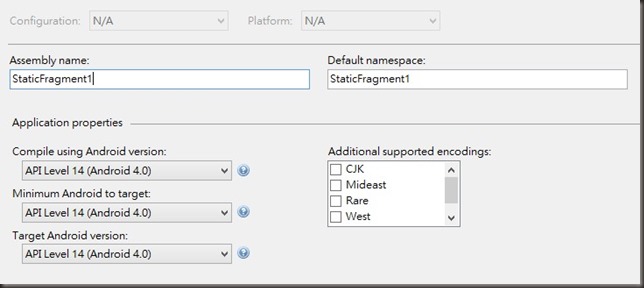
2.建立一個要被當做元件的Layout 在此範例為 ResourcesLayoutFragment1.axml
<?xml version="1.0" encoding="utf-8"?>
<LinearLayout xmlns:android="http://schemas.android.com/apk/res/android"
android:layout_width="match_parent"
android:layout_height="match_parent"
android:orientation="vertical">
<TextView
android:id="@+id/textView1"
android:layout_width="wrap_content"
android:layout_height="wrap_content"
android:text="我是Fragment" />
<Button
android:text="Fragment按鈕"
android:layout_width="fill_parent"
android:layout_height="wrap_content"
android:id="@+id/btnChangeText" />
</LinearLayout>
3.接下來就是先給予這隻程式一些靈魂可以操控這Layout 檔案位置為 Fragment1.cs
using Android.App;
using Android.OS;
using Android.Views;
using Android.Widget;
namespace StaticFragment1
{
public class Fragment1 : Fragment
{
/// <summary>
/// Poroperty DisplayContext
/// 欲呈現的文字
/// </summary>
public string DisplayContext { get; set; }
public override View OnCreateView(LayoutInflater inflater, ViewGroup container, Bundle savedInstanceState)
{
View v = inflater.Inflate(Resource.Layout.Fragment1, container, false);
var btnChangeText = v.FindViewById<Button>(Resource.Id.btnChangeText);
//設定 btnChangeText 點擊後將 textView1 的內容設為 DisplayContext
btnChangeText.Click += delegate
{
var textView1 = v.FindViewById<TextView>(Resource.Id.textView1);
textView1.Text = DisplayContext;
};
return v;
}
}
}
4. 主要的MainActivity Layout 位於 ResourcesLayoutMain.axml
<?xml version="1.0" encoding="utf-8"?>
<LinearLayout xmlns:android="http://schemas.android.com/apk/res/android"
xmlns:tools="http://schemas.android.com/tools"
android:layout_width="fill_parent"
android:orientation="vertical"
android:layout_height="fill_parent">
<TextView
android:id="@+id/textView1"
android:layout_width="fill_parent"
android:layout_height="wrap_content"
android:text="Test 靜態 Fragment" />
<fragment
android:id="@+id/fragmentFirst"
android:name="StaticFragment1.Fragment1"
android:layout_width="fill_parent"
android:layout_height="wrap_content" />
</LinearLayout>
其中注意, 在 fragment 中的name 我是設 [成專案名稱].[Fragment名稱] 許多範例是寫packagename 全名,但是我這邊是跑不起來的,所以應該是直接對應你在寫Fragment 程式端可被呼叫到的物件實體全名,並非package 之下,畢竟你現在是在xamarin. Design View :
5.接下來就是在 MainActivity 中C# 的部分 位置於 Activity1.cs
using Android.App;
using Android.OS;
namespace StaticFragment1
{
[Activity(Label = "測試靜態Fragment", MainLauncher = true, Icon = "@drawable/icon")]
public class Activity1 :Activity
{
protected override void OnCreate(Bundle bundle)
{
base.OnCreate(bundle);
// Set our view from the "main" layout resource
SetContentView(Resource.Layout.Main);
//取得該Fragment 因為在Layout那邊就已經指定他是Fragment1
var fragment1 = FragmentManager.FindFragmentById<Fragment1>(Resource.Id.fragmentFirst);|
//直接設定他的Peoperty
fragment1.DisplayContext = "Test 許噹噹";
}
}
}
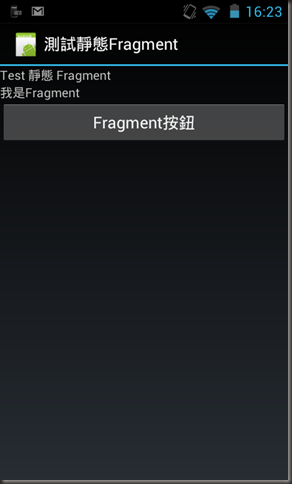
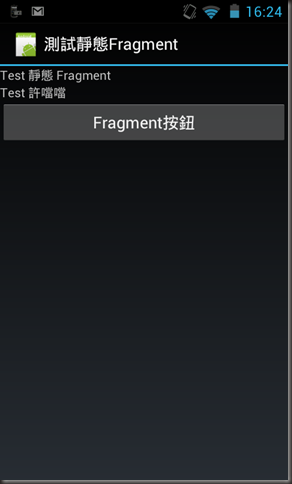
結果:
執行起來
點擊後-
因為官方寫的有點複雜,所以整理比較簡單的版本,這方法比單傳把畫面inflate 起來好管理多了
Reference: http://docs.xamarin.com/guides/android/platform_features/fragments
http://blog.kenyang.net/2013/03/android-fragment-activity.html
