前言
通过注解和AOP,实现主从数据源的切换。
示例
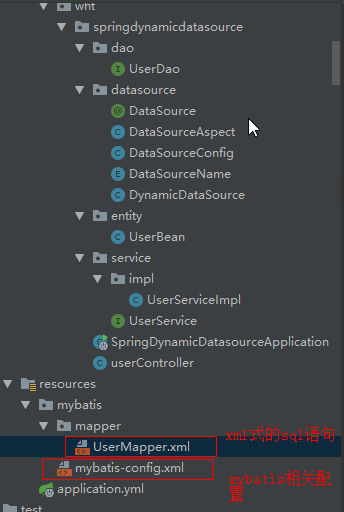
首先项目布局:
1:实体类,与数据库表的映射


@Data
@Builder
public class UserBean {

    private Long id;

    private String name;

    private String password;
}
2:dao类与对应的xml的mapper
@Repository
public interface UserDao {
    //新增
    int insertUser(UserBean userBean);
    //查询
    List<UserBean> getAllUser();
}
<?xml version="1.0" encoding="UTF-8" ?>
<!DOCTYPE mapper PUBLIC "-//mybatis.org//DTD Mapper 3.0//EN" "http://mybatis.org/dtd/mybatis-3-mapper.dtd">
<mapper namespace="com.wht.springdynamicdatasource.dao.UserDao">
    <!-- 创建用户(Create) -->
    <insert id="insertUser" parameterType="com.wht.springdynamicdatasource.entity.UserBean">
        insert into users(name,password) values(#{name},#{password})
    </insert>

    <!-- 查询全部用户 -->
    <select id="getAllUser" resultType="com.wht.springdynamicdatasource.entity.UserBean">
        select * from users
    </select>
</mapper>
3:Service与实现类
public interface UserService {

    int insertUser(UserBean user);

    List<UserBean> getAllUser();
}
@Service
@Transactional
// @DataSource("SLAVE_DATASOURCE")
public class UserServiceImpl implements UserService {

    @Autowired
    private UserDao userDao;

    @Override
    // @DataSource("MASTER_DATASOURCE")
    public int insertUser(UserBean user) {
        return userDao.insertUser(user);
    }

    @Override
    @DataSource("SLAVE_DATASOURCE")
    public List<UserBean> getAllUser() {
        return userDao.getAllUser();
    }
}
4:动态数据源配置
(1)注解:value参数指定数据源类型
@Target(value = {ElementType.METHOD,ElementType.FIELD,ElementType.PARAMETER,ElementType.TYPE})
@Retention(RetentionPolicy.RUNTIME)
public @interface DataSource {
    String value() default "MASTER-DATASOURCE";
}
(2)切面:指明要切哪个方法,如何获取该方法上的注解和注解值,从而根据注解配置切换数据源实例;
@Aspect
@Order(1)
@Component
public class DataSourceAspect {
    private Logger logger = LoggerFactory.getLogger(this.getClass());

    @Pointcut(value = "execution(* com.wht.springdynamicdatasource.service.*.*(..))")
    public void dataPointCut(){
    };

    @Before("dataPointCut()")
    public void before(JoinPoint joinPoint){
        Class<?> aClass = joinPoint.getTarget().getClass();
        // 获取类级别注解
        DataSource classAnnotation = aClass.getAnnotation(DataSource.class);
        if (classAnnotation != null){
            String dataSource = classAnnotation.value();
            logger.info("this is datasource: "+ dataSource);
            DynamicDataSource.putDataSourceKey(dataSource);
        }else {
            MethodSignature methodSignature = (MethodSignature) joinPoint.getSignature();
            Method method = methodSignature.getMethod();
            DataSource methodAnnotation = method.getAnnotation(DataSource.class);
            if (methodAnnotation != null){
                String dataSource = methodAnnotation.value();
                logger.info("this is dataSource: "+ dataSource);
                DynamicDataSource.putDataSourceKey(dataSource);
            }
        }
    }
    @After("dataPointCut()")
    public void after(JoinPoint joinPoint){
        logger.info("执行完毕!");
        DynamicDataSource.removeDataSourceKey();
    }
}
(3)自定义数据源路由:通过ThreadLocal保存当前线程要使用的数据源实例名称,determineCurrentLookupKey决定使用哪个数据源实例进行数据库mysql操作
public class DynamicDataSource  extends AbstractRoutingDataSource {
    private static final Logger log = LoggerFactory.getLogger(DynamicDataSource.class);
    //数据源key值
    private static final ThreadLocal<String> holder = new ThreadLocal<>();

    //设置数据源
    public static void putDataSourceKey(String key){
        log.info("切换数据源到{}", key);
        holder.set(key);
    }
    //获取数据源
    public static String getDataSourceKey(){
        return holder.get();
    }
    //移除
    public static void removeDataSourceKey(){
        holder.remove();
    }
    // 该方法决定使用哪个数据源
    @Override
    protected Object determineCurrentLookupKey() {
        Object o = getDataSourceKey();
        log.info("当前数据源为:===", getDataSourceKey());
        return getDataSourceKey();
    }
}
通过枚举,方便进行多个数据源的名称等管理:
@Getter
public enum  DataSourceName {

    MASTER("MASTER_DATASOURCE", 1),
    SLAVE("SLAVE_DATASOURCE", 2);

    private String name;
    private int index;

    DataSourceName(String name, int index) {
        this.name = name;
        this.index = index;
    }
}
(4)重要:多数据源的生成与配置,以及事务配置。多数据源最终目的是用自定义的数据源取代默认数据源配置,生成自定义的、线程安全的SqlSessionTemplate
/**
 * @createtime 2019/9/3
 * @description 根据配置文件生成多个DataSource实例,将其注入自定义DynamicDataSource中,
 * 该类继承了AbstractRoutingDataSource,进行路由管理。由sqlSessionFactory扫描mybatis相关配置,
 * 生成对应工厂实例。
 */
@Configuration
@EnableTransactionManagement
//指定dao的扫描位置和sqlSessionFactoryRef的引用实例。
@MapperScan(basePackages = {"com.wht.springdynamicdatasource.dao"}, sqlSessionFactoryRef = "sqlSessionFactory")
public class DataSourceConfig {
    //yml中配置的mapper扫描路径
    @Value("${mybatis.mapperLocations}")
    private String mapperLocations;

    //yml中配置的mybatis配置文件位置
    @Value("${mybatis.configLocation}")
    private String configLocation;

    /**
     * step1:通过指定配置文件前缀,生成主、从两个DataSource实例
     * @return
     */
    @Bean(name = "masterDataSource")
    @ConfigurationProperties(prefix = "spring.datasource.master")
    public DataSource masterDataSource(){
        DruidDataSource masterDataSource = DataSourceBuilder.create().type(DruidDataSource.class).build();
        masterDataSource.setName("masterDataSource");
        return masterDataSource;
    }
    //slave数据源实例
    @Bean(name = "slaveDataSource")
    @ConfigurationProperties(prefix = "spring.datasource.slave")
    public DataSource slaveDataSource(){
        DruidDataSource slaveDataSource = DataSourceBuilder.create().type(DruidDataSource.class).build();
        slaveDataSource.setName("slaveDataSource");
        return slaveDataSource;
    }

    /**
     * step: 通过DynamicDataSource继承Spring提供的数据库路由管理
     * 接口AbstractRoutingDataSource,将多个数据源实例注入其中。
     * @return
     */
    @Bean(name = "dataSource")
    public DataSource dataSource(){
        DynamicDataSource dynamicDataSource = new DynamicDataSource();
        //默认数据源
        dynamicDataSource.setDefaultTargetDataSource(masterDataSource());
        //多数据源
        Map<Object,Object> dataSourceMaps = new HashMap<>(2);
        //构建数据源映射map
        dataSourceMaps.put(DataSourceName.MASTER.getName(), masterDataSource());
        dataSourceMaps.put(DataSourceName.SLAVE.getName(), slaveDataSource());
        dynamicDataSource.setTargetDataSources(dataSourceMaps);
        return dynamicDataSource;
    }

    /**
     * step3:通过上一步的自定义多数据源路由Bean,指定mybatis配置文件位置和mapper.xml的位置。
     * 通过SqlSessionFactoryBean,生成SqlSessionFactory;
     * @param dynamicDataSource
     * @return
     * @throws Exception
     */
    @Bean(name = "sqlSessionFactory")
    public SqlSessionFactory sqlSessionFactory(@Qualifier("dataSource") DataSource dynamicDataSource) throws Exception {
        SqlSessionFactoryBean sqlSessionFactoryBean = new SqlSessionFactoryBean();
        sqlSessionFactoryBean.setDataSource(dynamicDataSource);
        //扫描mapper配置
        sqlSessionFactoryBean.setMapperLocations(new PathMatchingResourcePatternResolver().getResources(mapperLocations));
        //扫描mybatis配置文件
        sqlSessionFactoryBean.setConfigLocation(new ClassPathResource(configLocation));
        return sqlSessionFactoryBean.getObject();
    }

    /**
     * step4:通过上一步的SqlSessionFactory,生成线程安全的SqlSessionTemplate,
     * 该Bean为mybatis管理数据库连接的最核心类;
     * @param sqlSessionFactory
     * @return
     * @throws Exception
     */
    @Bean
    public SqlSessionTemplate sqlSessionTemplate(@Qualifier("sqlSessionFactory") SqlSessionFactory sqlSessionFactory) throws Exception {
        /* 使用上面配置的Factory,SqlSessionTemplate是线程安全的,是mybatis的管理数据库的最主要的一个类*/
        SqlSessionTemplate template = new SqlSessionTemplate(sqlSessionFactory);
        return template;
    }

    /**
     *  事务管理PlatformTransactionManager是Spring提供的事务管理的顶层抽象,
     *  通过手动配置,来代替默认的自动拾物配置,
     *  这样就可以在方法中直接使用注解@Transactional时,指定事务管理的数据源。
     * @param dataSource
     * @return
     */
    @Bean
    public PlatformTransactionManager transactionManager(@Qualifier("dataSource") DataSource dataSource){
        return new DataSourceTransactionManager(dataSource);
    }
}
5:启动类上,排除spring的自动数据源配置。
@SpringBootApplication(exclude = DataSourceAutoConfiguration.class)
public class SpringDynamicDatasourceApplication {

    public static void main(String[] args) {
        SpringApplication.run(SpringDynamicDatasourceApplication.class, args);
    }

}
6:配置文件:
mybatis的配置文件
<?xml version="1.0" encoding="UTF-8"?><!DOCTYPE configuration PUBLIC "-//mybatis.org//DTD Config 3.0//EN" "http://mybatis.org/dtd/mybatis-3-config.dtd">
<configuration>
    <!-- 全局参数 -->
    <settings>
        <!-- 使全局的映射器启用或禁用缓存。 -->
        <setting name="cacheEnabled" value="false"/>
        <!-- 全局启用或禁用延迟加载。当禁用时,所有关联对象都会即时加载。 -->
        <setting name="lazyLoadingEnabled" value="true"/>
        <!-- 当启用时,有延迟加载属性的对象在被调用时将会完全加载任意属性。否则,每种属性将会按需要加载。 -->
        <setting name="aggressiveLazyLoading" value="true"/>
        <!-- 是否允许单条sql 返回多个数据集  (取决于驱动的兼容性) default:true -->
        <setting name="multipleResultSetsEnabled" value="true"/>
        <!-- 是否可以使用列的别名 (取决于驱动的兼容性) default:true -->
        <setting name="useColumnLabel" value="true"/>
        <!-- 允许JDBC 生成主键。需要驱动器支持。如果设为了true,这个设置将强制使用被生成的主键,有一些驱动器不兼容不过仍然可以执行。  default:false  -->
        <setting name="useGeneratedKeys" value="true"/>
        <!-- 指定 MyBatis 如何自动映射 数据基表的列 NONE:不隐射 PARTIAL:部分  FULL:全部  -->
        <setting name="autoMappingBehavior" value="PARTIAL"/>
        <!-- 这是默认的执行类型  (SIMPLE: 简单; REUSE: 执行器可能重复使用prepared statements语句;BATCH: 执行器可以重复执行语句和批量更新)  -->
        <setting name="defaultExecutorType" value="SIMPLE"/>
        <!-- 使用驼峰命名法转换字段。 -->
        <setting name="mapUnderscoreToCamelCase" value="true"/>
        <!-- 设置本地缓存范围 session:就会有数据的共享  statement:语句范围 (这样就不会有数据的共享 ) defalut:session -->
        <setting name="localCacheScope" value="SESSION"/>
        <!-- 设置但JDBC类型为空时,某些驱动程序 要指定值,default:OTHER,插入空值时不需要指定类型 -->
        <setting name="jdbcTypeForNull" value="NULL"/>
    </settings>
</configuration>
spring的启动配置文件
#logging日志配置
logging:
  level:
    root: info
    org:
      springframework:
        web: DEBUG
##指向mapper的xml文件位置
mybatis:
  # 配置mapper的扫描,找到所有的mapper.xml映射文件
  mapperLocations: mybatis/mapper/*.xml
  # 加载全局的配置文件
  configLocation: mybatis/mybatis-config.xml
spring:
  datasource:
    ## master 数据源配置
    master:
      url: jdbc:mysql://localhost:3306/mytest?useUnicode=true&characterEncoding=UTF-8&allowMultiQueries=true&serverTimezone=GMT%2B8
      username: root
      password: ????
      driverClassName: com.mysql.cj.jdbc.Driver
    ## cluster 数据源配置
    slave:
      url: jdbc:mysql://localhost:3306/mytest1?useUnicode=true&characterEncoding=UTF-8&allowMultiQueries=true&serverTimezone=GMT%2B8
      username: root
      password: ????
      driverClassName: com.mysql.cj.jdbc.Driver