初始Spring
企业级开发应用
Spring 是一个开源框架,是为了解决企业应用程序开发复杂性而创建的。
框架的主要优势之一就是其分层架构,分层架构允许您选择使用哪一个组件,同时为 J2EE 应用程序开发提供集成的框架。
在这篇由三部分组成的 Spring 系列 的第 1 部分中,我将介绍 Spring 框架。
我先从框架底层模型的角度描述该框架的功能,然后将讨论两个最有趣的模块:
Spring 面向方面编程(AOP)和控制反转 (IOC) 容器。接着将使用几个示例演示 IOC 容器在典型应用程序用例场景中的应用情况。
这些示例还将成为本系列后面部分进行的展开式讨论的基础,在本文的后面部分,将介绍 Spring 框架通过 Spring AOP 实现 AOP 构造的方式。
Spring的两个主要的目标
一:让现有技术更易于使用
二:促进良好的编程习惯
Spring全新解决方案
坚持一个原则:
不重新发明轮子,Spring绝不做重复性的实现
Spring20个功能模块,6部分

Spring Core:框架最基础的部分,提供了IoC特性
Spring Context:为企业级开发提供了便利和集成的工具
Spring AOP:是基于Spring Core的符合规范的面向切面编程的实现
Spring JDBC:提供了JDBC的抽象层,简化了JDBC编码
Spring ORM:对市面上流行的ORM框架提供了支持
Spring Web:为Spring在Web程序中提供了支持
Spring IOC
控制反转(Inversion of Control)IoC,也称依赖注入(Dependency Injection)DI
是面向编程的一种设计理念,用来降低程序代码之间的耦合度
IOC不是什么技术,而是一种设计思想,DI是具体实现
Ioc意味着将你设计好的对象交给容器控制,而不是传统的在你的对象内部直接控制
而具体怎么做就是DI的具体实现了
什么是依赖
在代码中一般指通过局部变量,方法参数,返回值等建立的对于其他对象的调用关系。
Spring小案例:
步骤一:
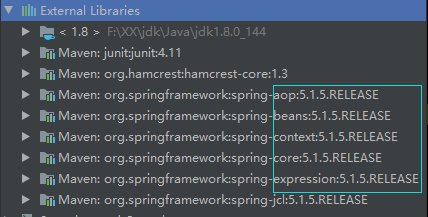
导入依赖
<!-- https://mvnrepository.com/artifact/org.springframework/spring-beans -->
    <dependency>
      <groupId>org.springframework</groupId>
      <artifactId>spring-beans</artifactId>
      <version>5.1.5.RELEASE</version>
    </dependency>
    <!-- https://mvnrepository.com/artifact/org.springframework/spring-context -->
    <dependency>
      <groupId>org.springframework</groupId>
      <artifactId>spring-context</artifactId>
      <version>5.1.5.RELEASE</version>
    </dependency>
  </dependencies>
步骤二:
创建applicationContext.xml大配置
<?xml version="1.0" encoding="UTF-8"?>
<beans xmlns="http://www.springframework.org/schema/beans"
       xmlns:xsi="http://www.w3.org/2001/XMLSchema-instance"
       xsi:schemaLocation="http://www.springframework.org/schema/beans
       http://www.springframework.org/schema/beans/spring-beans.xsd">
</beans>
步骤三:
创建实体类
package com.SpringMckz.entity;
public class Student {
//普通属性
private Integer stuid;
private String stuname;
//域属性
private Teacher teacher;
public Teacher getTeacher() {
return teacher;
}
public void setTeacher(Teacher teacher) {
this.teacher = teacher;
}
public Integer getStuid() {
return stuid;
}
public void setStuid(Integer stuid) {
this.stuid = stuid;
}
public String getStuname() {
return stuname;
}
public void setStuname(String stuname) {
this.stuname = stuname;
}
//普通方法
public void stu(){
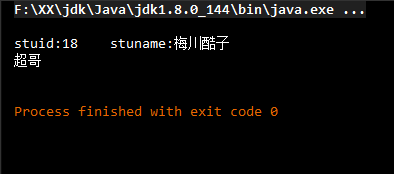
System.out.println("stuid:"+stuid+" stuname:"+stuname);
}
}
package com.SpringMckz.entity;

public class Teacher {
    //普通属性
    private Integer tid;
    private String tname;

    public Integer getTid() {
        return tid;
    }

    public void setTid(Integer tid) {
        this.tid = tid;
    }

    public String getTname() {
        return tname;
    }

    public void setTname(String tname) {
        this.tname = tname;
    }
}
步骤三:
在大配置文件中增加bean节点
<?xml version="1.0" encoding="UTF-8"?>
<beans xmlns="http://www.springframework.org/schema/beans"
       xmlns:xsi="http://www.w3.org/2001/XMLSchema-instance"
       xsi:schemaLocation="http://www.springframework.org/schema/beans
       http://www.springframework.org/schema/beans/spring-beans.xsd">
    <!--注入bean
        id相当于当前bean唯一标识
        class是bean 的全路径
        property注入bean中的属性         必须封装
    -->
    <bean id="Student" class="com.SpringMckz.entity.Student">
        <property name="stuid" value="18"></property>
        <property name="stuname" value="梅川酷子"></property>
        <!--关联下一个bean-->
        <property name="teacher" ref="teacher"></property>
    </bean>
  <bean id="teacher" class="com.SpringMckz.entity.Teacher">
      <property name="tid" value="28"></property>
      <property name="tname" value="超哥"></property>
  </bean>
</beans>
步骤四:
测试:
public class stutest {
    @Test
    public void teststu(){
        ApplicationContext atc=new ClassPathXmlApplicationContext("applicationContext.xml");
        Student student = (Student)atc.getBean("Student");
        student.stu();
        System.out.println(student.getTeacher().getTname());
    }
}