SpringBoot简介
Spring Boot是由Pivotal团队提供的全新框架,其设计目的是用来简化新Spring应用的初始搭建以及开发过程。该框架使用了特定的方式来进行配置,从而使开发人员不再需要定义样板化的配置。
SpringBoot特性
1. SpringBoot并不是对Spring功能上的增强,而是提供了一种快速创建独立的Spring应用程序的框架
2. 嵌入的Tomcat,无需部署WAR文件
3. 简化Maven配置
4. 自动配置Spring
5. 绝对没有代码生成和对XML没有要求配置
6.备受关注,是下一代框架,已经是不争的事实,不需要学习springmvc
7.微服务的入门级微框架,springboot是springcloud的基础
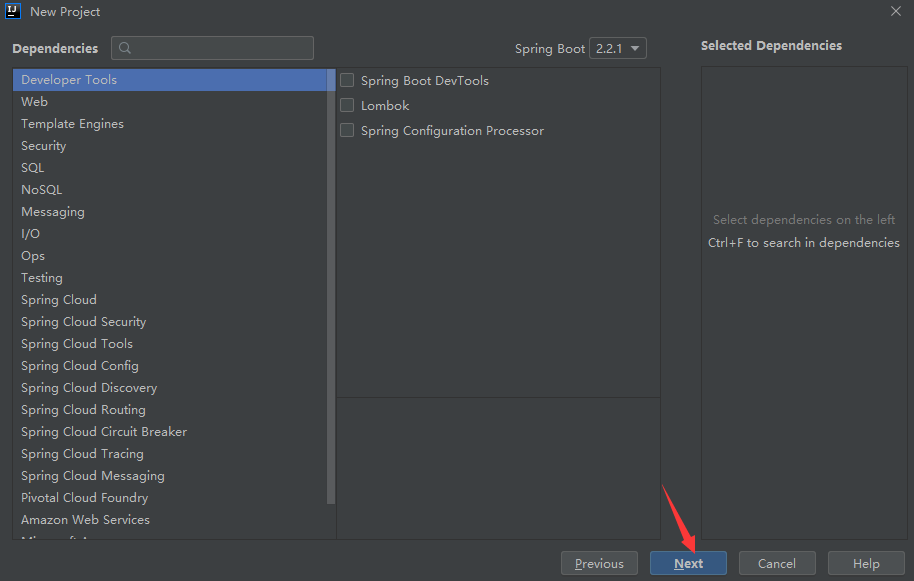
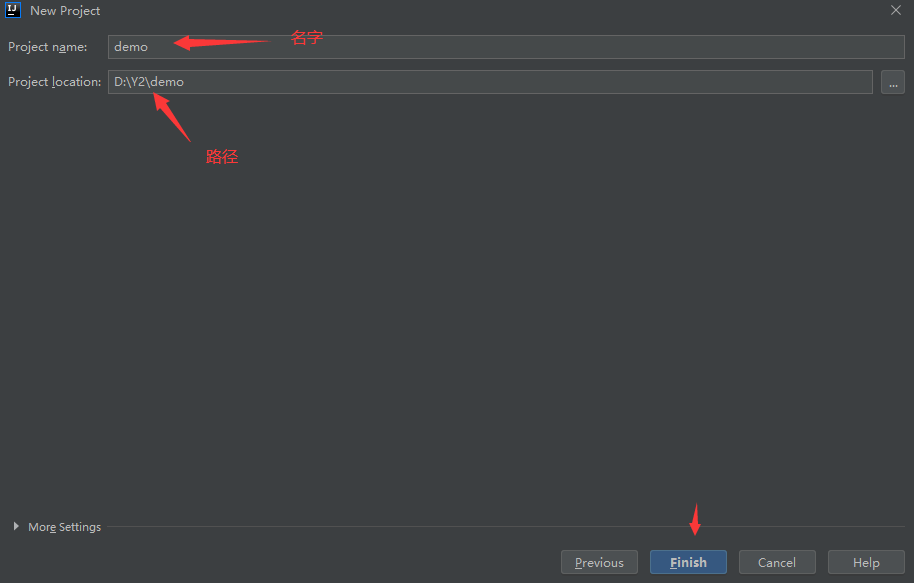
SpringBoot创建
步骤一:

步骤二:

步骤三:
步骤四:
步骤五:(依赖)
    <dependencies>
        <dependency>
            <groupId>org.springframework.boot</groupId>
            <artifactId>spring-boot-starter-web</artifactId>
        </dependency>
        <dependency>
            <groupId>org.springframework.boot</groupId>
            <artifactId>spring-boot-starter-tomcat</artifactId>
        </dependency>
        <!-- 引入springboot-mybatis的依赖 -->
        <dependency>
            <groupId>org.mybatis.spring.boot</groupId>
            <artifactId>mybatis-spring-boot-starter</artifactId>
            <version>1.1.1</version>
        </dependency>

        <dependency>
            <groupId>org.springframework.boot</groupId>
            <artifactId>spring-boot-starter-test</artifactId>
            <scope>test</scope>
        </dependency>

        <dependency>
            <groupId>mysql</groupId>
            <artifactId>mysql-connector-java</artifactId>
            <version>5.1.32</version>
        </dependency>
        <dependency>
            <groupId>org.springframework.boot</groupId>
            <artifactId>spring-boot-starter-web</artifactId>
        </dependency>

        <dependency>
            <groupId>org.springframework.boot</groupId>
            <artifactId>spring-boot-starter-test</artifactId>
            <scope>test</scope>
            <exclusions>
                <exclusion>
                    <groupId>org.junit.vintage</groupId>
                    <artifactId>junit-vintage-engine</artifactId>
                </exclusion>
            </exclusions>
        </dependency>
    </dependencies>
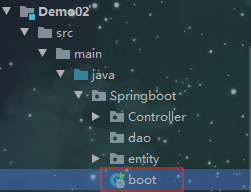
Springboot(一个主程序)
@SpringBootApplication(exclude= {DataSourceAutoConfiguration.class})
public class Springboot {
    public static void main(String[] args) {
        SpringApplication.run(Springboot.class, args);
    }
}
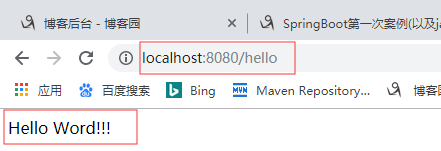
Controller
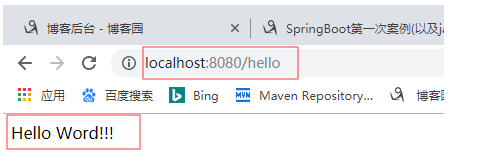
@Controller
public class myconterller {
    @RequestMapping("/hello")
    @ResponseBody
    public String deom(){
        return "Hello Word!!!";
    }
}
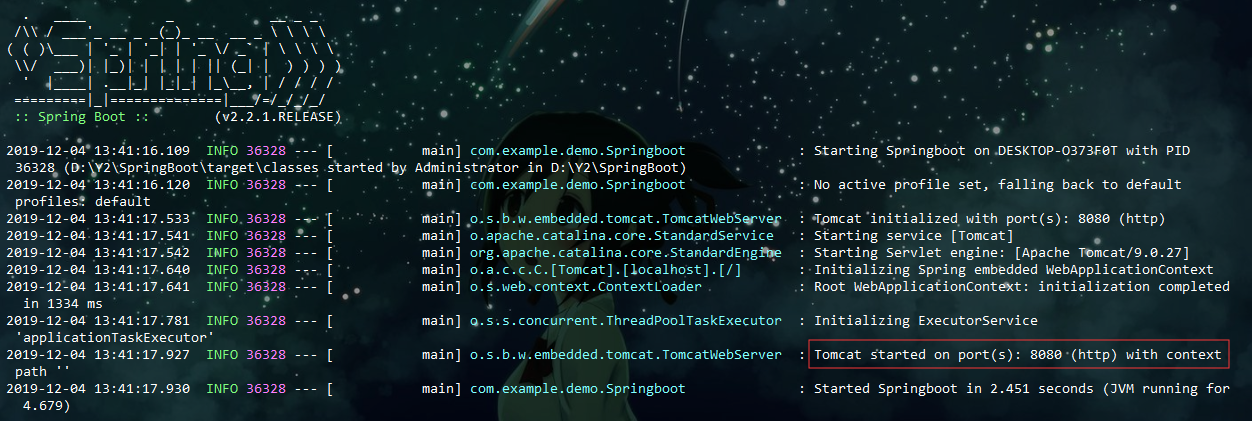
启动后观察(我们没有妹纸tomcat,却已有tomcat启动)
完成:
简单化部署
SpringBoot很强大,基本都不需要配置什么,就可以直接开发一个web程序。
当然了,它强大的还不止这个,还有项目部署这一块。
有了SpringBoot,我们可以直接把应用打包成一个可执行的jar包,
放在服务器上直接启动就可以用了。
打包是需要借助一个插件的,我们在初始化maven工程的时候已经把这个插件写到了pom文件中。
步骤一:(确保pom文件中有这个)
<build>
        <plugins>
            <plugin>
                <groupId>org.springframework.boot</groupId>
                <artifactId>spring-boot-maven-plugin</artifactId>
            </plugin>
        </plugins>
    </build>
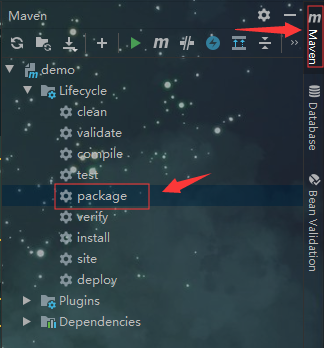
步骤二:右侧打开Maven,单击packge
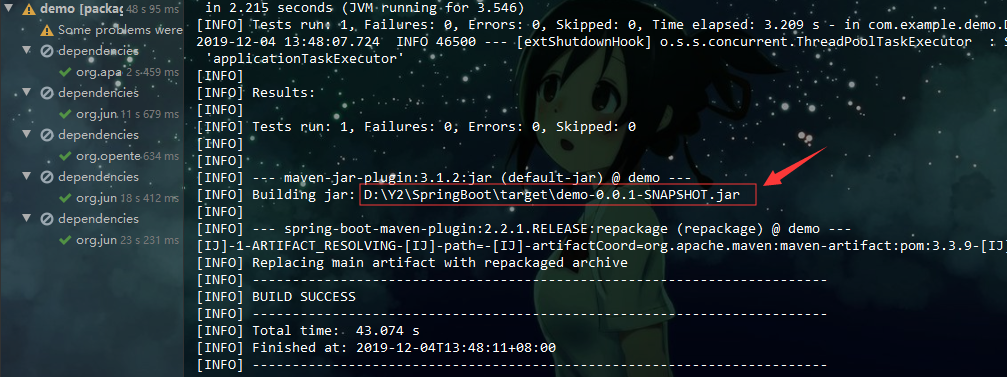
步骤三:找到打包后的jar
步骤四:打开
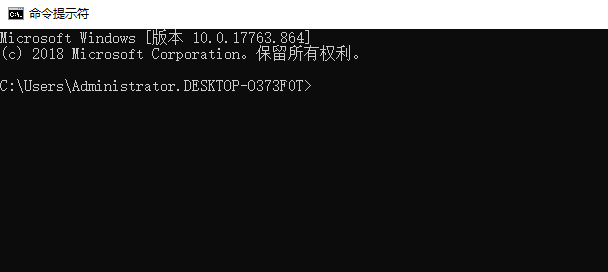
步骤五:找到刚刚打包的文件(使用java -jar 名字)

步骤六:(效果一样)
按照上面的步骤新加代码
注意1:主程序必须要与其改扫描的包在同一级
小小异常捕获:
controller
@RestController
@RequestMapping("/login")
public class FirstControler{
    @RequestMapping("/one")
    public String one(){
        int a=5/0;
        System.out.println("进来啦!!!");
        return "梅川酷子";
    }
}
捕获类
@ControllerAdvice
public class by {
    @ExceptionHandler(RuntimeException.class)
    @ResponseBody
    public Map<String,Object> ex(){
        Map<String,Object> map=new HashMap<>();
        map.put("您好!","服务器出现异常");
        return map;
    }
}
Springboot与templates
pom文件中增加freemarker的依赖
<!-- 添加freemarker模版的依赖 -->

   <dependency>

            <groupId>org.springframework.boot</groupId>

            <artifactId>spring-boot-starter-freemarker</artifactId>

   </dependency>
application.properties文件中新增freemarker配置
## Freemarker 配置

spring.freemarker.template-loader-path=classpath:/templates/

spring.freemarker.cache=false

spring.freemarker.charset=UTF-8

spring.freemarker.check-template-location=true

spring.freemarker.content-type=text/html

spring.freemarker.expose-request-attributes=false

spring.freemarker.expose-session-attributes=false

spring.freemarker.request-context-attribute=request
在src/main/resource/templates文件夹中创建helloFtl.ftl文件
controller
@Controller
@RequestMapping("/oo")
public class index {
    @RequestMapping("/one")
    public String one(ModelMap map){
        map.put("name","梅川酷子");
        return "login";
    }
}
.ftl文件网页
<!DOCTYPE html>
<html lang="en">
<head>
    <meta charset="UTF-8">
    <title>Title</title>
</head>
<body>
    欢迎:${name}


</body>
</html>

ebtity
package Springboot.entity;

public class student {
    private Integer stuid;
    private String stuname;

    public Integer getStuid() {
        return stuid;
    }

    public void setStuid(Integer stuid) {
        this.stuid = stuid;
    }

    public String getStuname() {
        return stuname;
    }

    public void setStuname(String stuname) {
        this.stuname = stuname;
    }
}
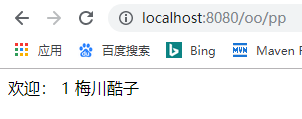
controller
@RequestMapping("pp")
    public String two(ModelMap map){
        List<student> stulist=new ArrayList<>();
        student stu=new student();
        stu.setStuid(1);
        stu.setStuname("梅川酷子");
        stulist.add(stu);
        map.put("stus",stulist);
        return "login";
    }
.ftl文件网页
<!DOCTYPE html>
<html lang="en">
<head>
    <meta charset="UTF-8">
    <title>Title</title>
</head>
<body>
    <#list stus as s>
        ${s.stuid}
        ${s.stuname}
    </#list>


</body>
</html>
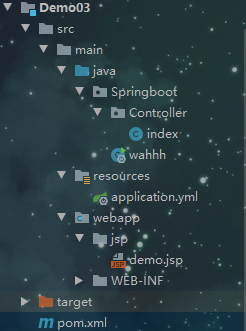
Springboot使用jsp
目录结构
依赖
<dependency>
      <groupId>org.springframework.boot</groupId>
      <artifactId>spring-boot-starter-tomcat</artifactId>
    </dependency>
    <dependency>
      <groupId>org.apache.tomcat.embed</groupId>
      <artifactId>tomcat-embed-jasper</artifactId>
    </dependency>
主程序
@SpringBootApplication
public class wahhh {
    public static void main(String[] args) {
        SpringApplication.run(wahhh.class,args);
    }
}
Controller
@Controller
@RequestMapping("/oo")
public class index {
    @RequestMapping("/one")
    public String one(ModelMap map){
        map.put("name","梅川酷子");
        return "demo";
    }
}
application.yml
spring:
  mvc:
    view:
      prefix: /jsp/
      suffix: .jsp
jsp页面
<%@ page contentType="text/html;charset=UTF-8" language="java" %>
<html>
<head>
    <title>Springboot_jsp</title>
</head>
<body>
    ${name}
</body>
</html>
启动

热部署
依赖
<!--热部署-->
    <dependency>
      <groupId>org.springframework.boot</groupId>
      <artifactId>spring-boot-devtools</artifactId>
      <optional>true</optional>
 </dependency>


<plugin>
          <groupId>org.springframework.boot</groupId>
          <artifactId>spring-boot-maven-plugin</artifactId>
          <configuration>
            <fork>true</fork>
          </configuration>
</plugin>
步骤:
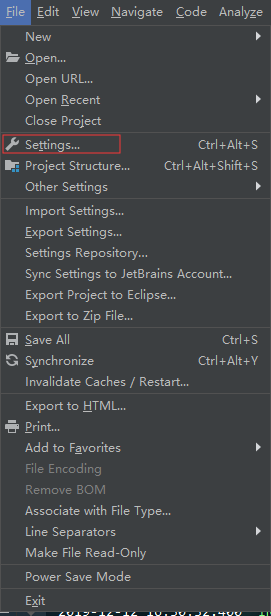
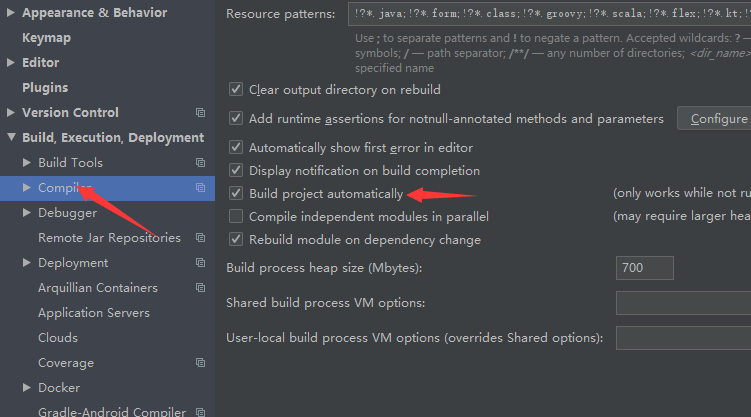
Ctrl+Shift+Alt+/
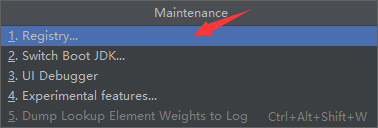

OK了
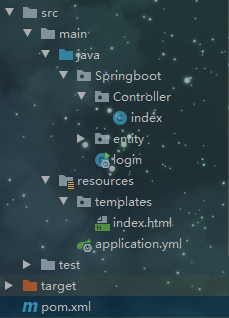
SpringBoot使用thymeleaf
目录结构
依赖
<!-- 添加thymeleaf模版的依赖 -->
    <dependency>
      <groupId>org.springframework.boot</groupId>
      <artifactId>spring-boot-starter-thymeleaf</artifactId>
    </dependency>
entity
public class student {
    private Integer stuid;
    private String stuname;

    public Integer getStuid() {
        return stuid;
    }

    public void setStuid(Integer stuid) {
        this.stuid = stuid;
    }

    public String getStuname() {
        return stuname;
    }

    public void setStuname(String stuname) {
        this.stuname = stuname;
    }
}
主程序
@SpringBootApplication
public class login {
    public static void main(String[] args) {
        SpringApplication.run(login.class,args);
    }
}
Controller
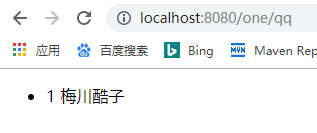
@Controller
@RequestMapping("/one")
public class index {
    @RequestMapping("/qq")
    public String one(Model model){
        List<student> list=new ArrayList<>();
        student stu1=new student();
        stu1.setStuid(1);
        stu1.setStuname("梅川酷子");
        list.add(stu1);
        model.addAttribute("stulist",list);
        return "index";
    }
}
application.yml
spring:
  thymeleaf:
    cache: false
index.xml
<!DOCTYPE html>
<html lang="en" xmlns:th="http://www.w3.org/1999/xhtml">
<head>
    <meta charset="UTF-8"/>
    <title>Title</title>
</head>
<body>
<ul th:each="stu:${stulist}">
    <li>
        <span th:text="${stu.stuid}"></span>
        <span th:text="${stu.stuname}"></span>
    </li>
</ul>
</body>
</html>
启动
Springboot与jpa
目录结构

依赖
<dependency>
      <groupId>org.springframework.boot</groupId>
      <artifactId>spring-boot-starter-data-jpa</artifactId>
    </dependency>
    <!-- https://mvnrepository.com/artifact/mysql/mysql-connector-java -->
    <dependency>
      <groupId>mysql</groupId>
      <artifactId>mysql-connector-java</artifactId>
      <version>8.0.15</version>
    </dependency>
entity
@Entity
public class student {
    @Id
    @GeneratedValue(strategy = GenerationType.AUTO)
    private Integer stuid;
    private String stuname;
    private Integer age;

    public Integer getStuid() {
        return stuid;
    }

    public void setStuid(Integer stuid) {
        this.stuid = stuid;
    }

    public String getStuname() {
        return stuname;
    }

    public void setStuname(String stuname) {
        this.stuname = stuname;
    }

    public Integer getAge() {
        return age;
    }

    public void setAge(Integer age) {
        this.age = age;
    }
}
dao
@Repository
public interface Istudao extends CrudRepository<student,Integer> {

}
service
public interface Istuservice {
    //添加
    public student insertstu(student stu);

    //修改
    public student updatestu(student stu);

    //删除
    public void deletestu(Integer stuid);

    //查询
    public Iterable<student> getAll();
}
serviceimpl
@Service
public class Istuserviceimpl implements Istuservice {

    @Resource
    private Istudao istudao;

    @Override
    public student insertstu(student stu) {
        return istudao.save(stu);
    }

    @Override
    public student updatestu(student stu) {
        return istudao.save(stu);
    }

    @Override
    public void deletestu(Integer stuid) {
        istudao.delete(stuid);
    }

    @Override
    public Iterable<student> getAll() {
        return istudao.findAll();
    }
}
Controller
@RestController
@RequestMapping("/stu")
public class stucontroller {

    @Resource
    private Istuservice istuservice;

    //新增数据
    @RequestMapping("/insertstu")
    public student insertstu(){
        student stu=new student();
        stu.setStuname("S1");
        return istuservice.insertstu(stu);
    }

    @RequestMapping("/updatestu")
    public student updateGrade(){
        student stu=new student();
        stu.setStuid(1);
        stu.setStuname("S5");
        return istuservice.updatestu(stu);
    }

    @RequestMapping("/deletestu")
    public void deleteGrade(){
        istuservice.deletestu(1);
    }


    @RequestMapping("/getAllstu")
    public Iterable<student> getAllGrade(){
        return  istuservice.getAll();
    }

}
主程序
@SpringBootApplication
public class Istu {
    public static void main(String[] args) {
        SpringApplication.run(Istu.class,args);
    }
}
application
##数据库四大连接参数
spring:
  datasource:
    driver-class-name: com.mysql.cj.jdbc.Driver
    url: jdbc:mysql:///student
    username: root
    password: 123
##jpa表的生成策略
  jpa:
    hibernate:
      ddl-auto: update