原文网址:http://tdppro.blog.51cto.com/749956/1388853
1、DownLoading the Support Libraries
1)Start the Android SDK Manager.
2)In the SDK Manager window, scroll to the end of the Packages list, find theExtras
folder and, if necessary, expand to show its contents.
3)Select the Android Support Library item.
4)Click the Install Packages... button
After downloading, the tool installs the Support Library files to your existing Android SDK directory. The library files are located in the following subdirectory of your SDK: <sdk>/extras/android/support dirctory
2、安装支持库
1)首先创建一个Library Project
File->import.
选择Existing Android Code Into Workspace ,单击 Next
找到SDK 安装目录的支持库。比如,这里需要找到以下目录录 <sdk>/extras/android/support/v7/appcompat/.
单击Finish 就可以导入项目。现在你可以看到一个名为 android-support-v7-appcompat.的 新项目。
在新项目下的libs目录下,将.jar文件加入到路径中。
在新项目文件名称上面右键,选择Configure Build Path
在Order and Export 标签下面,选中刚刚加入的.jar文件,将Android Dependencies不选中,单击OK
2)将支持库加入到自己的项目中
在项目中右键自己的项目名称,选择Properties
在左侧边栏选中Android
点击Add按钮
选择库项目,比如这里的android-support-v7-appcompat.。如果此处找不到,则在安装支持库之前需要<sdk>/extras/android/support中的文件拷贝到你的workplaces中,
选择OK即可。
原文网址:http://blog.csdn.net/appte/article/details/11712591
以前3.0以前的版本要使用ActionBar,必须使用国外大牛写的ActionBarSherlock这个开源项目。今年的Google/IO大会之后,Google官方在android-support-v7包中添加了ActionBar,开始让2.1以后的版本支持ActionBar,从此以后曾经最火的Android开源项目ActionBarSherlock可以退出历史舞台了。
要是用V7包中ActionBar也很简单,但有一个需要注意的地方。有些人可能刚开始仅仅是把android-support-v7-appcompat.jar导入项目中,但是在设置Activity的theme时会报错,提示找不到"@style/Theme.AppCompat"。这是由于我们要把v7和资源文件一起导入才行。
具体使用步骤(针对于Eclipse):
Create a library project based on the support library code:
- Make sure you have downloaded the Android Support Library using the SDK Manager.
- Create a library project and ensure the required JAR files are included in the project's build path:
- Select File > Import.
- Select Existing Android Code Into Workspace and click Next.
- Browse to the SDK installation directory and then to the Support Library folder. For example, if you are adding the
appcompatproject, browse to<sdk>/extras/android/support/v7/appcompat/. - Click Finish to import the project. For the v7 appcompat project, you should now see a new project titled android-support-v7-appcompat.
- In the new library project, expand the
libs/folder, right-click each.jarfile and select Build Path > Add to Build Path. For example, when creating the the v7 appcompat project, add both theandroid-support-v4.jarandandroid-support-v7-appcompat.jarfiles to the build path. - Right-click the project and select Build Path > Configure Build Path.
- In the Order and Export tab, check the
.jarfiles you just added to the build path, so they are available to projects that depend on this library project. For example, theappcompatproject requires you to export both theandroid-support-v4.jarandandroid-support-v7-appcompat.jarfiles. - Uncheck Android Dependencies.
- Click OK to complete the changes.
You now have a library project for your selected Support Library that you can use with one or more application projects.
Add the library to your application project:
- In the Project Explorer, right-click your project and select Properties.
- In the Library pane, click Add.
- Select the library project and click OK. For example, the
appcompatproject should be listed as android-support-v7-appcompat. - In the properties window, click OK.
Once your project is set up with the support library, here's how to add the action bar:
- Create your activity by extending
ActionBarActivity. - Use (or extend) one of the
Theme.AppCompatthemes for your activity. For example:<activity android:theme="@style/Theme.AppCompat.Light" ... >
Now your activity includes the action bar when running on Android 2.1 (API level 7) or higher.
On API level 11 or higher
The action bar is included in all activities that use the Theme.Holo theme (or one of its descendants), which is the default theme when either the targetSdkVersion or minSdkVersion attribute is set to "11" or higher. If you don't want the action bar for an activity, set the activity theme to Theme.Holo.NoActionBar.以上摘自Android官网。
示例代码:
- <?xml version="1.0" encoding="utf-8"?>
- <manifest xmlns:android="http://schemas.android.com/apk/res/android"
- package="com.folyd.actionbartest"
- android:versionCode="1"
- android:versionName="1.0" >
- <uses-sdk
- android:minSdkVersion="8"
- android:targetSdkVersion="17" />
- <application
- android:allowBackup="true"
- android:icon="@drawable/ic_launcher"
- android:label="@string/app_name"
- android:theme="@style/AppTheme" >
- <activity
- android:theme="@style/Theme.Base.AppCompat.Light"
- android:name="com.folyd.actionbartest.MainActivity"
- android:label="@string/app_name" >
- <intent-filter>
- <action android:name="android.intent.action.MAIN" />
- <category android:name="android.intent.category.LAUNCHER" />
- </intent-filter>
- </activity>
- </application>
- </manifest>
- package com.folyd.actionbartest;
- import android.os.Bundle;
- import android.support.v7.app.ActionBar;
- import android.support.v7.app.ActionBarActivity;
- public class MainActivity extends ActionBarActivity {
- private ActionBar actionBar;
- @Override
- protected void onCreate(Bundle savedInstanceState) {
- super.onCreate(savedInstanceState);
- setContentView(R.layout.activity_main);
- actionBar = getSupportActionBar();
- actionBar.setDisplayShowHomeEnabled(true);
- }
- }
效果截图:

2016/01/19
1. File->Import (android-sdkextrasandroidsupportv7)导入appCompat后出现如下
error: Error retrieving parent for item: No resource found that matches the given name 'android:Widget.Material.Button.Colored'.
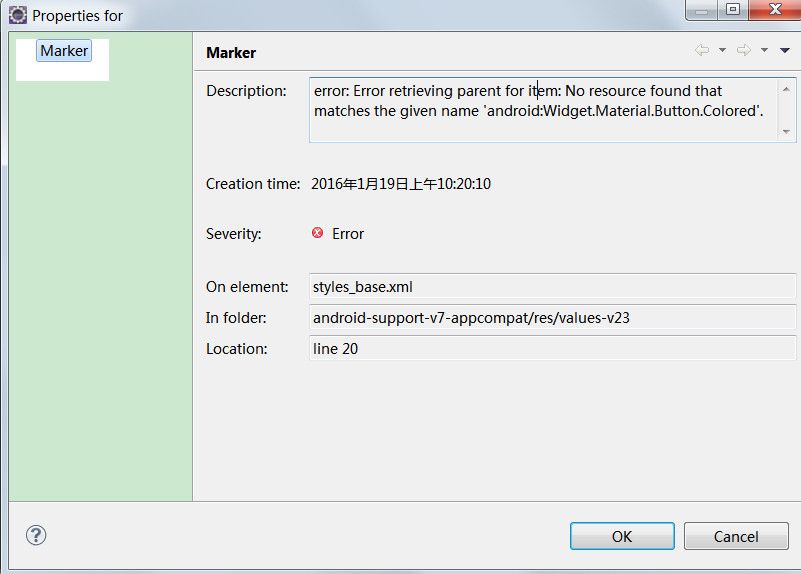
解决方案1:下载API23的SDK Platform source packet --可行
右击 appcompat -> Properties -> android, 选择android5.0.1
原文网址:http://www.phperz.com/article/14/1204/39233.html
解决方案2:直接将value-v23删除。--可行
2. 自己的工程出现 error: Error retrieving parent for item: No resource found that matches the given name 'Theme.AppCompat.Light.DarkActionBar'.
原文网址:http://www.tuicool.com/articles/YreyEn3
在整合android过程中导入别人的项目出现下面的错误:
<style name="AppBaseTheme" parent="Theme.AppCompat.Light">
error: Error retrieving parent for item: No resource found that matches the given name 'Theme.AppCompat.Light'.
通过stackoverflow查到其解决方法,如下:
(1)File->Import (android-sdkextrasandroidsupportv7). Choose "appcompat"
在"文件"中导入sdk路径extrasandroidsupportv7中的appcompat文件夹.如下图所示:

此时问题即可解决,能正确运行.

新的eclipse默认模版主题UI需要使用比较高版本api,如果需要支持低版本,需要导入appCompact库来支持
注意的地方:(原文网址:http://blog.csdn.net/huiguixian/article/details/41210895)
简单来说就是新的eclipse默认模版主题UI需要使用比较高版本api,如果需要支持低版本,需要导入appCompact库来支持,网上一般给出的解法:
- File->Import (android-sdkextrasandroidsupportv7). Choose "appcompat"
- Project-> properties->Android. In the section library "Add" and choose "appCompat"
android新建项目时 出现appcompat_v7工程错误和红色感叹号
原文网址:http://www.cnblogs.com/xiaozhang2014/p/4109856.html
最近初学android,版本是22.6.0的话,每次创建一个项目就会出现一个appcompat_v7工程;然后我升级到最新的版本23.0.4之后,创建第一个项目,也会出现一个appcompat_v7工程,但创建多个项目的话,appcompat_v7工程也仅有一个,但有错误;

上网查了一下,原来appcompat_v7是Google的一个兼容包,就是一个支持库,项目新建后之所以会生成appcomat_v7工程,是为了能兼容2.2以上的版本,eclipse在新建项目的时候自动关联了所需要的lib;
关联的方式是:项目 -> Properies -> Android ->Libary;
你会看到appcomat_v7被作为lib加载了进来,如果不想引用这个lib,把它删除了,关联就解除了,也就不能兼容以前的版本了;

如果不想让appcompat_v7自动生成,可以在创建项目时,将Minimum Required SDK(即兼容的最小版本)设置为4.0,那就不会有这个工程的出现了;
而出现归出现,这个错误还是要解决的,解决方式为:
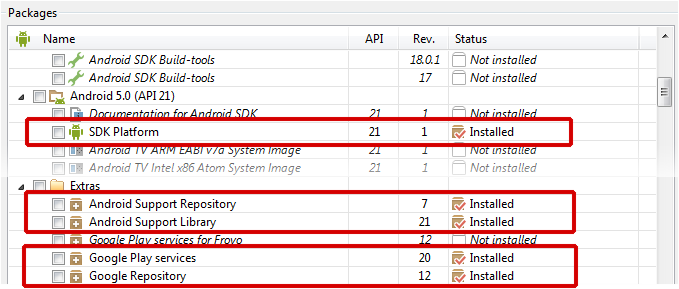
(1)打开Android SDK Manager,把最新的Android SDK和Tools里对应的Android SDK Build-tools下载下来,截止到2014年11月,应该是Android 5.0(API 21);当然,Extras的Android Support Respository,Android Support Library和Google USB Driver也要下载下来;

(2)下载完成后,选中appcompat_v7工程,点击菜单栏里的Project ,把Build Automatically的勾去掉,即不要自动构建;
然后clean一下整个项目:clean all projects,然后再build project;当然,这当中最好能重启一下;然后再clean;

然后就应该没有错误了,然后再把Build Automatically选上,以后就可以新建项目了;
(3)新建项目时,为了兼容以前的版本,如果不想生成appcompat_v7工程的话,就要引入appcompat_v7的jar包作为支持;
在Eclipse添加Android兼容包( v4、v7 appcompat )
原文网址:http://www.cnblogs.com/kissazi2/p/3644848.html
昨天添加Android兼容包,碰到了很多问题,在这里记录一下,让后面的路好走。
如何选择兼容包,
请参考Android Support Library Features(二)
一、下载Support Library
方法1:右击项目→选择Android Tools→Add Support Library…

方法2:
通过SDK Manager获取Support Library:
1.打开Android SDK Manager
2.在SDK Manager窗口,滚动到Package List的末尾,找到Extra文件夹,如果需要的话打开文件夹显示它的内容。
3.选择Android Support Library项目。
注意:如果你使用的是Android Studio开发,选择并安装Android Support Repository项目而不是Android Support Library项目。
4.点击Install packages按钮。

下载完成后,SDK会将Support Library文件安装到你已经存在的Android SDK目录下。库文件位于SDK的如下子目录:<sdk>/extras/android/support/目录。
二、添加V4兼容包(v4 appconpat)
- 确保你已经利用SDK Manager下载了Android Support Library 。
- 在你的项目的根目录下创建一个libs/目录。
- 从你的Android SDK安装目录(例如,<sdk>/extras/android/support/v4/android-support-v4.jar)下拷贝JAR文件到你项目的libs/目录下。
- 右键点击JAR文件并选择Build Path > Add to Build Path。
三、添加V7兼容包(v7 appconpat)
创建一个基于support library代码的 library project:
- 确保你已经利用 SDK Manager下载了Android Support Library。
- 创建一个library项目并且确保需要的JAR文件包含在了项目的build path中:
- 选择File > Import。
- 选择Existing Android Code Into Workspace 并点击Next。
- 浏览SDK安装目录,并进入Support Library目录下。例如,如果你要添加appcompat项目,浏览 <sdk>/extras/android/support/v7/appcompat/。
- 点击Finish引入项目。对于v7 appcompat项目,你将看到一个标题为android-support-v7-appcompat的新项目。

- 在新项目中,展开libs/ 文件夹,右键点击每一个.jar文件,并选择Build Path > Add to Build Path。例如,当创建v7 appcompat项目时,同时将android-support-v4.jar和android-support-v7-appcompat.jar文件添加到build path中。
- 右键点击library项目文件夹并选择Build Path > Configure Build Path。
- 在Order and Export选项中,在刚刚添加到build path中的.jar文件上打勾,这时这些文件成为项目可用的了并依赖于这个library项目。例如,appcompat项目要求同时导出android-support-v4.jar和android-support-v7-appcompat.jar文件。
- 去掉Android Dependencies上的对勾。
- 点击OK完成设置


现在你拥有了一个包含你选择的Support Library的library项目,你可以在一个或多个应用项目中利用这个Support Library。
现在我们要向应用工程(需要加入Support Library的工程)添加库:
- 在项目浏览器中右键单击你的项目,选择Properties。
- 在左边的分类面板中,选择Android。
- 在Library面板中,点击Add。
- 选择库项目,然后点击OK。例如,appcompat项目会在列表中显示为android-support-v7-appcompat。
- 在properties窗口中,点击OK。

遇到的问题:
1、java.lang.NoClassDefFoundError: android.support.v7.appcompat.R$attr
这个问题,是因为app在运行时没有找到对应的V7兼容包导致的,请参考文中 添加V7兼容包(v7 appconpat)
2、java.lang.IllegalStateException: You need to use a Theme.AppCompat theme (or descendant) with this activity.
完成上文提到的1,3步骤后,修改android:theme为@style/Theme.AppCompat

作者:kissazi2
出处:http://www.cnblogs.com/kissazi2/
本文版权归作者所有,欢迎转载,但未经作者同意必须保留此段声明,且在文章页面明显位置给出原文连接,否则保留追究法律责任的权利。