继 负载均衡 之 nginx+consul+consul template,我这次将使用2台虚拟机,来做一个简单的双机负载均衡试验。
试验目标:
1. 当参加负载均衡的子节点服务,有任何其中一个或多个停止工作,总服务还能正常工作;
2. 当两台机子,其中有一台关机了,总服务还能正常工作;
3. 其中一台关机之后,重启,能自动加入负载均衡;
3. 当两台都关机了,总服务停止工作(如果还能工作,那就是见鬼了!)
试验准备:
2台虚拟机:
192.168.40.128 (ubuntu 16.04)
192.168.40.129 (ubuntu 16.04)
试验开始如下:
1. 两台机子分别安装keepalived
sudo apt-get install libssl-dev
sudo apt-get install openssl
sudo apt-get install libpopt-dev
sudo apt-get install keepalived
192.168.40.128 (ubuntu 16.04)配置为备用机:
sudo vim /etc/keepalived/keepalived.conf
内容:
vrrp_instance VI_1 {
   state BACKUP
   interface ens33 #ifconfig确定
   virtual_router_id 51 #路由器标识,MASTER和BACKUP必须是一致的
   priority 100 #定义优先级,数字越大,优先级越高,在同一个vrrp_instance下,MASTER的优先级必须大于BACKUP的优先级。这样MASTER故障恢复后,就可以将VIP资源再次抢回来
   advert_int 1
   authentication {
       auth_type PASS
       auth_pass 123456
   }
   virtual_ipaddress {
       192.168.40.100 # 虚拟ip
   }
}
192.168.40.129 (ubuntu 16.04)配置为主机:
sudo vim /etc/keepalived/keepalived.conf
内容:
vrrp_instance VI_1 {
   state MASTER
   interface ens33 #ifconfig确定
   virtual_router_id 51 #路由器标识,MASTER和BACKUP必须是一致的
   priority 100 #定义优先级,数字越大,优先级越高,在同一个vrrp_instance下,MASTER的优先级必须大于BACKUP的优先级。这样MASTER故障恢复后,就可以将VIP资源再次抢回来
   advert_int 1
   authentication {
       auth_type PASS
       auth_pass 123456
   }
   virtual_ipaddress {
       192.168.40.100 # 虚拟ip
   }
}
两台机子共用一个虚拟IP 192.168.40.100, 在生产环境中应该是一个域名
分别开启 keepalived
sudo service keepalived start
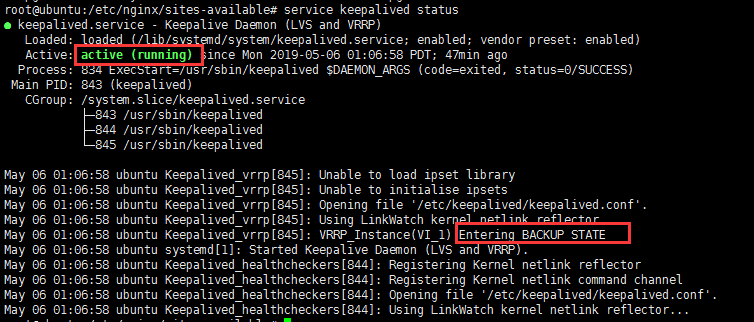
查看
sudo servicv keepalived status
2. 两台机子都安装nginx,这些我就不详说了
3. 两台机子都安装consul,以及 consul-template, 也不详说,具体看负载均衡 之 nginx+consul+consul template
4. 两台机子分别配置3个试验站点:
server {
    listen 8010;
    root /www/static-web/site1;
    index index.html;
}


server {
    listen 8020;
    root /www/static-web/site2;
    index index.html;
}


server {
    listen 8030;
    root /www/static-web/site3;
    index index.html;
}
html的内容随便写点,能区别就好
试访问一下:
192.168.40.128:8010
192.168.40.128:8020
192.168.40.128:8030
192.168.40.129:8010
192.168.40.129:8020
192.168.40.129:8030
这些我是将一个站点,放在两台机子,每台机子布署3个站点,一共6个子节点服务来做负载均衡
5. 分别配置服务注册文件:
{
  "encrypt": "k4NEAxg594DeOEjIs/FYBw==",
 "services": [
      {
      "id": "api4",
      "name": "MasterService",
      "tags": [ "ApiService" ],
      "address": "192.168.40.129",
      "port": 8010,
      "checks": [
        {
          "id": "ApiServiceD_Check",
          "name": "ApiServiceD_Check",
          "http": "http://192.168.40.129:8010",
          "interval": "10s",
          "tls_skip_verify": false,
          "method": "GET",
          "timeout": "1s"
        }
      ]
    },
    {
      "id": "api5",
      "name": "MasterService",
      "tags": [ "ApiService" ],
      "address": "192.168.40.129",
      "port": 8020,
      "checks": [
        {
          "id": "ApiServiceE_Check",
          "name": "ApiServiceE_Check",
          "http": "http://192.168.40.129:8020",
          "interval": "10s",
          "tls_skip_verify": false,
          "method": "GET",
          "timeout": "1s"
        }
      ]
    },
    {
      "id": "api6",
      "name": "MasterService",
      "tags": [ "ApiService" ],
      "address": "192.168.40.129",
      "port": 8030,
      "checks": [
        {
          "id": "ApiServiceF_Check",
          "name": "ApiServiceF_Check",
          "http": "http://192.168.40.129:8030",
          "interval": "10s",
          "tls_skip_verify": false,
          "method": "GET",
          "timeout": "1s"
        }
      ]
    }
  ]
}
配置consul-template模板:
upstream masterservice {
   {{range service "MasterService"}}
    server {{.Address}}:{{.Port}} max_fails=3 fail_timeout=60 weight=1;
     {{else}}server 127.0.0.1:65535; # force a 502{{end}}
}

server {
        listen       8088;
        location / {
            proxy_pass   http://masterservice;
            proxy_http_version 1.1;
            proxy_set_header Upgrade $http_upgrade;
            proxy_set_header Connection keep-alive;
            proxy_set_header Host $http_host;
            proxy_set_header X-Real-IP $remote_addr;
            proxy_set_header X-Forwarded-For $proxy_add_x_forwarded_for;
            proxy_cache_bypass $http_upgrade;

        }

  }
6. 192.168.40.128 执行:
consul agent -server -ui -bootstrap-expect=2 -data-dir=/tmp/consul -node=consul-1 -client=0.0.0.0 -bind=192.168.40.128 -datacenter=dc1 -config-dir=/consul/balanceload &
consul-template --consul-addr 192.168.40.128:8500 --template "/consul/template/nginx.ctmpl:/consul/template/vhost.conf:service nginx restart" --log-level=info &
192.168.40.128 执行:
consul agent -server -ui -bootstrap-expect=2 -data-dir=/tmp/consul -node=consul-2 -client=0.0.0.0 -bind=192.168.40.129 -datacenter=dc1 -config-dir=/consul/balanceload -join 192.168.40.128 &
consul-template --consul-addr 192.168.40.129:8500 --template "/consul/template/nginx.ctmpl:/consul/template/vhost.conf:service nginx restart" --log-level=info &
注意consul 服务注册的一些问题
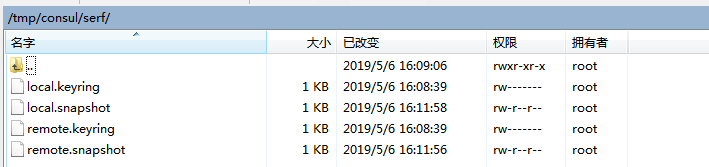
这里存储着consul 主机,远程机的注册密钥和运行快照,因为下次再次启动consul时,之前的配置不会丢失
7. 检查consul 成员
consul members

consul info
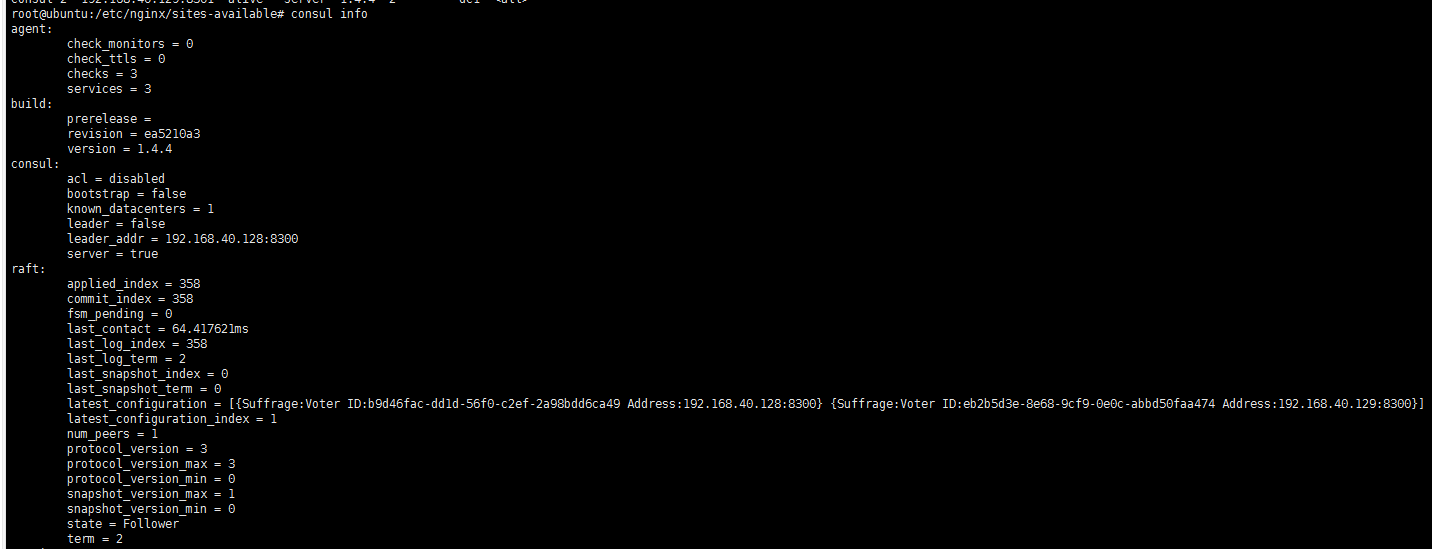
可以看到,两台机的consul服务已经形成集群,129这台是follower, 128是leader
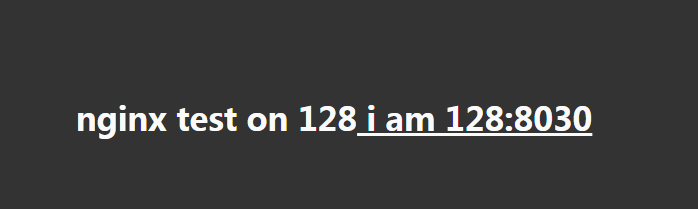
8. 现在访问那个虚拟VIP,加上nginx模板配置的8088端口: 192.168.40.100:8088
一次次刷新:
nginx test on 128 i am 128:8010
nginx test on 128 i am 128:8020
nginx test on 128 i am 128:8030
nginx test on 129 i am 129:8010
nginx test on 129 i am 129:8020
nginx test on 129 i am 129:8030
可以看到, 192.168.40.100:8088, 轮询的去访问2台机6个站点
我们也可以看到模板文件生成的结果:
upstream masterservice {

    server 192.168.40.128:8010 max_fails=3 fail_timeout=60 weight=1;

    server 192.168.40.128:8020 max_fails=3 fail_timeout=60 weight=1;

    server 192.168.40.128:8030 max_fails=3 fail_timeout=60 weight=1;

    server 192.168.40.129:8010 max_fails=3 fail_timeout=60 weight=1;

    server 192.168.40.129:8020 max_fails=3 fail_timeout=60 weight=1;

    server 192.168.40.129:8030 max_fails=3 fail_timeout=60 weight=1;

}

server {
        listen       8088;
        location / {
            proxy_pass   http://masterservice;
            proxy_http_version 1.1;
            proxy_set_header Upgrade $http_upgrade;
            proxy_set_header Connection keep-alive;
            proxy_set_header Host $http_host;
            proxy_set_header X-Real-IP $remote_addr;
            proxy_set_header X-Forwarded-For $proxy_add_x_forwarded_for;
            proxy_cache_bypass $http_upgrade;

        }

  }
9. 试关掉一个站点 192.168.40.128:8010
192.168.40.100:8088 正常工作,只是轮询时少了 192.168.40.128:8010
模板生成的结果:
upstream masterservice {


    server 192.168.40.128:8020 max_fails=3 fail_timeout=60 weight=1;

    server 192.168.40.128:8030 max_fails=3 fail_timeout=60 weight=1;

    server 192.168.40.129:8010 max_fails=3 fail_timeout=60 weight=1;

    server 192.168.40.129:8020 max_fails=3 fail_timeout=60 weight=1;

    server 192.168.40.129:8030 max_fails=3 fail_timeout=60 weight=1;

}

server {
        listen       8088;
        location / {
            proxy_pass   http://masterservice;
            proxy_http_version 1.1;
            proxy_set_header Upgrade $http_upgrade;
            proxy_set_header Connection keep-alive;
            proxy_set_header Host $http_host;
            proxy_set_header X-Real-IP $remote_addr;
            proxy_set_header X-Forwarded-For $proxy_add_x_forwarded_for;
            proxy_cache_bypass $http_upgrade;

        }

  }
10. 把 128 的 consul 服务关掉
129那边得知128的consul 节点离开了,会将自己推选为leader
访问一下http://192.168.40.100:8088/
还是能正常工作
nginx test on 129 i am 129:8010
nginx test on 129 i am 129:8020
nginx test on 129 i am 129:8030
只是再看不到128
11. 把128的consul服务开回来
这时,128和129并不能一起推选出leader。也就是说128并没有加入集群。这时候需要 -rejoin 。表示重新加入集群。重新推选出了leader。
12.把128的机子关机
这时,129那边一直报
找不到128,129也处于候选人状态,这个consul服务挂掉了,也就是说只有2台服务器形成一个consul集群,其中一个意外挂掉了,只留下一个节点,它是无法再推送出leader。活着的那个节点,只能处于候选人状态。
13.做到这里,终于明白 consul官网为何建议一个consul集群,至少要有3个服务节点。
那么使用consul来做双机负载均衡和服务发现,是不行,必须至少要三机。于是我再安装多一个虚拟机。192.168.40.130
安装了跟前两台一样的软件和相关配置。
访问192.168.40.100:8088
可以看到负载均衡的成员多了130

3台机推送了130为leader

暴力地把130给关机了
看看129,128的反应
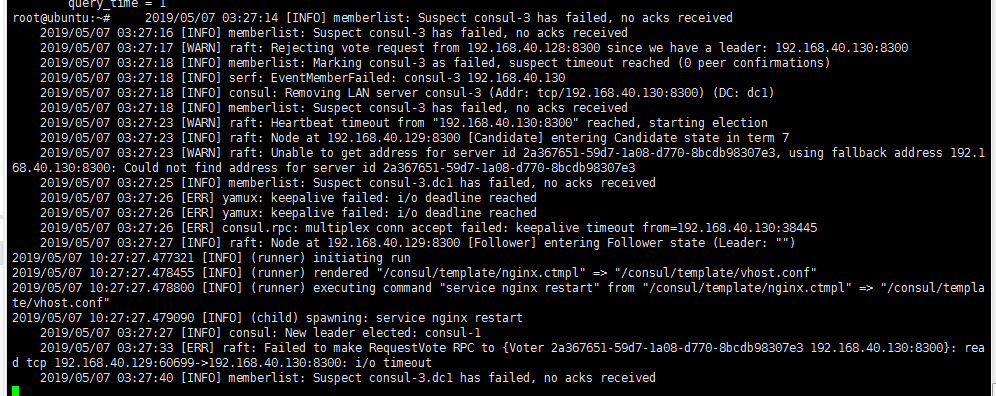
可以看这里报了很多消息
1. keepalived重新选举 master
2. consul重新选举 leader:consul-1 128那台成了新的老大
3. consul-template 自动更新nginx 配置,并重启
再看看consul members:

130的consul是一个失败状态,这跟离开状态是不一样的,所以consul集群也是会不放弃地继续呼叫130 回家。
这时访问192.168.40.100:8088,会发现负载均衡的成员,只有6个。
14. 让130回家
直接把130那台机子开机

consul又恢复了3个节点,leader依然是 consul-1
总结:至此,高可用集群搭建的研究告一段落了。中间踩地了不少坑,也有不少的疑惑,总之自己走过一遍是必须的。
如此,我们的网站服务器是可以无限扩展的。