随着用户量的增多,数据库操作往往会成为一个系统的瓶颈所在,而且一般的系统“读”的压力远远大于“写”,因此我们可以通过实现数据库的读写分离来提高系统的性能。通过设置主从数据库实现读写分离,主数据库负责“写操作”,从数据库负责“读操作”。读写分离是为了提供程序的性能,读写分离简单的说是把对数据库读和写的操作分开对应不同的数据库服务器,这样能有效地减轻数据库压力,也能减轻io压力。
环境:
| 主机名 | IP | 系统/数据库版本 | 角色 |
| tiandong | 192.168.199.3 | centos6.5/5.6.26 | 主 |
| winter | 192.168.199.4 | centos6.5/5.6.26 | 从 |
| localhost | 192.168.199.6 | rhel7.4 | mysql-proxy |
安装mysql-proxy:
需要系统支持LUA语言环境,
[root@localhost ~]# yum install lua -y
[root@localhost~]# tar -xf mysql-proxy-0.8.5-linux-el6-x86-64bit.tar.gz -C /usr/local/src/
[root@localhost ~]# cd !$
cd /usr/local/src/
[root@CFCA src]# ll
总用量 0
drwxr-xr-x. 8 7161 wheel 87 8月 19 2014 mysql-proxy-0.8.5-linux-el6-x86-64bit
[root@localhost src]# mv mysql-proxy-0.8.5-linux-el6-x86-64bit/ mysql-proxy
增加环境变量:
[root@localhost mysql-proxy]# tail -n 1 /etc/profile
export PATH=/usr/local/src/mysql-proxy/bin:$PATH
[root@localhost mysql-proxy]# source /etc/profile
[root@localhost ~]# ls /usr/local/src/mysql-proxy/share/doc/mysql-proxy/
active-queries.lua histogram.lua tutorial-inject.lua tutorial-routing.lua
active-transactions.lua load-multi.lua tutorial-keepalive.lua tutorial-scramble.lua
admin-sql.lua README tutorial-monitor.lua tutorial-states.lua
analyze-query.lua ro-balance.lua tutorial-packets.lua tutorial-tokenize.lua
auditing.lua ro-pooling.lua tutorial-prep-stmts.lua tutorial-union.lua
commit-obfuscator.lua rw-splitting.lua tutorial-query-time.lua tutorial-warnings.lua
commit-obfuscator.msc tutorial-basic.lua tutorial-resultset.lua xtab.lua
COPYING tutorial-constants.lua tutorial-rewrite.lua
[root@localhost mysql-proxy]# mkdir logs #创建日志文件
[root@localhost mysql-proxy]# mkdir lua #创建脚本存放目录
[root@localhost mysql-proxy]# cp /usr/local/src/mysql-proxy/share/doc/mysql-proxy/rw-splitting.lua ./lua/
修改读写分离配置文件
[root@localhost mysql-proxy]# vim lua/rw-splitting.lua
38 if not proxy.global.config.rwsplit then
39 proxy.global.config.rwsplit = {
40 min_idle_connections = 1, 默认是4
41 max_idle_connections = 1, 默认是8,为了测试效果设置为1
42
43 is_debug = false
配置mysql-proxy,创建主配置文件
[root@localhost mysql-proxy]# vim /etc/mysql-proxy.cnf
[mysql-proxy]
user=root #运行mysql-proxy用户
admin-username=proxy #主从mysql共用的用户
admin-password=123456 #用户的密码
proxy-address=192.168.199.6:4040 #mysql-proxy运行ip和端口,不加端口,默认4040
proxy-read-only-backend-addresses=192.168.199.4 #指定后端从slave读取数据
proxy-backend-addresses=192.168.199.3 #指定后端主master写入数据
proxy-lua-script=/usr/local/src/mysql-proxy/lua/rw-splitting.lua #指定读写分离配置文件位置
admin-lua-script=/usr/local/src/mysql-proxy/lua/admin-sql.lua #指定管理脚本
log-file=/usr/local/src/mysql-proxy/logs/mysql-proxy.log #日志位置
log-level=info #定义log日志级别,由高到低分别有(error|warning|info|message|debug)
#daemon=true #以守护进程方式运行
#keepalive=true #mysql-proxy崩溃时,尝试重启
[root@localhost ~]# chmod 660 /etc/mysql-proxy.cnf
启动mysql-proxy
[root@localhost logs]# mysql-proxy --defaults-file=/etc/mysql-proxy.cnf
在服务器创建proxy用户用于mysql-proxy使用,(主从上面都的创建)
[root@tiandong ~]# mysql -uroot -p123456
mysql> grant all on HA.* to 'proxy'@'192.168.199.6' identified by '123456';
mysql> flush privileges;
启动mysql-proxy
[root@localhost logs]# mysql-proxy --defaults-file=/etc/mysql-proxy.cnf
[root@localhost ~]# lsof -i:4040 #查看已经启动了端口
COMMAND PID USER FD TYPE DEVICE SIZE/OFF NODE NAME
mysql-pro 5834 root 10u IPv4 57303 0t0 TCP localhost.localdomain:yo-main (LISTEN)
读写测试:
在测试之前把主从同步关闭了,让主从之间的数据不一致,这样可以看见读写是在那台数据库上。
先看一下主库上的数据:
[root@tiandong ~]# mysql -uroot -p123456
mysql> select * from HA.T1;
+------+---------+
| id | name |
+------+---------+
| 2 | thunder |
| 3 | winter |
+------+---------+
2 rows in set (0.00 sec)
从库上的数据:
[root@winter ~]# mysql -uroot -p123456
mysql> select * from HA.T1;
+------+---------+
| id | name |
+------+---------+
| 2 | thunder |
| 3 | winter |
| 4 | qq |
| 10 | asd |
+------+---------+
4 rows in set (0.00 sec)
第一次连接mysql-proxy
[root@localhost ~]# mysql -uproxy -p123456 -P 4040 -h 192.168.199.6
Welcome to the MariaDB monitor. Commands end with ; or g.
Your MySQL connection id is 20
Server version: 5.6.26-log Source distribution
MySQL [(none)]> select * from HA.T1;
+------+---------+
| id | name |
+------+---------+
| 2 | thunder |
| 3 | winter |
+------+---------+
2 rows in set (0.01 sec)
第一次的数据是主库上的,说明第一次连接的是主库,
第二次连接mysql-proxy:
[root@localhost ~]# mysql -uproxy -p123456 -P 4040 -h 192.168.199.6
Welcome to the MariaDB monitor. Commands end with ; or g.
Your MySQL connection id is 22
Server version: 5.6.26-log Source distribution
MySQL [(none)]> select * from HA.T1;
+------+---------+
| id | name |
+------+---------+
| 2 | thunder |
| 3 | winter |
+------+---------+
2 rows in set (0.00 sec)
第二次连接的是主库。
第三次连接:
[root@localhost ~]# mysql -uproxy -p123456 -P 4040 -h 192.168.199.6
Welcome to the MariaDB monitor. Commands end with ; or g.
Your MySQL connection id is 14
Server version: 5.6.26 Source distribution
MySQL [(none)]> select * from HA.T1;
+------+---------+
| id | name |
+------+---------+
| 2 | thunder |
| 3 | winter |
| 4 | qq |
| 10 | asd |
+------+---------+
4 rows in set (0.00 sec)
数据是从库上的,说明连接的是从库。以后读就在从库上了,
测试一下写操作:
[root@localhost ~]# mysql -uproxy -p123456 -P 4040 -h 192.168.199.6
Welcome to the MariaDB monitor. Commands end with ; or g.
Your MySQL connection id is 15
Server version: 5.6.26 Source distribution
Copyright (c) 2000, 2017, Oracle, MariaDB Corporation Ab and others.
Type 'help;' or 'h' for help. Type 'c' to clear the current input statement.
MySQL [(none)]> insert into HA.T1 values(4,'dongtian');
Query OK, 1 row affected (0.00 sec)
在数据库上查看
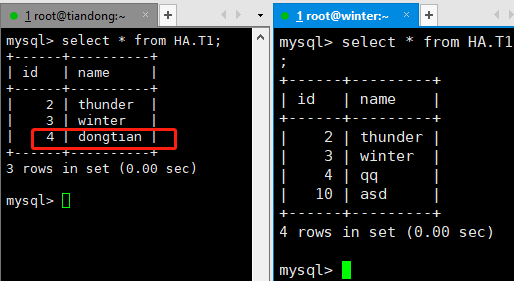
插入的数据写到了主库上,这样就实现了读写分离。
为了实现主从的读写分离,把主从关系重新建立起来。
查看主库和从库的数据一致
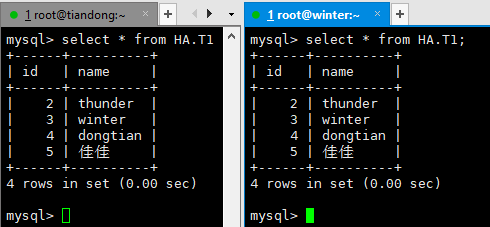
然后进行读写:
[root@localhost ~]# mysql -uproxy -p123456 -P 4040 -h 192.168.199.6
Welcome to the MariaDB monitor. Commands end with ; or g.
Your MySQL connection id is 22
Server version: 5.6.26-log Source distribution
Copyright (c) 2000, 2017, Oracle, MariaDB Corporation Ab and others.
MySQL [(none)]> select * from HA.T1;
+------+----------+
| id | name |
+------+----------+
| 2 | thunder |
| 3 | winter |
| 4 | dongtian |
| 5 | 佳佳 |
+------+----------+
4 rows in set (0.00 sec)
MySQL [(none)]> insert into HA.T1 values(6,'鸡鸡');
Query OK, 1 row affected (0.00 sec)
在主库和从库上查看:
主库和从库上都有数据了。
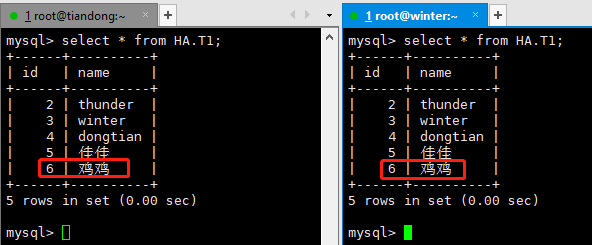
这样就实现了读写分离。