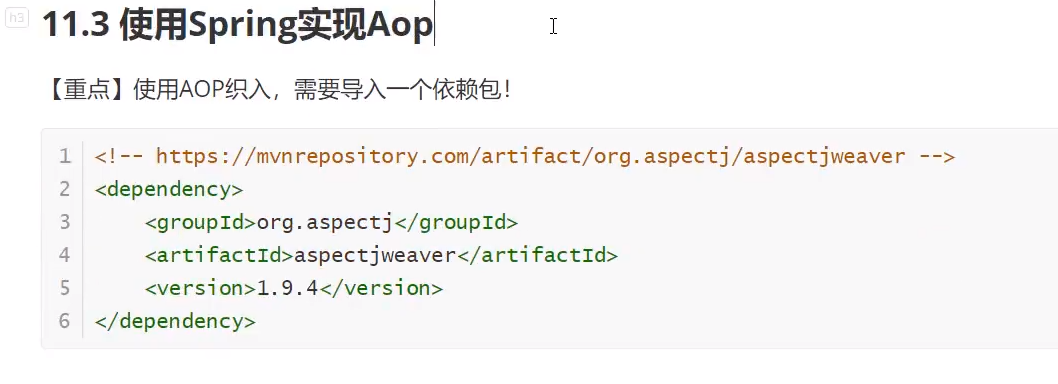
需要导入的依赖:
<dependency>
            <groupId>org.aspectj</groupId>
            <artifactId>aspectjweaver</artifactId>
            <version>1.9.4</version>
</dependency>
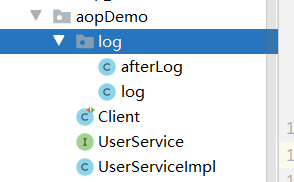
一、spring实现aop方式一:
项目结构:
前置日志:Log类
public class log implements MethodBeforeAdvice {
    //method:要执行的目标对象的方法
    //Ojbects:参数
    //o:目标对象
    @Override
    public void before(Method method, Object[] objects, Object o) throws Throwable {
        System.out.println(o.getClass().getName() + "的" + method.getName() + "被执行了");
    }
}
后置日志:AfterLog类
public class afterLog implements AfterReturningAdvice {
    @Override
    public void afterReturning(Object returnValue, Method method, Object[] objects, Object o1) throws Throwable {
        System.out.println("执行了" + method.getName() + "方法" + ",返回结果为:" + returnValue);
    }
}
抽象角色类:UserService
public interface UserService {
    public void add();
    public void del();
    public void alt();
    public void sel();
}
真实角色类UserServiceImpl
public class UserServiceImpl implements UserService {
    @Override
    public void add() {
        System.out.println("增加一个用户");
    }

    @Override
    public void del() {
        System.out.println("删除一个用户");
    }

    @Override
    public void alt() {
        System.out.println("修改一个用户");
    }

    @Override
    public void sel() {
        System.out.println("查询一个用户");
    }
}
ApplicationContext.xml文件:
<?xml version="1.0" encoding="UTF-8"?>
<beans xmlns="http://www.springframework.org/schema/beans"
       xmlns:xsi="http://www.w3.org/2001/XMLSchema-instance"
       xmlns:aop="http://www.springframework.org/schema/aop"
       xsi:schemaLocation="http://www.springframework.org/schema/beans
       http://www.springframework.org/schema/beans/spring-beans.xsd
       http://www.springframework.org/schema/aop
       http://www.springframework.org/schema/aop/spring-aop.xsd">

    <bean id="userService" class="aopDemo.UserServiceImpl"/>
    <bean id="log" class="aopDemo.log.log"/>
    <bean id="afterLog" class="aopDemo.log.afterLog"/>
    <!--这是测试注释-->
    <aop:config>
        <!--切入点-->
        <aop:pointcut id="pointcut" expression="execution(* aopDemo.UserServiceImpl.*(..))"/>
        <!--前置与后置日志-->
        <aop:advisor advice-ref="log" pointcut-ref="pointcut"/>
        <aop:advisor advice-ref="afterLog" pointcut-ref="pointcut"/>
    </aop:config>
</beans>
注:粘贴代码时去掉注释以防报错。
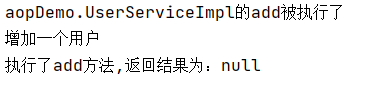
输出:
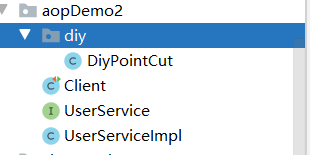
二、spring 实现aop方式二:
项目结构:
抽象角色:
public interface UserService {
    public void add();
    public void del();
    public void alt();
    public void sel();
}
真实角色:
public class UserServiceImpl implements UserService {
    @Override
    public void add() {
        System.out.println("增加一个用户");
    }

    @Override
    public void del() {
        System.out.println("删除一个用户");
    }

    @Override
    public void alt() {
        System.out.println("修改一个用户");
    }

    @Override
    public void sel() {
        System.out.println("查询一个用户");
    }
自定义切入类:
public class DiyPointCut { //自定义切入点
    public void before(){
        System.out.println("方法执行前");
    }
    public void after(){
        System.out.println("方法执行后");
    }
}
ApplicationContext.xml文件:
<?xml version="1.0" encoding="UTF-8"?>
<beans xmlns="http://www.springframework.org/schema/beans"
       xmlns:xsi="http://www.w3.org/2001/XMLSchema-instance"
       xmlns:aop="http://www.springframework.org/schema/aop"
       xsi:schemaLocation="http://www.springframework.org/schema/beans
       http://www.springframework.org/schema/beans/spring-beans.xsd
       http://www.springframework.org/schema/aop
       http://www.springframework.org/schema/aop/spring-aop.xsd">

    <bean id="userService" class="aopDemo2.UserServiceImpl"/>
    <bean id="diyPointCut" class="aopDemo2.diy.DiyPointCut"/>
    <aop:config>
        <aop:aspect ref="diyPointCut">
            <aop:pointcut id="point" expression="execution(* aopDemo2.UserServiceImpl.*(..))"/>
            <aop:before method="before" pointcut-ref="point"/>
            <aop:after method="after" pointcut-ref="point"/>
        </aop:aspect>
    </aop:config>
</beans>
测试代码:
public class Client {
    @Test
    public void test(){
        ClassPathXmlApplicationContext classPathXmlApplicationContext = new ClassPathXmlApplicationContext("ApplicationContext.xml");
        UserService userService = classPathXmlApplicationContext.getBean("userService", UserService.class);
        userService.add();
    }
}
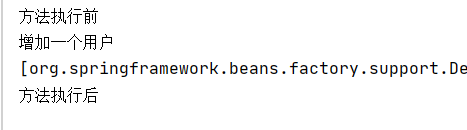
输出:
三、spring实现aop的方式三:
项目结构:
抽象角色:
public interface UserService {
    public void add();
    public void del();
    public void alt();
    public void sel();
}
真实角色:
public class UserServiceImpl implements UserService {
    @Override
    public void add() {
        System.out.println("增加一个用户");
    }

    @Override
    public void del() {
        System.out.println("删除一个用户");
    }

    @Override
    public void alt() {
        System.out.println("修改一个用户");
    }

    @Override
    public void sel() {
        System.out.println("查询一个用户");
    }
}
被注解的切面类:
@Aspect
public class AnotationPointCut {
    @Before("execution(* aopDemo3.UserServiceImpl.*(..))")
    public void before(){
        System.out.println("方法执行前");
    }
    @After("execution(* aopDemo3.UserServiceImpl.*(..))")
    public void after(){
        System.out.println("方法执行后");
    }
    @Around("execution(* aopDemo3.UserServiceImpl.*(..))")
    public void around(ProceedingJoinPoint proceedingJoinPoint) throws Throwable {
        System.out.println("环绕前");
        Signature signature = proceedingJoinPoint.getSignature();//获取签名
        System.out.println("signature" + signature);
        Object proceed = proceedingJoinPoint.proceed();//执行方法
        System.out.println("环绕后");
        System.out.println("proceed:"+proceed);
    }
}
ApplicationContext.xml:
<?xml version="1.0" encoding="UTF-8"?>
<beans xmlns="http://www.springframework.org/schema/beans"
       xmlns:xsi="http://www.w3.org/2001/XMLSchema-instance"
       xmlns:aop="http://www.springframework.org/schema/aop"
       xsi:schemaLocation="http://www.springframework.org/schema/beans
       http://www.springframework.org/schema/beans/spring-beans.xsd
       http://www.springframework.org/schema/aop
       http://www.springframework.org/schema/aop/spring-aop.xsd">

    <bean id="userService" class="aopDemo3.UserServiceImpl"/>
    <bean id="anotationPointCut" class="aopDemo3.AnotationPointCut"/>
    <aop:aspectj-autoproxy/>
</beans>
输出:
