前言
上一篇随笔我们谈到了多租户模式,通过多租户模式的演化的例子。大致归纳和总结了几种模式的表现形式。
并且顺带提到了读写分离。
通过好几次的代码调整,使得这个库更加通用。今天我们聊聊怎么通过该类库快速接入多租户。
类库地址:
https://github.com/woailibain/kiwiho.EFcore.MultiTenant
实施
这次实例的代码,完全引用上面github地址中的 traditional_and_multiple_context 的例子。
从实例的名称可以知道,我们主要演示典型的多组户模式,并且在同一个系统中同时支持多个 DbContext
为什么一个系统要同时支持多个 DbContext
其实回答这个问题还是要回到你们系统为什么要多租户模式上。无非是系统性能瓶颈、数据安全与隔离问题。
1. 系统性能问题,那系统是经过长时间的洗礼的,就是说多租户是系统结构演化的过程。以前的系统,以单体为主,一个系统一个数据库。
要演化, 肯定需要一个过程,所以将一个数据库按业务类型分割成多个数据库就是顺理成章的事情。
2. 数据安全与隔离问题,其实数据安全和隔离,并不需要全部数据都进行隔离。例如,一些公司可能只对自己客户的资料进行隔离,可能只对敏感数据隔离。
那么我们大可按业务分开好几个模块,将敏感的数据使用数据库分离模式隔离数据,对不敏感数据通过数据表模式进行隔离,节省资源。
项目结构
我们先来看看项目结构。分别有2个项目:一个是Api,另一个DAL。
这里涉及到一个问题,为什么要分开Api和DAL。其实是为了模拟当今项目中主流的项目结构,最起码数据层和逻辑操作层是分开的。
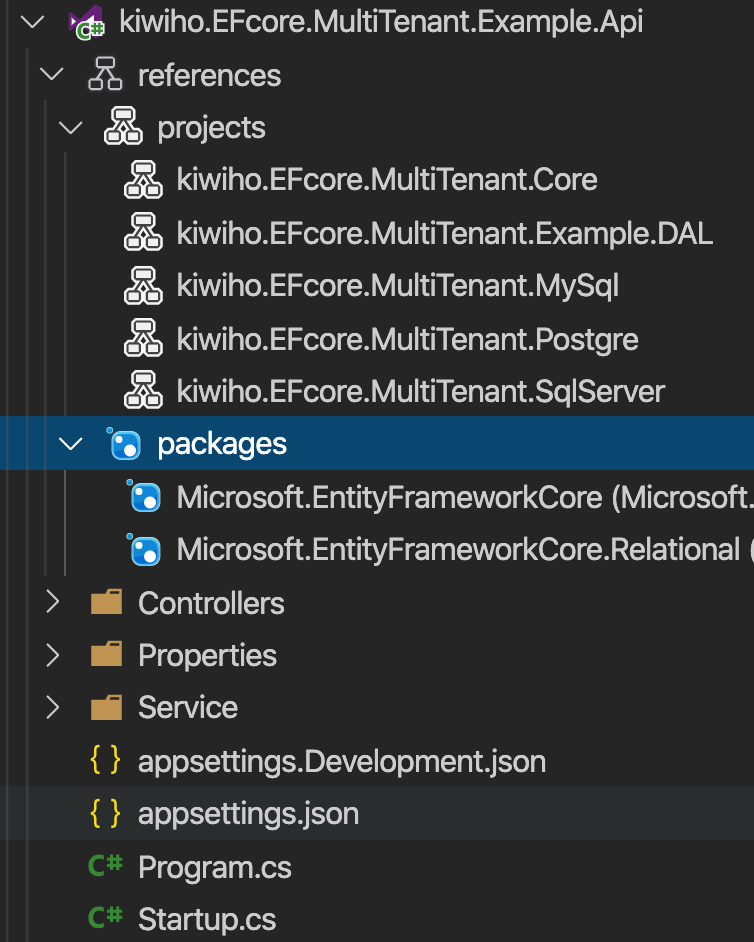
Api的结构和引用,可以看到Api几乎引用了MultiTenant的所有包,并且包含DAL。
其实这里的****.MySql ,***.SqlServer和****.Postgre三个包,只需要引用一个即可,由于这个example是同时使用了3个数据库,才需要同时引用多个。
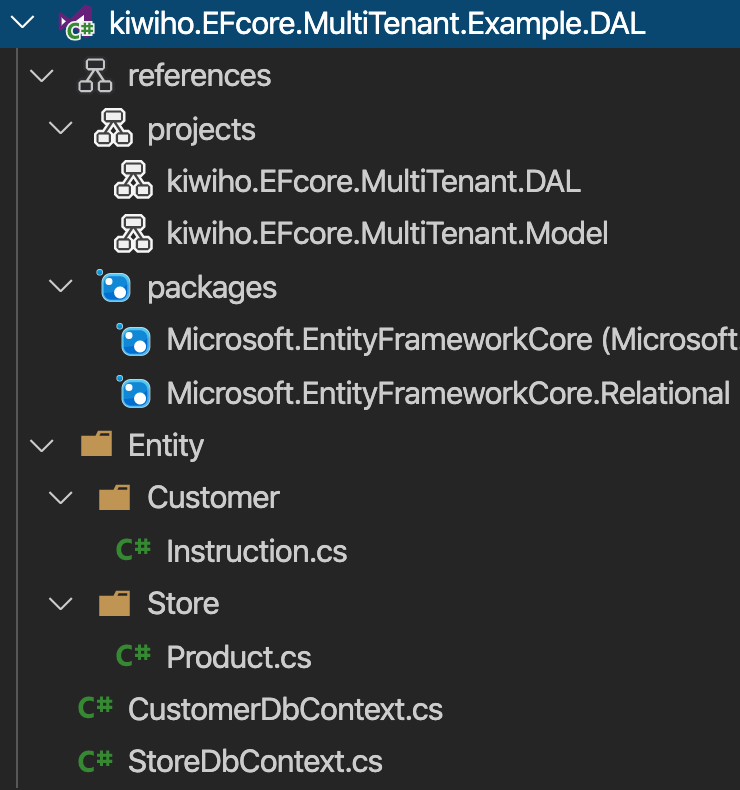
DAL的结构和引用,DAL的引用就相对简单了,只需要引用DAL和Model即可
实施详解
DAL详解
DAL既然是数据层,那么DbContext和Entity是必须的。这里同时有 CustomerDbContext 和 StoreDbContext 。
我们首先看看 StoreDbContext ,它主要包含 Product 产品表。
里面有几个要点:
1. StoreDbContext 必须继承自 TenantBaseDbContext
2. 构造函数中的第一个参数 options ,需要使用泛型 DbContextOptions<> 类型传入。(如果整个系统只有一个DbContext,那么这里可以使用 DbContextOptions 代替)
3. 重写 OnModelCreating 方法。这个并不是必要步骤。但由于大部分 DbContext 都需要通过该方法定义数据库实体结构,所以如果有重写这个方法,必须要显式调用 base.OnModelCreating
4. 公开的属性 Products,代表product表。
 1     public class StoreDbContext : TenantBaseDbContext
 2     {
 3         public DbSet<Product> Products => this.Set<Product>();
 4
 5         public StoreDbContext(DbContextOptions<StoreDbContext> options, TenantInfo tenant, IServiceProvider serviceProvider)
 6             : base(options, tenant, serviceProvider)
 7         {
 8
 9         }
10
11         protected override void OnModelCreating(ModelBuilder modelBuilder)
12         {
13             base.OnModelCreating(modelBuilder);
14         }
15     }
现在看看 CustomerDbContext ,它主要包含 Instruction 订单表
这里使用了精简的DbContext实现方式,只包含了公开的Instructions属性和构造函数
1     public class CustomerDbContext : TenantBaseDbContext
2     {
3         public DbSet<Instruction> Instructions => this.Set<Instruction>();
4         public CustomerDbContext(DbContextOptions<CustomerDbContext> options, TenantInfo tenant, IServiceProvider serviceProvider)
5             : base(options, tenant, serviceProvider)
6         {
7         }
8     }
剩下的2个类分别是 Product 和 Instruction 。他们没有什么特别的,就是普通Entity


 1     public class Product
 2     {
 3         [Key]
 4         public int Id { get; set; }
 5
 6         [StringLength(50), Required]
 7         public string Name { get; set; }
 8
 9         [StringLength(50)]
10         public string Category { get; set; }
11
12         public double? Price { get; set; }
13     }
 1     public class Instruction
 2     {
 3         [Key]
 4         public int Id { get; set; }
 5
 6         public DateTime Date { get; set; }
 7
 8         public double TotalAmount { get; set; }
 9
10         [StringLength(200)]
11         public string Remark { get; set; }
12
13     }
Api详解
Startup
Startup作为asp.net core的配置入口,我们先看看这里
首先是ConfigureService 方法。这里主要配置需要使用的服务和注册
1. 我们通过 AddMySqlPerConnection 扩展函数,添加对 StoreDbContext 的使用,使用的利用数据库分离租户间数据的模式
里面配置的 ConnectionPerfix,代表配置文件中前缀是 mysql_ 的连接字符串,可以提供给 StoreDbContext 使用。
2. 通过 AddMySqlPerTable 扩展函数,添加对 CustomerDbContext 的使用,使用的是利用表分离租户间数据的模式。
配置的第一个参数是多租户的键值,这里使用的是customer,注意在多个 DbContext 的情况下,其中一个DbContext必须包含键值
配置的第二个参数是链接字符串的键值,由于多个租户同时使用一个数据库,所以这里只需要配置一个链接字符串
这里可以注意到,我们默认可以提供2中方式配置多租户,分别是 委托 和 参数 。
它们2个使用方式有区别,在不同的模式下都同时支持这2种模式
 1         public void ConfigureServices(IServiceCollection services)
 2         {
 3             // MySql
 4             services.AddMySqlPerConnection<StoreDbContext>(settings=>
 5             {
 6                 settings.ConnectionPrefix = "mysql_";
 7             });
 8
 9             services.AddMySqlPerTable<CustomerDbContext>("customer","mysql_default_customer");
10
11             services.AddControllers();
12         }
其次是 Configure 方法。这里主要是配置asp.net core的请求管道
1. 可以看到使用了好几个asp.net core的中间件,其中 UseRouting 和 UseEndpoint 是必要的。
2. 使用 UserMiddleware 扩展函数引入我们的中间件 TenantInfoMiddleware 。这个中间件是类库提供的默认支持。
 1         public void Configure(IApplicationBuilder app, IWebHostEnvironment env)
 2         {
 3             if (env.IsDevelopment())
 4             {
 5                 app.UseDeveloperExceptionPage();
 6             }
 7
 8             app.UseMiddleware<TenantInfoMiddleware>();
 9
10
11             app.UseRouting();
12
13             app.UseEndpoints(endpoints =>
14             {
15                 endpoints.MapControllers();
16             });
17         }
appsettings
修改appsettings这个文件,主要是为了在里面添加链接字符串
 1 {
 2   "Logging": {
 3     "LogLevel": {
 4       "Default": "Information",
 5       "Microsoft": "Warning",
 6       "Microsoft.Hosting.Lifetime": "Information"
 7     }
 8   },
 9   "AllowedHosts": "*",
10   "ConnectionStrings":{
11     "mysql_default":"server=127.0.0.1;port=3306;database=multi_tenant_default;uid=root;password=gh001;charset=utf8mb4",
12     "mysql_store1":"server=127.0.0.1;port=3306;database=multi_tenant_store1;uid=root;password=gh001;charset=utf8mb4",
13     "mysql_store2":"server=127.0.0.1;port=3306;database=multi_tenant_store2;uid=root;password=gh001;charset=utf8mb4",
14
15 "mysql_default_customer":"server=127.0.0.1;port=3306;database=multi_tenant_customer;uid=root;password=gh001;charset=utf8mb4"
16   }
17 }
ProductController 和 InstructionController
productController 和 InstructionController 非常相似,他们的里面主要包含3个方法,分别是:查询所有、根据Id查询、添加
里面的代码就不一一解释了
 1 namespace kiwiho.EFcore.MultiTenant.Example.Api.Controllers
 2 {
 3     [ApiController]
 4     [Route("api/[controller]s")]
 5     public class ProductController : ControllerBase
 6     {
 7         private readonly StoreDbContext storeDbContext;
 8
 9         public ProductController(StoreDbContext storeDbContext)
10         {
11             this.storeDbContext = storeDbContext;
12             this.storeDbContext.Database.EnsureCreated();
13
14             // this.storeDbContext.Database.Migrate();
15         }
16
17         [HttpPost("")]
18         public async Task<ActionResult<Product>> Create(Product product)
19         {
20             var rct = await this.storeDbContext.Products.AddAsync(product);
21
22             await this.storeDbContext.SaveChangesAsync();
23
24             return rct?.Entity;
25
26         }
27
28         [HttpGet("{id}")]
29         public async Task<ActionResult<Product>> Get([FromRoute] int id)
30         {
31
32             var rct = await this.storeDbContext.Products.FindAsync(id);
33
34             return rct;
35
36         }
37
38         [HttpGet("")]
39         public async Task<ActionResult<List<Product>>> Search()
40         {
41             var rct = await this.storeDbContext.Products.ToListAsync();
42             return rct;
43         }
44     }
45 }
 1 namespace kiwiho.EFcore.MultiTenant.Example.Api.Controllers
 2 {
 3     [ApiController]
 4     [Route("api/[controller]s")]
 5     public class InstructionController : ControllerBase
 6     {
 7         private readonly CustomerDbContext customerDbContext;
 8         public InstructionController(CustomerDbContext customerDbContext)
 9         {
10             this.customerDbContext = customerDbContext;
11             this.customerDbContext.Database.EnsureCreated();
12         }
13
14         [HttpPost("")]
15         public async Task<ActionResult<Instruction>> Create(Instruction instruction)
16         {
17             var rct = await this.customerDbContext.Instructions.AddAsync(instruction);
18
19             await this.customerDbContext.SaveChangesAsync();
20
21             return rct?.Entity;
22
23         }
24
25         [HttpGet("{id}")]
26         public async Task<ActionResult<Instruction>> Get([FromRoute] int id)
27         {
28
29             var rct = await this.customerDbContext.Instructions.FindAsync(id);
30
31             return rct;
32
33         }
34
35         [HttpGet("")]
36         public async Task<ActionResult<List<Instruction>>> Search()
37         {
38             var rct = await this.customerDbContext.Instructions.ToListAsync();
39             return rct;
40         }
41     }
42 }
实施概括
实施过程中我们总共做了4件事:
1. 定义 DbContext 和对应的 Entity . DbContext必须继承 TenantBaseDbContext 。
2. 修改 Startup 类,配置多租户的服务,配置多租户需要使用的中间件。
3. 按照规则添加字符串。
4. 添加 Controller 。
检验结果
检验结果之前,我们需要一些原始数据。可以通过数据库插入或者调用api生成
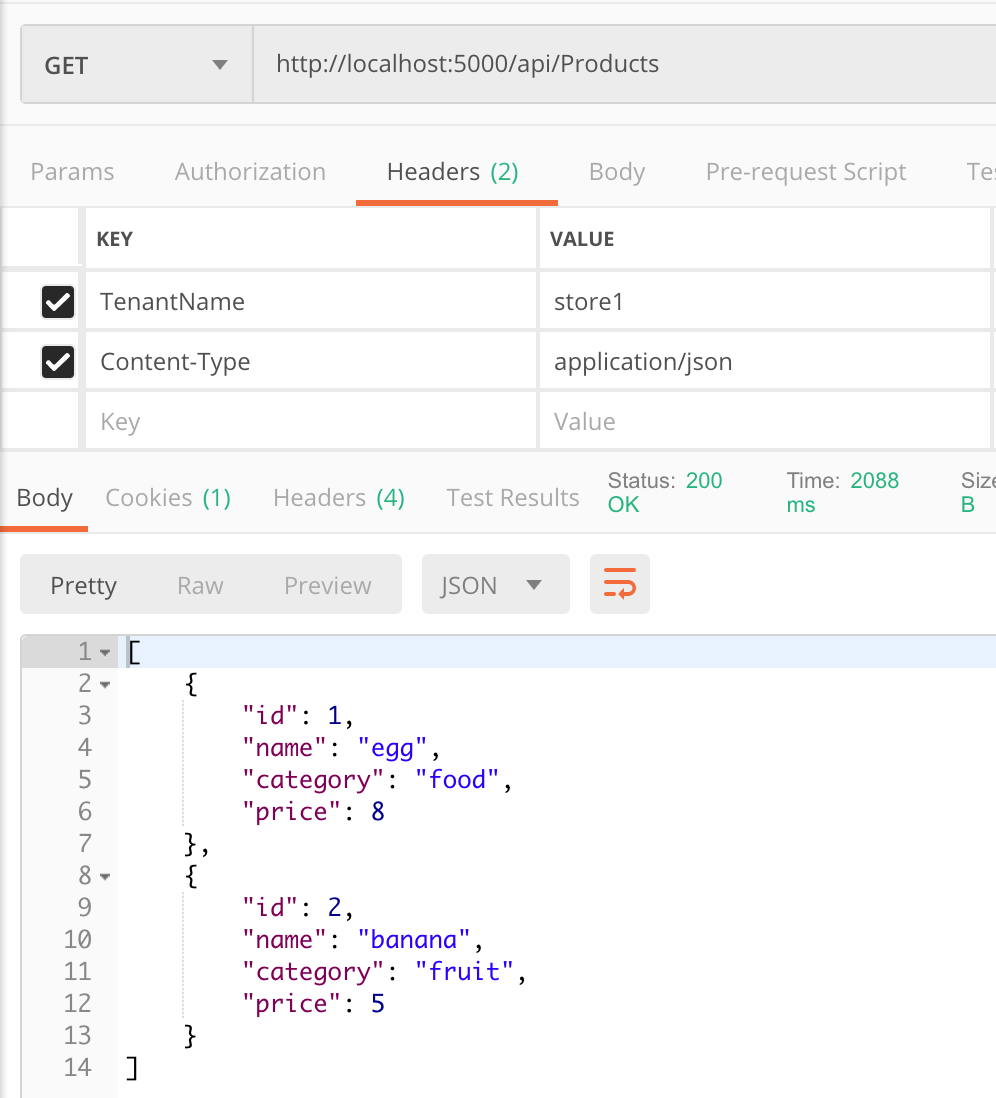
使用 store1 查询 Product 的数据
使用 store2 查询 Product 的数据

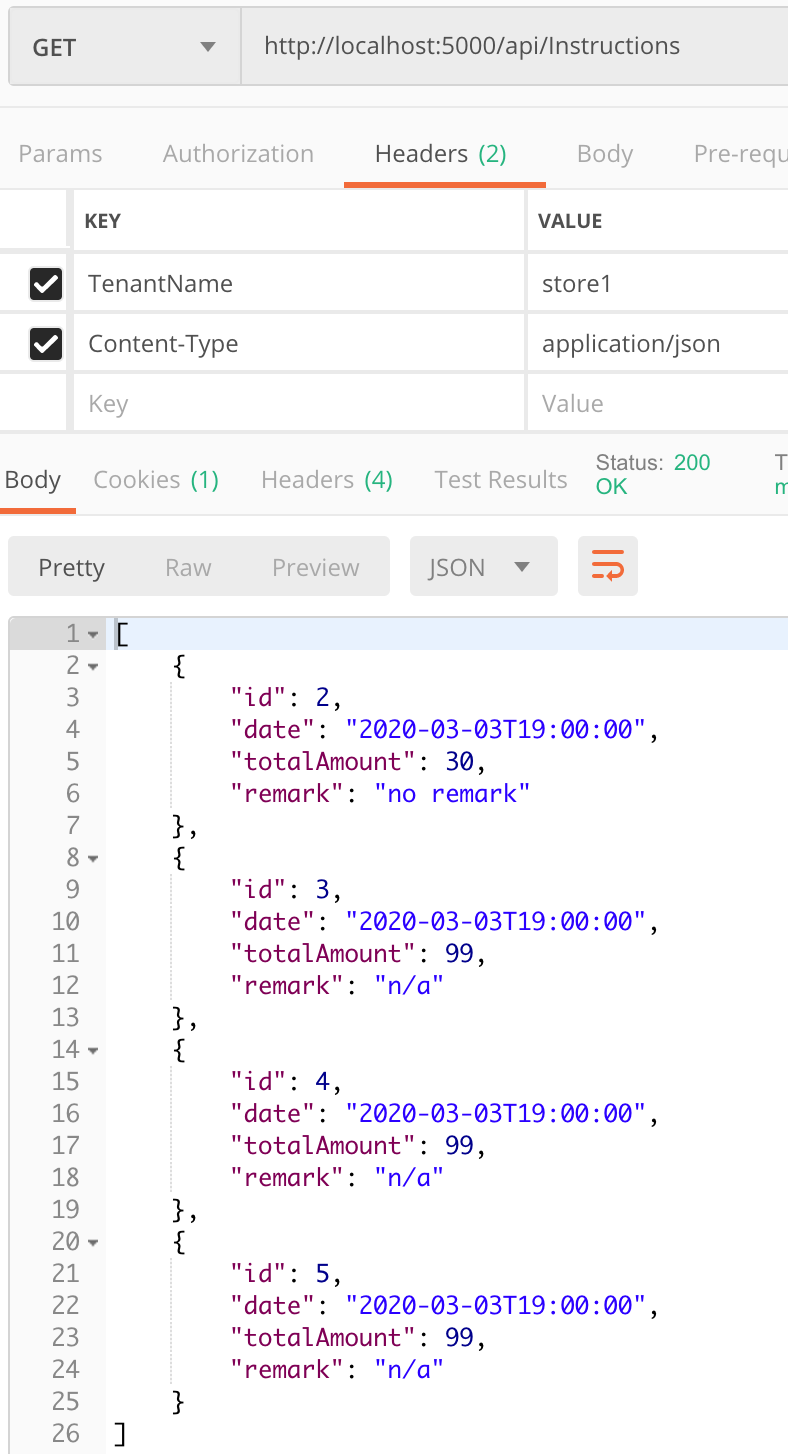
使用 store1 查询 Instruction 的数据
使用 store2 查询 Instruction 的数据

总结
通过上述步骤,已经可以看出我们能通过简单的配置,就实施多租户模式。
这个例子有什么缺陷:
大家应该能发现,实例中Store和Customer都使用了store1和store2来请求数据。但是Customer这个域,很明显是需要用customer1和customers2等等去请求数据的。
本实例主要为了简单明了,将他们混为一谈的。
但是要解决这个事情,是可以达到的。我们将在日后的文章继续。
之后的还会有什么例子:
既然上一篇随笔提到了多租户的演化和读写分离,那么我们将会优先讲到这部分内容。
通过查看github源代码,可能有人疑问,除了MySql,SqlServer和Postgre,是不是就不能支持别的数据库了。
其实并不是的,类库里已经做好一定的扩展性,各位可以通过自行使用UseOracle等扩展方法把Oracle集成进来,代码仅需不到10行。
代码怎么看:
代码已经全部更新到github,其中本文事例代码在example/traditional_and_multiple_context 内