Allure报告
安装及使用
- 安装插件包: pip install allure-pytest
- 下载allure-commandline bin目录添加到xpath下
- 使用: 配置pytest.ini的配置文件会生成一堆json文件
- 格式转换: allure generate report/ -o report/html --clean
Allure描述用例详解
| 使用方法 | 参数值 | 参数说明 |
|---|---|---|
| @allure.epic() | epic描述 | 敏捷里面的概念,定义史诗,往下是feature |
| @allure.feature() | 模块名称 | 功能点的描述,往下是story |
| @allure.story() | 用户故事 | 用户故事,往下是title |
| @allure.title(用例的标题) | 用例的标题 | 重命名html报告名称 |
| @allure.testcase() | 测试用例的链接地址 | 对应功能测试用例系统里面的case |
| @allure.issue() | 缺陷 | 对应缺陷管理系统里面的链接 |
| @allure.description() | 用例描述 | 测试用例的描述 |
| @allure.step() | 操作步骤 | 测试用例的步骤 |
| @allure.severity() | 用例等级 | blocker,critical,normal,minor,trivial |
| @allure.link() | 链接 | 定义一个链接,在测试报告展现 |
| @allure.attachment() | 附件 | 报告添加附件 |
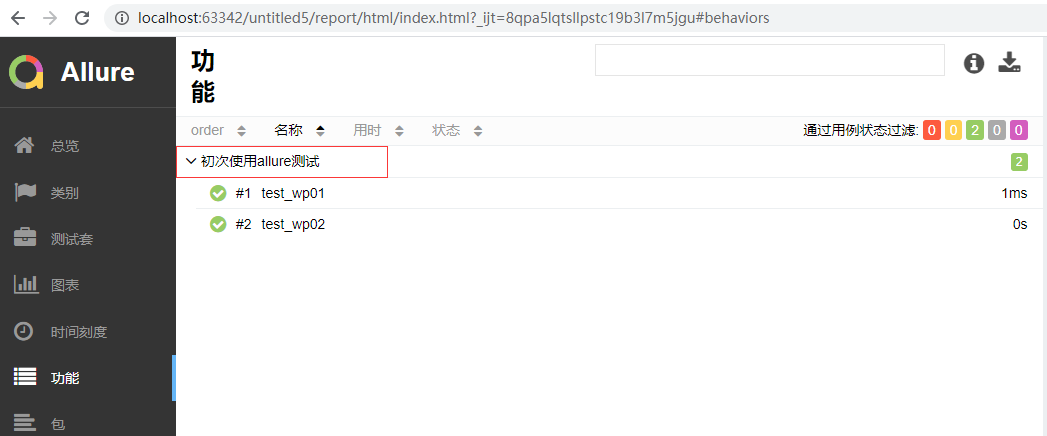
Allure之@allure.feature()
主要表现在allure测试报告的功能处,会显示模块名称
实例代码
import pytest
import allure


@allure.feature("初次使用allure测试")
class TestName:
    def test_wp01(self):
        print("
第一条测试")

    def test_wp02(self):
        print("第二条测试")


if __name__ == '__main__':
    pytest.main(["-s", "test_allure.py"])
实例展示图
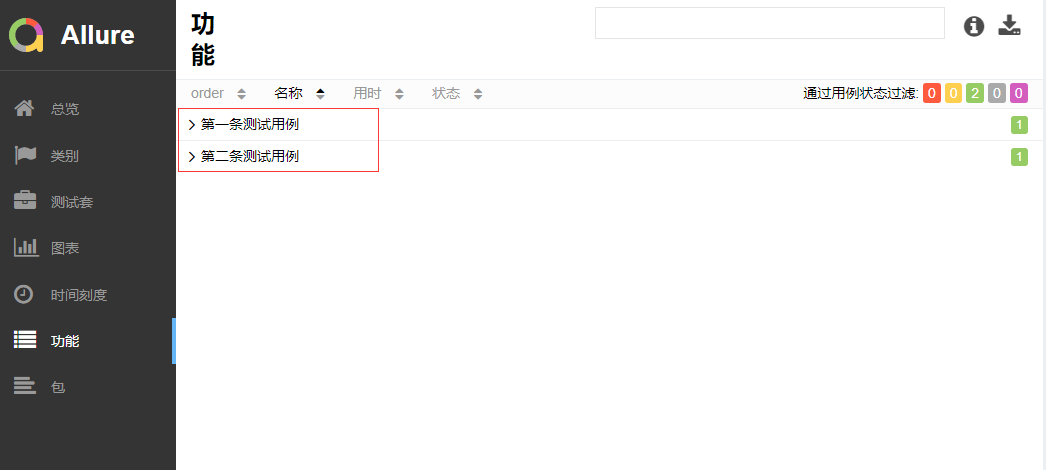
Allure之@allure.story()
主要表现在测试报告的功能处以及总览的特性场景,显示用例故事(对测试用例进行标记)
实例代码
import pytest
import allure


class TestName:
    @allure.story("第一条测试用例")
    def test_wp01(self):
        print("
第一条测试")

    @allure.story("第二条测试用例")
    def test_wp02(self):
        print("第二条测试")


if __name__ == '__main__':
    pytest.main(["-s", "test_allure.py"])
实例展示图
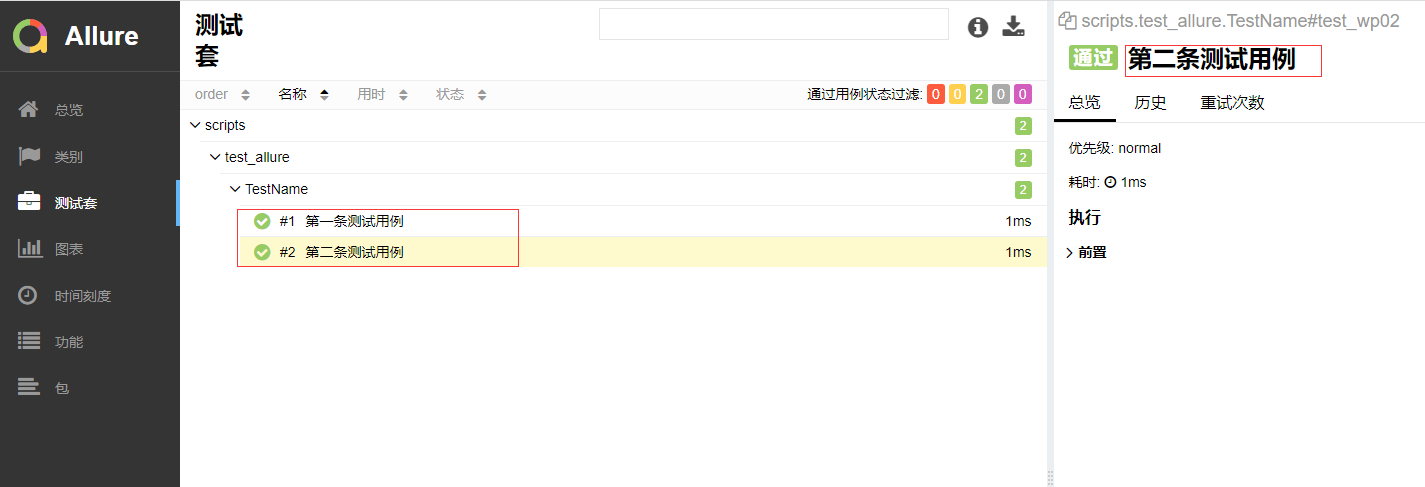
Allure之@allure.title()
主要表现在测试报告的功能以及测试套的右侧,显示用例的标题
实例代码
import pytest
import allure


class TestName:
    @allure.title("第一条测试用例")
    def test_wp01(self):
        print("
第一条测试")

    @allure.title("第二条测试用例")
    def test_wp02(self):
        print("第二条测试")


if __name__ == '__main__':
    pytest.main(["-s", "test_allure.py"])
实例展示图
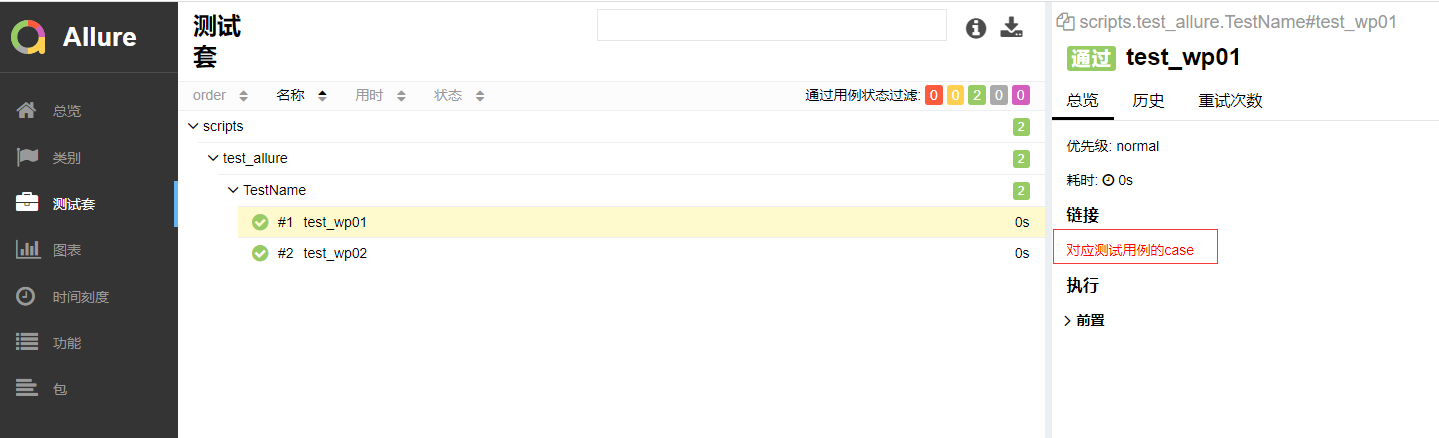
Allure之@allure.testcase()
主要表现在测试报告中的功能和测试套,显示用例链接(一般对应bug链接地址)
实例代码
import pytest
import allure


class TestName:
    @allure.story("第一")
    @allure.testcase(name="缺陷1", url="https://www.baidu.com")  # name参数对应链接中文,url链接地址
    def test_wp01(self):
        print("
第一条测试")

    @allure.story("第二")
    @allure.testcase("https://www.chrome.com")
    def test_wp02(self):
        print("第二条测试")


if __name__ == '__main__':
    pytest.main(["-s", "test_allure.py"])
实例展示图
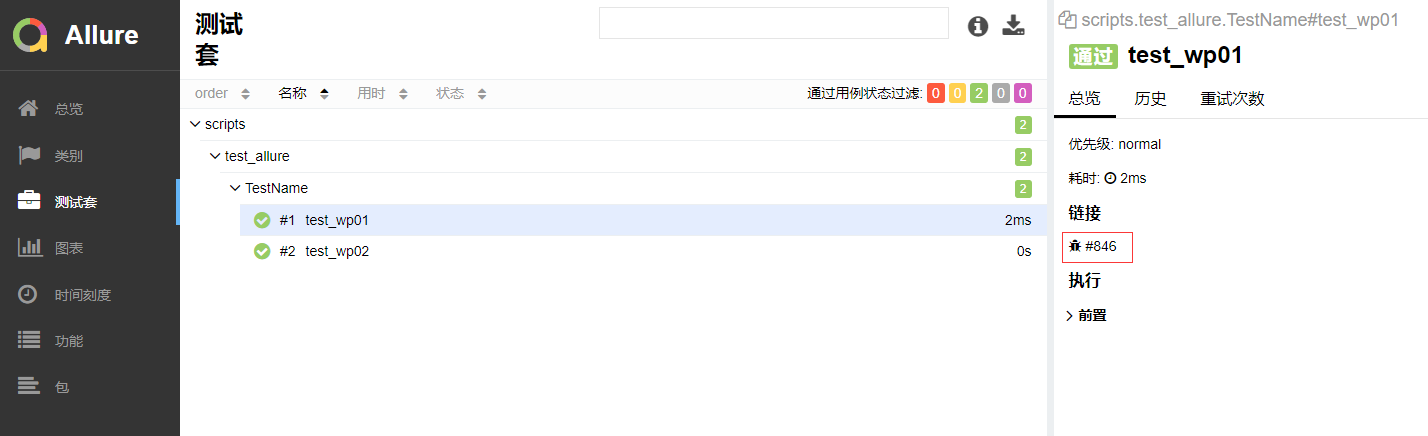
Allure之@allure.issue()
主要表现在测试报告的测试套和功能处,显示bug链接地址
实例代码
import pytest
import allure


class TestName:
    @allure.story("第一")
    @allure.issue(name="#846", url="https://www.baidu.com")
    def test_wp01(self):
        print("
第一条测试")

    @allure.story("第二")
    def test_wp02(self):
        print("第二条测试")


if __name__ == '__main__':
    pytest.main(["-s", "test_allure.py"])
实例展示图
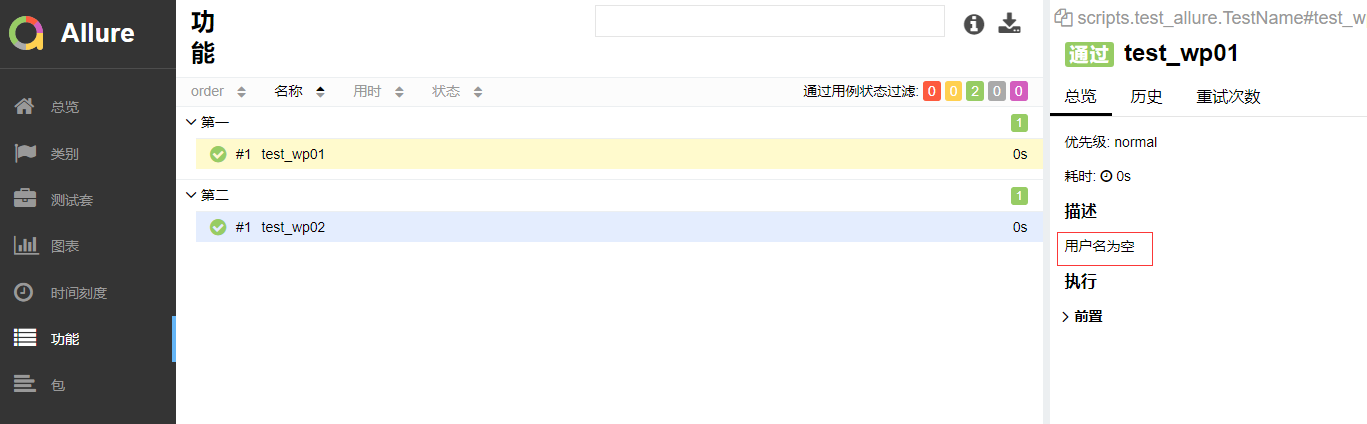
Allure之@allure.description()
主要表现在测试报告的测试套和功能处,显示测试用例的描述
实例代码
import pytest
import allure


class TestName:
    @allure.story("第一")
    @allure.description("用户名为空")
    def test_wp01(self):
        print("
第一条测试")

    @allure.story("第二")
    @allure.description("用户名为特殊字符")
    def test_wp02(self):
        print("第二条测试")


if __name__ == '__main__':
    pytest.main(["-s", "test_allure.py"])
实例展示图
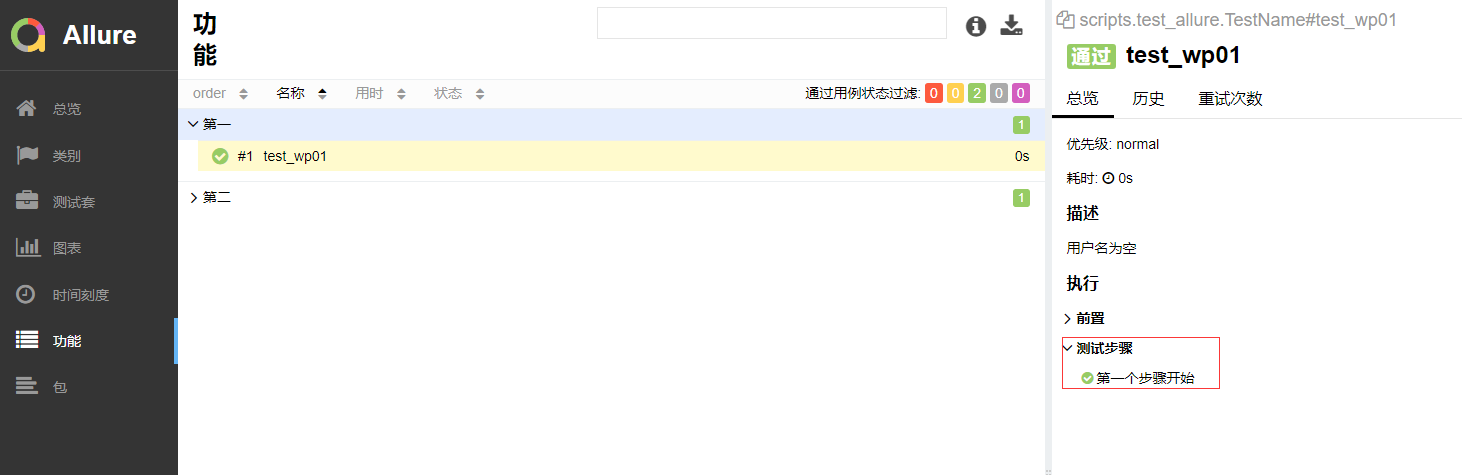
Allure之@allure.step()
具体表现在测试套件和功能处,显示测试用例的测试步骤
装饰器方式实例代码
import pytest
import allure


class TestName:
    @allure.story("第一")
    @allure.description("用户名为空")
    @allure.step("第一个步骤开始")
    def test_wp01(self):
        print("
第一条测试")

    @allure.story("第二")
    @allure.description("用户名为特殊字符")
    @allure.step("第二个步骤开始")
    def test_wp02(self):
        print("第二条测试")


if __name__ == '__main__':
    pytest.main(["-s", "test_allure.py"])
with方式实例代码
# test_allure_step.py
import allure
import pytest
from .common_function import *

'''
流程性的用例,添加测试步骤,让用例更清晰
用例步骤:1.登陆, 2.浏览商品 3.添加购物车  4.生成订单  5.支付成功
'''


@pytest.fixture(scope="session")
def login_setup():
    login("admin", "123456")


@allure.feature("功能模块")
@allure.story("测试用例小模块-成功案例")
@allure.title("测试用例名称:流程性的用例,添加测试步骤")
def test_add_goods_and_buy(login_setup):
    '''
    用例描述:
    前置:登陆
    用例步骤:1.浏览商品 2.添加购物车  3.购买  4.支付成功
    '''
    with allure.step("step1:浏览商品"):
        open_goods()

    with allure.step("step2:添加购物车"):
        add_shopping_cart()

    with allure.step("step3:生成订单"):
        buy_goods()

    with allure.step("step4:支付"):
        pay_goods()

    with allure.step("断言"):
        assert 1 == 1
实例展示图
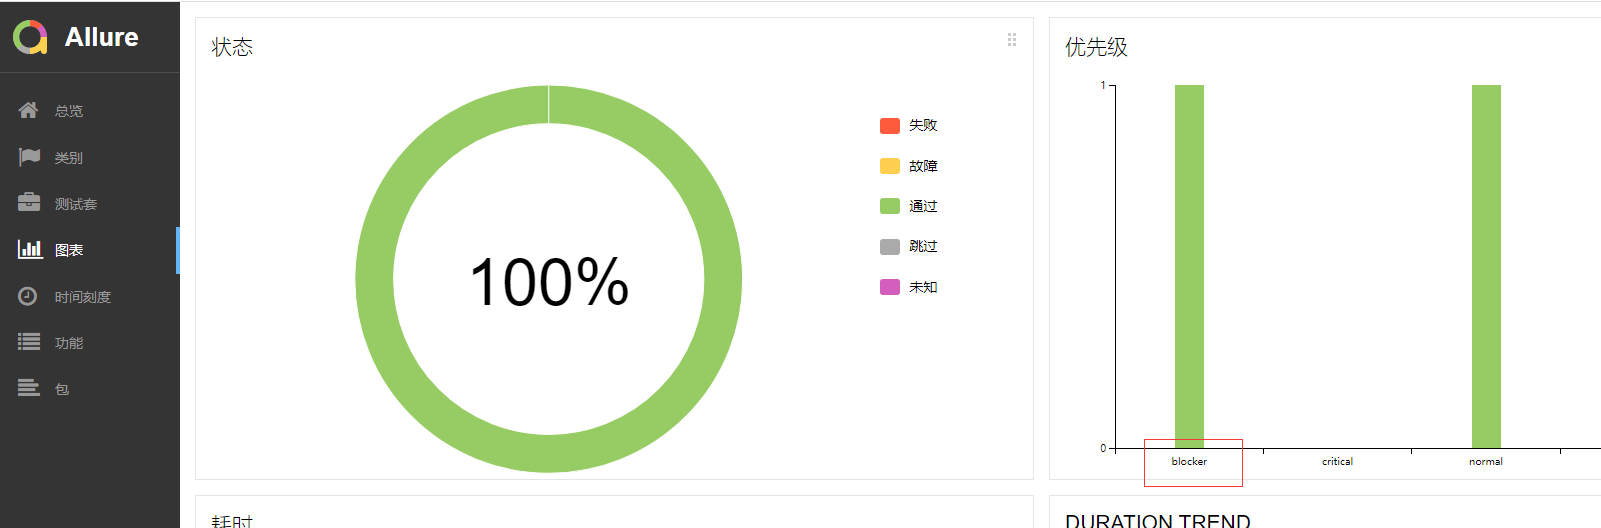
Allure之@allure.severity()
具体表现在测试报告的图表处,显示用例等级
实例代码
import pytest
import allure


class TestName:
    @allure.story("第一")
    @allure.description("用户名为空")
    @allure.step("第一个步骤开始")
    def test_wp01(self):
        print("
第一条测试")

    @allure.story("第二")
    @allure.description("用户名为特殊字符")
    @allure.step("第二个步骤开始")
    @allure.severity(severity_level="blocker")
    def test_wp02(self):
        print("第二条测试")


if __name__ == '__main__':
    pytest.main(["-s", "test_allure.py"])
实例展示图
Allure之@allure.link()
主要用于访问连接,用法其实跟issue()与testcase()类似
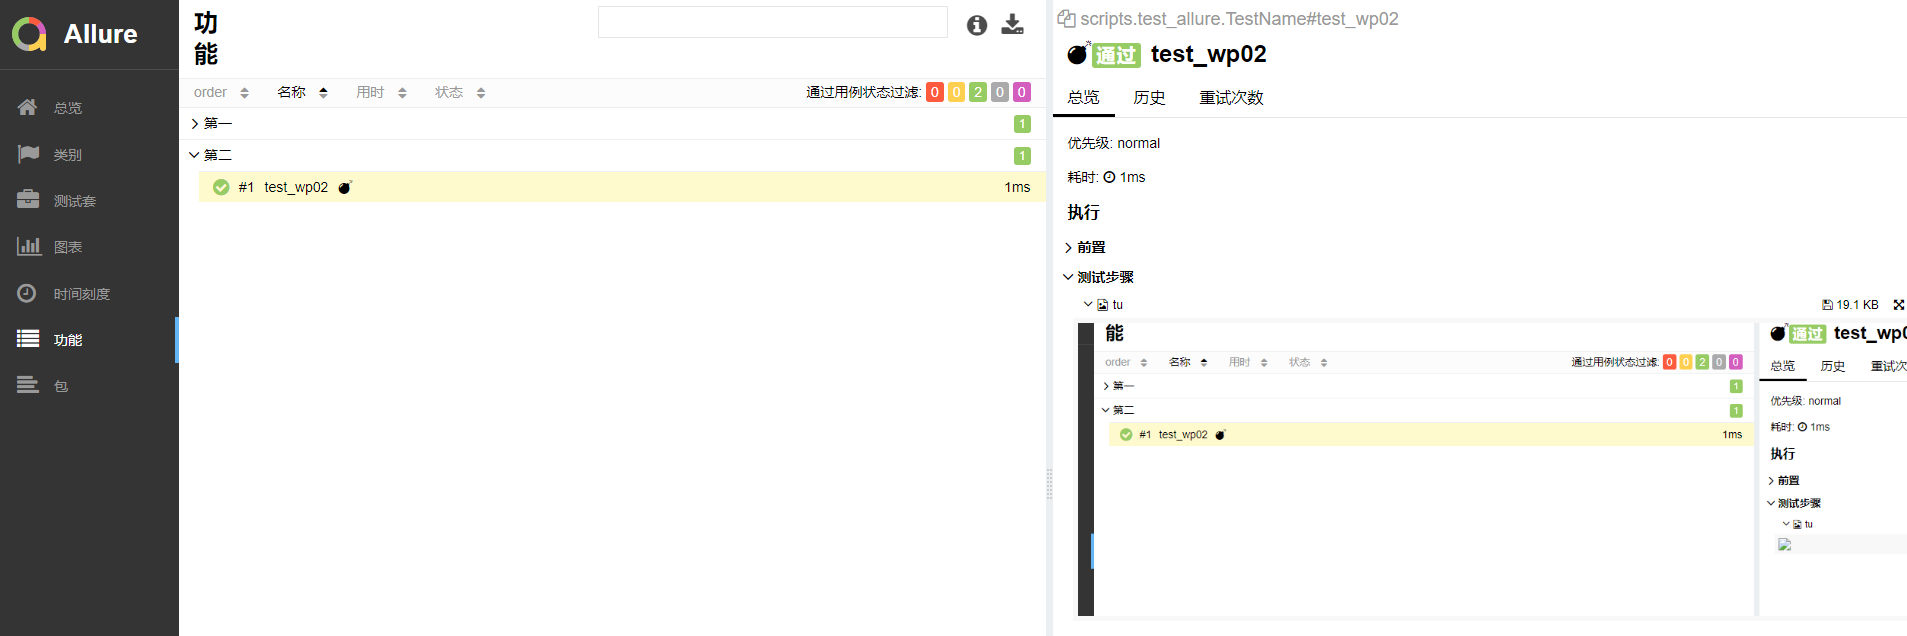
Allure之allure.attach()
具体表现在测试报告的功能和测试套件处,展示测试用例下的附件(我多用于截图)
实例代码
import pytest
import allure


class TestName:
    @allure.story("第一")
    def test_wp01(self):
        print("
第一条测试")

    @allure.story("第二")
    def test_wp02(self):
        allure.attach(open("wp.png","rb").read(), "tu", allure.attachment_type.PNG)
        print("第二条测试")

        if __name__ == '__main__':
            pytest.main(["-s", "test_allure.py"])
实例展示图
Allure之报告趋势图
- 解决手动产生allure报告不显示趋势图的问题
1. 将allure-report中的history复制到allure-result
2. 重新转换为html一次 allure generate report/ -o report/html --clean - 解决jenkins没有趋势图的问题 首次构建是不显示图形,在构建一次就会有趋势图
Allure之环境与分类
给测试报告配置环境(ENVIRONMENT)和分类(CATEGORIES)
配置环境
- 在allure-results目录下(对于我们的项目来说,是allure_reports目录,即生成json和txt的目录),添加environment.properties
- 在allure-results目录下,添加environment.xml
properties文件

systemVersion=Centos7.6
appiumVersion=1.17.0
pythonVersion=3.8.0
allureVersion=2.12.1
phoneSimulator=YeShen
platformName=Android5.1.1, Android7.1.2
appPackage=com.xxzb.fenwoo
appActivity=com.xxzb.fenwoo.activity.addition.WelcomeActivity

xml文件

<environment>
    <parameter>
        <key>Browser</key>
        <value>Chrome</value>
    </parameter>
    <parameter>
        <key>Browser.Version</key>
        <value>63.0</value>
    </parameter>
    <parameter>
        <key>Stand</key>
        <value>Production</value>
    </parameter>
</environment>
配置分类
在allure-results目录下添加一个categories.json文件,默认是有两类缺陷
- 产品缺陷(测试结果:failed)
- 测试缺陷(测试结果:broken)
实例代码
categories.json文件

[
  {
    "name": "Ignored tests",
    "matchedStatuses": [
      "skipped"
    ]
  },
  {
    "name": "Infrastructure problems",
    "matchedStatuses": [
      "broken",
      "failed"
    ],
    "messageRegex": ".*bye-bye.*"
  },
  {
    "name": "Outdated tests",
    "matchedStatuses": [
      "broken"
    ],
    "traceRegex": ".*FileNotFoundException.*"
  },
  {
    "name": "Product defects",
    "matchedStatuses": [
      "failed"
    ]
  },
  {
    "name": "Test defects",
    "matchedStatuses": [
      "broken"
    ]
  }
]
相关参数
- name:分类名称
- matchedStatuses:测试用例的运行状态,默认["failed", "broken", "passed", "skipped", "unknown"]
- messageRegex:测试用例运行的错误信息,默认是.*,通过正则匹配
- traceRegex:测试用例运行的错误堆栈信息,默认是.*,通过正则匹配