Spring Boot2系列文章可以通过这里进行回顾:SpringBoot2(001):入门介绍、官网参考和博客汇总
本文主要介绍如何 手动创建第1个 SpringBoot2 简单应用——“HelloWorld” web 工程。具体可参考 springboot 官方文档中的 11. Developing Your First Spring Boot Application。目录结构如下:
PS: 2020-04-08更新,并附上helloworld工程代码地址
1、开发环境配置说明
首先列一下自己的一些开发环境信息:
win10 + JDK 1.8.0_111 + Apache Maven 3.3.9 + idea2019.1/Eclipse Mars.2 Release (4.5.2) + 阿里云maven镜像(https://maven.aliyun.com/repository/public)
需要注意的是,如果在命令行使用 maven 而且不指定配置文件的话,则用的是 maven 默认的镜像,地址:https://repo.maven.apache.org/maven2 ,建议通过参数【-s setting.xml的全路径】指定 maven 的配置文件,使用指定的镜像仓库和本地仓库。
对于 JDK 和 maven ,先要确保没问题,命令分别为 java -version 和 mvn -v :

2、创建 springboot2 简单工程
2.1、创建相关目录和 pom 文件
首先就是先创建工程所需要的目录以及 pom.xml 文件,例如,我这里创建了 springboot2-example-helloworld 作为工程项目来使用,内部结构如下:

当然还有个 pom.xml 文件,如下:
<?xml version="1.0" encoding="UTF-8"?>
<project xmlns="http://maven.apache.org/POM/4.0.0" xmlns:xsi="http://www.w3.org/2001/XMLSchema-instance"
xsi:schemaLocation="http://maven.apache.org/POM/4.0.0 https://maven.apache.org/xsd/maven-4.0.0.xsd">
    <modelVersion>4.0.0</modelVersion>

    <groupId>com.wpbxin</groupId>
    <artifactId>springboot2-example-helloworld</artifactId>
    <version>0.0.1-SNAPSHOT</version>

    <parent>
        <groupId>org.springframework.boot</groupId>
        <artifactId>spring-boot-starter-parent</artifactId>
        <version>2.1.5.RELEASE</version>
    </parent>
    <!-- Additional lines to be added here... -->

</project>
然后使用命令 mvn package (注意:在 springboot2-example-helloworld 目录下)运行下确保打包正常(这里没有指定配置文件,使用的默认的 maven 镜像:https://repo.maven.apache.org/maven2 ,下载速度相对来说应该会慢点,稍微缓一缓休息下,正常就行,一次不行再来一遍。建议通过参数【-s setting.xml的全路径】指定 maven 的配置文件,使用指定的镜像仓库和本地仓库。例如:mvn package -s C:your-maven-pathapache-maven-3.3.9confsettings-aliyun.xml):

注意:如果打包时遇到了错误:“sun.security.validator.ValidatorException: PKIX path building failed: sun.security.provider.certpath.SunCertPathBuilderException: unable to find valid certification path to requested target” ,可以参考笔者的另一篇说明:Maven:sun.security.validator.ValidatorException: PKIX path building failed: sun.security.provider.certpath.SunCertPathBuilderException: unable to find valid certification path to requested target,还有可能 Maven:java.lang.RuntimeException: Unexpected error: java.security.InvalidAlgorithmParameterException: the trustAnchors parameter must be non-empty,可以解决相关问题。
2.2、添加依赖
springboot 提供了很多的“Starters”来添加相关的 jar 包依赖,案例中的 spring-boot-starter-parent 是一个比较特殊的 parent pom ,它提供了很多有用的默认配置,但是没有任何的 jar 直接依赖。这里可以运行下 mvn dependency:tree 查看下当前工程的依赖,可以发现 spring-boot-starter-parent 并没有提供任何依赖。

这里我们要创建的是 web 工程,需要有 web 相关的依赖,因此 pom.xml 中添加如下配置:
    <dependencies>
        <dependency>
            <groupId>org.springframework.boot</groupId>
            <artifactId>spring-boot-starter-web</artifactId>
        </dependency>
    </dependencies>
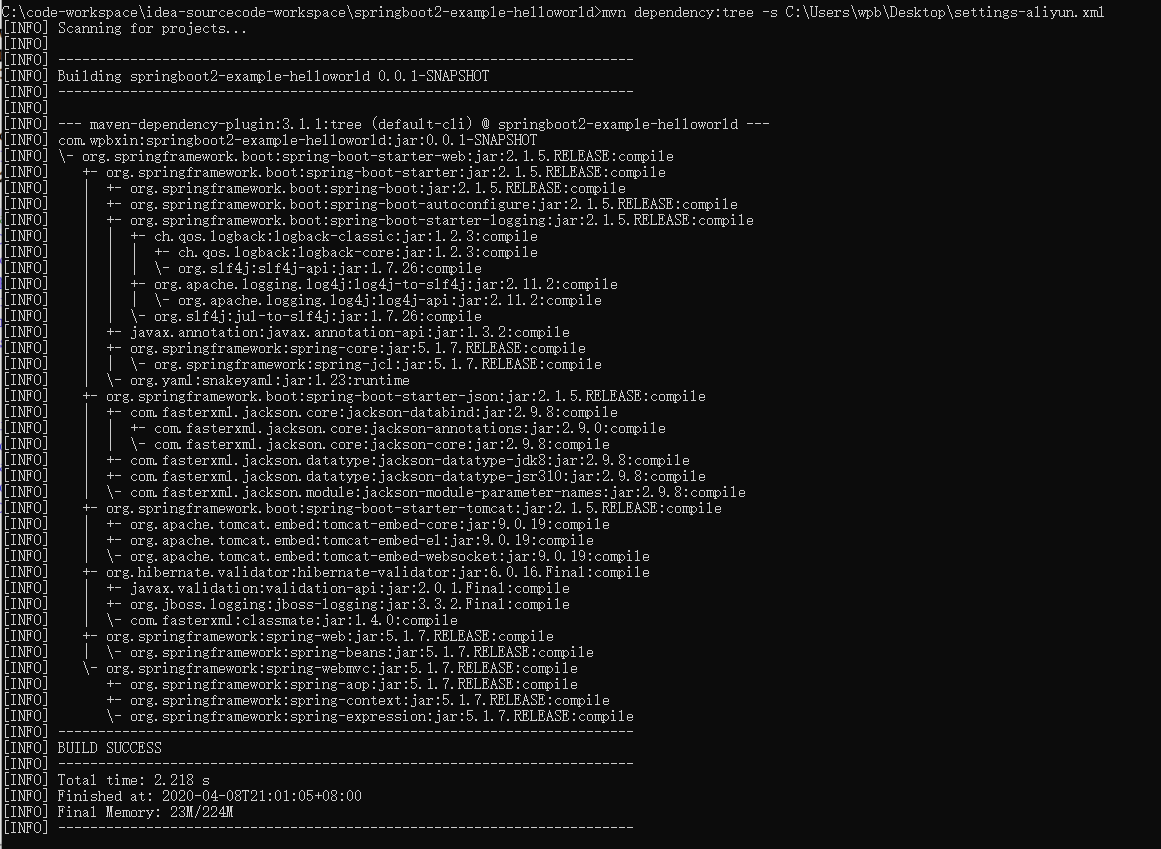
再来一遍 mvn dependency:tree (截图的是已经下载完后的),这下可以看出 spring 全家桶差不多出来了,而且还有内嵌的 tomcat :

2.3、添加“Hello World”代码
HelloWorld Java类:
package com.wpbxin;

import org.springframework.boot.*;
import org.springframework.boot.autoconfigure.*;
import org.springframework.web.bind.annotation.*;

@RestController
@EnableAutoConfiguration
public class HelloWorldExample {
    @RequestMapping("/")
    String home() {
        return "Hello World!";
    }
    public static void main(String[] args) {
        SpringApplication.run(HelloWorldExample.class, args);
    }
}
2.4、运行“Hello World” web 工程
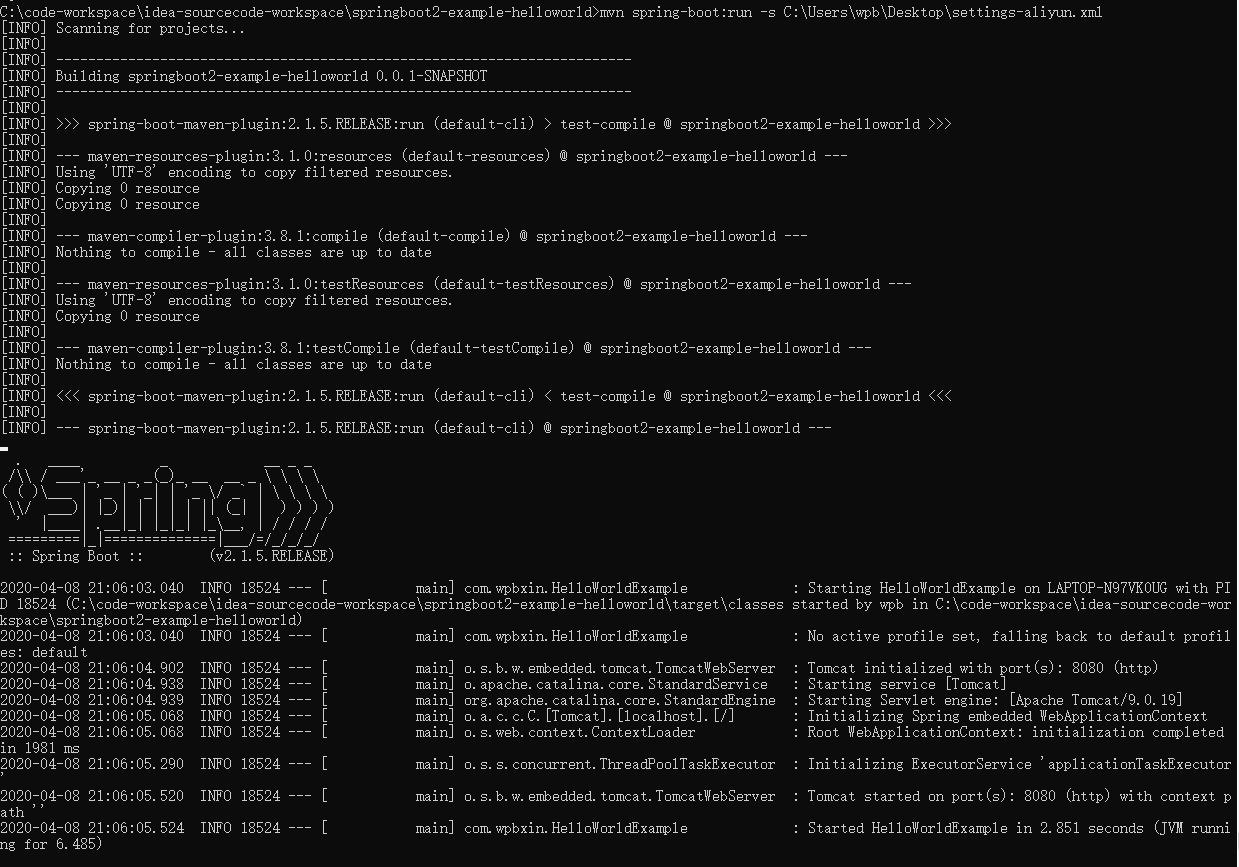
通过命令 mvn spring-boot:run 来运行(期间笔者又遇到了 PKIX 的错误,重新来几遍就没问题了,很可能是网络问题):

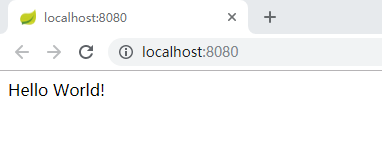
看到打出来了 Spring 的标识就正常了,然后访问 http://localhost:8080/ 正常:

然后按 ctrl -c 结束:

2.5、创建可运行的jar
pom.xml 中增加配置:
    <build>
        <plugins>
            <plugin>
                <groupId>org.springframework.boot</groupId>
                <artifactId>spring-boot-maven-plugin</artifactId>
            </plugin>
        </plugins>
    </build>
再次执行 mvn package :

这时候 target 目录下会有个文件 springboot2-example-helloworld-0.0.1-SNAPSHOT.jar.original 和相关的jar 包(大概10MB左右):

通过 jar -tvf targetspringboot2-example-helloworld-0.0.1-SNAPSHOT.jar 查看内部所有文件和引用:

这次通过 jar -jar 来运行 jar 包,也是正常:

访问 http://localhost:8080/ ,OK

同样是通过 CTRL-c 来结束运行:

至此,整合了springboot2 的 “Hello World” web 工程便可正常使用了。
2.6、“HelloWorld” web 工程链接和 maven 的配置
本文使用的工程参考github链接:springboot2-example-helloworld
使用的 maven 的setting.xml 如下:
<?xml version="1.0" encoding="UTF-8"?>
<settings xmlns="http://maven.apache.org/SETTINGS/1.0.0"
          xmlns:xsi="http://www.w3.org/2001/XMLSchema-instance"
          xsi:schemaLocation="http://maven.apache.org/SETTINGS/1.0.0 http://maven.apache.org/xsd/settings-1.0.0.xsd">
  <!-- localRepository
   | The path to the local repository maven will use to store artifacts.
   | Default: ${user.home}/.m2/repository
  <localRepository>/path/to/local/repo</localRepository>
  -->
  <localRepository>C:cs-softwaresmaven-repo</localRepository>
  <mirrors>
    <mirror>
      <id>alimaven</id>
      <name>aliyun maven</name>
      <mirrorOf>central</mirrorOf>
      <!-- 阿里云公共代理库使用指南:https://help.aliyun.com/document_detail/102512.html?spm=a2c40.aliyun_maven_repo.0.0.36183054oSYFKS -->
      <!-- <url>https://maven.aliyun.com/nexus/content/groups/public</url> -->
      <url>https://maven.aliyun.com/repository/public</url>
    </mirror>
    <!-- 默认的maven仓库-2019-10-26:https://repo.maven.apache.org/maven2 -->
  </mirrors>

  <profiles>
    <!-- 阿里云私服 -->
    <profile>
        <id>alimaven-profile</id>
        <activation>
            <activeByDefault>true</activeByDefault>
            <jdk>1.8</jdk>
        </activation>
        <properties>
            <maven.compiler.source>1.8</maven.compiler.source>
            <maven.compiler.target>1.8</maven.compiler.target>
            <maven.compiler.compilerVersion>1.8</maven.compiler.compilerVersion>
        </properties>
        <repositories>
            <repository>
                <id>alimaven</id>
                <url>https://maven.aliyun.com/repository/public</url>
                <releases>
                    <enabled>true</enabled>
                </releases>
            </repository>
        </repositories>
    </profile>
  </profiles>

  <activeProfiles>
    <activeProfile>alimaven-profile</activeProfile>
  </activeProfiles>
</settings>