Spring Boot2系列文章可以通过这里进行回顾:SpringBoot2(001):入门介绍、官网参考和博客汇总
本文主要针对 SpringBoot 应用的启动委托类 SpringApplication 进行介绍,包括如何定制启动 banner、定制 SpringAppication 等,主要参考官方文档:23. SpringApplication ,目录结构如下:
- 1、SpringBoot 应用启动失败
- 2、定制应用的启动 Banner
- 3、定制 SpringApplication
- 4、流构造器API:SpringApplicationBuilder
- 5、上下文事件和监听器:Application Events and Listeners
- 6、Web 环境
- 7、访问 Application 参数
- 8、使用 ApplicationRunner 或者 CommandLineRunner
- 9、退出 Application(优雅停机)
- 10、管理运维功能(Admin Features)
- 11、参考
SpringApplication 类提供了一种很便捷的方式来从 main() 方法启动 Spring 应用。在大多数场景下都可以像下面的例子一样,委托给静态方法 SpringApplication.run :
public static void main(String[] args) {
    SpringApplication.run(MySpringConfiguration.class, args);
}
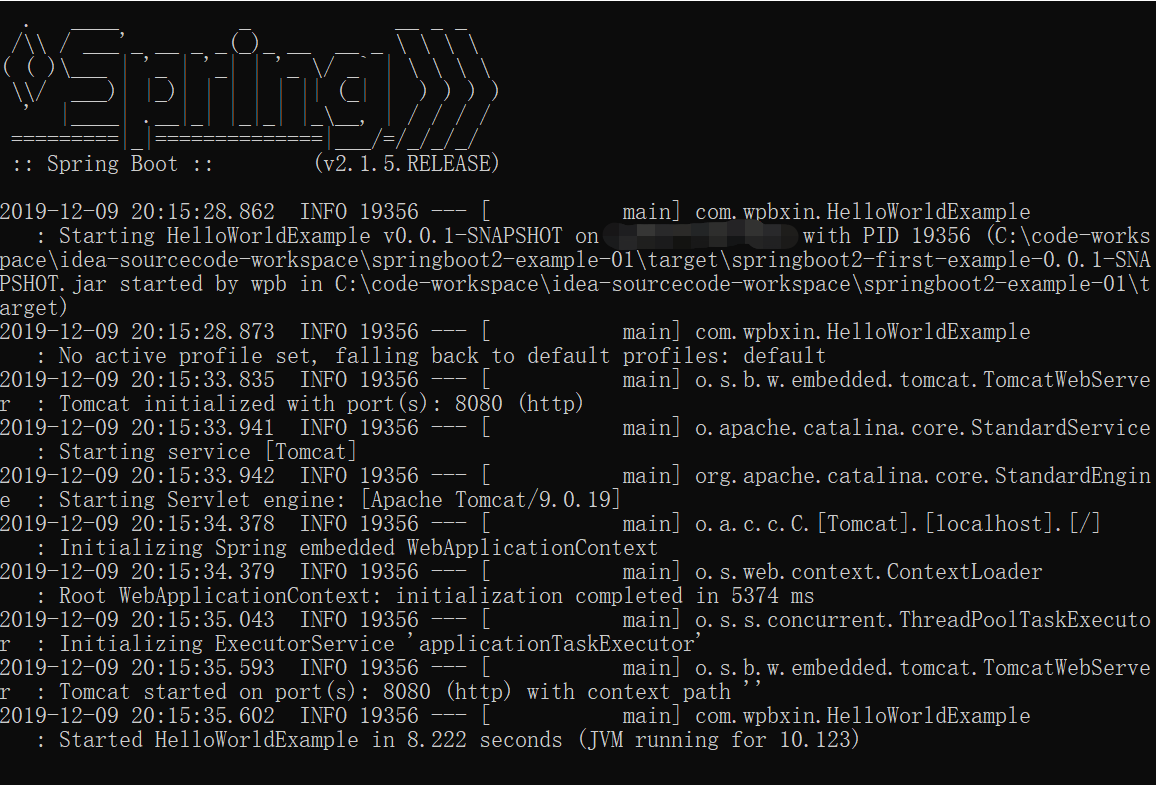
然后可以看到类似的输出:

默认情况下会打印 INFO 级别的日志信息,包括一些相关的启动明细,比如启动应用程序的用户信息。关于日志级别方面的,可以参考:Section 26.4, “Log Levels”
1、SpringBoot 应用启动失败
如果应用启动失败, FailureAnalyzers 会记录相关的错误提示并提供具体的解决措施。例如,启动 web 应用并配置了8080端口,如果端口已被占用,可以在看类似的提示信息:
***************************
APPLICATION FAILED TO START
***************************

Description:

The Tomcat connector configured to listen on port 8080 failed to start. The port may already be in use or the connector may be misconfigured.

Action:

Verify the connector's configuration, identify and stop any process that's listening on port 8080, or configure this application to listen on another port.
Spring Boot 本身提供了很多 FailureAnalyzer 实现,也可以自行扩展添加,参考 76.1 Create Your Own FailureAnalyzer
如果没有 FailureAnalyzer 处理异常,还可以通过开启 debug 模式来记录和展示错误信息,可以参考 enable DEBUG logging。
如果通过 java -jar 来启动应用,则可以直接加上启动参数 --debug,如下
java -jar myproject-0.0.1-SNAPSHOT.jar --debug
2、定制应用的启动 Banner
Banner 是在启动过程中打印出来的,如下,可以通过在类路径中增加 banner.txt 或者通过 spring.banner.location 设定文件路径,文件默认是 UTF-8 ,可以通过 spring.banner.charset 指定字符集。
. ____ _ __ _ _
/\ / ___'_ __ _ _(_)_ __ __ _
( ( )\___ | '_ | '_| | '_ / _` |
\/ ___)| |_)| | | | | || (_| | ) ) ) )
' |____| .__|_| |_|_| |_\__, | / / / /
=========|_|==============|___/=/_/_/_/
:: Spring Boot :: (v2.1.5.RELEASE)
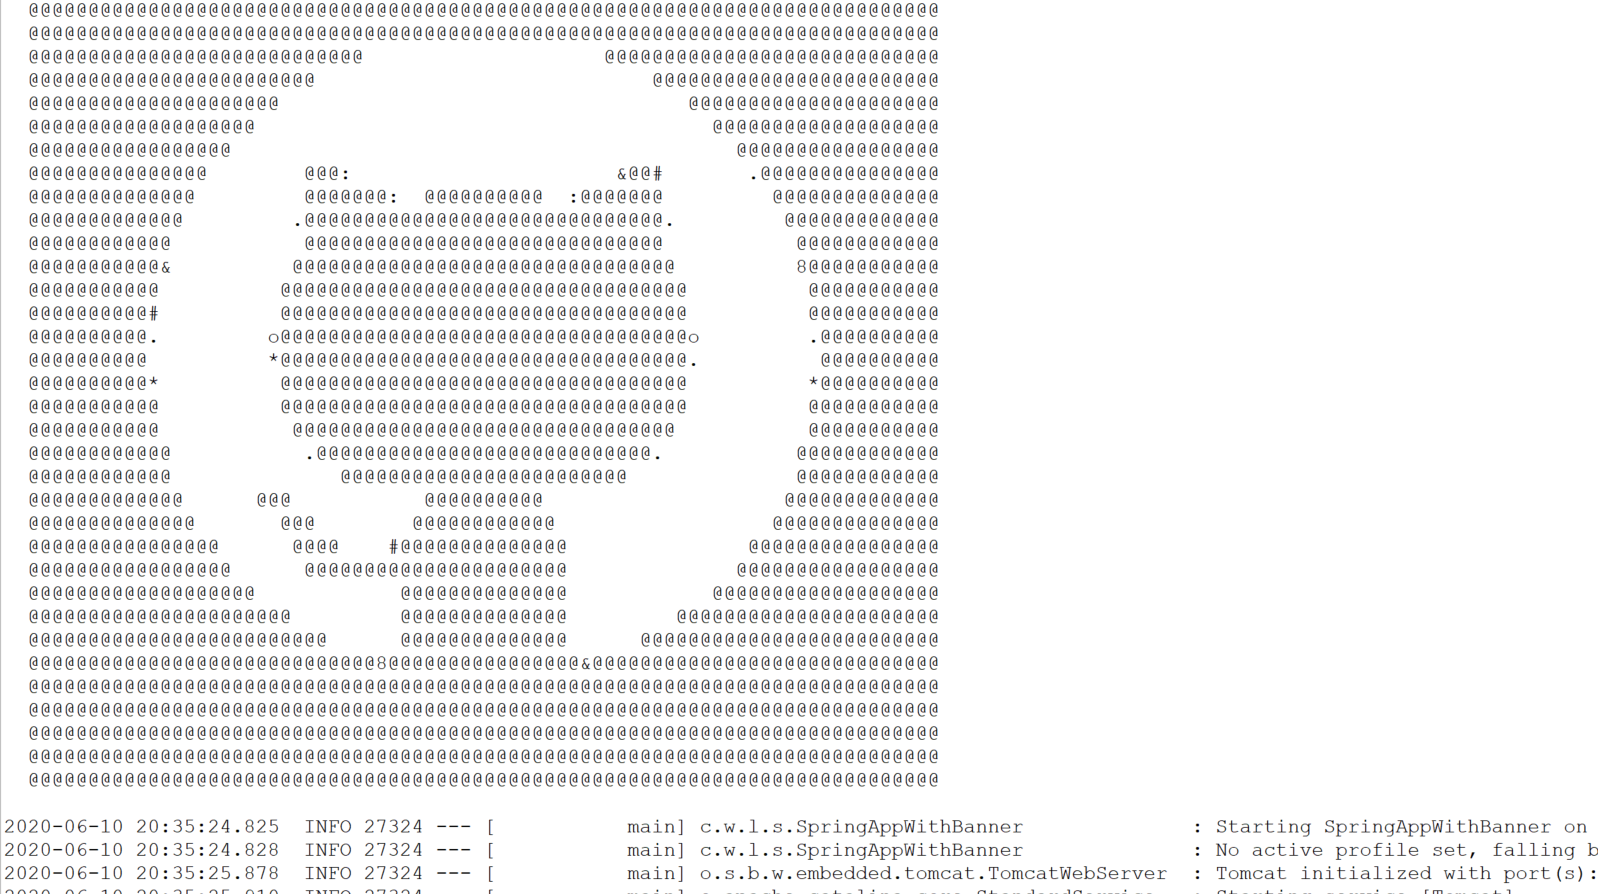
除了 banner.txt ,还可以添加 banner.gif, banner.jpg, 或者 banner.png 的图像文件并设置 spring.banner.image.location 路径,图像被转换成ASCII艺术表现形式,并打印输出。

笔者试着拿了 github 上面的这个 logo 进行测试,打印出来的是下面这坨,将就着看吧,一般也没这么蛋疼输出个图片吧,顶多就搞公司的 logo 进行转换输出(提前转换成 txt 的 banner)

banner.txt 可以用下面这些变量属性:
${application.version}

${application.formatted-version}

${spring-boot.version}    使用到的 SpringBoot 版本,例如 2.1.5.RELEASE

${spring-boot.formatted-version}    使用到的 SpringBoot 格式化版本,加了v前缀,例如 v2.1.5.RELEASE

${Ansi.NAME} (or ${AnsiColor.NAME},
${AnsiBackground.NAME},
${AnsiStyle.NAME})

${application.title}
注:如果是进行编程式的 banner 定制,可以通过实现 org.springframework.boot.Banner 接口,覆盖 printBanner() 方法来进行输出的定制,然后通过 SpringApplication.setBanner(new MyBanner()) 进行配置。例如,自定义 Banner 如下:
public class MyBanner implements Banner {

    private static final Logger LOGGER = LoggerFactory.getLogger(MyBanner.class);

    @Override
    public void printBanner(Environment environment, Class<?> sourceClass, PrintStream out) {
        LOGGER.info("MyBanner test!");
    }

}
可以看到输出如下:
2020-06-10 20:38:56.402 INFO 28284 --- [ main] c.w.learning.springapplication.MyBanner : MyBanner test!
对于 banner 的输出,还可以使用配置 spring.main.banner-mode 来指定是打印到控制台 System.out(console),还是通过配置的 logger(log),抑或是直接关闭(off)。以下配置就是直接 banner 输出关闭掉。
spring.main.banner-mode=off
SpringBoot 中,banner 被注册为 springBootBanner 单例。
相关代码链接可以参考:https://github.com/wpbxin/springboot2-leanring
3、定制 SpringApplication
SpringApplication 的默认配置如果不适合实际,可以通过直接创建一个 SpringApplication 实例来进行相关的设置。例如,关掉 banner:
public static void main(String[] args) {
    SpringApplication app = new SpringApplication(MySpringConfiguration.class);
    app.setBannerMode(Banner.Mode.OFF);
    app.run(args);
}
注:SpringApplication 的构造器参数一般是有 @Configuration 的配置类,当然,也可以是指定的 XML 配置等。笔者建议最好是应用的启动类。
另外还可以使用 application.properties 来对 SpringApplication 进行配置,参考 24. Externalized Configuration 。
SpringApplication 的完整的配置选项,可以参考api文档的具体说明 https://docs.spring.io/spring-boot/docs/2.1.5.RELEASE/api/org/springframework/boot/SpringApplication.html
4、流构造器API:SpringApplicationBuilder
如果需要构建 ApplicationContext 层次结构(具有父/子关系的多个上下文),或者开发者更偏向于使用流构建器 API,可以使用 SpringApplicationBuilder :
new SpringApplicationBuilder()
    .sources(Parent.class)
    .child(Application.class)
    .bannerMode(Banner.Mode.OFF)
    .run(args);
注:创建 ApplicationContext 层次结构时存在一些限制。例如, Web 组件必须包含在子上下文中,并且父上下文和子上下文都使用相同的 Environment,详见:https://docs.spring.io/spring-boot/docs/2.1.5.RELEASE/api/org/springframework/boot/builder/SpringApplicationBuilder.html
5、上下文事件和监听器:Application Events and Listeners
除了通常的 Spring 框架事件(如 ContextRefreshedEvent)之外,SpringApplication 还额外提供了一些应用程序事件。
注:有些事件是在 ApplicationContext 创建之前被触发的,例如监听器,因此不能在 @Bean 上注册监听器,而是需要使用 SpringApplication.addListeners(…) 或者 SpringApplicationBuilder.listeners(…) 进行添加。
如果想自动注册监听器,可以在工程中添加 META-INF/spring.factories 文件并且使用 org.springframework.context.ApplicationListener 指定:
org.springframework.context.ApplicationListener=com.example.project.MyListener
应用启动时,Application 事件的发送顺序:
- An ApplicationStartingEvent is sent at the start of a run but before any processing, except for the registration of listeners and initializers.
- An ApplicationEnvironmentPreparedEvent is sent when the Environment to be used in the context is known but before the context is created.
- An ApplicationPreparedEvent is sent just before the refresh is started but after bean definitions have been loaded.
- An ApplicationStartedEvent is sent after the context has been refreshed but before any application and command-line runners have been called.
- An ApplicationReadyEvent is sent after any application and command-line runners have been called. It indicates that the application is ready to service requests.
- An ApplicationFailedEvent is sent if there is an exception on startup.
大致意思如下:
- ApplicationStartingEvent 在运行开始时但在任何处理之前发送,listeners 和 initializers 的注册除外。
- ApplicationEnvironmentPreparedEvent 在上下文中需要使用的环境 Environment 已准备就绪但在创建上下文之前发送。
- ApplicationPreparedEvent 是在刷新启动之前但 bean 定义加载之后发送的。
- ApplicationStartedEvent 是在刷新上下文之后,在调用任何应用程序和命令行运行器之前发送的。
- ApplicationReadyEvent 是在调用任意应用程序和命令行运行器之后发送的。它表示应用程序已准备好为请求提供服务。
- 启动过程中有异常抛出的话会发送 ApplicationFailedEvent 事件。
Application 事件都是通过 Spring 框架的事件发布机制进行发送的。这种机制中的一部分可以确保发布到子上下文中的事件也会发布到任何父上下文的监听器中。因此,如果应用程序使用有层次结构的SpringApplication实例,监听器可能会接收到相同类型的应用程序事件的多个实例,也即是接收到多次同类事件通知。
为了让监听器区分上下文事件和子上下文事件,监听器应该请求注入相关应用程序上下文,然后将注入的上下文与事件的上下文进行比较。上下文可以通过实现 ApplicationContextAware 接口来进行注入;或者是通过使用 @Autowired 来注入,如果监听器是一个 bean 的话。
关于这个问题,有兴趣的可以都搜下“onApplicationEvent多次调用”,就是这里所说的问题。
6、Web 环境
SpringApplication 会根据应用尝试创建正确类型的 ApplicationContext。确定 WebApplicationType 的算法相当简单:
- 如果存在 Spring MVC,则使用 AnnotationConfigServletWebServerApplicationContext;
- 如果 Spring MVC 不存在,而 Spring WebFlux 存在,则使用 AnnotationConfigReactiveWebServerApplicationContext;
- 否则,使用 AnnotationConfigApplicationContext。
这意味着如果在同一个应用程序中使用 Spring MVC 和来自 Spring WebFlux 的新 WebClient, Spring MVC 将被作为默认使用。开发者可以通过调用 setWebApplicationType(WebApplicationType) 轻松地覆盖默认设置。
另外,通过调用 setApplicationContextClass(…) 来完全控制 ApplicationContext 的类型也是可以的。
注:在 JUnit 测试中使用 SpringApplication 时,通常需要调用先 setWebApplicationType(WebApplicationType.NONE)。
7、访问 Application 参数
如果需要访问 SpringApplication.run(…) 传递进来的参数,可以注入 org.springframework.boot.ApplicationArguments 这个 bean。ApplicationArguments 接口提供了对原始 String[] 参数以及解析的可选项和非选项参数的访问,如下面的示例所示:
import org.springframework.boot.*;
import org.springframework.beans.factory.annotation.*;
import org.springframework.stereotype.*;

@Component
public class MyBean {

    @Autowired
    public MyBean(ApplicationArguments args) {
        boolean debug = args.containsOption("debug");
        List<String> files = args.getNonOptionArgs();
        // if run with "--debug logfile.txt" debug=true, files=["logfile.txt"]
    }

}
注:SpringBoot 还向 Spring Environment 注册了一个 CommandLinePropertySource,允许通过使用 @Value 注解注入单个命令行参数。
8、使用 ApplicationRunner 或者 CommandLineRunner
如果需要 SpringApplication 已开启时运行一些特定的代码,可以通过实现 ApplicationRunner 或者 CommandLineRunner 接口来进行处理。这2个接口都提供了 run 方法,供 SpringApplication.run(…) 完成之前调用运行。
CommandLineRunner 接口的 run 方法提供的入参是 String 数组,而 ApplicationRunner 则使用前面提到的 ApplicationArguments 作为参数。下面这个例子展示了如何使用 CommandLineRunner :
import org.springframework.boot.*;
import org.springframework.beans.factory.annotation.*;
import org.springframework.stereotype.*;

@Component
public class MyBean {

    @Autowired
    public MyBean(ApplicationArguments args) {
        boolean debug = args.containsOption("debug");
        List<String> files = args.getNonOptionArgs();
        // if run with "--debug logfile.txt" debug=true, files=["logfile.txt"]
    }

}
如果定义了多个的 CommandLineRunner 或者 ApplicationRunner,并且需要按照特定的顺序执行,则需要实现 org.springframework.core.Ordered 接口或者使用 org.springframework.core.annotation.Order 注解来声明执行顺序
9、退出 Application
每个 SpringApplication 都会在 JVM 中注册一个 shutdown 钩子,以确保在退出时可以优雅地关闭 ApplicationContext。所有的标准的 Spring 生命周期回调函数(Spring lifecycle callbacks,例如 DisposableBean 接口 或者 @PreDestroy 注解)都可以使用。
另外,当 SpringApplication.exit() 被调用时,如果期望返回特定退出状态码(exit code)的,可以通过实现 org.springframework.boot.ExitCodeGenerator 接口来进行处理。这个返回的退出状态码可以传递给 System.exit() 作为一个状态码,如下示例:
@SpringBootApplication
public class ExitCodeApplication {

    @Bean
    public ExitCodeGenerator exitCodeGenerator() {
        return () -> 42;
    }

    public static void main(String[] args) {
        System.exit(SpringApplication
                .exit(SpringApplication.run(ExitCodeApplication.class, args)));
    }

}
此外,ExitCodeGenerator 接口也可以被异常类实现,当这种异常产生时,Spring Boot 会通过其提供的 getExitCode() 来获取 退出状态码。
10、管理运维功能(Admin Features)
通过指定属性 spring.application.admin.enabled 可以为应用程序启用与管理相关的特性。这会将 SpringApplicationAdminMXBean 暴露给 MBeanServer 平台。开发者可以使用此特性远程管理 SpringBoot 应用。该特性还可以用于任何服务包装器类实现。
注:如果需要知道哪个 HTTP 端口在使用,可以通过获取 local.server.port 来得知。
警告:需要特别注意的是,MBean 暴露了一个用于关闭应用的方法。生产环境建议关闭。
11、参考
- 官方文档:23. SpringApplication
- 本文部分相关相关代码链接可以参考:https://github.com/wpbxin/springboot2-leanring