在介绍Spring IoC和MVC的加载前,用这篇小文章简单地记录下,最简单的web应用的加载过程。
一、从最简单的web应用出发
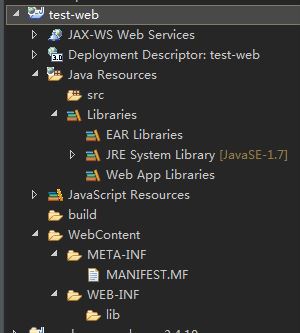
使用Eclipse直接创建一个Dynamic Web Project即可,工程如下test-web,然后右键→Run as→Run on Server,然后访问:http://localhost:8080/test-web/
可以看到,返回的是404错误,表示找不到请求的资源。
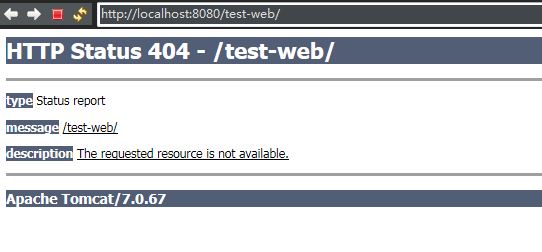
其实这个web应用是可运行而且没问题的。问题在于它没有Servlet可以接收并处理请求,在这里也没有定义首页和错误页的默认选项,因此应用直接返回了404找不到资源错误。如果把首页配置上去,默认的访问可以直接使用首页,我们增加web.xml和欢迎页index.jsp,如下
 1 <?xml version="1.0" encoding="UTF-8"?>
 2 <web-app xmlns:xsi="http://www.w3.org/2001/XMLSchema-instance"
 3     xmlns="http://java.sun.com/xml/ns/javaee"
 4     xsi:schemaLocation="http://java.sun.com/xml/ns/javaee http://java.sun.com/xml/ns/javaee/web-app_3_0.xsd"
 5     id="WebApp_ID" version="3.0">
 6     <display-name>test-web</display-name>
 7     <welcome-file-list>
 8         <welcome-file>/WEB-INF/jsp/index.jsp</welcome-file>
 9     </welcome-file-list>
10 </web-app>
index.jsp
 1 <%@ page language="java" contentType="text/html; charset=utf-8"
 2     pageEncoding="utf-8"%>
 3 <!DOCTYPE html PUBLIC "-//W3C//DTD HTML 4.01 Transitional//EN" "http://www.w3.org/TR/html4/loose.dtd">
 4 <html>
 5 <head>
 6 <meta http-equiv="Content-Type" content="text/html; charset=utf-8">
 7 <title>Insert title here</title>
 8 </head>
 9 <body>Hello
10 </body>
11 </html>
重新启动应用,然后访问http://localhost:8080/test-web/,结果如下。
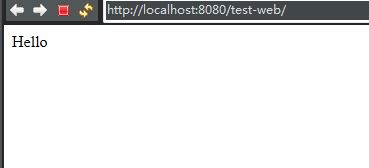
可见,确实得到了正确的响应。
二、Web应用的简单加载过程
那Web是怎样加载的呢?如下图:
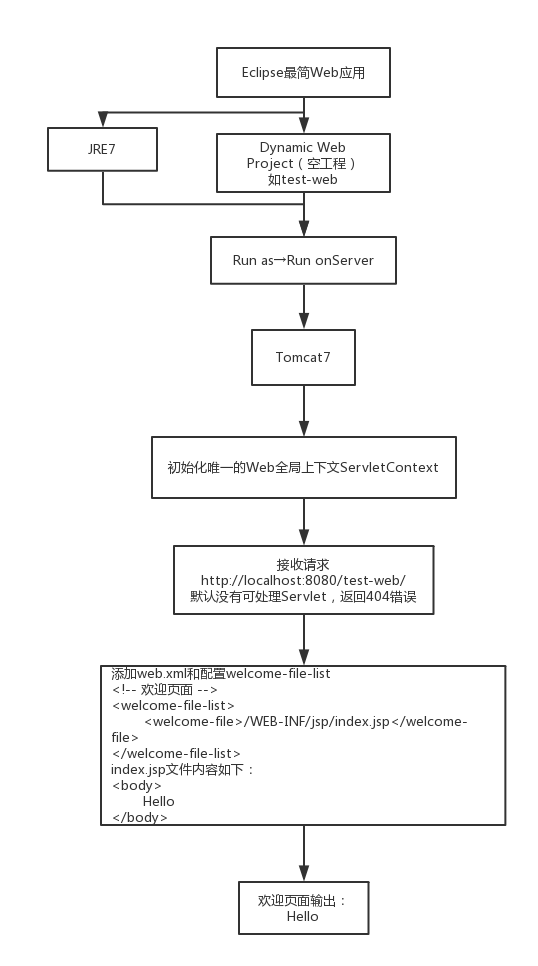
简单地说,web应用加载后,会先初始化整个web应用的唯一的ServletContext,即Servlet应用上下文(说白了就只有这一步)。这个上下文是必须要有的,而且每个web应用只有一个。ServletContext定义了运行在Servlet的应用程序环境的一些行为和观点,可以使用ServletContext实现对象来取得所请求资源的URL、设置与存储属性、应用程序初始参数,甚至动态设置Servlet实例。web.xml中配置的首页、错误页等,都会被web应用解析并按照最后的请求适配处理。
ServletContext属性的配置可以在web.xml的<context-param />中配置:
1     <context-param>
2         <param-name>contextConfigLocation</param-name>
3         <param-value>
4             classpath*:applicationContext*.xml
5         </param-value>
6     </context-param>
总结一句话就是:web应用在部署时,web容器为web应用初始化了唯一的ServletContext,之后其他的可扩展选项按照配置进行初始化,然后就开始接收请求进行处理。
以上便是一个最简web应用的加载。
三、Web应用的常规加载过程
实际上,一个web.xml里面有很多的配置,而其中,接触最多的就是Listener、Filter、Servlet。在这里。我们并没有定义Listener、Filter、Servlet(实际处理请求的类),这是可行的,因为这些都是可扩展的选择。下面简单地介绍下这几个扩展选项:
1、Listener:
Web容器管理Servlet/JSP相关的对象生命周期,若对HttpServletRequest对象、HttpSession对象、ServletContext对象在生成、销毁或相关属性设置发生变化的时机点有兴趣,需要进行一些处理,如进行资源的加载、数据库的初始化等,可以使用Listener。主要有2大类的监听器Listener:
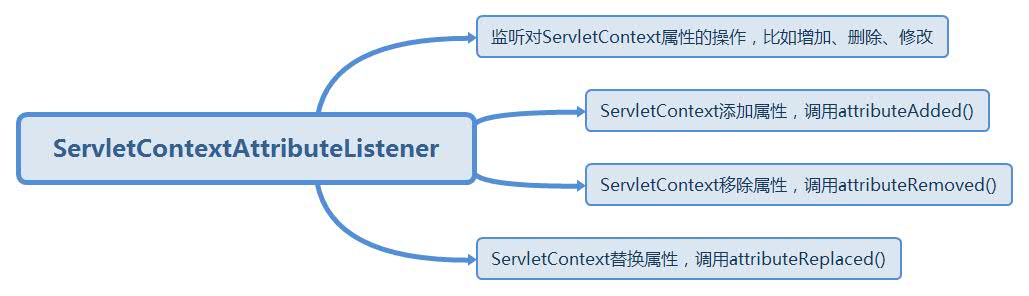
- ServletContext事件监听器:ServletContextListener、ServletContextAttributeListener
- HttpSession事件监听器:HttpSessionListener、HttpSessionAttributeListener、HttpSessionBindingListener、HttpSessionActivationListener
下面主要讲解ServletContext相关的2个监听器,其作用如下:
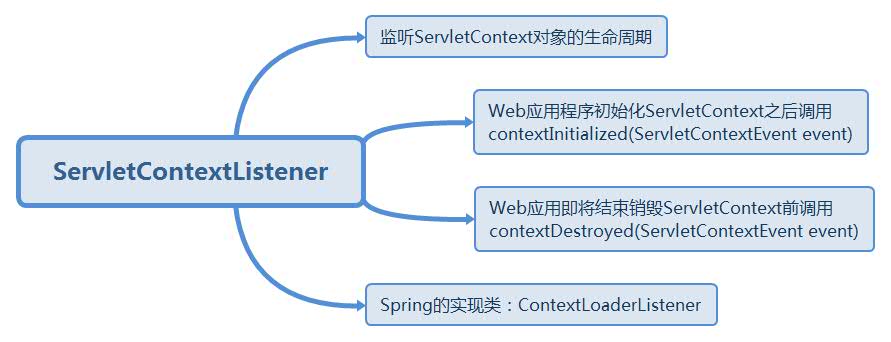
Spring IoC容器的配置就是ServletContextListener的实现类ContextLoaderListener,它在ServletContext加载之后就开始进行IoC容器的初始化和bean的加载解析。配置如下:
 1     <!-- 默认的spring配置文件是在WEB-INF下的applicationContext.xml -->
 2     <listener>
 3         <listener-class>org.springframework.web.context.ContextLoaderListener</listener-class>
 4     </listener>
 5     <context-param>
 6         <param-name>contextConfigLocation</param-name>
 7         <param-value>
 8             classpath*:applicationContext*.xml
 9         </param-value>
10     </context-param>
2、Filter
在容器调用Servlet的service()方法前,Servlet并不会知道有请求的到来,而在Servlet的service()方法运行后,容器真正对浏览器进行HTTP相应之前,浏览器也不会知道Servlet真正的响应是什么。过滤器Filter正如其名称所示,是介于Servlet之前,可拦截过滤浏览器对Servlet的请求,也可以改变Servlet对浏览器的响应。Filter的解析是按照其在web.xml中的声明顺序来的。
常见到的就是强制字符转码的CharacterEncodingFilter:
 1     <filter>
 2         <filter-name>CharacterEncodingFilter</filter-name>
 3         <filter-class>org.springframework.web.filter.CharacterEncodingFilter</filter-class>
 4         <init-param>
 5             <param-name>encoding</param-name>
 6             <param-value>UTF-8</param-value>
 7         </init-param>
 8     </filter>
 9     <filter-mapping>
10         <filter-name>CharacterEncodingFilter</filter-name>
11         <url-pattern>/*</url-pattern>
12     </filter-mapping>
3、Servlet
这是处理实际请求的类,整个web应用存在的意义,是因为存在可以处理实际请求的Servlet,因此,一般Web应用中都需要配置Servlet。而Spring Web MVC中配置的类就是DispatcherServlet,如下:
 1     <!-- springMVC的核心控制器 -->
 2     <servlet>
 3         <servlet-name>springMVC</servlet-name>
 4         <servlet-class>org.springframework.web.servlet.DispatcherServlet</servlet-class>
 5         <init-param>
 6             <param-name>contextConfigLocation</param-name>
 7             <param-value>classpath*:springMVC-servlet.xml</param-value>
 8         </init-param>
 9         <load-on-startup>1</load-on-startup>
10     </servlet>
11     <servlet-mapping>
12         <servlet-name>springMVC</servlet-name>
13         <url-pattern>/</url-pattern>
14     </servlet-mapping>
从以上定义可以看出(实际上也可以进行调试debug):这些加载顺序 context-param ==> Listener ==> Filter ==> Servlet。
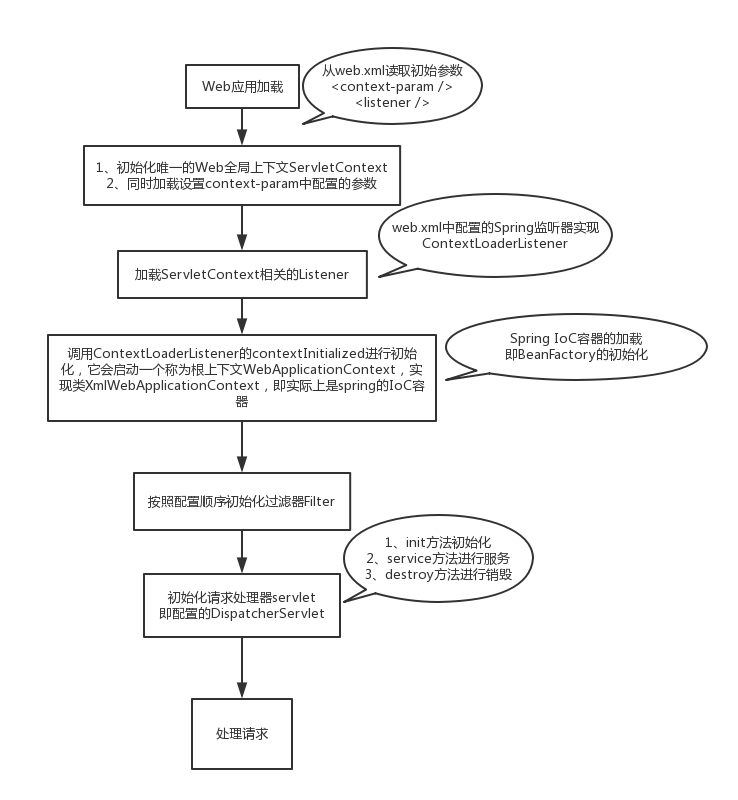
大体的加载流程表示如下:
- 读取web.xml的配置参数,如context-param、listener配置等
- web容器为web应用初始化一个唯一的全局上下文ServletContext,并把上述的参数配置即context-param,维护到ServletContext中。
- ServletContext初始化完成后,初始化配置的Listener,这里是Spring的ContextLoaderListener(实现了ServletContextListener,ServletContext初始化完成后会调用其contextInitialized方法),初始化Spring的IoC容器,即ApplicationContext,同时把自己设置给ServletContext,并设置WebApplicationContext.ROOTWEBAPPLICATIONCONTEXTATTRIBUTE。
- 按照顺序加载配置Filter
- 加载配置的Servlet。这里是DispatcherServlet,它会初始化自己的ApplicationContext(主要是controller),同时把IoC容器的ApplicationContext,即WebApplicationContext.ROOTWEBAPPLICATIONCONTEXTATTRIBUTE设置为自己的父容器,并注册在ServletContext。
整体的web.xml配置
 1 <?xml version="1.0" encoding="UTF-8"?>
 2 <web-app xmlns:xsi="http://www.w3.org/2001/XMLSchema-instance"
 3     xmlns="http://java.sun.com/xml/ns/javaee"
 4     xsi:schemaLocation="http://java.sun.com/xml/ns/javaee http://java.sun.com/xml/ns/javaee/web-app_3_0.xsd"
 5     id="WebApp_ID" version="3.0">
 6
 7     <!-- 默认的spring配置文件是在WEB-INF下的applicationContext.xml -->
 8     <listener>
 9         <listener-class>org.springframework.web.context.ContextLoaderListener</listener-class>
10     </listener>
11     <context-param>
12         <param-name>contextConfigLocation</param-name>
13         <param-value>
14             classpath*:applicationContext*.xml
15         </param-value>
16     </context-param>
17
18     <!-- 强制进行转码 -->
19     <filter>
20         <filter-name>CharacterEncodingFilter</filter-name>
21         <filter-class>org.springframework.web.filter.CharacterEncodingFilter</filter-class>
22         <init-param>
23             <param-name>encoding</param-name>
24             <param-value>UTF-8</param-value>
25         </init-param>
26     </filter>
27     <filter-mapping>
28         <filter-name>CharacterEncodingFilter</filter-name>
29         <url-pattern>/*</url-pattern>
30     </filter-mapping>
31
32     <!-- springMVC的核心控制器 -->
33     <servlet>
34         <servlet-name>springMVC</servlet-name>
35         <servlet-class>org.springframework.web.servlet.DispatcherServlet</servlet-class>
36         <init-param>
37             <param-name>contextConfigLocation</param-name>
38             <param-value>classpath*:springMVC-servlet.xml</param-value>
39         </init-param>
40         <load-on-startup>1</load-on-startup>
41     </servlet>
42     <servlet-mapping>
43         <servlet-name>springMVC</servlet-name>
44         <url-pattern>/</url-pattern>
45     </servlet-mapping>
46
47     <!-- session配置 -->
48     <session-config>
49         <session-timeout>30</session-timeout>
50     </session-config>
51
52     <!-- 欢迎页面 -->
53     <welcome-file-list>
54         <welcome-file>index.html</welcome-file>
55         <welcome-file>index.jsp</welcome-file>
56     </welcome-file-list>
57
58     <!-- 错误页面 -->
59     <error-page>
60         <error-code>403</error-code>
61         <location>/WEB-INF/jsp/403.jsp</location>
62     </error-page>
63     <error-page>
64         <error-code>404</error-code>
65         <location>/WEB-INF/jsp/404.jsp</location>
66     </error-page>
67     <error-page>
68         <error-code>500</error-code>
69         <location>/WEB-INF/jsp/500.jsp</location>
70     </error-page>
71     <error-page>
72         <exception-type>java.lang.Throwable</exception-type>
73         <location>/WEB-INF/jsp/error.jsp</location>
74     </error-page>
75 </web-app>
备注:web.xml的其他配置、IoC的记载、DispatcherServlet的解析等后续将进行逐一介绍。