本文转载自:http://blog.csdn.net/typa01_kk/article/details/45905129
此篇为“创建Dynamic Web Projec工程,”搭建Dynamic Web Project(动态web项目)的springmvc工程1的续篇,“搭建springmvc框架web项目”:
注:开发工具,以及jar包下载,404访问处理,请到上篇或下链接!!!
下载分享%springmvc开发分享****,(提取码:2c4a)也可网上下载,适合自己的或最新版本使用。
404错误解决可以查看:springmvc下404解决
搭建完的目录:
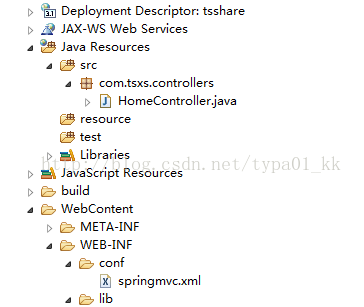

注:此处,如果,只有spring的包,而没有”commons-pool-1.4.jar“和”commons-logging-1.1.1.jar“(版本不限),会在启动tomcat的时候,出现,找不到日志类Not found class Log,或者线程池错误Thread pool。
然后,本篇,具体springmvc备注细节,why?,可上网查看。
1:使用maven或者,自己导入项目springmvc支持包,可在分析找到
2:配置web.xml配置文件:
配置web.xml文件为:
<?xml version="1.0" encoding="UTF-8"?>
<web-app xmlns:xsi="http://www.w3.org/2001/XMLSchema-instance"
    xmlns="http://xmlns.jcp.org/xml/ns/javaee"
    xsi:schemaLocation="http://xmlns.jcp.org/xml/ns/javaee http://xmlns.jcp.org/xml/ns/javaee/web-app_3_1.xsd" id="WebApp_ID" version="3.1">
  <display-name>tsshare</display-name>

  <!-- 监听spring上下文容器 -->
  <listener>
    <listener-class>
            org.springframework.web.context.ContextLoaderListener
    </listener-class>
  </listener>
  <!-- 加载spring的xml配置文件到spring的上下文容器中 -->
  <context-param>
        <param-name>contextConfigLocation</param-name>
        <param-value>classpath*:/springmvc*.xml</param-value>
  </context-param>

  <!-- 配置springmvc DispatcherServlet  -->
  <servlet>
    <servlet-name>mvc</servlet-name>
    <servlet-class>org.springframework.web.servlet.DispatcherServlet</servlet-class>
    <init-param>
        <param-name>contextConfigLocation</param-name>
        <param-value>/WEB-INF/conf/springmvc.xml</param-value>
    </init-param>
    <load-on-startup>1</load-on-startup>
  </servlet>
  <!-- 配置DispatcherServlet需要拦截的url -->
  <servlet-mapping>
    <servlet-name>mvc</servlet-name>
    <url-pattern>*.html</url-pattern>
  </servlet-mapping>

  <!-- 欢迎页 -->
  <welcome-file-list>
    <welcome-file>index.html</welcome-file>
    <welcome-file>index.htm</welcome-file>
    <welcome-file>index.jsp</welcome-file>
    <welcome-file>default.html</welcome-file>
    <welcome-file>default.htm</welcome-file>
    <welcome-file>default.jsp</welcome-file>
  </welcome-file-list>
</web-app>
注:此处注意:<url-pattern>*.html</url-pattern>
3:配置springmvc的配置文件为:
<?xml version="1.0" encoding="UTF-8"?>
<beans
    xmlns="http://www.springframework.org/schema/beans"
    xmlns:xsi="http://www.w3.org/2001/XMLSchema-instance"
    xmlns:tx="http://www.springframework.org/schema/tx"
    xmlns:context="http://www.springframework.org/schema/context"
    xmlns:mvc="http://www.springframework.org/schema/mvc"
    xsi:schemaLocation="http://www.springframework.org/schema/beans
    http://www.springframework.org/schema/beans/spring-beans-3.0.xsd
    http://www.springframework.org/schema/tx
    http://www.springframework.org/schema/tx/spring-tx-3.0.xsd
    http://www.springframework.org/schema/context
    http://www.springframework.org/schema/context/spring-context-3.0.xsd
    http://www.springframework.org/schema/mvc
    http://www.springframework.org/schema/mvc/spring-mvc-3.0.xsd">
        <!-- springmvc配置 -->
        <!-- 通过component-scan让spring扫描package下的所有类,让spring的注解生效-->
        <context:component-scan base-package="com.tsxs"></context:component-scan>
        <!-- 配置springmvc的视图渲染器,让其前缀为:/ 后缀为: .jsp 将视图渲染到 /views/<method返回值>.jsp中 -->
        <bean class="org.springframework.web.servlet.view.InternalResourceViewResolver">
            <property name="prefix" value="/WEB-INF/views/"></property>
            <property name="suffix" value=".jsp"></property>
        </bean>
</beans>
4:配置jsp页面:路径在”/WEB-INF/views/“下:
index.jsp
<%@ page language="java" contentType="text/html; charset=UTF-8"
    pageEncoding="UTF-8"%>
<!DOCTYPE html PUBLIC "-//W3C//DTD HTML 4.01 Transitional//EN" "http://www.w3.org/TR/html4/loose.dtd">
<html>
<head>
<meta http-equiv="Content-Type" content="text/html; charset=UTF-8">
<title>Insert title here</title>
</head>
<body>
            欢迎页!
</body>
</html>
home.jsp
<%@ page language="java" contentType="text/html; charset=UTF-8"
    pageEncoding="UTF-8"%>
<!DOCTYPE html PUBLIC "-//W3C//DTD HTML 4.01 Transitional//EN" "http://www.w3.org/TR/html4/loose.dtd">
<html>
<head>
<meta http-equiv="Content-Type" content="text/html; charset=UTF-8">
<title>Insert title here</title>
</head>
<body>
    我为spring的主页!
</body>
</html>
home1.jsp
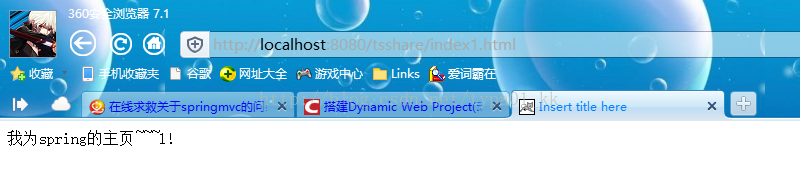
<%@ page language="java" contentType="text/html; charset=UTF-8"
    pageEncoding="UTF-8"%>
<!DOCTYPE html PUBLIC "-//W3C//DTD HTML 4.01 Transitional//EN" "http://www.w3.org/TR/html4/loose.dtd">
<html>
<head>
<meta http-equiv="Content-Type" content="text/html; charset=UTF-8">
<title>Insert title here</title>
</head>
<body>
    我为spring的主页~~~1!
</body>
</html>
5:配置springmvc的控制层类,自动通过annotation扫描,此处为HomeController:
package com.tsxs.controllers;

import org.springframework.stereotype.Controller;
import org.springframework.web.bind.annotation.RequestMapping;
import org.springframework.web.servlet.ModelAndView;


@Controller
public class HomeController {
    /**
     * 首页 返回至 /views/home.jsp页面
     * */
    @RequestMapping("index")
    public String toHome(){
        System.out.println("let`s  go!");
        return "home";
    }

    @RequestMapping("index1")
    public ModelAndView toHome1(){
        //创建模型和视图,用于渲染页面.并指向要返回的页面为home1
        ModelAndView mv = new ModelAndView();
        System.out.println("let`s  go1!");
        mv.setViewName("home1");
        return mv;
    }

}
注:此处注意:import org.springframework.web.servlet.ModelAndView;
浏览器访问:
http://localhost:8080/tsshare

http://localhost:8080/tsshare/index.html

http://localhost:8080/tsshare/index1.html