一、Linux内核打实时补丁
1、将下载的Linux和xenomai安装包放在/usr/src目录下,并解压文件包,命令如下
tar xjf Linux-3.8.13.tar.bz2
tar xjf xenomai-2.6.3.tar.bz2
2、利用/xenomai-2.6.3/scripts目录下的prepare-kernel.sh脚本进行打补丁,命令如下
cd /usr/src/xenomai-2.6.3/srcipts/prepare-kernel.sh --arch=x86 --linux=/usr/src/linux-3.8.13
执行后,输出结果如下
patching file arch/x86/Kconfig
patching file arch/x86/include/asm/apic.h
patching file arch/x86/include/asm/apicdef.h
[...]
patching file mm/mmu_context.c
patching file mm/mprotect.c
patching file mm/vmalloc.c
Xenomai 提供了一个与 Linux 无缝结合地实时子系统,所以首先要做的是将Xenomai 作为目标内核的一部分进行编译。Xenomai 提供了一个脚本文件scripts/prepare-kernel.sh 用来进行目标内核的编译。这个脚本文件同样能够应用于Adeos 对于内核的补丁。脚本文件使用方法如下:
$scripts/preparekernel.sh
–linux=<linuxsrctree>[adeos=<adeospatch>][arch=<targetarch>]
--linux 选项指定了目标内核源代码树路径。
--adeos 选项指定了与目标内核版本很相匹配的Adeos补丁的路径。如果Adeos
已经安装在目标内核中,这个参数选项可以忽略。如果系统侦测到以前安装过Adeos补丁,将不再安装。
--arch 选项给脚本文件指定了目标板的结构。如果没有说明该选项,编译系统将会侦测并推荐一个合理的默认值。
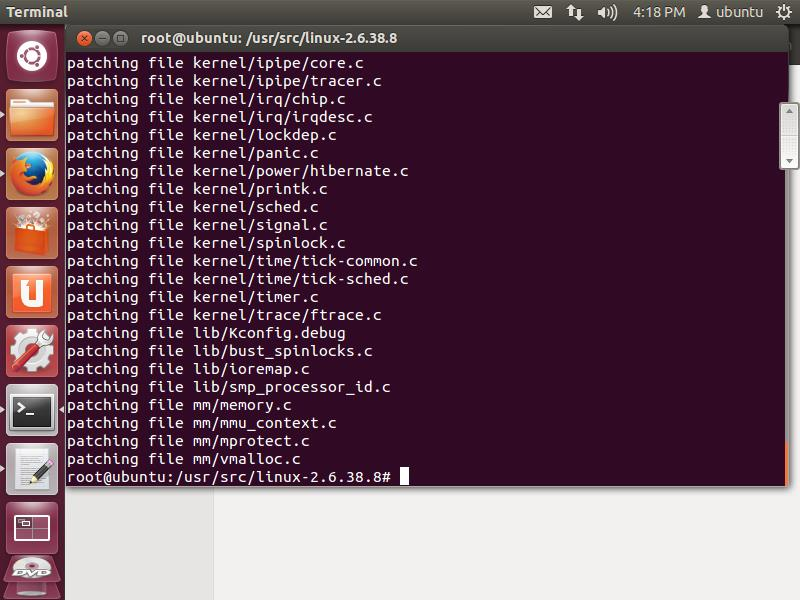
打完补丁后的效果图
二、配置内核
参考:http://qiuhanstar.blog.163.com/blog/static/3085469520104610215649/
http://news.gmane.org/gmane.linux.real-time.xenomai.users
https://code.google.com/p/jhu-lcsr-ros-pkg/wiki/UbuntuXenomai
1、依次使用如下命令
1、cd /usr/src/linux-3.8.13
2、cp /boot/config-3.8.0-generic .config
3、make menuconfig
在make menuconfig 中设置一下3个选项
1、
General setup -->
<*> Kernel .config support
      [*]  Enable access to .config through /proc/config.gz/

2、
Processor type and features -->
    Processor family (Core 2/newer Xeon) -->
3、
Processor type and features -->
Preemption Model -->
(X) Preemptible Kernel (Low-Latency Desktop)
三、内核编译
依次执行(一下命令最好在超级用户模式下输入)
make dep
make clean
make bzImage
make modules
make modules_install
make install


编译uImage时 出现错误

解决方法:

http://www.360doc.com/content/14/0925/15/18578054_412271561.shtml
这段时间比较长  2到3个小时左右

四、建立虚拟文件系统
mkinitramfs –o /boot/initrd-3.8.13.img 3.8.13
五、添加组和用户
sudo addgroup xenomai
sudo usermod -a -G xenomai YOURUSERNAME
六、修改启动项
通过修改grub启动项来启动新的内核,修改grub.cfg之前要修改文件的属性以便顺利的写文件
chmod 777 /boot/grub/grub.cfg
打开grub.cfg文件
vim /boot/grub/grub.cfg
修改如下所示内容
menuentry 'Ubuntu, with Linux 2.6.32-21-generic' --class ubuntu --class gnu-linux --class gnu --class os {
recordfail
insmod ext2
set root='(hd0,1)'
search --no-floppy --fs-uuid --set 97129b6f-598b-4b8c-9c44-e0dec8bb26d6
linux /boot/vmlinuz-2.6.32-21-generic root=UUID=97129b6f-598b-4b8c-9c44-e0dec8bb26d6 ro crashkernel=384M-2G:64M,2G-:128M quiet splash
initrd /boot/initrd.img-2.6.32-21-generic
}
menuentry 'Ubuntu, with Linux 3.8.13-xenomai-generic' --class ubuntu --class gnu-linux --class gnu --class os {
recordfail
insmod ext2
set root='(hd0,1)'
search --no-floppy --fs-uuid --set 97129b6f-598b-4b8c-9c44-e0dec8bb26d6
linux /boot/vmlinuz-3.8.13 root=UUID=97129b6f-598b-4b8c-9c44-e0dec8bb26d6 ro crashkernel=384M-2G:64M,2G-:128M quiet splash
initrd /boot/initrd-3.8.13.img
}
这里有2个启动项,第二个启动项是我们需要添加的,更改的部分是linux和initrd部分UUID以及其他部分保持不变。
然后重启,启动时按住shift键进入grub选择新的内核启动。
七、验证启动的新内核
uname –a
会出现如下信息可以看到3.8.13表示是新的内核
Linux wujing 3.8.13 #1 SMP PREEMPT Wed May 8 18:43:42 CST 2016 i686 GNU/Linux

   接下来要关闭之后 重启,就如原来的系统,执行以下命令。由于我最后还是有问题(进入新内核之后无法操作,输入命令没有效果,无法访问目录,shutdown命令也不能实现)
重启进入原来系统之后  查看如下信息(在超级用户模式下进行以下命令)
root@wujing:/usr/src/linux-3.8.13# dmesg | grep I-pipe
[ 0.000000] I-pipe 2.8-04: pipeline enabled.
[ 3.080321] I-pipe: Domain Xenomai registered.
root@wujing:/usr/src/linux-3.8.13# dmesg | grep I-pipe
[ 0.000000] I-pipe 2.8-04: pipeline enabled.
[ 3.080321] I-pipe: Domain Xenomai registered.
root@wujing:/usr/src/linux-3.8.13# dmesg | grep Xenomai
[ 3.080321] I-pipe: Domain Xenomai registered.
[ 3.080367] Xenomai: hal/i386 started.
[ 3.080757] Xenomai: scheduling class idle registered.
[ 3.080772] Xenomai: scheduling class rt registered.
[ 3.081321] Xenomai: real-time nucleus v2.6.0 (Movin' On) loaded.
[ 3.081333] Xenomai: debug mode enabled.
[ 3.082899] Xenomai: starting native API services.
[ 3.082923] Xenomai: starting POSIX services.
[ 3.083330] Xenomai: starting RTDM services.
root@wujing:/usr/src/linux-3.8.13# cat /proc/ipipe/version
4
root@yangjia-desktop:/usr/src/linux-3.8.13# cat /proc/xenomai/version
2.6.3
如出现以上信息表明补丁已经打好。
八、配置和编译xenomai
/*是否增加--enable-x86-sep --enable-x86-tsc需要查看cpu的信息:用命令cat /proc/cpuinfo,如果在flag中出现则添加*/
cd /usr/src/xenomai-2.6.3
./configure --enable-shared --enable-smp --enable-posix-auto-mlockall --enable-dlopen-skins --enable-x86-sep -–enable-x86-tsc
make
sudo make install
我用cat/proc/cpuinfo/在flag中没有看到--enable-x86-sep --enable-x86-tsc
第一次没有加--enable-x86-sep --enable-x86-tsc
报错为--enable-dlopen-skins   --enable-posix-auto-mlockall  没有
第二次加了--enable-x86-sep --enable-x86-tsc
仍报错为--enable-dlopen-skins --enable-posix-auto-mlockall 没有
接下来执行以下命令
cd /usr/xenomai/bin/
export LD_LIBRARY_PATH=/usr/xenomai/lib/
./cyclictest
./latency
正常情况会出现如下结果,我没有出现
== Sampling period: 100 us
== Test mode: periodic user-mode task
== All results in microseconds
warming up...
RTT| 00:00:01 (periodic user-mode task, 100 us period, priority 99)
RTH|----lat min|----lat avg|----lat max|-overrun|---msw|---lat best|--lat worst
RTD| -1.449| 2.415| 19.886| 0| 0| -1.449| 19.886
RTD| -1.470| 2.412| 19.979| 0| 0| -1.470| 19.979
RTD| -1.456| 2.384| 15.410| 0| 0| -1.470| 19.979
RTD| -1.668| 2.401| 20.585| 0| 0| -1.668| 20.585
RTD| -1.445| 2.364| 18.106| 0| 0| -1.668| 20.585
RTD| -1.671| 2.377| 18.016| 0| 0| -1.671| 20.585
RTD| -1.475| 2.384| 19.541| 0| 0| -1.671| 20.585
RTD| -1.470| 2.356| 17.344| 0| 0| -1.671| 20.585
RTD| -1.483| 2.418| 20.039| 0| 0| -1.671| 20.585
RTD| -1.469| 2.374| 14.998| 0| 0| -1.671| 20.585
(Contrôle-C)
---|-----------|-----------|-----------|--------|------|-------------------------
RTS| -1.671| 2.388| 20.585| 0| 0| 00:00:10/00:00:10