1、webpack的简单使用
一般项目中不会直接编译ts代码,而是使用打包工具来进行
ts_webpack文件夹
初始化项目:npm init -y(生成package.json)
下载构建工具:npm i -D webpack webpack-cli typescript ts-loader
webpack:构建工具webpack
webpack-cli:webpack的命令行工具
typescript:ts的编译器
ts-loader:ts加载器,用于在webpack中编译ts文件
配置webpack:
1、根目录下创建webpack的配置文件:webpack.config.js
const path = require('path')
module.exports = {
  mode: 'none',
  entry: './src/index.ts', // 指定入口文件
  output: {
    path: path.resolve(__dirname, 'dist'), // 指定打包文件的目录
    filename: 'bundle.js' // 打包后文件的名称
  },
  // 指定webpack打包时要使用的模块
  module: {
    // 指定loader加载的规则
    rules: [
      {
        test: /.ts$/, // 指定规则生效的文件:以ts结尾的文件
        use: 'ts-loader', // 要使用的loader
        exclude: /node-modules/ // 要排除的文件
      }
    ]
  },
  // 设置哪些文件类型可以作为模块被引用
  resolve: {
    extensions: ['.ts', '.js']
  }
}
2、根目录下创建tsconfig.json:
{
  "compilerOptions": {
    "module": "ES6",
    "target": "ES6",
    "strict": true
  }
}
3、在package.json中加上build命令"build": "webpack"

4、执行npm run build,项目根目录下会生成dist/bundle.js
2、webpack中常用的插件
1、html-webpack-plugin 打包时自动创建html文件,并自动引入js文件
①安装插件:cnpm i -D html-webpack-plugin
②引入和使用插件
const HtmlWebpackPlugin = require('html-webpack-plugin')

...

plugins: [new HtmlWebpackPlugin()]
③打包:npm run build
打包后dist中会生成index.html
④html-webpack-plugin插件的配置项
    new HtmlWebpackPlugin({
      title: '自定义标题', // 自定义title标签内容
      template: './src/template.html' // 以template.html文件作为模板生成dist/index.html(设置了template,title就失效了)
    })
2、webpack-dev-server 热更新
①安装插件:npm i -D webpack-dev-server
②在package.json中加上start命令:"start": "webpack serve --open chrome.exe"

③执行npm start,会自动打开谷歌浏览器
如果打开的是http://localhost:8081/chrome.exe,手动将/chrome.exe去掉
如果报这个错:

在webpack.config.js中设置mode属性,可选值有'production'、'development'、'none'
④此时,在index.ts中编写的ts代码会在dist/index.html中实时更新
3、clean-webpack-plugin 在build前清空dist目录所有文件,避免旧文件的遗留
①安装插件:npm i -D clean-webpack-plugin
②引入和使用:
const { CleanWebpackPlugin } = require('clean-webpack-plugin') // clean插件

...

new CleanWebpackPlugin()
3、babel的使用
为了使代码能够兼容不同的浏览器,我们需要使用babel工具(与webpack结合一起使用)
①安装插件:npm i -D @babel/core @babel/preset-env babel-loader core-js
@babel/core:babel的核心工具
@babel/preset-env:babel的预设环境
babel-loader:babel与webpack结合的工具
core-js:模拟js运行环境,使老版本的浏览器支持新版es语法(比如Promise在ie11中不支持,添加corejs配置会引入corejs中封装的Promise)
②修改webpack配置文件,添加babel配置
          {
            loader: 'babel-loader', // 指定加载器
            // 设置babel
            options: {
              // 设置预定义的环境
              presets: [
                [
                  '@babel/preset-env', // 指定环境的插件
                  // 配置信息
                  {
                    targets: { chrome: 58, ie: 11 }, // 要兼容的目标浏览器及版本(ie11不支持es6语法,写上 ie: 11 打包时就会编译成支持到ie11)
                    corejs: 3, // 指定corejs的版本(根据package.json中的版本,只写整数)
                    useBuiltIns: 'usage' // 使用corejs的方式,'usage'表示按需加载
                  }
                ]
              ]
            }
          },
③此时,打包后的代码就支持到Chrome58和ie11了。
注意:ie11不支持es6,如果使用了Promise,则需要引入corejs,它会将自带的封装好的Promise打包到最终的bundle.js中,使用corejs时将useBuiltIns设置为'usage'则为按需引入
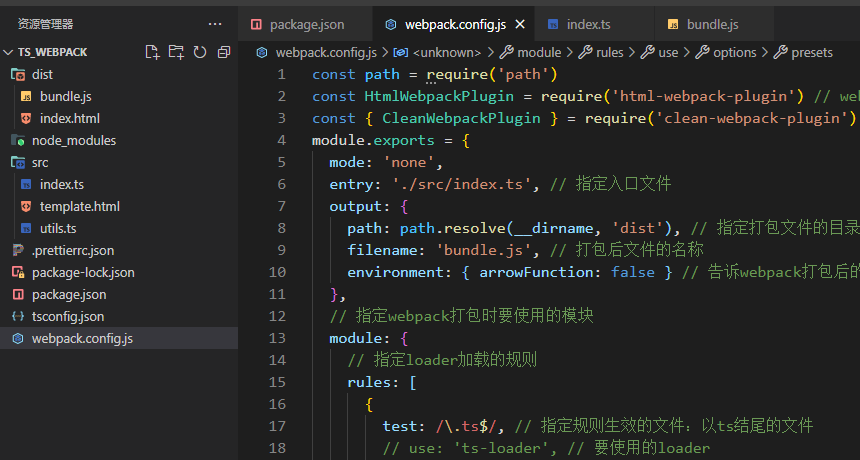
4、webpack.config.js最终配置文件
const path = require('path')
const HtmlWebpackPlugin = require('html-webpack-plugin') // webpack中html插件,用来自动创建html文件
const { CleanWebpackPlugin } = require('clean-webpack-plugin') // clean插件
module.exports = {
  mode: 'none',
  entry: './src/index.ts', // 指定入口文件
  output: {
    path: path.resolve(__dirname, 'dist'), // 指定打包文件的目录
    filename: 'bundle.js', // 打包后文件的名称
    environment: { arrowFunction: false } // 告诉webpack打包后的【立即执行函数】不使用箭头函数(新版的webpack不支持ie11,如果需要打包后的代码支持ie11需要加上该配置)
  },
  // 指定webpack打包时要使用的模块
  module: {
    // 指定loader加载的规则
    rules: [
      {
        test: /.ts$/, // 指定规则生效的文件:以ts结尾的文件
        // use: 'ts-loader', // 要使用的loader
        // ts先由ts-loader转换成js文件,再由babel中target指定的浏览器版本,将js转成对应的语法。配置了babel后不需要考虑使用es5还是es6的版本了,在target中指定了需要兼容的浏览器版本,babel会自动帮我们转
        use: [
          {
            loader: 'babel-loader', // 指定加载器
            // 设置babel
            options: {
              // 设置预定义的环境
              presets: [
                [
                  '@babel/preset-env', // 指定环境的插件
                  // 配置信息
                  {
                    targets: { chrome: 58, ie: 11 }, // 要兼容的目标浏览器及版本(ie11不支持es6语法,写上 ie: 11 打包时就会编译成支持到ie11)
                    corejs: 3, // 指定corejs的版本(根据package.json中的版本,只写整数)
                    useBuiltIns: 'usage' // 使用corejs的方式,'usage'表示按需加载
                  }
                ]
              ]
            }
          },
          'ts-loader'
        ],
        exclude: /node-modules/ // 要排除的文件
      }
    ]
  },
  // 配置webpack插件
  plugins: [
    new HtmlWebpackPlugin({
      title: '自定义标题', // 自定义title标签内容
      template: './src/template.html' // 以template.html文件作为模板生成dist/index.html(设置了template,title就失效了)
    }),
    new CleanWebpackPlugin()
  ],
  // 设置哪些文件类型可以作为模块被引用
  resolve: {
    extensions: ['.ts', '.js']
  }
}
目录结构:
