话不多说,直接上码。
<view class="section">
  <!--放一张图片或按钮  点击时去选择图片-->
  <image class='ph' src='{{photos}}' bindtap='touchphoto' mode='aspectFit'>  </image>
  <!--循环显示选中的图片-->
  <block wx:for="{{pics}}" wx:for-index="index">
  <view class="item" data-index="{{index}}" >
   <image class='ph' src='{{item}}' bindtap='touchphoto' mode='aspectFit'>  </image>
  </view>
    </block>
</view>
<button bindtap='sendFile'>上传</button>
js
// 在需要使用的js文件中,导入js var util = require('../../../utils/util.js'); var app = getApp(); Page({ data: { pics:[],//存放选中图片数组 photos: "../../../img/camera.jpg",//默认点击图片 fileNames:""// }, touchphoto: function (e) {//点击选择图片事件 var that = this var pic = this.data.pics; wx.chooseImage({ count: 9 - pic.length, //图片数量 默认9 sizeType: ['original', 'compressed'], // 可以指定是原图还是压缩图,默认二者都有 sourceType: ['album', 'camera'], // 可以指定来源是相册还是相机,默认二者都有 success: function (res) { // 返回选定照片的本地文件路径列表,tempFilePath可以作为img标签的src属性显示图片 var tempFilePaths = res.tempFilePaths; pic = pic.concat(tempFilePaths); that.setData({ pics:pic, //如果上传单张图片的话可以取消这个
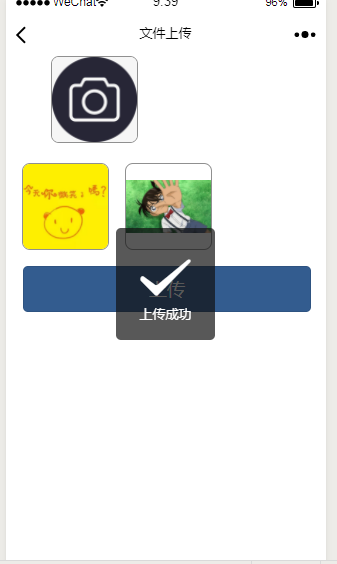
photos:tempFilePaths //如果上传单张图片的话,可以用这个 }) } }) }, sendFile: function (e) {//多图片上传 var paths = this.data.pics;//获取上传数组 for (var index in paths){//循环这个数组 var fileP = ""; fileP = fileP + paths[index];//获取当前循环到的图片 wx.uploadFile({ url: app.globalData.API_URL + '/uploadFileWX', filePath: fileP, name: 'file',//名称根据自己情况取 formData: {//除了要上传的附件外。其他额外要传的参数 'user': 'admin' }, success: function (res) {//上传成功方法 wx.showToast({ title: '上传成功', icon: 'success', duration: 2000 }) } }) } }, onLoad: function () { } })
css样式
.ph{
   200rpx;
  height: 200rpx;
  border: 1px solid #909090;
  margin-left:14%;
  border-radius: 20rpx;
}
.ph1{
   200rpx;
  height: 200rpx;
  border: 1px solid #909090;
  margin-left:5%;
  float: left;
  border-radius: 20rpx;
  margin-top: 5%;
  margin-bottom: 5%;
}

.btn{
    background: #335c8f;
    color: #fff;
    margin-left:40rpx;
    margin-right: 40rpx;
     90%;
}
java后台代码
  @RequestMapping(value = "/uploadFile", method = RequestMethod.POST)
    public @ResponseBody  Object uploadFile(HttpServletRequest request, HttpServletResponse response,
            @RequestParam(value = "file", required = false) MultipartFile file,
            @RequestParam(value = "user") String user,Model model) {
        try {
            request.setCharacterEncoding("UTF-8");

            if (!file.isEmpty()) {
                 System.out.println("成功获取照片");
                String fileName = file.getOriginalFilename();
                String path = null;
                String type = null;
                type = fileName.indexOf(".") != -1 ? fileName.substring(fileName.lastIndexOf(".") + 1,
                        fileName.length()) : null;
                if (type != null) {//类型验证,如果不需要验证的话,也可以取消这一步
                    if ("GIF".equals(type.toUpperCase()) || "PNG".equals(type.toUpperCase())
                            || "JPG".equals(type.toUpperCase())) {
                        // 项目在容器中实际发布运行的根路径
                        String realPath = request.getSession().getServletContext().getRealPath("/");
                        // 自定义的文件名称
                        String trueFileName = String.valueOf(System.currentTimeMillis()) + fileName;
                        // 设置存放图片文件的路径
                        path = realPath + "/resources/wxFile/" + trueFileName;
                        file.transferTo(new File(path));

                        model.addAttribute("resultCode", "200");
                    } else {
                         System.out.println("不是我们想要的文件类型,请按要求重新上传");
                        model.addAttribute("resultCode", "300");

                    }
                } else {
                     System.out.println("文件类型为空");
                    model.addAttribute("resultCode", "300");

                }
            } else {
                 System.out.println("没有找到相对应的文件");
                model.addAttribute("resultCode", "erro");
            }
        } catch (IOException e) {
            e.printStackTrace();
        }
        return model;
    }

看完是不是觉得特别简单?