本来还想给大家介绍介绍画板中笔的属性(线条粗细和虚线实线来着),后来因为时间的关系就不再细说了,想学的朋友可以自己看看属性,vs都有解释的或者大家去这个网址:http://www.cnblogs.com/stg609/archive/2008/03/16/1108407.html 学习一下,个人感觉还是不错的,因为我就是照着他的学的。
今天在这主要是说一说QQ截图的模拟实现,都是模仿。不过我也是做了几遍的。
1、在这里需要见一个项目,在项目中新建连个窗体(Main 和 Catch)

2、把命名为Catch.然后设置这个窗体的FormBorderStyle为None,WindowState为Maximized.(作为截图使用)
3、对其catch窗体进行代码编辑(事件引用我就不详细说了)


  1 using System;
  2 using System.Collections.Generic;
  3 using System.ComponentModel;
  4 using System.Data;
  5 using System.Drawing;
  6 using System.Linq;
  7 using System.Text;
  8 using System.Threading;
  9 using System.Threading.Tasks;
 10 using System.Windows.Forms;
 11
 12 namespace FromPaint3
 13 {
 14     public partial class Catch : Form
 15     {
 16
 17         #region 用户变量
 18         private Point DownPoint = Point.Empty;//记录鼠标按下坐标,用来确定绘图起点
 19         private bool CatchFinished = false;//用来表示是否截图完成
 20         private bool CatchStart = false;//表示截图开始
 21         private Bitmap originBmp;//用来保存原始图像
 22         private Rectangle CatchRect;//用来保存截图的矩形
 23         #endregion
 24
 25         public Catch()
 26         {
 27             InitializeComponent();
 28
 29             //全屏显示
 30             this.FormBorderStyle = System.Windows.Forms.FormBorderStyle.None;
 31             this.WindowState = System.Windows.Forms.FormWindowState.Maximized;
 32         }
 33         /// <summary>
 34         /// 窗体初始化
 35         /// </summary>
 36         /// <param name="sender"></param>
 37         /// <param name="e"></param>
 38         private void Catch_Load(object sender, EventArgs e)
 39         {
 40             this.SetStyle(ControlStyles.OptimizedDoubleBuffer | ControlStyles.AllPaintingInWmPaint | ControlStyles.UserPaint, true);
 41             this.UpdateStyles();
 42             //以上两句是为了设置控件样式为双缓冲,这可以有效减少图片闪烁的问题,关于这个大家可以自己去搜索下
 43             originBmp = new Bitmap(this.BackgroundImage);//BackgroundImage为全屏图片,我们另用变量来保存全屏图片
 44         }
 45
 46         //鼠标右键点击结束截图
 47         private void Catch_MouseClick(object sender, MouseEventArgs e)
 48         {
 49             if (e.Button == MouseButtons.Right)
 50             {
 51                 this.DialogResult = DialogResult.OK;
 52                 this.Close();
 53             }
 54         }
 55
 56         //鼠标左键按下时动作
 57         private void Catch_MouseDown(object sender, MouseEventArgs e)
 58         {
 59             if (e.Button == MouseButtons.Left)
 60             {
 61                 if (!CatchStart)
 62                 {//如果捕捉没有开始
 63                     CatchStart = true;
 64                     DownPoint = new Point(e.X, e.Y);//保存鼠标按下坐标
 65                 }
 66             }
 67         }
 68
 69         private void Catch_MouseMove(object sender, MouseEventArgs e)
 70         {
 71             if (CatchStart)
 72             {//如果捕捉开始
 73                 Bitmap destBmp = (Bitmap)originBmp.Clone();//新建一个图片对象,并让它与原始图片相同
 74                 Point newPoint = new Point(DownPoint.X, DownPoint.Y);//获取鼠标的坐标
 75                 Graphics g = Graphics.FromImage(destBmp);//在刚才新建的图片上新建一个画板
 76                 Pen p = new Pen(Color.Blue, 1);
 77                 int width = Math.Abs(e.X - DownPoint.X), height = Math.Abs(e.Y - DownPoint.Y);//获取矩形的长和宽
 78                 if (e.X < DownPoint.X)
 79                 {
 80                     newPoint.X = e.X;
 81                 }
 82                 if (e.Y < DownPoint.Y)
 83                 {
 84                     newPoint.Y = e.Y;
 85                 }
 86                 CatchRect = new Rectangle(newPoint, new Size(width, height));//保存矩形
 87                 g.DrawRectangle(p, CatchRect);//将矩形画在这个画板上
 88                 g.Dispose();//释放目前的这个画板
 89                 p.Dispose();
 90                 Graphics g1 = this.CreateGraphics();//重新新建一个Graphics类
 91                 //如果之前那个画板不释放,而直接g=this.CreateGraphics()这样的话无法释放掉第一次创建的g,因为只是把地址转到新的g了.如同string一样
 92                 g1 = this.CreateGraphics();//在整个全屏窗体上新建画板
 93                 g1.DrawImage(destBmp, new Point(0, 0));//将刚才所画的图片画到这个窗体上
 94                 //这个也可以属于二次缓冲技术,如果直接将矩形画在窗体上,会造成图片抖动并且会有无数个矩形.
 95                 g1.Dispose();
 96                 destBmp.Dispose();//要及时释放,不然内存将会被大量消耗
 97
 98             }
 99         }
100
101         private void Catch_MouseUp(object sender, MouseEventArgs e)
102         {
103             if (e.Button == MouseButtons.Left)
104             {
105                 if (CatchStart)
106                 {
107                     CatchStart = false;
108                     CatchFinished = true;
109
110                 }
111             }
112         }
113
114         private void Catch_MouseDoubleClick(object sender, MouseEventArgs e)
115         {
116             if (e.Button == MouseButtons.Left && CatchFinished)
117             {
118                 if (CatchRect.Contains(new Point(e.X, e.Y)))
119                 {
120                     Bitmap CatchedBmp = new Bitmap(CatchRect.Width, CatchRect.Height);//新建一个于矩形等大的空白图片
121                     Graphics g = Graphics.FromImage(CatchedBmp);
122                     g.DrawImage(originBmp, new Rectangle(0, 0, CatchRect.Width, CatchRect.Height), CatchRect, GraphicsUnit.Pixel);
123                     //把orginBmp中的指定部分按照指定大小画在画板上
124                     Clipboard.SetImage(CatchedBmp);//将图片保存到剪贴板
125                     g.Dispose();
126                     CatchFinished = false;
127                     this.BackgroundImage = originBmp;
128                     CatchedBmp.Dispose();
129                     this.DialogResult = DialogResult.OK;
130                     this.Close();
131                 }
132             }
133         }
134
135     }
136 }
4、既然有截图了,我们还需要有截图功能的使用开关,所以刚开始建的main窗体就有用了(代码如下)
using System;
using System.Collections.Generic;
using System.ComponentModel;
using System.Data;
using System.Drawing;
using System.Linq;
using System.Text;
using System.Threading;
using System.Threading.Tasks;
using System.Windows.Forms;

namespace FromPaint3
{
    public partial class main : Form
    {
        #region 用户变量
        private Point DownPoint = Point.Empty;//记录鼠标按下坐标,用来确定绘图起点
        #endregion

        public main()
        {
            InitializeComponent();
        }

        private void Form1_Load(object sender, EventArgs e)
        {

        }

        private void 截屏ToolStripMenuItem_Click(object sender, EventArgs e)
        {
            this.Hide();//隐藏当前窗体
            Thread.Sleep(50);//让线程睡眠一段时间,窗体消失需要一点时间
            Catch CatchForm = new Catch();
            Bitmap CatchBmp = new Bitmap(Screen.AllScreens[0].Bounds.Width, Screen.AllScreens[0].Bounds.Height);//新建一个和屏幕大小相同的图片
            Graphics g = Graphics.FromImage(CatchBmp);
            g.CopyFromScreen(new Point(0, 0), new Point(0, 0), new Size(Screen.AllScreens[0].Bounds.Width, Screen.AllScreens[0].Bounds.Height));//保存全屏图片
            CatchForm.BackgroundImage = CatchBmp;//将Catch窗体的背景设为全屏时的图片
            if (CatchForm.ShowDialog() == DialogResult.OK)
            {
                //如果Catch窗体结束,就将剪贴板中的图片放到信息发送框中
                IDataObject iData = Clipboard.GetDataObject();
                DataFormats.Format myFormat = DataFormats.GetFormat(DataFormats.Bitmap);
                if (iData.GetDataPresent(DataFormats.Bitmap))
                {
                    richtextbox1.Paste(myFormat);
                    Clipboard.Clear();//清除剪贴板中的对象
                }
                this.Show();//重新显示窗体
            }
        }
    }
}
这是我main窗体的截图
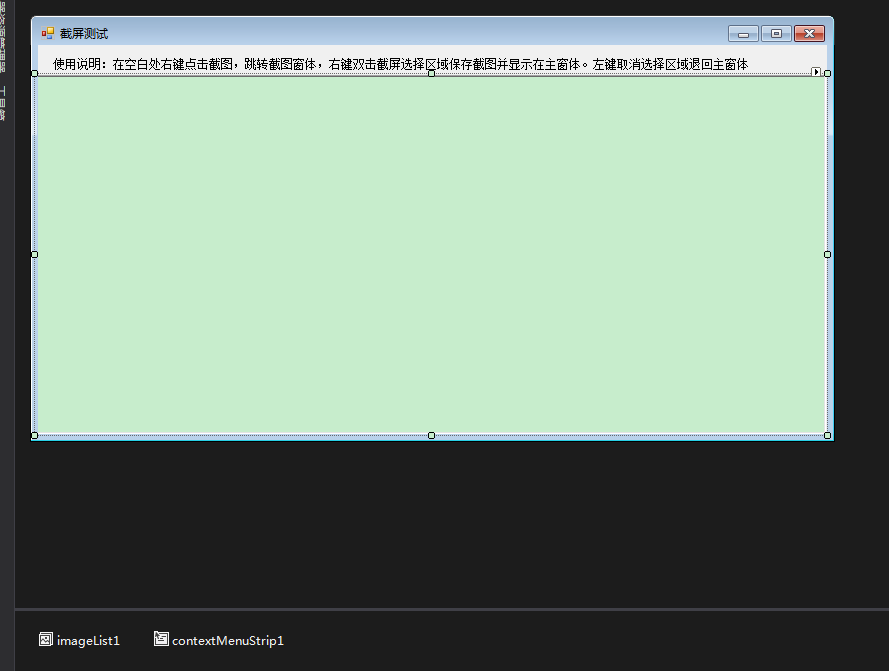
截屏特效我在这用的是右键菜单
5、现在你就可以运行程序,看看效果了
希望对大家有帮助吧
如果没有运行出来大家可以去http://www.cnblogs.com/stg609/archive/2008/03/19/1113694.html 看一看
版权声明:本文版权归作者和博客园共有,欢迎转载,但未经作者同意必须保留此段声明,且在文章页面明显位置给出原文连接,否则保留追究法律责任的权利。
作者:黯淡の青春 博客地址:http://www.cnblogs.com/wuwangqianxun/