在Android系统中,提供了独特的匿名共享内存子系统Ashmem(Anonymous Shared Memory),它以驱动程序的形式实现在内核空间中。它有两个特点,一是能够辅助内存管理系统来有效地管理不再使用的内存块,二是它通过Binder进程间通信机制来实现进程间的内存共享。本文中,我们将通过实例来简要介绍Android系统的匿名共享内存的使用方法,使得我们对Android系统的匿名共享内存机制有一个感性的认识,为进一步学习它的源代码实现打下基础。
《Android系统源代码情景分析》一书正在进击的程序员网(http://0xcc0xcd.com)中连载,点击进入!
Android系统的匿名共享内存子系统的主体是以驱动程序的形式实现在内核空间的,同时,在系统运行时库层和应用程序框架层提供了访问接口,其中,在系统运行时库层提供了C/C++调用接口,而在应用程序框架层提供了Java调用接口。这里,我们将直接通过应用程序框架层提供的Java调用接口来说明匿名共享内存子系统Ashmem的使用方法,毕竟我们在Android开发应用程序时,是基于Java语言的,而实际上,应用程序框架层的Java调用接口是通过JNI方法来调用系统运行时库层的C/C++调用接口,最后进入到内核空间的Ashmem驱动程序去的。
我们在这里举的例子是一个名为Ashmem的应用程序,它包含了一个Server端和一个Client端实现,其中,Server端是以Service的形式实现的,在这里Service里面,创建一个匿名共享内存文件,而Client是一个Activity,这个Activity通过Binder进程间通信机制获得前面这个Service创建的匿名共享内存文件的句柄,从而实现共享。在Android应用程序框架层,提供了一个MemoryFile接口来封装了匿名共享内存文件的创建和使用,它实现在frameworks/base/core/java/android/os/MemoryFile.java文件中。下面,我们就来看看Server端是如何通过MemoryFile类来创建匿名共享内存文件的以及Client是如何获得这个匿名共享内存文件的句柄的。
在MemoryFile类中,提供了两种创建匿名共享内存的方法,我们通过MemoryFile类的构造函数来看看这两种使用方法:
public class MemoryFile
{
	......

	/**
	* Allocates a new ashmem region. The region is initially not purgable.
	*
	* @param name optional name for the file (can be null).
	* @param length of the memory file in bytes.
	* @throws IOException if the memory file could not be created.
	*/
	public MemoryFile(String name, int length) throws IOException {
		mLength = length;
		mFD = native_open(name, length);
		mAddress = native_mmap(mFD, length, PROT_READ | PROT_WRITE);
		mOwnsRegion = true;
	}

	/**
	* Creates a reference to an existing memory file. Changes to the original file
	* will be available through this reference.
	* Calls to {@link #allowPurging(boolean)} on the returned MemoryFile will fail.
	*
	* @param fd File descriptor for an existing memory file, as returned by
	*        {@link #getFileDescriptor()}. This file descriptor will be closed
	*        by {@link #close()}.
	* @param length Length of the memory file in bytes.
	* @param mode File mode. Currently only "r" for read-only access is supported.
	* @throws NullPointerException if <code>fd</code> is null.
	* @throws IOException If <code>fd</code> does not refer to an existing memory file,
	*         or if the file mode of the existing memory file is more restrictive
	*         than <code>mode</code>.
	*
	* @hide
	*/
	public MemoryFile(FileDescriptor fd, int length, String mode) throws IOException {
		if (fd == null) {
			throw new NullPointerException("File descriptor is null.");
		}
		if (!isMemoryFile(fd)) {
			throw new IllegalArgumentException("Not a memory file.");
		}
		mLength = length;
		mFD = fd;
		mAddress = native_mmap(mFD, length, modeToProt(mode));
		mOwnsRegion = false;
	}

	......
} 从注释中,我们可以看出这两个构造函数的使用方法,这里就不再详述了。两个构造函数的主要区别是第一个参数,第一种构造方法是以指定的字符串调用JNI方法native_open来创建一个匿名共享内存文件,从而得到一个文件描述符,接着就以这个文件描述符为参数调用JNI方法natvie_mmap把这个匿名共享内存文件映射在进程空间中,然后就可以通过这个映射后得到的地址空间来直接访问内存数据了;第二种构造方法是以指定的文件描述符来直接调用JNI方法natvie_mmap把这个匿名共享内存文件映射在进程空间中,然后进行访问,而这个文件描述符就必须要是一个匿名共享内存文件的文件描述符,这是通过一个内部函数isMemoryFile来验证的,而这个内部函数isMemoryFile也是通过JNI方法调用来进一步验证的。前面所提到的这些JNI方法调用,最终都是通过系统运行时库层进入到内核空间的Ashmem驱动程序中去,不过这里我们不关心这些JNI方法、系统运行库层调用以及Ashmem驱动程序的具体实现,在接下来的两篇文章中,我们将会着重介绍,这里我们只关注MemoryFile这个类的使用方法。前面我们说到,我们在这里举的例子包含了一个Server端和一个Client端实现,其中, Server端就是通过前面一个构造函数来创建一个匿名共享内存文件,接着,Client端过Binder进程间通信机制来向Server请求这个匿名共享内存的文件描述符,有了这个文件描述符之后,就可以通过后面一个构造函数来共享这个内存文件了。
因为涉及到Binder进程间通信,我们首先定义好Binder进程间通信接口。Binder进程间通信机制的相关介绍,请参考前面一篇文章Android进程间通信(IPC)机制Binder简要介绍和学习计划,这里就不详细介绍了,直接进入主题。
首先在源代码工程的packages/experimental目录下创建一个应用程序工程目录Ashmem。关于如何获得Android源代码工程,请参考在Ubuntu上下载、编译和安装Android最新源代码一文;关于如何在Android源代码工程中创建应用程序工程,请参考在Ubuntu上为Android系统内置Java应用程序测试Application Frameworks层的硬件服务一文。这里,工程名称就是Ashmem了,它定义了一个路径为shy.luo.ashmem的package,这个例子的源代码主要就是实现在这里了。下面,将会逐一介绍这个package里面的文件。
这里要用到的Binder进程间通信接口定义在src/shy/luo/ashmem/IMemoryService.java文件中:
package shy.luo.ashmem;

import android.util.Log;
import android.os.IInterface;
import android.os.Binder;
import android.os.IBinder;
import android.os.Parcel;
import android.os.ParcelFileDescriptor;
import android.os.RemoteException;

public interface IMemoryService extends IInterface {
	public static abstract class Stub extends Binder implements IMemoryService {
		private static final String DESCRIPTOR = "shy.luo.ashmem.IMemoryService";

		public Stub() {
			attachInterface(this, DESCRIPTOR);
		}

		public static IMemoryService asInterface(IBinder obj) {
			if (obj == null) {
				return null;
			}

			IInterface iin = (IInterface)obj.queryLocalInterface(DESCRIPTOR);
			if (iin != null && iin instanceof IMemoryService) {
				return (IMemoryService)iin;
			}

			return new IMemoryService.Stub.Proxy(obj);
		}

		public IBinder asBinder() {
			return this;
		}

		@Override
		public boolean onTransact(int code, Parcel data, Parcel reply, int flags) throws android.os.RemoteException {
			switch (code) {
			case INTERFACE_TRANSACTION: {
				reply.writeString(DESCRIPTOR);
				return true;
			}
			case TRANSACTION_getFileDescriptor: {
				data.enforceInterface(DESCRIPTOR);

				ParcelFileDescriptor result = this.getFileDescriptor();

				reply.writeNoException();

				if (result != null) {
					reply.writeInt(1);
					result.writeToParcel(reply, 0);
				} else {
					reply.writeInt(0);
				}

				return true;
			}
			case TRANSACTION_setValue: {
				data.enforceInterface(DESCRIPTOR);

				int val = data.readInt();
				setValue(val);

				reply.writeNoException();

				return true;
			}
			}

			return super.onTransact(code, data, reply, flags);
		}

		private static class Proxy implements IMemoryService {
			private IBinder mRemote;

			Proxy(IBinder remote) {
				mRemote = remote;
			}

			public IBinder asBinder() {
				return mRemote;
			}

			public String getInterfaceDescriptor() {
				return DESCRIPTOR;
			}

			public ParcelFileDescriptor getFileDescriptor() throws RemoteException {
				Parcel data = Parcel.obtain();
				Parcel reply = Parcel.obtain();

				ParcelFileDescriptor result;

				try {
					data.writeInterfaceToken(DESCRIPTOR);

					mRemote.transact(Stub.TRANSACTION_getFileDescriptor, data, reply, 0);

					reply.readException();
					if (0 != reply.readInt()) {
						result = ParcelFileDescriptor.CREATOR.createFromParcel(reply);
					} else {
						result = null;
					}
				} finally {
					reply.recycle();
					data.recycle();
				}

				return result;
			}

			public void setValue(int val) throws RemoteException {
				Parcel data = Parcel.obtain();
				Parcel reply = Parcel.obtain();

				try {
					data.writeInterfaceToken(DESCRIPTOR);
					data.writeInt(val);

					mRemote.transact(Stub.TRANSACTION_setValue, data, reply, 0);

					reply.readException();
				} finally {
					reply.recycle();
					data.recycle();
				}
			}
		}

		static final int TRANSACTION_getFileDescriptor = IBinder.FIRST_CALL_TRANSACTION + 0;
		static final int TRANSACTION_setValue = IBinder.FIRST_CALL_TRANSACTION + 1;

	}

	public ParcelFileDescriptor getFileDescriptor() throws RemoteException;
	public void setValue(int val) throws RemoteException;
} 这里主要是定义了IMemoryService接口,它里面有两个调用接口:public ParcelFileDescriptor getFileDescriptor() throws RemoteException; public void setValue(int val) throws RemoteException;同时,还分别定义了用于Server端实现的IMemoryService.Stub基类和用于Client端使用的代理IMemoryService.Stub.Proxy类。关于Binder进程间通信机制在应用程序框架层的Java接口定义,请参考前面Android系统进程间通信Binder机制在应用程序框架层的Java接口源代码分析一文。
有了Binder进程间通信接口之后,接下来就是要在Server端实现一个本地服务了。这里,Server端实现的本地服务名为MemoryService,实现在src/shy/luo/ashmem/MemoryService.java文件中:
package shy.luo.ashmem;

import java.io.FileDescriptor;
import java.io.IOException;

import android.os.Parcel;
import android.os.MemoryFile;
import android.os.ParcelFileDescriptor;
import android.util.Log;

public class MemoryService extends IMemoryService.Stub {
	private final static String LOG_TAG = "shy.luo.ashmem.MemoryService";
	private MemoryFile file = null;

	public MemoryService() {
		try {
                        file = new MemoryFile("Ashmem", 4);
                        setValue(0);
                }
                catch(IOException ex) {
                        Log.i(LOG_TAG, "Failed to create memory file.");
                        ex.printStackTrace();
                }
	}

	public ParcelFileDescriptor getFileDescriptor() {
		Log.i(LOG_TAG, "Get File Descriptor.");

		ParcelFileDescriptor pfd = null;

		try {
			pfd = file.getParcelFileDescriptor();
		} catch(IOException ex) {
			Log.i(LOG_TAG, "Failed to get file descriptor.");
			ex.printStackTrace();
		}

		return pfd;
	}

	public void setValue(int val) {
		if(file == null) {
			return;
		}

		byte[] buffer = new byte[4];
		buffer[0] = (byte)((val >>> 24) & 0xFF);
		buffer[1] = (byte)((val >>> 16) & 0xFF);
		buffer[2] = (byte)((val >>> 8) & 0xFF);
		buffer[3] = (byte)(val & 0xFF);

		try {
			file.writeBytes(buffer, 0, 0, 4);
			Log.i(LOG_TAG, "Set value " + val + " to memory file. ");
		}
		catch(IOException ex) {
			Log.i(LOG_TAG, "Failed to write bytes to memory file.");
			ex.printStackTrace();
		}
	}
}
注意,这里的MemoryService类实现了IMemoryService.Stub类,表示这是一个Binder服务的本地实现。在构造函数中,通过指定文件名和文件大小来创建了一个匿名共享内存文件,即创建MemoryFile的一个实例,并保存在类成员变量file中。这个匿名共享内存文件名为"Ashmem",大小为4个节字,刚好容纳一个整数,我们这里举的例子就是要说明如果创建一个匿名共享内存来在两个进程间实现共享一个整数了。当然,在实际应用中,可以根据需要创建合适大小的共享内存来共享有意义的数据。 这里还实现了IMemoryService.Stub的两个接口getFileDescriptor和setVal,一个用来获取匿名共享内存文件的文件描述符,一个来往匿名共享内存文件中写入一个整数,其中,接口getFileDescriptor的返回值是一个ParcelFileDescriptor。在Java中,是用FileDescriptor类来表示一个文件描述符的,而ParcelFileDescriptor是用来序列化FileDescriptor的,以便在进程间调用时传输。
定义好本地服务好,就要定义一个Server来启动这个服务了。这里定义的Server实现在src/shy/luo/ashmem/Server.java文件中:
package shy.luo.ashmem;

import android.app.Service;
import android.content.Intent;
import android.os.IBinder;
import android.util.Log;
import android.os.ServiceManager;

public class Server extends Service {
    private final static String LOG_TAG = "shy.luo.ashmem.Server";

    private MemoryService memoryService = null;

    @Override
    public IBinder onBind(Intent intent) {
        return null;
    }

    @Override
    public void onCreate() {
	Log.i(LOG_TAG, "Create Memory Service...");

	memoryService = new MemoryService();

        try {
            ServiceManager.addService("AnonymousSharedMemory", memoryService);
            Log.i(LOG_TAG, "Succeed to add memory service.");
        } catch (RuntimeException ex) {
            Log.i(LOG_TAG, "Failed to add Memory Service.");
            ex.printStackTrace();
        }

    }

    @Override
    public void onStart(Intent intent, int startId) {
        Log.i(LOG_TAG, "Start Memory Service.");
    }

    @Override
    public void onDestroy() {
	Log.i(LOG_TAG, "Destroy Memory Service.");
    }
}
这个Server继承了Android系统应用程序框架层提供的Service类,当它被启动时,运行在一个独立的进程中。当这个Server被启动时,它的onCreate函数就会被调用,然后它就通过ServiceManager的addService接口来添加MemoryService了: memoryService = new MemoryService();
try {
ServiceManager.addService("AnonymousSharedMemory", memoryService);
Log.i(LOG_TAG, "Succeed to add memory service.");
} catch (RuntimeException ex) {
Log.i(LOG_TAG, "Failed to add Memory Service.");
ex.printStackTrace();
} 这样,当这个Server成功启动了,Client就可以通过ServiceManager的getService接口来获取这个MemoryService了。接着,我们就来看Client端的实现。Client端是一个Activity,实现在src/shy/luo/ashmem/Client.java文件中:
package shy.luo.ashmem;

import java.io.FileDescriptor;
import java.io.IOException;

import shy.luo.ashmem.R;
import android.app.Activity;
import android.content.Intent;
import android.os.Bundle;
import android.os.MemoryFile;
import android.os.ParcelFileDescriptor;
import android.os.ServiceManager;
import android.os.RemoteException;
import android.util.Log;
import android.view.View;
import android.view.View.OnClickListener;
import android.widget.Button;
import android.widget.EditText;

public class Client extends Activity implements OnClickListener {
	private final static String LOG_TAG = "shy.luo.ashmem.Client";

	IMemoryService memoryService = null;
	MemoryFile memoryFile = null;

	private EditText valueText = null;
	private Button readButton = null;
	private Button writeButton = null;
	private Button clearButton = null;

    	@Override
    	public void onCreate(Bundle savedInstanceState) {
        	super.onCreate(savedInstanceState);
        	setContentView(R.layout.main);

		IMemoryService ms = getMemoryService();
		if(ms == null) {
        		startService(new Intent("shy.luo.ashmem.server"));
		} else {
			Log.i(LOG_TAG, "Memory Service has started.");
		}

        	valueText = (EditText)findViewById(R.id.edit_value);
        	readButton = (Button)findViewById(R.id.button_read);
        	writeButton = (Button)findViewById(R.id.button_write);
        	clearButton = (Button)findViewById(R.id.button_clear);

		readButton.setOnClickListener(this);
        	writeButton.setOnClickListener(this);
        	clearButton.setOnClickListener(this);

        	Log.i(LOG_TAG, "Client Activity Created.");
    	}

    	@Override
    	public void onResume() {
		super.onResume();

		Log.i(LOG_TAG, "Client Activity Resumed.");
    	}

    	@Override
    	public void onPause() {
		super.onPause();

		Log.i(LOG_TAG, "Client Activity Paused.");
    	}

    	@Override
    	public void onClick(View v) {
    		if(v.equals(readButton)) {
    			int val = 0;

    			MemoryFile mf = getMemoryFile();
    			if(mf != null) {
				try {
    					byte[] buffer = new byte[4];
    					mf.readBytes(buffer, 0, 0, 4);

    					val = (buffer[0] << 24) | ((buffer[1] & 0xFF) << 16) | ((buffer[2] & 0xFF) << 8) | (buffer[3] & 0xFF);
				} catch(IOException ex) {
					Log.i(LOG_TAG, "Failed to read bytes from memory file.");
					ex.printStackTrace();
				}
    			}

    			String text = String.valueOf(val);
    			valueText.setText(text);
    		} else if(v.equals(writeButton)) {
    			String text = valueText.getText().toString();
    			int val = Integer.parseInt(text);

    			IMemoryService ms = getMemoryService();
    			if(ms != null) {
				try {
    					ms.setValue(val);
				} catch(RemoteException ex) {
					Log.i(LOG_TAG, "Failed to set value to memory service.");
					ex.printStackTrace();
				}
    			}
    		} else if(v.equals(clearButton)) {
    			String text = "";
    			valueText.setText(text);
    		}
    	}

    	private IMemoryService getMemoryService() {
    		if(memoryService != null) {
    			return memoryService;
    		}

    		memoryService = IMemoryService.Stub.asInterface(
                			ServiceManager.getService("AnonymousSharedMemory"));

		Log.i(LOG_TAG, memoryService != null ? "Succeed to get memeory service." : "Failed to get memory service.");

    		return memoryService;
    	}

    	private MemoryFile getMemoryFile() {
    		if(memoryFile != null) {
    			return memoryFile;
    		}

    		IMemoryService ms = getMemoryService();
    		if(ms != null) {
			try {
    				ParcelFileDescriptor pfd = ms.getFileDescriptor();
				if(pfd == null) {
					Log.i(LOG_TAG, "Failed to get memory file descriptor.");
					return null;
				}

				try {
					FileDescriptor fd = pfd.getFileDescriptor();
					if(fd == null) {
						Log.i(LOG_TAG, "Failed to get memeory file descriptor.");
						return null;
					}

    					memoryFile = new MemoryFile(fd, 4, "r");
				} catch(IOException ex) {
					Log.i(LOG_TAG, "Failed to create memory file.");
					ex.printStackTrace();
				}
    			} catch(RemoteException ex) {
				Log.i(LOG_TAG, "Failed to get file descriptor from memory service.");
				ex.printStackTrace();
			}
		}

    		return memoryFile;
    	}
} Client端的界面主要包含了三个按钮Read、Write和Clear,以及一个用于显示内容的文本框。这个Activity在onCreate时,会通过startService接口来启动我们前面定义的Server进程。调用startService时,需要指定要启动的服务的名称,这里就是"shy.luo.ashmem.server"了,后面我们会在程序的描述文件AndroidManifest.xml看到前面的Server类是如何和名称"shy.luo.ashmem.server"关联起来的。关于调用startService函数来启动自定义服务的过程,可以参考Android系统在新进程中启动自定义服务过程(startService)的原理分析一文。
内部函数getMemoryService用来获取IMemoryService。如果是第一次调用该函数,则会通过ServiceManager的getService接口来获得这个IMemoryService接口,然后保存在类成员变量memoryService中,以后再调用这个函数时,就可以直接返回memoryService了。
内部函数getMemoryFile用来从MemoryService中获得匿名共享内存文件的描述符。同样,如果是第一次调用该函数,则会通过IMemoryService的getFileDescriptor接口来获得MemoryService中的匿名共享内存文件的描述符,然后用这个文件描述符来创建一个MemoryFile实例,并保存在类成员变量memoryFile中,以后再调用这个函数时,就可以直接返回memoryFile了。
有了memoryService和memoryFile后,我们就可以在Client端访问Server端创建的匿名共享内存了。点击Read按钮时,就通过memoryFile的readBytes接口把共享内存中的整数读出来,并显示在文本框中;点击Write按钮时,就通过memoryService这个代理类的setVal接口来调用MemoryService的本地实现类的setVal服务,从而把文本框中的数值写到Server端创建的匿名共享内存中去;点击Clear按钮时,就会清空文本框的内容。这样,我们就可以通过Read和Write按钮来验证我们是否在Client和Server两个进程中实现内存共享了。
现在,我们再来看看Client界面的配置文件,它定义在res/layout/main.xml文件中:
<?xml version="1.0" encoding="utf-8"?>
<LinearLayout xmlns:android="http://schemas.android.com/apk/res/android"
    android:orientation="vertical"
    android:layout_width="fill_parent"
    android:layout_height="fill_parent"
    >
    <LinearLayout
    	android:layout_width="fill_parent"
    	android:layout_height="wrap_content"
    	android:orientation="vertical"
    	android:gravity="center">
    	<TextView
			android:layout_width="wrap_content"
       		android:layout_height="wrap_content"
        	android:text="@string/value">
    	</TextView>
    	<EditText
     		android:layout_width="fill_parent"
        	android:layout_height="wrap_content"
        	android:id="@+id/edit_value"
        	android:hint="@string/hint">
    	</EditText>
    </LinearLayout>
     <LinearLayout
    	android:layout_width="fill_parent"
    	android:layout_height="wrap_content"
    	android:orientation="horizontal"
    	android:gravity="center">
    	<Button
    		android:id="@+id/button_read"
    		android:layout_width="wrap_content"
    		android:layout_height="wrap_content"
    		android:text="@string/read">
    	</Button>
    	<Button
    		android:id="@+id/button_write"
    		android:layout_width="wrap_content"
    		android:layout_height="wrap_content"
    		android:text="@string/write">
    	</Button>
    	<Button
    		android:id="@+id/button_clear"
    		android:layout_width="wrap_content"
    		android:layout_height="wrap_content"
    		android:text="@string/clear">
    	</Button>
    </LinearLayout>
</LinearLayout> 相关的字符串定义在res/values/strings.xml文件中:<?xml version="1.0" encoding="utf-8"?>
<resources>
<string name="app_name">Ashmem</string>
<string name="value">Value</string>
<string name="hint">Please input a value...</string>
<string name="read">Read</string>
<string name="write">Write</string>
<string name="clear">Clear</string>
</resources> 这样,界面的相关配置文件就介绍完了。 我们还要再来看程序描述文件AndroidManifest.xml的相关配置,它位于Ashmem目录下:
<?xml version="1.0" encoding="utf-8"?>
<manifest xmlns:android="http://schemas.android.com/apk/res/android"
      package="shy.luo.ashmem"
      android:sharedUserId="android.uid.system"
      android:versionCode="1"
      android:versionName="1.0">
    <application android:icon="@drawable/icon" android:label="@string/app_name">
        <activity android:name=".Client"
                  android:label="@string/app_name">
            <intent-filter>
                <action android:name="android.intent.action.MAIN" />
                <category android:name="android.intent.category.LAUNCHER" />
            </intent-filter>
        </activity>
		<service
			android:enabled="true"
			android:name=".Server"
			android:process=".Server" >
			<intent-filter>
                <action android:name="shy.luo.ashmem.server"/>
                <category android:name="android.intent.category.DEFAULT"/>
            </intent-filter>
		</service>
    </application>
</manifest>
这里我们可以看到,下面的配置项把服务名称"shy.luo.ashmem.server"和本地服务类Server关联了起来: <service
android:enabled="true"
android:name=".Server"
android:process=".Server" >
<intent-filter>
<action android:name="shy.luo.ashmem.server"/>
<category android:name="android.intent.category.DEFAULT"/>
</intent-filter>
</service> 这样,我们就可以通过startService(new Intent("shy.luo.ashmem.server"))来启动这个Server了。不过,在Android中,启动服务是需要权限的,所以,下面这一行配置获取了启动服务需要的相应权限:android:sharedUserId="android.uid.system"最后,我们来看工程的编译脚本文件Android.mk,它位于Ashmem目录下:
LOCAL_PATH:= $(call my-dir)
include $(CLEAR_VARS)

LOCAL_MODULE_TAGS := optional

LOCAL_SRC_FILES += $(call all-subdir-java-files)

LOCAL_PACKAGE_NAME := Ashmem

LOCAL_CERTIFICATE := platform

include $(BUILD_PACKAGE)
这里又有一个关键的地方:
LOCAL_CERTIFICATE := platform因为我们需要在程序中启动Service,所以要配置这一行,并且要把源代码工程放在Android源代码平台中进行编译。
这样,整个例子的源代码实现就介绍完了,接下来就要编译了。有关如何单独编译Android源代码工程的模块,以及如何打包system.img,请参考如何单独编译Android源代码中的模块一文。
执行以下命令进行编译和打包:
USER-NAME@MACHINE-NAME:~/Android$ mmm packages/experimental/Ashmem
USER-NAME@MACHINE-NAME:~/Android$ make snod
这样,打包好的Android系统镜像文件system.img就包含我们前面创建的Ashmem应用程序了。
再接下来,就是运行模拟器来运行我们的例子了。关于如何在Android源代码工程中运行模拟器,请参考在Ubuntu上下载、编译和安装Android最新源代码一文。
执行以下命令启动模拟器:
USER-NAME@MACHINE-NAME:~/Android$ emulator模拟器启动起,就可以在Home Screen上看到Ashmem应用程序图标了:
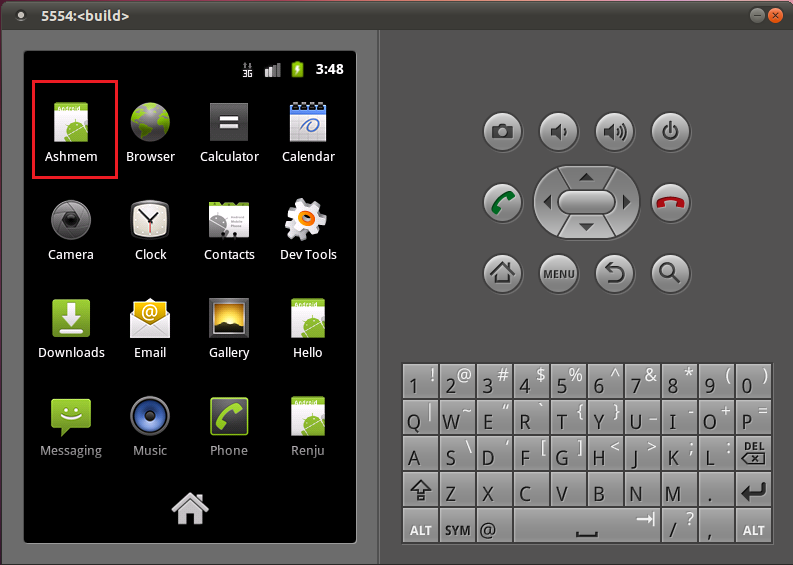
点击Ashmem图标,启动Ashmem应用程序,界面如下:
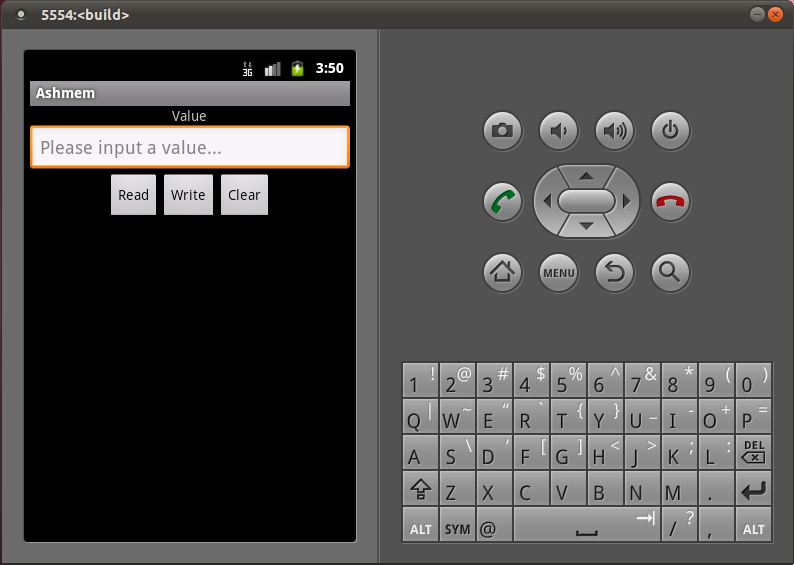
这样,我们就可以验证程序的功能了,看看是否实现了在两个进程中通过使用Android系统的匿名共享内存机制来共享内存数据的功能。
通过这个例子的学习,相信读者对Android系统匿名共享内存子系统Ashmem有了一个大概的认识,但是,这种认识还是停留在表面上。我们在文章开始时就提到,Android系统匿名共享内存子系统Ashmem两个特点,一是能够辅助内存管理系统来有效地管理不再使用的内存块,二是它通过Binder进程间通信机制来实现进程间的内存共享。第二个特点我们在上面这个例子中看到了,但是似乎还不够深入,我们知道,在Linux系统中,文件描述符其实就是一个整数,它是用来索引进程保存在内核空间的打开文件数据结构的,而且,这个文件描述符只是在进程内有效,也就是说,在不同的进程中,相同的文件描述符的值,代表的可能是不同的打开文件,既然是这样,把Server进程中的文件描述符传给Client进程,似乎就没有用了,但是不用担心,在传输过程中,Binder驱动程序会帮我们处理好一切,保证Client进程拿到的文件描述符是在本进程中有效的,并且它指向就是Server进程创建的匿名共享内存文件。至于第一个特点,我们也准备在后续学习Android系统匿名共享内存子系统Ashmem时,再详细介绍。
因此,为了深入了解Android系统匿名共享内存子系统Ashmem,在接下来的两篇文章中,围绕上面提到的两个特点,分别学习:
1. Android系统匿名共享内存子系统Ashmem是如何够辅助内存管理系统来有效地管理不再使用的内存块的?
2. Android系统匿名共享内存子系统Ashmem是如何通过Binder进程间通信机制来实现进程间的内存共享的?
学习完这两篇文章后,相信大家对 Android系统匿名共享内存子系统Ashmem就会有一个更深刻的认识了,敬请关注。
老罗的新浪微博:http://weibo.com/shengyangluo,欢迎关注!