对于编辑器,也可以设置编辑器所对应的菜单、工具栏和上下文菜单。实现这些功能需要实现IEditorActionBarContributor接口,EditorActionBarContributor类实现了该接口。代码如下:
1、添加JsEditorContributor.java
package com.testrcp.myrcp.editors;
import org.eclipse.jface.action.Action;
import org.eclipse.jface.action.IMenuManager;
import org.eclipse.jface.action.IToolBarManager;
import org.eclipse.jface.action.MenuManager;
import org.eclipse.ui.ISharedImages;
import org.eclipse.ui.PlatformUI;
import org.eclipse.ui.part.EditorActionBarContributor;

public class JsEditorContributor extends EditorActionBarContributor {
	private Action action1 ;
	private Action action2 ;
	public JsEditorContributor() {
		super();
		makeActions();
	}

	public void makeActions() {
		action1 = new Action() {
			public void run() {

			}
		};
		action1.setText("Action 1");
		action1.setToolTipText("Action 1 tooltip");
		action1.setImageDescriptor(PlatformUI.getWorkbench().getSharedImages().
				getImageDescriptor(ISharedImages.IMG_DEF_VIEW));

		action2 = new Action() {
			public void run() {

			}
		};
		action2.setText("Action 2");
		action2.setToolTipText("Action 2 tooltip");
		action2.setImageDescriptor(PlatformUI.getWorkbench().getSharedImages().
				getImageDescriptor(ISharedImages.IMG_OBJS_WARN_TSK));

	}

	//覆盖父类中的方法,创建菜单
	public void contributeToMenu(IMenuManager menuManager) {
		MenuManager editMenu = new MenuManager("编辑器菜单");
		editMenu.add( action1 );
		editMenu.add( action2 );
		menuManager.add( editMenu );
	}

	//覆盖父类的方法,创建工具栏
	public void contributeToToolBar(IToolBarManager toolBarManager) {
		toolBarManager.add( action1 );
		toolBarManager.add( action2 );
	}
}
其中,创建菜单栏和工具栏的方法分别是覆盖父类中的contributeToMenu和contributeToToolBar方法。
2、在Perspective类的createInitialLayout方法中只留下下面两行代码:
   String editorArea = layout.getEditorArea();
   layout.addStandaloneView(OpenEditorView.ID,true,IPageLayout.RIGHT,.3f,editorArea);
3、在plugin.xml中添加如下代码
<extension
         point="org.eclipse.ui.editors">
      <editor
            class="com.testrcp.myrcp.editors.JsEditor"
            contributorClass="com.testrcp.myrcp.editors.JsEditorContributor"
            default="false"
            icon="icons/alt_about.gif"
            id="com.testrcp.myrcp.editors.JsEditor"
            name="JsEditor">
      </editor>
   </extension>
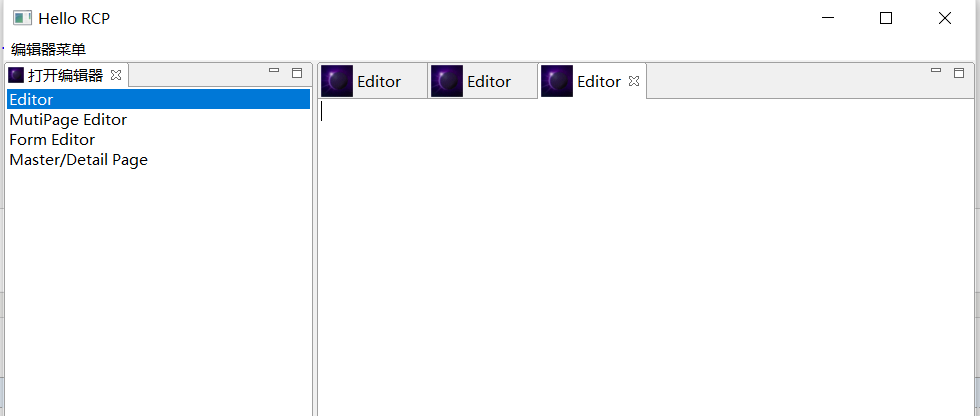
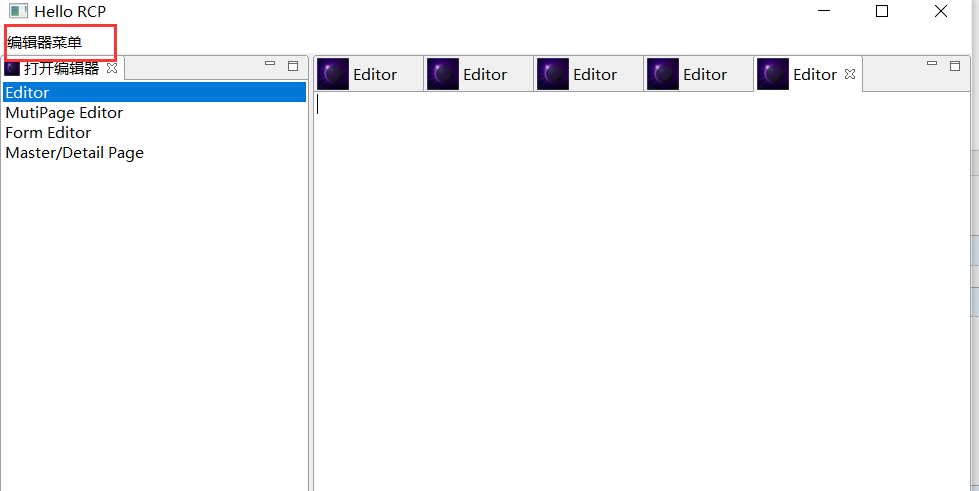
4、运行后的显示效果如下:
a、多次点击“Editor”行,显示效果如下:出现多个Editor

b、显示出来了“编辑器菜单”的菜单项

5、获取源码
链接:https://pan.baidu.com/s/1GjtxKitstcsdX2HvBSfJAg
提取码:oeah