半自动化之系统安装
自制应答文件
1. 使⽤kickstart半⾃动化安装CentOS系统
- 理解kickstart文件的作用和编写格式。
KickStart是一种半自动化的安装方式。KickStart的工作原理是通过记录典型的安装过程中所需人工干预填写的
各种参数,并生成一个名为ks.cfg的文件;在其后的安装过程中(不只局限于生成KickStart安装文件的机器)当
出现要求填写参数的情况时,安装程序会首先去查找KickStart生成的文件,当找到合适的参数时,就采用找到的
参数,当没有找到合适的参数时,才需要安装者手工干预。这样,如果KickStart文件涵盖了安装过程中出现的所
有需要填写的参数时,安装者完全可以只告诉安装程序从何处取ks.cfg文件,然后去忙自己的事情。等安装完毕,
安装程序会根据ks.cfg中设置的重启选项来重启系统,并结束安装。
2. KickStart⽂件格式与anaconda-ks.cfg⽂件格式⼗分类似,总体由三部分组成:
1. 命令段:
指明各种安装前配置,如键盘类型等
-
必备命令:
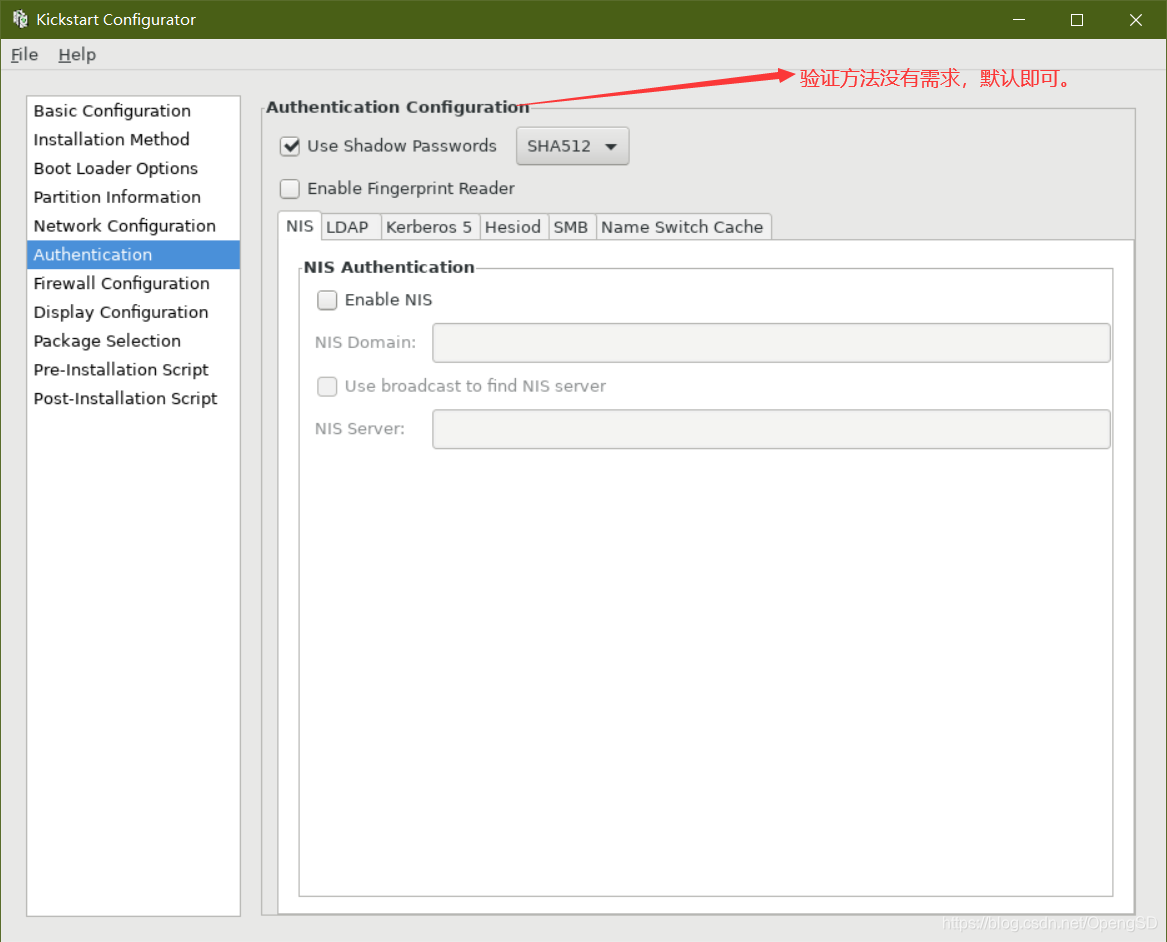
authconfig:认证方式配置
authconfig --useshadow --passalgo=sha512
bootloader:bootloader的安装位置及相关配置
bootloader --location=mbr --driveorder=sda –
append="crashkernel=auto rhgb quiet"
keyboard:设定键盘类型
ang:语言类型
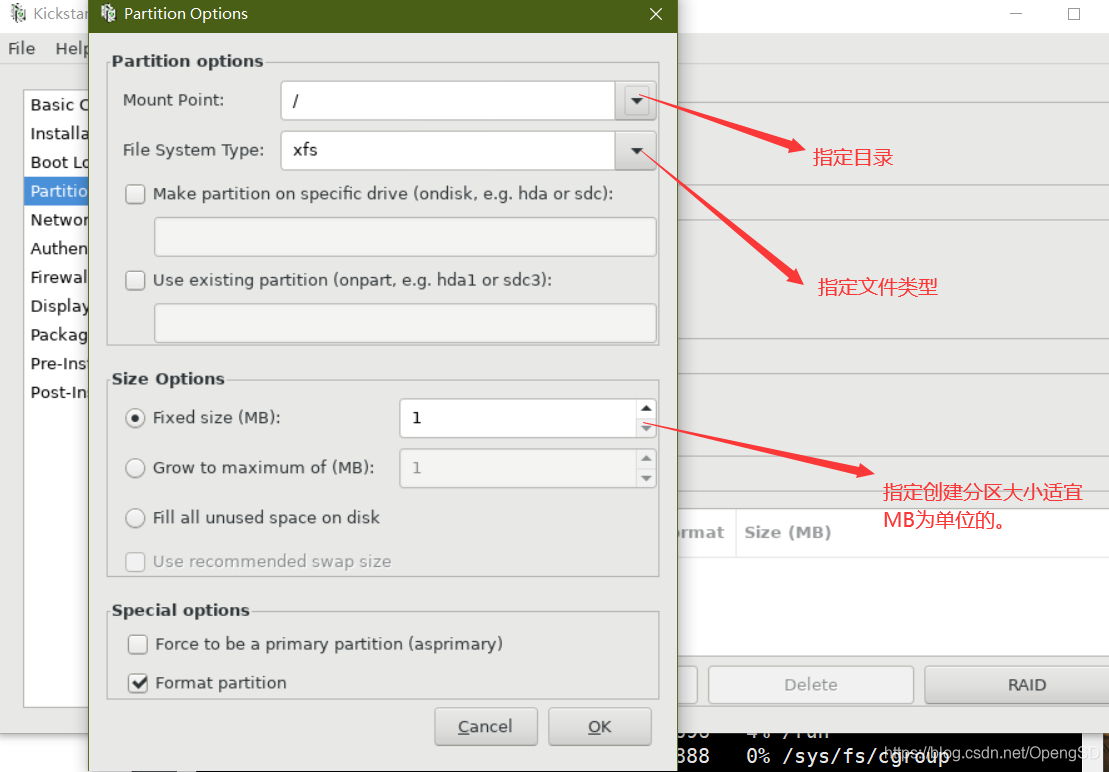
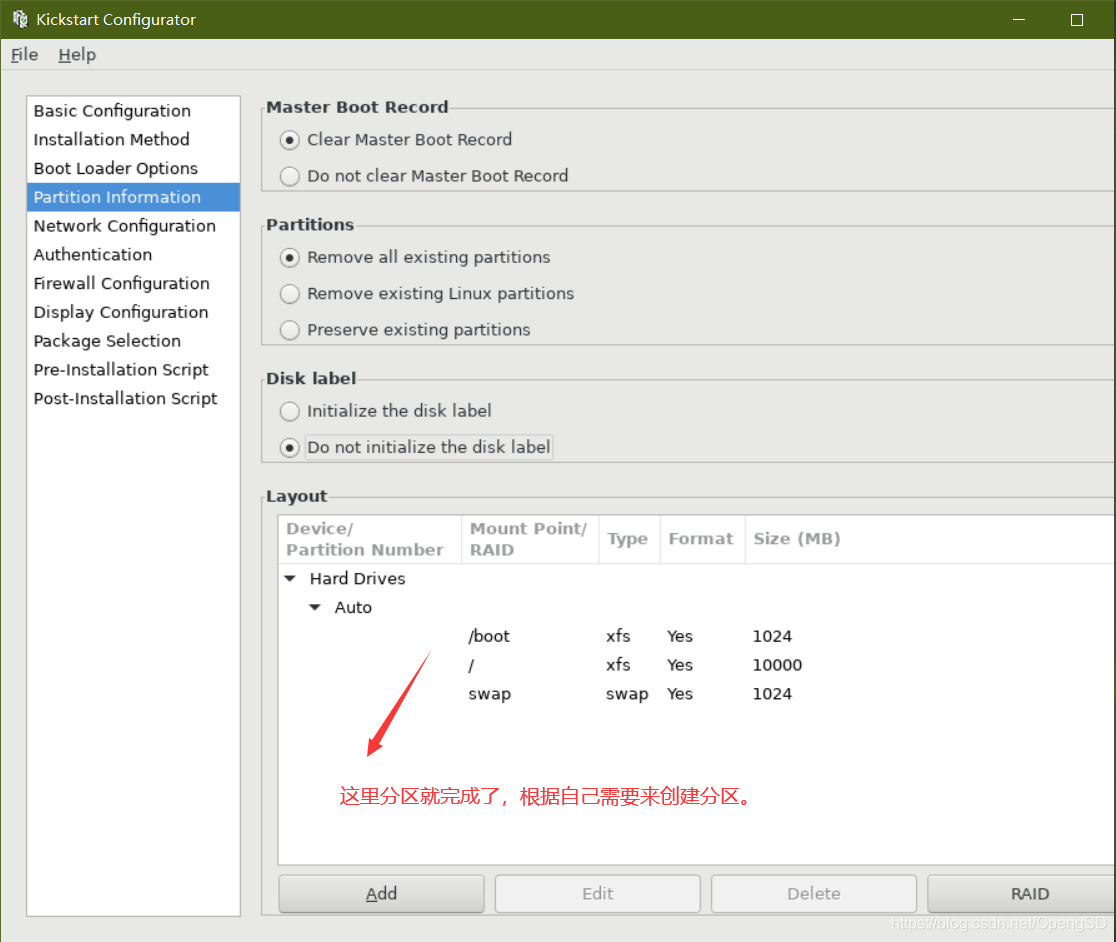
part:创建分区
rootpw:指明root的密码
timezone:时区 -
可选命令
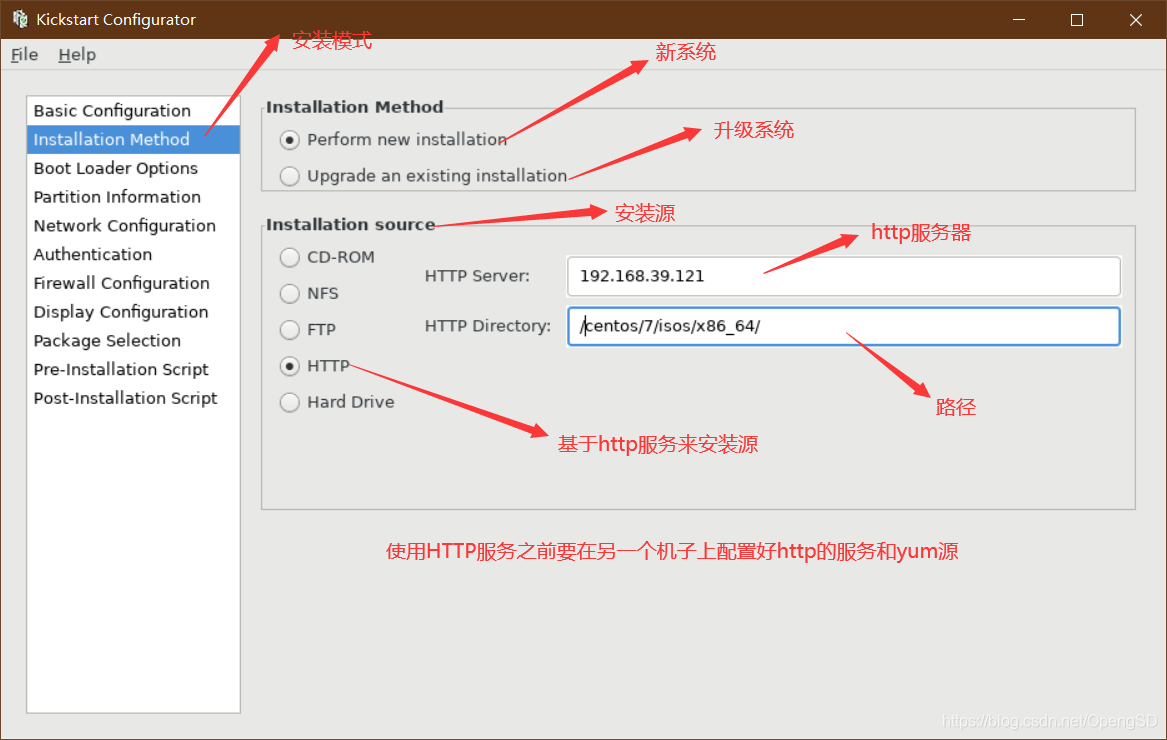
install OR upgrade
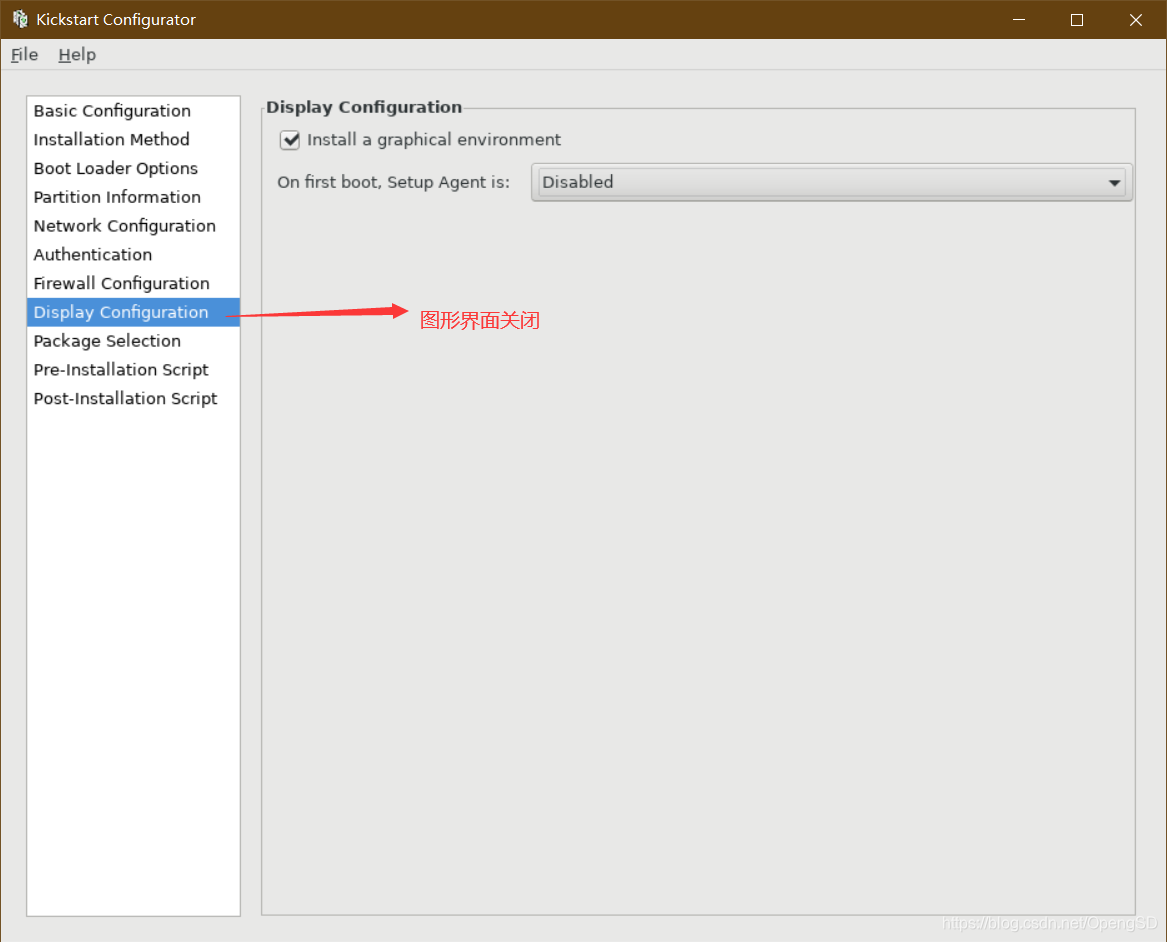
text:文本安装界面
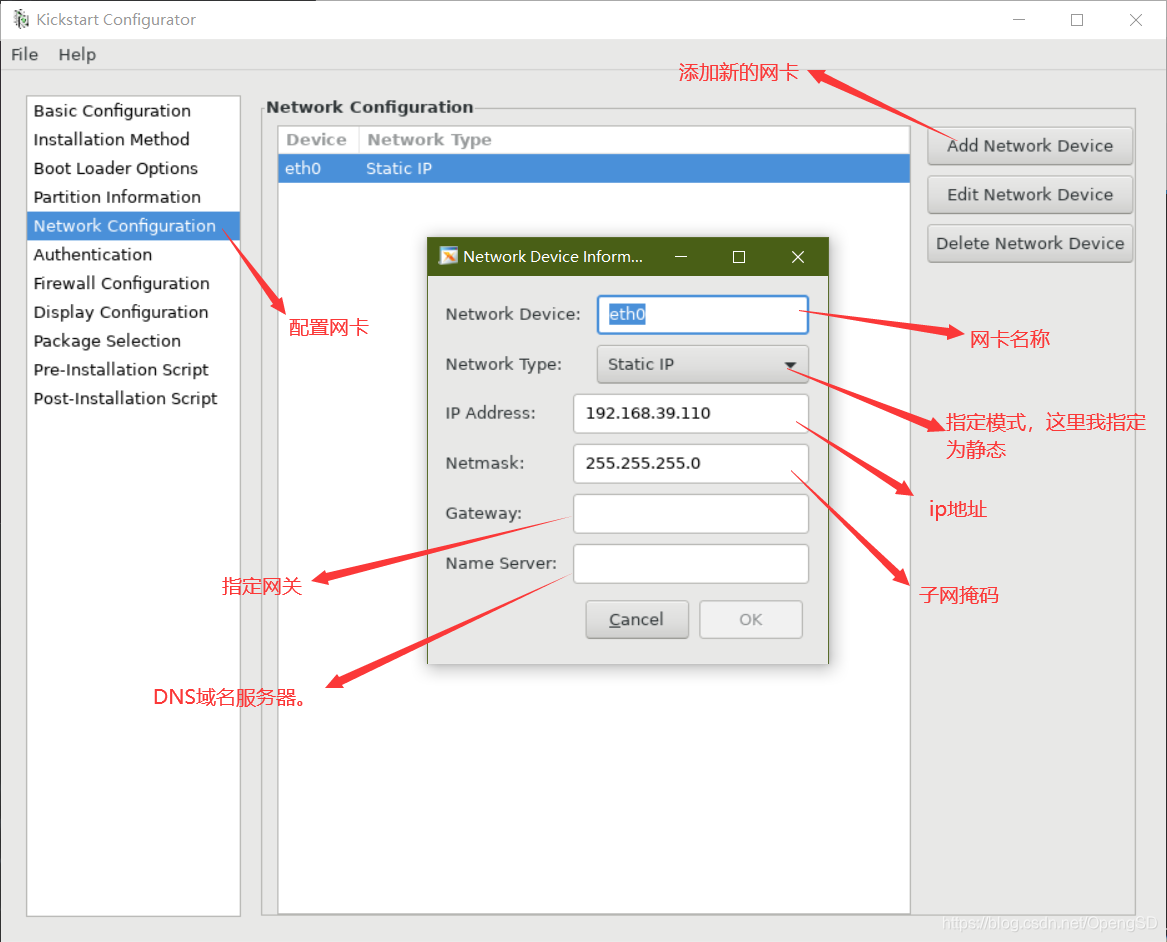
network
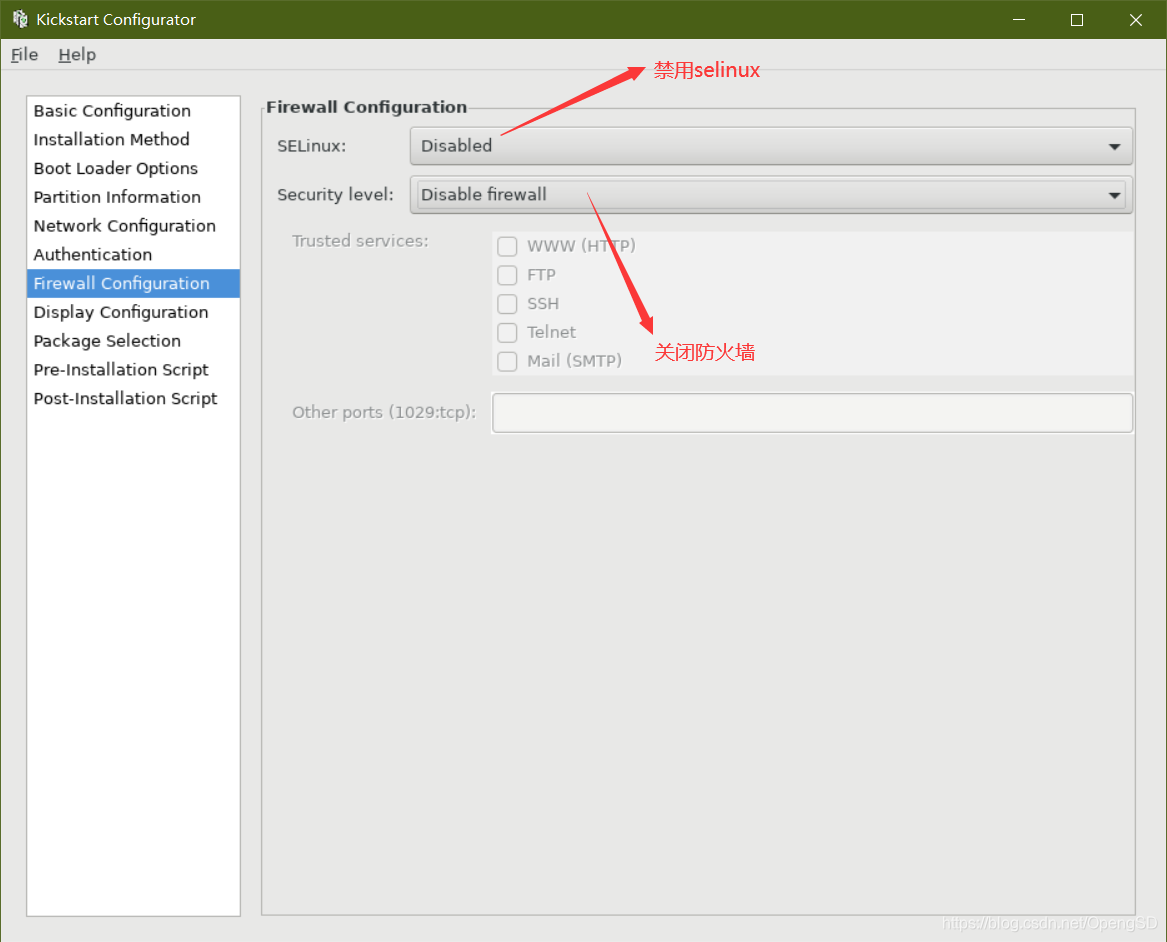
firewall
selinux
halt
poweroff
reboot
repo
user:安装完成后为系统创建新用户
url: 指明安装源
key –skip 跳过安装号码,适用于rhel版本
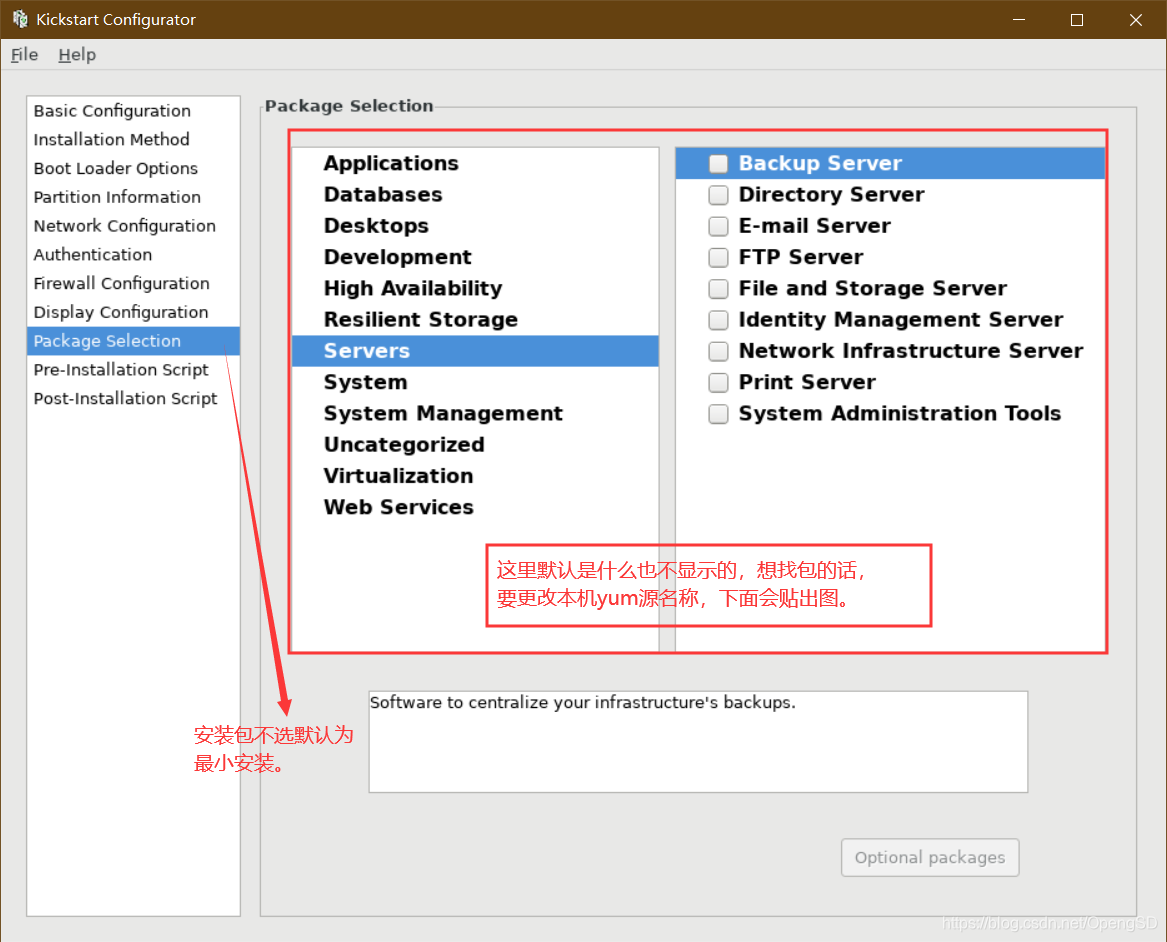
2. 程序包段:
指明要安装的程序包组或程序包,不安装的程序包等
%packages
@group_name
检查ks⽂件语法错误:
ksvalidator /path/to/ks.cfg
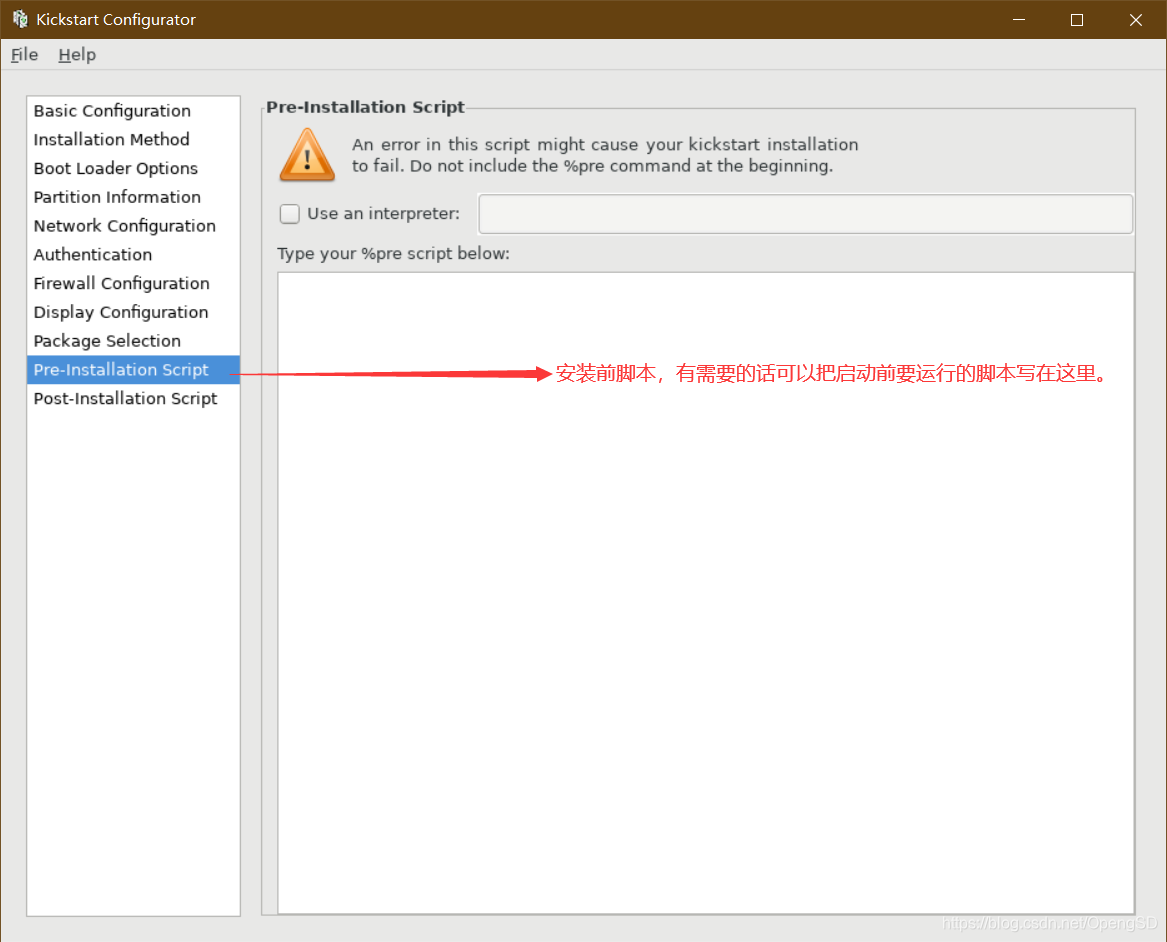
3. 脚本段:
%pre:安装前脚本
运行环境:运行于安装介质上的微型Linux环境
%post:安装后脚本
运行环境:安装完成的系统
安装后脚本非常有用,我们可以在这里定义系统安装完成后自动安装yum源,创建一些普通用户等功能。
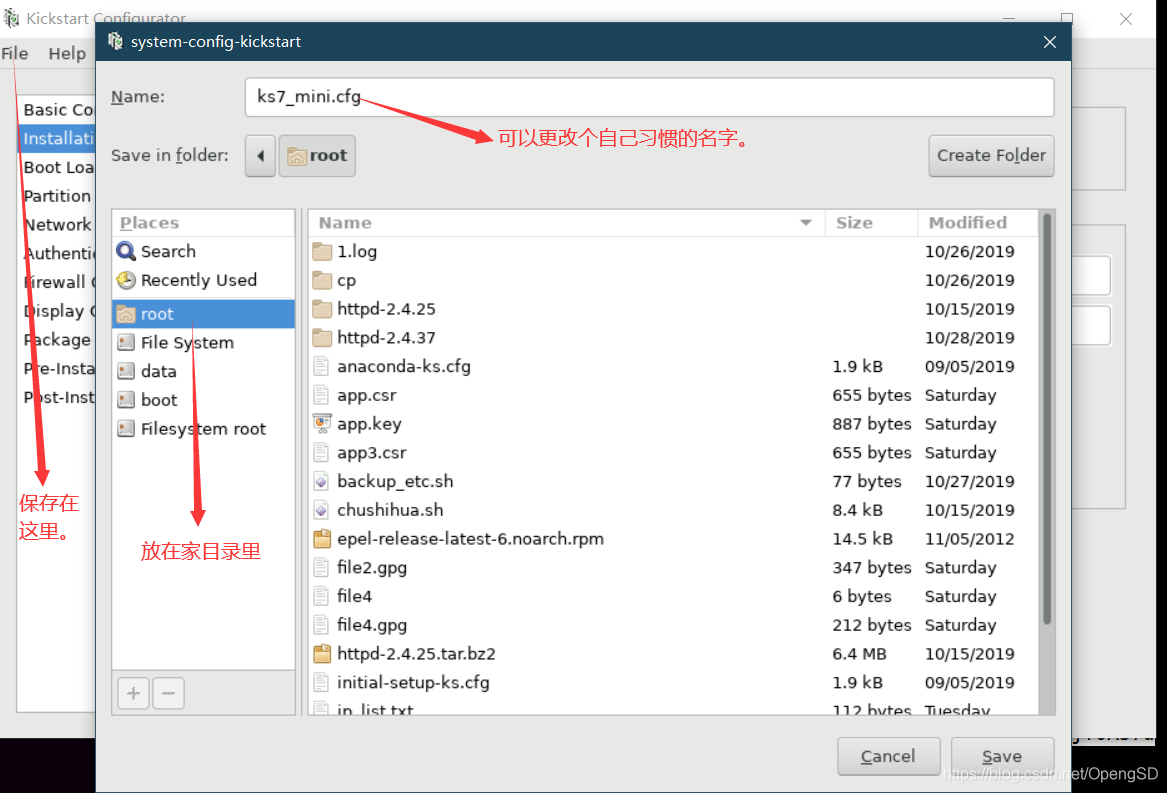
生成ks应答文件方法:
1.参照anaconda-ks.cfg文件修改(不常用)
2.利用system-config-kickstart图形工具制作(常用)
检查ks⽂件语法错误:
ksvalidator /path/to/ks.cfg
前提准备
系统安装程序anaconda以及光盘中isolinux目录的功能:
anaconda:系统安装程序
anaconda安装系统可分为三个阶段:
安装前配置阶段:
安装过程使用的语言;
键盘类型;
安装目标存储设备;
Basic Storage:本地磁盘;
特殊设备:iSCSI;
设定主机名;
配置网络接口;
时区;
管理员密码;
设定分区方式及MBR的安装位置;
创建一个普通用户;
选定要安装的程序包;
系统在完成安装后,会在⽤户家⽬录⾃动⽣成⼀个anaconda-ks.cfg配置⽂件,记录了安装系统时选择的各种参数,安装
包等内容。
系统光盘中isolinux目录列表文件说明:
boot.cat:类似于系统启动时MBR的作用
grub.conf:grub.conf文件镜像
initrd.img:是ramfs虚拟文件系统(先cpio,再gzip压缩)
isolinux.bin:相当于grub的第二阶段
isolinux.cfg:isolinux.bin的配置文件,当光盘启动,会自动去找isolinux.cfg文件
memtest:内存检测,这是一个独立程序
splash.jpg:光盘启动界面的背景图
vesamenu.c32:菜单风格,菜单图标
vmlinuz:内核镜像。
可用的centos6系统。
1、系统默认未安装system-config-kickstart,先进⾏yum安装
[root@centos7 ~]#yum install system-config-kickstart.noarch
2、运⾏kickstart(会生成一个图形化工具)
[root@centos7 ~]#system-config-kickstart
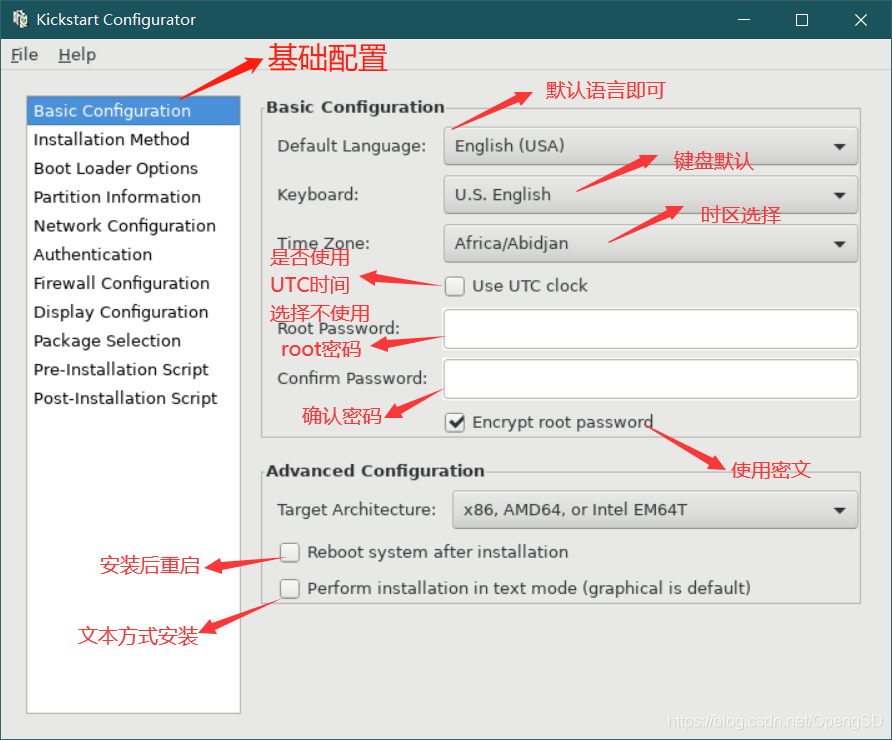
设置这个之前你要做一个http的yum仓库。


 写安装后後文件使新的操作系统拥有一定功能
[06:19:58 root@centos html]#ssh-keygen
Generating public/private rsa key pair.
Enter file in which to save the key (/root/.ssh/id_rsa):
Enter passphrase (empty for no passphrase):
Enter same passphrase again:
Your identification has been saved in /root/.ssh/id_rsa.
Your public key has been saved in /root/.ssh/id_rsa.pub.
The key fingerprint is:
SHA256:uaSUcve3zpBKOHXaa5XQb+G1+nkaShHt7Q//qiqHgiI root@centos.yang.com
The key's randomart image is:
+---[RSA 2048]----+
|                 |
|             .   |
|           .. .  |
|       . .. .o...|
|    . + S ...+.oo|
|     + * * .o.+o |
|     .+ +.=.o.+ .|
|E . . .oo.o* + ++|
| . .   ..+oo*.+=*|
+----[SHA256]-----+
(生成ssh的公钥私钥对)
[06:32:04 root@centos html]#
[06:32:04 root@centos html]#ssh-copy-id 127.0.0.1
/usr/bin/ssh-copy-id: INFO: Source of key(s) to be installed: "/root/.ssh/id_rsa.pub"
The authenticity of host '127.0.0.1 (127.0.0.1)' can't be established.
ECDSA key fingerprint is SHA256:5mW0aEb7Z8qFTeDBRng6t5CFhjujGSdYa5vp1S6rq80.
ECDSA key fingerprint is MD5:28:3a:27:1a:ab:1c:a0:c5:5c:a6:f2:50:23:f4:77:3f.
Are you sure you want to continue connecting (yes/no)? yes
/usr/bin/ssh-copy-id: INFO: attempting to log in with the new key(s), to filter out any that are already installed
/usr/bin/ssh-copy-id: INFO: 1 key(s) remain to be installed -- if you are prompted now it is to install the new keys
root@127.0.0.1's password:

Number of key(s) added: 1

Now try logging into the machine, with:   "ssh '127.0.0.1'"
and check to make sure that only the key(s) you wanted were added.
(把文件拷贝到本地)
[06:49:34 root@centos ~]#cd .ssh
[06:49:51 root@centos .ssh]#ls
authorized_keys  id_rsa  id_rsa.pub  known_hosts
[06:49:55 root@centos .ssh]#ll(查看authorized_keys权限)
total 16
-rw------- 1 root root  402 Nov 12 06:48 authorized_keys
-rw------- 1 root root 1679 Nov 12 06:32 id_rsa
-rw-r--r-- 1 root root  402 Nov 12 06:32 id_rsa.pub
-rw-r--r-- 1 root root 2053 Nov 12 06:48 known_hosts
[06:50:10 root@centos .ssh]#cd ..
[06:50:20 root@centos ~]#ll -d .ssh (查看.ssh目录权限)
drwx------. 2 root root 80 Nov 12 06:48 .ssh
(脚本里的权限要和这里的一样。)
[06:50:31 root@centos ~]#cat .ssh/authorized_keys (查看公钥复制与脚本里作为key验证使用。)
ssh-rsa AAAAB3NzaC1yc2EAAAADAQABAAABAQDTQNHJOrFP0eljtDEpsU4SH0lzrZ/uK9IJgwiVo0Cem0g57xtf8k52WxlOXJO6OhV4C2oEWh0i2wUZtKIOStrDgPO17xWIt2ogEgPVj2OGS5MBdDi0IpVEg++P/HhG+69hHPK7VngYW3pHCnOfO4cuQ3oxIemg2Yk8AsVlrKLkfmhJIy9Cluc8yxO9aACsZ+SqejNR+uWZsGHIs/teJdeQF9QwgHr/1DwvbupoAN0Y7ZqVFzdSATGOb0QO1L+4Vj6tjd0pRnOAyoTc6oQl+3XWTrfdTWvSJJRtNWbAd0xSnE5mOgIL9lhr3SdnnJtBbHjY0A57uqV3kZ7WZShToOyh root@centos.yang.com

到这里基本上应答文件就已经制作完成了,不满意的话可以在进行修改。
[root@centos7 ~]#vim ks7_mini2.cfg
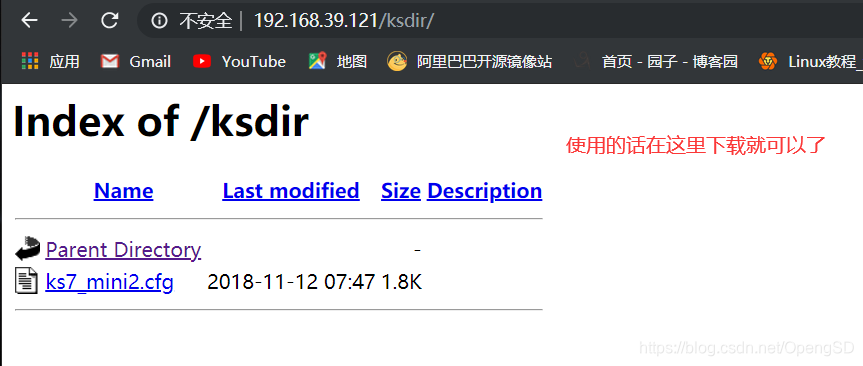
之后把制作好的应答文件放到之前的http服务器上
[06:51:04 root@centos ~]#cd /var/www/html/
[07:46:42 root@centos html]#
[07:46:44 root@centos html]#ls
centos
[07:46:45 root@centos html]#mkdir ksdir
[07:46:55 root@centos html]#ls
centos  ksdir
[07:46:57 root@centos html]#pwd
/var/www/html
[07:47:12 root@centos html]#cd ksdir/
[07:47:22 root@centos ksdir]#pwd
/var/www/html/ksdir
[root@centos7 ~]#vim ks7_mini2.cfg
[root@centos7 ~]#scp ks7_mini2.cfg 192.168.39.121:/var/www/html/ksdir
之后再重新使用vmr制作一个虚拟机
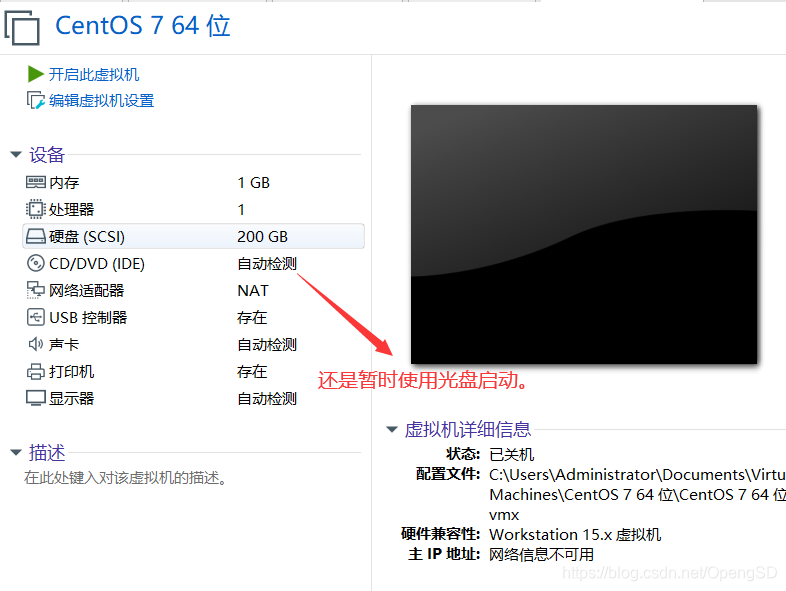
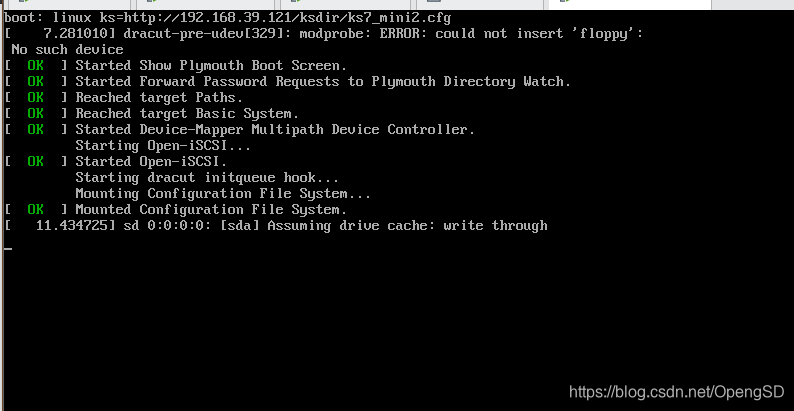
在这个界面按Esc键进入anaconda界面

之后输入http的路径
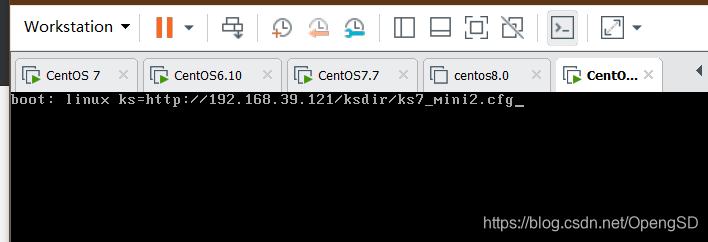
回车系统就会自动安装了,不用在手动管理了。

这里看一下key验证有没有实现。
[09:14:08 root@centos ~]#scp 1.txt 192.168.39.135:/root/
The authenticity of host '192.168.39.135 (192.168.39.135)' can't be established.
ECDSA key fingerprint is SHA256:XIqej+HofAyUdoNtkcyK9myMo5LaGYjBx4qkWNUjnuI.
ECDSA key fingerprint is MD5:6e:cf:b7:a5:99:ce:a6:05:ae:cb:41:d7:a5:17:2e:15.
Are you sure you want to continue connecting (yes/no)? yes
Warning: Permanently added '192.168.39.135' (ECDSA) to the list of known hosts.
1.txt                                  100%    0     0.0KB/s   00:00
[09:14:32 root@centos ~]#scp xiangqi2_while.sh 192.168.39.135:/root/
xiangqi2_while.sh                                                                                                          100%  819   419.8KB/s   00:00
(第一次输了yes第二次什么也没输key验证登录成功)
[root@localhost ~]# ip a
1: lo: <LOOPBACK,UP,LOWER_UP> mtu 65536 qdisc noqueue state UNKNOWN group default qlen 1000
    link/loopback 00:00:00:00:00:00 brd 00:00:00:00:00:00
    inet 127.0.0.1/8 scope host lo
       valid_lft forever preferred_lft forever
    inet6 ::1/128 scope host
       valid_lft forever preferred_lft forever
2: eth0: <BROADCAST,MULTICAST,UP,LOWER_UP> mtu 1500 qdisc pfifo_fast state UP group default qlen 1000
    link/ether 00:0c:29:7d:42:24 brd ff:ff:ff:ff:ff:ff
    inet 192.168.39.135/24 brd 192.168.39.255 scope global noprefixroute dynamic eth0
       valid_lft 1653sec preferred_lft 1653sec
    inet6 fe80::c95d:730e:fbfe:7644/64 scope link noprefixroute
       valid_lft forever preferred_lft forever
[root@localhost ~]# ls
1.txt  anaconda-ks.cfg  original-ks.cfg  xiangqi2_while.sh
(到这这个半自动化的系统安装已经完成,注意几点这个实验我事先配好了http的yum仓库)