有两种方式:一种是配置文件,另一种是注解
一、使用配置文件:
1.写dao接口:
@Mapper
public interface EmployeeMapper {
    public Employee getEmpById(Integer id);
    public void insertEmp(Employee emp);
}
注:这里使用了@Mapper注解,这样操作每一个接口都要使用@Mapper注解,所以也可以直接在springboot启动类上使用@MapperScan(value="com.atguigu.mapper"),如下:
@MapperScan(value = "com.atguigu.mapper")//这里就是扫描了所有dao接口所在的文件夹路径
@SpringBootApplication
public class SpringbootMybatisApplication {

    public static void main(String[] args) {
        SpringApplication.run(SpringbootMybatisApplication.class, args);
    }

}
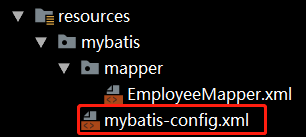
2.创建mybatis的全局配置文件
下面是文件目录
配置文件内容如下:
<?xml version="1.0" encoding="UTF-8" ?>
<!DOCTYPE configuration
        PUBLIC "-//mybatis.org//DTD Config 3.0//EN"
        "http://mybatis.org/dtd/mybatis-3-config.dtd">
<configuration>
    <settings>
        <!--开启驼峰命名法-->
        <setting name="mapUnderscoreToCamelCase" value="true"/>
    </settings>
</configuration>
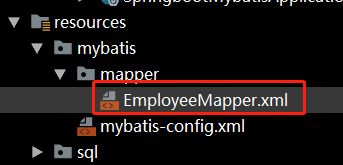
3.配置mybatis的映射文件
文件目录如下:
映射文件内容如下:
<?xml version="1.0" encoding="UTF-8" ?>
<!DOCTYPE mapper
        PUBLIC "-//mybatis.org//DTD Mapper 3.0//EN"
        "http://mybatis.org/dtd/mybatis-3-mapper.dtd">
<mapper namespace="com.atguigu.mapper.EmployeeMapper"><!--namespace是dao映射接口的全路径-->
    <!--
    public Employee getEmpById(Integer id);
    public void insertEmp(Employee emp);
    -->
    <select id="getEmpById" resultType="com.atguigu.bean.Employee"><!--id是dao接口底下的方法名称,resultType表示返回值类型-->
        SELECT * FROM employee WHERE id=#{id}
    </select>

    <insert id="insertEmp">
        insert into employee (lastName,email,gender,d_id)values (#{lastName},#{email},#{gender},#{dId})
    </insert>
</mapper>
4.在springboot配置文件(application.yml或application.properties)中配置mybatis,下面以application.yml为例:
mybatis:
  #配置mybatis的全局配置文件
  config-location: classpath:mybatis/mybatis-config.xml
  #配置mybatis的映射文件
  mapper-locations: classpath:mybatis/mapper/*.xml
二、使用注解的方式
1.开启驼峰命名法
package com.atguigu.config;

import org.mybatis.spring.boot.autoconfigure.ConfigurationCustomizer;
import org.springframework.context.annotation.Bean;
import org.springframework.context.annotation.Configuration;

@Configuration
public class MyBatisConfig {
    //开启驼峰命名法
    @Bean
    public ConfigurationCustomizer configurationCustomizer(){
        return new ConfigurationCustomizer(){
            @Override
            public void customize(org.apache.ibatis.session.Configuration configuration) {
                configuration.setMapUnderscoreToCamelCase(true);
            }
        };
    }
}
2.写dao接口,并且直接在接口上面写sql语句加上注解
package com.atguigu.mapper;

import com.atguigu.bean.Department;
import org.apache.ibatis.annotations.*;

//@Mapper和@ScanMapper同上
public interface DepartmentMapper {
    @Select("select * from department where id=#{id}")
    public Department getDeptById(Integer id);
    @Delete("delete from department where id=#{id}")
    public int deleteDeptById(Integer id);
    @Options(useGeneratedKeys = true,keyProperty = "id")//这个注解的作用是将插入的数据的主键返回过来封装到对象之中
    @Insert("insert into department(departmentName) values(#{departmentName})")
    public int insertDept(Department dept);
    @Update("update department set departmentName=#{departmentName} where id=#{id}")
    public int editDept(Department dept);
}