1. Centos在虚拟机中, 最小化安装, 网络连接选择的是 桥接模式, 安装完成后, 是不能直接上网的, 输入root 和密码, 登录进去, 然后执行:
[root@localhost ~]# vi /etc/sysconfig/network-scripts/ifcfg-eno16777736 #注意这个eno16777736 这东西, 在centos7 下可能是随机生成的, 之前的版本都是eth0
这里只需要将 ONBOOT=no 改成ONBOOT=yes即可, 这里就用dhcp的方式, 然后重启网络服务
[root@localhost ~]# service network restart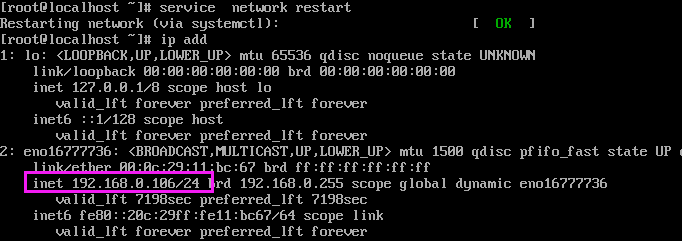
2. 到这里仅仅是把网络配置好, 能够上互联网了, 现在将鼠标从黑窗口中拔出来, 使用Xshell连接, 现在开始配置yum源, 最小化安装的centos 7 是没有wget的, 所以不要想着用wget, 在宿主机(windows系统)上的浏览器中输入http://mirrors.163.com/.help/CentOS7-Base-163.repo , 然后将文件下载到卓面, 然后在上传到Centos 7的/etc/yum.repos.d目录下, 如果不能上传, 那么就在windows上用记事本打开下载的文件, 复制, 然后在/etc/yum.repos.d目下新建一个Centos-Base.repo文件, 将内容拷贝进去即可
[root@localhost ~]# cd /etc/yum.repos.d/
[root@localhost yum.repos.d]# mv CentOS-Base.repo CentOS-Base.repo.bak
[root@localhost yum.repos.d]# vi CentOS-Base.repo
#
# The mirror system uses the connecting IP address of the client and the
# update status of each mirror to pick mirrors that are updated to and
# geographically close to the client.  You should use this for CentOS updates
# unless you are manually picking other mirrors.
#
# If the mirrorlist= does not work for you, as a fall back you can try the
# remarked out baseurl= line instead.
#
#
[base]
name=CentOS-$releasever-Base - 163.com
#mirrorlist=http://mirrorlist.centos.org/?release=$releasever&arch=$basearch&repo=os
baseurl=http://mirrors.163.com/centos/$releasever/os/$basearch/
gpgcheck=1
gpgkey=http://mirrors.163.com/centos/RPM-GPG-KEY-CentOS-7

#released updates
[updates]
name=CentOS-$releasever - Updates - 163.com
#mirrorlist=http://mirrorlist.centos.org/?release=$releasever&arch=$basearch&repo=updates
baseurl=http://mirrors.163.com/centos/$releasever/updates/$basearch/
gpgcheck=1
gpgkey=http://mirrors.163.com/centos/RPM-GPG-KEY-CentOS-7

#additional packages that may be useful
[extras]
name=CentOS-$releasever - Extras - 163.com
#mirrorlist=http://mirrorlist.centos.org/?release=$releasever&arch=$basearch&repo=extras
baseurl=http://mirrors.163.com/centos/$releasever/extras/$basearch/
gpgcheck=1
gpgkey=http://mirrors.163.com/centos/RPM-GPG-KEY-CentOS-7

#additional packages that extend functionality of existing packages
[centosplus]
name=CentOS-$releasever - Plus - 163.com
baseurl=http://mirrors.163.com/centos/$releasever/centosplus/$basearch/
gpgcheck=1
enabled=0
gpgkey=http://mirrors.163.com/centos/RPM-GPG-KEY-CentOS-7
3. 更新系统并安装postgre数据库, 并对其初始化
[root@localhost yum.repos.d]# yum clean all
[root@localhost yum.repos.d]# yum -y update
[root@localhost yum.repos.d]# yum -y install postgresql postgresql-server postgresql-libs
[root@localhost yum.repos.d]# postgresql-setup initdb
4. 设置开机启动, 并且启动postgre数据库, 设置postgres密码
[root@localhost yum.repos.d]# systemctl enable postgresql
Created symlink from /etc/systemd/system/multi-user.target.wants/postgresql.service to /usr/lib/systemd/system/postgresql.service.
[root@localhost yum.repos.d]# systemctl start postgresql
[root@localhost yum.repos.d]# su - postgres
-bash-4.2$ psql
psql (9.2.18)
输入 "help" 来获取帮助信息.
postgres=# password postgres
输入新的密码:
再次键入:
postgres=# q
-bash-4.2$ exit
登出
[root@localhost ~]# yum install epel-release -y #安装odoo的依赖
5. 添加Odoo仓库
[root@localhost ~]# yum install yum-utils -y
[root@localhost ~]# yum-config-manager --add-repo=https://nightly.odoo.com/10.0/nightly/rpm/odoo.repo
[root@localhost ~]# yum -y install odoo #安装odoo 10.0.20170201, 下载比较慢, 我下载了将近2个小时; 也可以使用迅雷下载, 然后传到服务器上, 安装
[root@localhost ~]# systemctl enable odoo #创建开机自启动
Created symlink from /etc/systemd/system/multi-user.target.wants/odoo.service to /usr/lib/systemd/system/odoo.service.
[root@localhost ~]# systemctl start odoo #启动odoo
[root@localhost ~]# systemctl stop firewalld.service #临时关闭防火墙, 如果想永久关闭 systemctl disable firewalld.service
#或者可以配置放行8069端口, 初练习建议关闭防火墙, 真实环境建议放行端口
[root@localhost ~]# firewall-cmd --zone=public --add-port=8069/tcp --permanent
success
[root@localhost ~]# firewall-cmd --reload
success
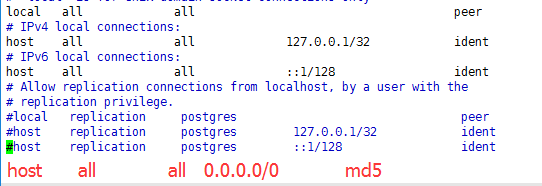
默认情况下只有本地菜运行连接数据库, 如果要允许PostgreSql远程访问, 需要在[root@localhost ~]# vim /var/lib/pgsql/data/pg_hba.conf
文件中添加 允许访问
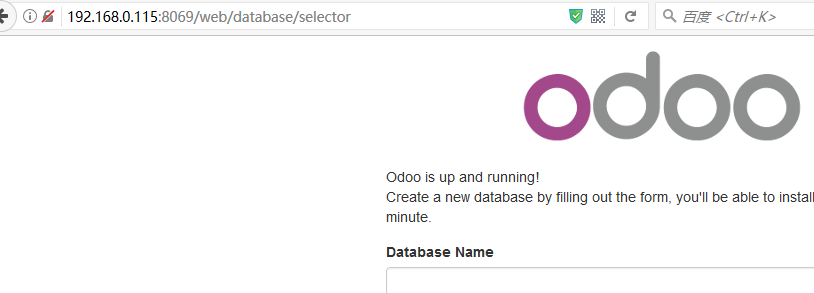
6. 现在就可以在浏览器中输入ip:8069访问了