必需的Oracle链接库的下载地址:https://www.oracle.com/technetwork/topics/winx64soft-089540.html
只连接数据库的话不必安装客户端:
1. 把cx_Oracle的客户端文件复制到site-packages/ 目录下,可能是Python, Anaconda, venv下面的安装包里
2. 把下载的instantclient文件夹下的oci.dll, oraocci12.dll,oraociei12.dll文件复制到site-packages/ 目录下
3. 把instantclient文件解压后的地址添加到环境变量里面去。
4. 创建数据库连接.
注:oracle18和orcale12.2版本的需下载安装vs2013,否则报:
1、无法启动此程序,因为计算机丢失MSVCP120.dll,MSVCR120.dll
2、“64-bit Oracle Client library cannot be loaded: "The specified module could not be”
创建数据库连接connect和关闭数据库连接close
创建数据库连接的三种方式:
方法一:用户名、密码和监听分开写
import cx_Oracle
db=cx_Oracle.connect('username/password@host/orcl')
db.close()
方法二:用户名、密码和监听写在一起
import cx_Oracle
db=cx_Oracle.connect('username','password','host/orcl')
db.close()
方法三:配置监听并连接
import cx_Oracle
tns=cx_Oracle.makedsn('host',1521,'orcl')
db=cx_Oracle.connect('username','password',tns)
db.close()
python链接oracle数据库时报64-bit Oracle Client library cannot be loaded: "The specified module could not be found"错误
在使用pycharm对远程oracle数据库进行访问时(本地未安装oracle),会出现64-bit Oracle Client library cannot be loaded: "The specified module could not be found"的错误。
(1)首先要做的是按照网上有的下载对应版本的instantclient
下载地址:http://www.oracle.com/technetwork/database/database-technologies/instant-client/overview/index.html
需要64位的就下载64位的,需要32位的就下载32位的,这次错误提示是需要64位的,所以我下载的是64位的。
(2)将解压后的instantclient路径添加到环境变量PATH中**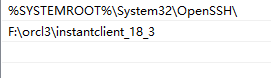
到文件夹即可
(3)在文件夹中创建名为‘ tnsnames.ora ’的文件,文件内容:
orcl =
(DESCRIPTION =
(ADDRESS_LIST =
(ADDRESS = (PROTOCOL = TCP)(HOST = IP地址)(PORT = 1521))
)
(CONNECT_DATA =
(SERVER = DEDICATED)
(SERVICE_NAME = orcl)
)
)
IP地址和SERVICE_NAME可根据需要更改
(4)将文件夹下的oci.dll, oraocci12.dll,oraociei12.dll 拷贝到python安装目录下的lib/site-packages中**
(5)重启pycharm
重点来了,如果还报错,那就是你没有安装正确的vc++库。
检测方式是打开你的instantclient_xx_x,找到genezi.exe,点开看看是不是报"缺少msvcr120.dll"
如果是那你就得去下载vc++库了
下载地址是:
https://support.microsoft.com/en-us/help/2977003/the-latest-supported-visual-c-downloads#bookmark-vs2013
注意oracle18和orcale12.2版本的下载vs2013!!!
然后重启pycharm,ok,收工。
cx_Oracle错误:Unable to acquire Oracle environment handle
错误表现:
cx_Oracle连接Oracle数据库的时候报错:
cx_Oracle.InterfaceError: Unable to acquire Oracle environment handle
解决办法:将instantclient目录下的所有*.dll文件拷贝到Python27Libsite-packages目录下,问题解决
SQLAlchemy Oracle 的中文问题
你需要设置 NLS_LANG 环境变量,否则你读取出来的中文可能是乱码,或者当 insert 的数据有中文时会导致 Unicode 编码错误。
你可以在 Python 代码中这么设置环境变量
# 设置编码,否则:
# 1. Oracle 查询出来的中文是乱码
# 2. 插入数据时有中文,会导致
# UnicodeEncodeError: 'ascii' codec can't encode characters in position 1-7: ordinal not in range(128)
os.environ['NLS_LANG'] = 'SIMPLIFIED CHINESE_CHINA.UTF8'
No module named cx_Oracle:import cx_Oracle
ImportError: No module named cx_Oracle如果安装的 python 64 位,需要把cx_Oracle文件复制到 /usr/lib64/python2.7/site-packages/ 目录下
cd /usr/lib/python2.7/site-packages/
cp cx_Oracle.so /usr/lib64/python2.7/site-packages/cx_Oracle.so
cp cx_Oracle-5.1.2-py2.7.egg-info /usr/lib64/python2.7/site-packages/cx_Oracle-5.1.2-py2.7.egg-info
还有如下方法:
1、复制oci.dll到$python_home (比如c:/python26)解决的
2、复制oci.dll到$python_home和C:Python33Libsite-packages 下解决的
3、老外是重装解决的。
I was able to solve this problem with the following steps:
Download instantclient-basic-win32-10.2.0.5 from Oracle Website
unzipped the into my c: with the name oraclient
Created the directory structure C:oraclient etworkadmin to add the TNSNAMES.ORA
Added the TNS_ADMIN env var pointing to C:oraclient etworkadmin
Added the ORACLE_HOME env var pointing to C:oraclient
http://stackoverflow.com/questions/13708998/cx-oracle-and-python-2-7
下载一个
instantclient-basic-win32-10.2.0.4.zip
然后复制到C:Python33Libsite-packages搞定。
首先安装配置时,必须把握一个点,就是版本一致!包括:系统版本,python版本,oracle客户端的版本,cx_Oracle的版本,然后安装配置就容易了!
因为我的系统是win7 64位,python版本也是64位的,所以下载安装的Oracle Client 也是64位 10g的,相应的cx_Oracle 也要是64位10g的,当然也要注意python的版 本python2.X还是python3.X,也要下相应的版本的
1、oracle client 下载地址:http://www.oracle.com/technetwork/database/features/instant-client/index-097480.html
把下载的文件解压到自己想要放的路径下,我的是Q:OracleClient,
然后是配置环境变量:右键计算机——属性——高级系统设置——环境变量——系统变量——新建
变量:ORACLE_HOME 值:Q:OracleClient
变量:TNS_ADMIN 值:Q:OracleClient
编辑path用';'隔开加一个 Q:OracleClient
2、cx_Oracle就可以在PyPI中下载,打开PyPI的网址https://pypi.python.org/pypi,在里面搜索cx_Oracle,找到相应的版本下载,下载完成后安装就可以了
也可以在 https://sourceforge.net/projects/cx-oracle/files/ 下下载cx_Oracle
3、遇到的一些问题,及解决方法
"cx_Oracle.InterfaceError: Unable to acquire Oracle environment handle"
或者是 "ImportError: DLL load failed: 找不到指定的程序"
或者是 "import cx_Oracle,ImportError: DLL load failed: 找不到指定的模块"
---解决方法:把下载解压的oracle client 中的ico.dll,复制到python的安装目录下即可,网上看到有些人的解决方法是放到Python27Libsite-packages下
"cx_Oracle.DatabaseError: ORA-12170: TNS" --解决方法:检查自己的网络、监听、tnsname.ora都行
"cx_Oracle ORA-24315: 非法的属性类型" ----出现该错误的原因是因为版本不兼容,检查一下环境,如果oracle client是10g的,但安装的cx_oracle是for 11g的话就会报这个错,下载cx_oracle是for 10g的安装即可
UnicodeEncodeError: 'gbk' codec can't encode character 'xa0' in position ... 问题解决办法
目标文件的编码是导致标题所指问题的罪魁祸首
f = open("out.html","w"),在windows下面,新文件的默认编码是gbk,这样的话,python解释器会用gbk编码去解析我们的网络数据流txt,然而txt此时已经是decode过的unicode编码,这样的话就会导致解析不了,出现上述问题。 解决的办法就是,改变目标文件的编码:
f = open("out.html","w",encoding='utf-8')问题解决。
1. cx_Oracle
cx_Oracle模块是Python连接Oracle数据库的模块,在Python中,如果要连接Oracle,必须先安装cx_Oracle模块。
cx_Oracle的下载地址:https://pypi.python.org/pypi/cx_Oracle/
选择和操作系统、Python版本一致的安装包进行安装。当然为了省事儿,你也可以直接使用pip命令来安装cx_Oracle。
pip install cx_Oracle
安装完成后,在交互模式下输入import cx_Oracle,不报错,说明安装成功。
2. 连接Oracle数据库
方法一:用户名、密码、监听分开写
import cx_Oracle
db=cx_Oracle.connect('username','password','host:port/sid')
方法二:用户名、密码、监听写一起
import cx_Oracle
db=cx_Oracle.connect('username/password@host:port/sid')
方法三:先配置监听,后连接
import cx_Oracle
tnsname = cx_Oracle.makedsn('host', port,'sid')
db = cx_Oracle.connect('username','password',tnsname)
说明:代码中username、password、host、port、sid换成实际数据库的用户名、密码、主机名或主机IP、数据库实例名。
3. 创建游标
cx_Oracle中,对于数据库的增删改查操作需要通过游标来进行,游标的创建语句如下:
cur=db.cursor()
4. 执行sql语句
Sql语句书写:不需要从外部传入参数,可以直接书写sql语句,然后使用execute执行sql即可;如果需要从外部传入参数,在需要传入参数的地方使用变量,并在变量前加“:”,然后通过prepare加载sql语句。
cur.prepare:如果执行的sql语句需要传外部参数,可以先用这个函数加载sql语句,然后再通过execute或executemany加参数执行。
cur.execute:执行单条sql语句。
cur.executemany:执行多条sql语句。
关于execute需要说明的是如果执行的sql语句不需要从外部传入参数,那么可以跳过prepare,直接将sql语句作为execute的第一个参数来执行sql。
db.commit():执行提交操作,增、删、改后需要使用。
cur.fetchall:在查询之后使用,获取所有查询到的结果记录。
cur.fetchone:在查询之后使用,获取一条查询到的结果记录。
关于fetchall和fetchone需要说明的是查询到的记录一旦被提取,就不能再次被提取,不管是用fetchall提取还是使用fetchone提取。
res = cur.fetchall()[0][0].read();
fetchall和fetchone返回的是元组,加上[][],可以直接取到值。
查询:
需要外部参数:
>>> cur.prepare('select * from t_emp a where a.empid=:id')
>>> cur.execute(None,{'id':id})
<cx_Oracle.Cursor on <cx_Oracle.Connection to cs@192.168.1.226:1521/db_emp>>
>>> cur.fetchall()
不需要外部参数:
>>> cur.execute("select e.empid,e.empname from t_emp e")
<cx_Oracle.Cursor on <cx_Oracle.Connection to cs@192.168.102.219:1521/t45>>
>>> cur.fetchone()
(1, '张三')
>>> cur.fetchall()
[(2, '李四'), (3, '王五'), (4, '沈六'), (5, '田七'), (6, '凤九')]
增加、删除、修改:
单条增加:
>>> sql="insert into t_emp(empid,empname) values (:empid,:empname)"
>>> cur.prepare(sql)
>>> cur.execute(None,{'empname':'李绅','empid':7})
>>> db.commit()
多条增加:
>>> sql="insert into t_emp(empid,empname) values (:empid,:empname)"
>>> cur.prepare(sql)
>>> cur.executemany(None,[{'empname':'赵青','empid':8},{'empname':'萧远','empid':9}])
>>> db.commit()
单条修改:
>>> sql="update t_emp a set a.empname='清月' where a.empid=:empid"
>>> cur.prepare(sql)
>>> cur.execute(None,{empid:"4"})
>>> db.commit()
多条修改:
>>> sql="update t_emp a set a.empname=:empnamewhere a.empid=:empid"
>>> cur.prepare(sql)
>>> cur.executemany(None,[{'empid':"5","empname":"明月"},{'empid':"6","empname":"乐天"}])
>>> db.commit()
删除:
>>> cur.execute('delete from t_emp a where a.empid in (3,4,5,6)')
>>> db.commit()
5. 关闭游标
sql语句执行结束,不再使用时,应关闭游标,关闭游标的语句为:
cur.close()
6. 关闭数据库
数据库操作结束后应及时释放连接,关闭数据库连接的语句为:
db.close()
7. 我写的一个Oracle数据库操作类
cx_Oracle是Python的Oracle操作的模块,在使用时导入就能使用,但是因为数据库使用时涉及连接、操作、提交、关闭连接等一系列操作,不可能每次使用时都把这些操作用代码写一遍,所以我把这些操作放到一个类里,在实际使用时来调用这个类就行了。
#coding=utf-8
import cx_Oracle
class OpOracle():
    def __init__(self,ora_username,ora_password,ora_host,ora_port,ora_sid):
        '''初始化Oracle连接'''
        self.db=cx_Oracle.connect(ora_username,ora_password,ora_host+':'+ora_port+'/'+ora_sid)
        self.cur=self.db.cursor()
    def Ora_Select(self,strSql):
        '''执行strSql语句进行查询'''
        self.cur.execute(strSql)
        return self.cur.fetchall()
    def Ora_IUD_Single(self,strSql):
        '''执行strSql语句进行增加、删除、修改操作'''
        self.cur.execute(strSql)
        self.db.commit()
    def Ora_IUD_Multi(self,strSql,List):
        '''执行strSql语句进行增加、删除、修改操作,对应参数使用List中的数据'''
        self.cur.prepare(strSql)
        self.cur.executemany(None,List)
        self.db.commit()
    def Ora_Cur_Close(self):
        '''关闭游标'''
        self.cur.close()
    def Ora_db_Close(self):
        '''关闭Oracle数据库连接'''
        self.db.close()
我把这段代码保存在OpOracle.py文件中,使用时直接导入这个文件即可。如:
from OpOracle import OpOracle
ora=OpOracle('cs','ceshi','192.168.1.226','1521','db_emp')
l_emp=ora.Ora_Select('select * from t_emp')    #查询t_emp表的数据并保存到l_emp列表中
ora.Ora_IUD_Single('delete from t_emp a where a.empid=1')  #删除empid为1的记录
ora.Ora_Cur_Close()
ora.Ora_db_Close()     #最后记得关闭游标和数据库连接
---------------------
后面代码操作来自:
原文:https://blog.csdn.net/xinyuzxx/article/details/81703625