假定kvm已经准备好


1、创建磁盘

qemu-img    create    -f qcow2     /kvm/os/vm-01.qcow2  16G

2、上传或下载安装镜像

mkdir  -p /kvm/iso

cd  /kvm/iso

上传事先下载好的镜像文件到/kvm/iso/目录下,或在线下载

wget  -O  /kvm/iso/CentOS-7-x86_64-Minimal-1804.iso   https://mirrors.aliyun.com/centos/7.5.1804/isos/x86_64/CentOS-7-x86_64-Minimal-1804.iso
3、创建kickstart配置文件

生成密码加密字符串, 即虚拟机的root用户密码 :
grub-crypt --sha-512 #centos 6.x
python -c 'import crypt,getpass;pw=getpass.getpass();print(crypt.crypt(pw) if (pw==getpass.getpass("Confirm: ")) else exit())' #centos 7.x
perl -e 'print crypt("1234abcdefg",q($1$password)),"
"'                                                        #centos 7.x
# install
install
# password
rootpw  --iscrypted $6$yz7YWSt2MmouUuTu$cjz1eZf9lhMke2Ply8P5Jngrwxh5lb8zwmC124JlXdOnSvrKZaD2/IWdVgahFfNIykbYCBnzCqbbVwjZH59YA.
authconfig --enableshadow --passalgo=sha512
firewall --service=ssh
text
firstboot --disable
keyboard us
lang en_US.UTF-8
selinux --disabled
timezone Aisa/Shanghai
# 配置网络
network --onboot yes --device eth0 --bootproto static --ip 10.0.91.82 --netmask 255.255.255.0 --gateway=10.0.91.1 --nameserver=1.1.1.1,8.8.8.8 --hostname test.com --noipv6
如果局域网内有dhcp服务器,也可自动获取网络配置
#network  --bootproto=dhcp --device=eth0 --onboot=on --ipv6=auto

# 指定引导分区
zerombr
bootloader --location=mbr --driveorder=vda
# 清除硬盘分区
clearpart --drives=vda --all --initlabel
part /boot --fstype="xfs" --ondisk=vda --size=500
part / --fstype="xfs" --ondisk=vda --grow --size=1
part swap --fstype="swap" --ondisk=vda --recommende
reboot
%packages
@base
注意:
1)、由于安装源直接在virt-install 命令中指定,因此ks文件中没有安装源配置项
2)、由于安装的是虚拟机,而kvm中中qemu-img创建的磁盘,在kvm中默认识别为vda、vdb...之类的磁盘,因此ks文件中,不能再像安装物理机一样指定为sda、sdb之类的磁盘
virt-install
--name=vm-03
--disk path=/kvm/os/vm-03.qcow2,device=disk,bus=virtio,perms=rw,cache=writethrough
--graphics none
--vcpus sockets=2,cores=2,threads=2
--ram=16000
--location=/kvm/iso/CentOS-7-x86_64-DVD-1804.iso
--network bridge=br0
--os-type=linux
--os-variant=rhel7
--initrd-inject=/kvm/iso/ks.cfg
--extra-args="ks=file:/ks.cfg console=tty0 console=ttyS0,115200n8"
如果局域网中配置了nfs或ftp或http服务,可直接从这些服务上拉取镜像文件
下面以http为例:
yum install httpd -y
mkdir /var/www/html/os
systemctl start httpd && systemctl enable httpd && systemctl status httpd
mount /dev/sr0 /var /var/www/html/os
在浏览器中访问http://IP/os
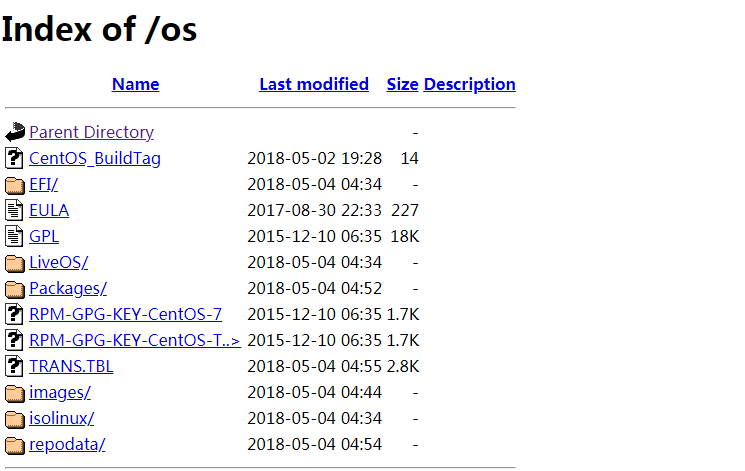
可看到镜像已经中文件已经可访问
执行下述指令进行安装:
virt-install
--name=vm-05
--disk path=/kvm/os/vm-05.qcow2,device=disk,bus=virtio,perms=rw,cache=writethrough
--graphics none
--vcpus sockets=2,cores=2,threads=2
--ram=16000
--location="http://10.0.91.10/os"
--network bridge=br0
--os-type=linux
--os-variant=rhel7
--initrd-inject=/kvm/iso/ks.cfg
--extra-args="ks=file:/ks.cfg console=tty0 console=ttyS0,115200n8"
等待安装完成,安装完成后,会提示登录界面:

注意:使用ks安装时,也可通过--graphics 选项指定vnc选项,如果指定vnc选项,安装界面可通过vnsviewer查看,但是当前终端不会显示安装过程
指令如下:
virt-install
--name=vm-05
--disk path=/kvm/os/vm-05.qcow2,device=disk,bus=virtio,perms=rw,cache=writethrough
--graphics vnc,listen=0.0.0.0,port=5934
--vcpus sockets=2,cores=2,threads=2
--ram=16000
--location="http://10.0.91.10/os"
--network bridge=br0
--os-type=linux
--os-variant=rhel7
--initrd-inject=/kvm/iso/ks.cfg
--extra-args="ks=file:/ks.cfg console=tty0 console=ttyS0,115200n8"