java.lang.ClassCastException: android.app.Application cannot be cast to com.example.lbsdemo.TrackApplication:
原因:
添加了新application类,没有在AndroidManifest.xml中添加该类的声明,所以编译器抛出异常
解决:
在AndroidManifest.xml中添加:
<application
        android:name=".application类名"
安装失败,存在同名的数据库:
原因:
provider的authoritie属性和其他项目同名

解决:换一个名
java.io.IOException: open failed: EACCES (Permission denied)
解决:需要动态申请权限
Error:(1, 0) Plugin with id 'com.android.application' not found.
原因:所用gradle版本太低(maybe)
解决:使用较新的gradle版本:build gradle中加入
buildscript {
    repositories {
        mavenCentral()
    }
    dependencies {
        classpath 'com.android.tools.build:gradle:3.0.+'
    }
}
项目上的问题,需要从服务器下载文件,别人的手机可以,我的OPPO R9就不行,排查之后找到问题:文件URL含有中文
解决:将URL encode
    /**
     * 将url进行encode,解决部分手机无法下载含有中文url的文件的问题
     *
     * @param url
     * @return
     * @author xch
     */
    private String toUtf8String(String url) {
        StringBuffer sb = new StringBuffer();
        for (int i = 0; i < url.length(); i++) {
            char c = url.charAt(i);
            if (c >= 0 && c <= 255) {
                sb.append(c);
            } else {
                byte[] b;
                try {
                    b = String.valueOf(c).getBytes("utf-8");
                } catch (Exception ex) {
                    System.out.println(ex);
                    b = new byte[0];
                }
                for (int j = 0; j < b.length; j++) {
                    int k = b[j];
                    if (k < 0)
                        k += 256;
                    sb.append("%" + Integer.toHexString(k).toUpperCase());
                }
            }
        }
        return sb.toString();
    }
java.lang.ClassCastException: com.entity.Device cannot be cast to java.io.Serializable
原因:实体类没有序列化
解决:将实体类继承Serializable接口
public class Device implements Serializable{
    private static final long serialVersionUID = 1L;
}
Android Error receiving broadcast Intent { act=com.example.servicecallback.content flg=0x10 (has extras)}
原因:多个地方发送相同的广播,但是有的带参有的不带参,也就是extra不一致。
解决:相同的事件统一extra,然后一起sendBroadCast时要么都带参要么都不带参
    /**
     * 发送广播,用于改变UI界面
     * @param phone
     * @param state
     * @param callTime
     */
    private void sendBroadcastForUi(String phone, String state, String callTime) {
        Intent intent = new Intent();
        intent.setAction("com.example.servicecallback.content");
        intent.putExtra("phone", phone);
        intent.putExtra("state", state);
        intent.putExtra("callTime", callTime);
        sendBroadcast(intent);
    }
ContextCompat不包含checkSelfPermission方法:
原因:android-support-v4.jar版本过低
Error when loading the SDK:

解决方法:
用F:android-sdk-windowsandroid-sdk-windows oolslib下的devices.xml文件替换掉
F:android-sdk-windowsandroid-sdk-windowssystem-imagesandroid-25android-wearx86下的devices.xml
Unable to resolve target 'android-XX
原因:android环境跟此处不对应
解决办法:打开project.properties修改target=android-XX,XX是配置的android版本
svn提交 has encountered a problem
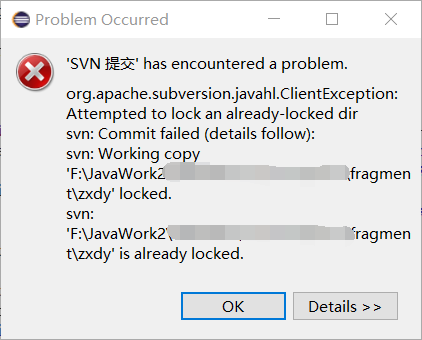
解决方法:右键项目---> Team---> Refresh/Cleanup
Gradle sync failed: Unsupported method: BaseConfig.getApplicationIdSuffix().
The version of Gradle you connect to does not support that method.
原因:目测应该是gradle版本太低了
解决:
1.修改build.gradle文件:
    dependencies {
        classpath 'com.android.tools.build:gradle:1.2.1'
    }
改为(从能成功运行的项目里复制一下):
    dependencies {
        classpath 'com.android.tools.build:gradle:3.0.1'
    }
2.然后修改gradle-wrapper.properties文件:
distributionUrl=https://services.gradle.org/distributions/gradle-2.2.1-all.zip
改为:
distributionUrl=https://services.gradle.org/distributions/gradle-4.1-all.zip
3.try again即可
Gradle sync failed: The "android" command is no longer included in the SDK. Any references to it (e.g. by third-party plugins) should be removed.
Consult IDE log for more details (Help | Show Log) (1s 26ms)
解决:
remove掉build.gradle里的:
apply plugin: 'android-sdk-manager'
NavigationView中的headerLayout重复显示,如图(由于需要获取里面的控件,我动态获取了headerLayout,当再次刷新该界面时会出现重复):

    <android.support.design.widget.NavigationView
        android:id="@+id/nav_view"
        android:layout_width="match_parent"
        android:layout_height="match_parent"
        android:layout_gravity="start"
        app:menu="@menu/nav_menu" />
        NavigationView  navView = (NavigationView) findViewById(R.id.nav_view);
        View headerView = navView.inflateHeaderView(R.layout.nav_header);
        Button btn_setting = (Button) headerView.findViewById(R.id.btn_setting);
        login_register = (TextView) headerView.findViewById(R.id.login_regist);
        user_nickname = (TextView) headerView.findViewById(R.id.user_nickname);
        icon_image = (CircleImageView) headerView.findViewById(R.id.icon_image);
解决方法:
在布局中加入headerLayout: app:headerLayout="@layout/nav_header"
    <android.support.design.widget.NavigationView
        android:id="@+id/nav_view"
        android:layout_width="match_parent"
        android:layout_height="match_parent"
        android:layout_gravity="start"
        app:headerLayout="@layout/nav_header"
        app:menu="@menu/nav_menu" />
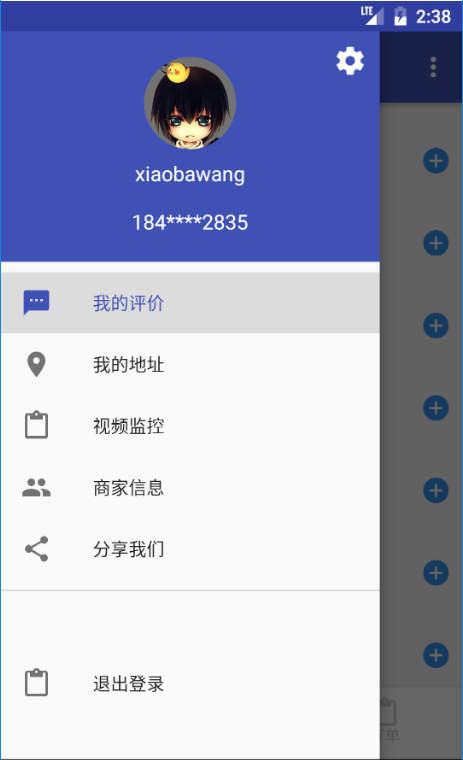
代码中用getHeaderView方法获取头部布局:navView.getHeaderView(0);
//        View headerView = navView.inflateHeaderView(R.layout.nav_header);
        View headerView =navView.getHeaderView(0);//利用此方法获取头部视图,避免重复显示
        Button btn_setting = (Button) headerView.findViewById(R.id.btn_setting);
        login_register = (TextView) headerView.findViewById(R.id.login_regist);
        user_nickname = (TextView) headerView.findViewById(R.id.user_nickname);
        icon_image = (CircleImageView) headerView.findViewById(R.id.icon_image);
再次刷新,如图,已解决:
ExpandableListView滑动时上下两边背景会变黑
解决:加入android:cacheColorHint="#00000000"
 <ExpandableListView
        android:id="@+id/listview_file"
        android:layout_width="match_parent"
        android:layout_height="match_parent"
        android:background="@color/white"
        android:childDivider="@color/dark_gray_bg"
        android:divider="@color/dark_gray_bg"
        android:dividerHeight="1dp"
        android:cacheColorHint="#00000000" />
java.lang.NoSuchMethodError: android.os.PowerManager.isIgnoringBatteryOptimizations
原因:系统API太低
解决:查询要求的最低API是多少,做判断。如
if(Build.VERSION.SDK_INT >= 20.) {

} else {

}
No implementation found for int com.baidu.platform.comjni.engine.JNIEngine.initClass(java.lang.Object, int)
原因:so文件放在app-libs底下,没有在build.gradle中指定路径
解决:1.在build.gradle中指定路径
android{}里添加:
    sourceSets{
        main{
            jniLibs.srcDir 'libs'
        }
    }
2. so文件放在src-main-jniLibs文件夹下,会自动加载
Android点击事件,第一次点击无效,第二次才响应
原因:第一次点击之获取焦点,没有响应click事件
解决:
           android:focusable="true"
           android:focusableInTouchMode="false"
focusableInTouchMode:是否通过touch来获取聚焦,为false则直接响应click
java.lang.UnsatisfiedLinkError: dlopen failed: "/data/app/***/lib/arm/libiconv.so" is 64-bit instead of 32-bit
原因:找不到64位的so文件,32位的又不能代替
解决:暂时可以更换so文件


scrollview+TextView TextView无法更新内容
原因:布局问题
解决:两个的layout_height都设置为充满:match_parent
ImageView设置src或background在Android低版本中报错:Error inflating class ImageView
原因:可能是oom,图片优化不好导致
解决:将图片从drawable换到mipmap中,Google推荐使用mipmap是有道理的,对图片进行了优化处理
原生模拟器使用adb shell显示“$”,输入su命令切换为超级用户时提示 not found
解决:换一个更低版本的模拟器,我用的是8.0出现上述问题,换为6.0后正常
svn so文件无法提交
解决:https://blog.csdn.net/archer_zoro/article/details/63366977
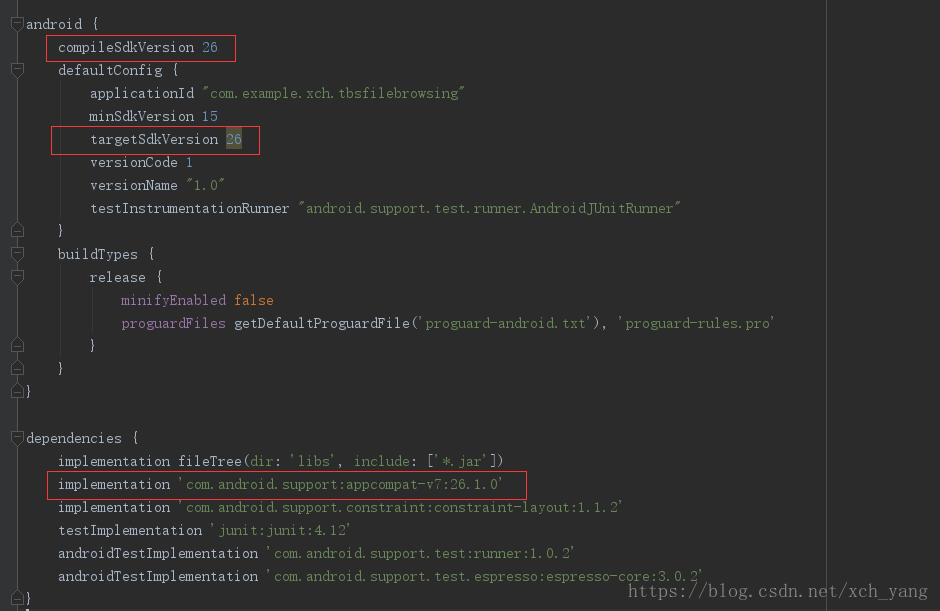
AS新建项目提示 error: resource style/Platform.Widget.AppCompat.Spinner not found
解决:报错时compileSdkVersion、targetSdkVersion和support包都是27的,降低版本就不会报错,如图我换为26
模拟器安装apk时 INSTALL_FAILED_NO_MATCHING_ABIS
原因:当前APK编译运行的CPU类型与X86不符合,默认编译为ARM(真机的CPU类型),但是虚拟机默认是使用X86
解决:在 app moudle 的 build.gradle 文件中, android {}添加:
// 解决 native libraries 不支持cpu的体系结构。同时编译X86及ARM类型,允许模拟器调试
splits {
    abi {
        enable true
        reset()
        include 'x86', 'armeabi-v7a','x86_64'
        universalApk true
    }
}
注:在打包发布时需注释以上代码,并且 rebuild
使用DrawerLayout实现侧滑栏功能时,点击侧滑栏空白处时,主界面会获得事件。
解决方法:侧滑栏布局添加
android:clickable="true"
java.lang.UnsatisfiedLinkError: dalvik.system.PathClassLoader[DexPathList[[zip.....],nativeLibraryDirectories=[/vendor/lib, /system/lib]]] couldn't find "libiconv.so"
原因:导入so文件没有编译到apk里面去,所以导致UnsatisfiedLinkError异常
解决:so文件放到libs下 需要在build.gradle,android标签下加入如下代码:
   sourceSets {
        main {
            jniLibs.srcDirs = ['libs']
        }
    }
这样编译时会自动到libs下寻找so文件
错误: 程序包org.apache.http不存在
解决:build.gradle中android下加入
useLibrary 'org.apache.http.legacy'
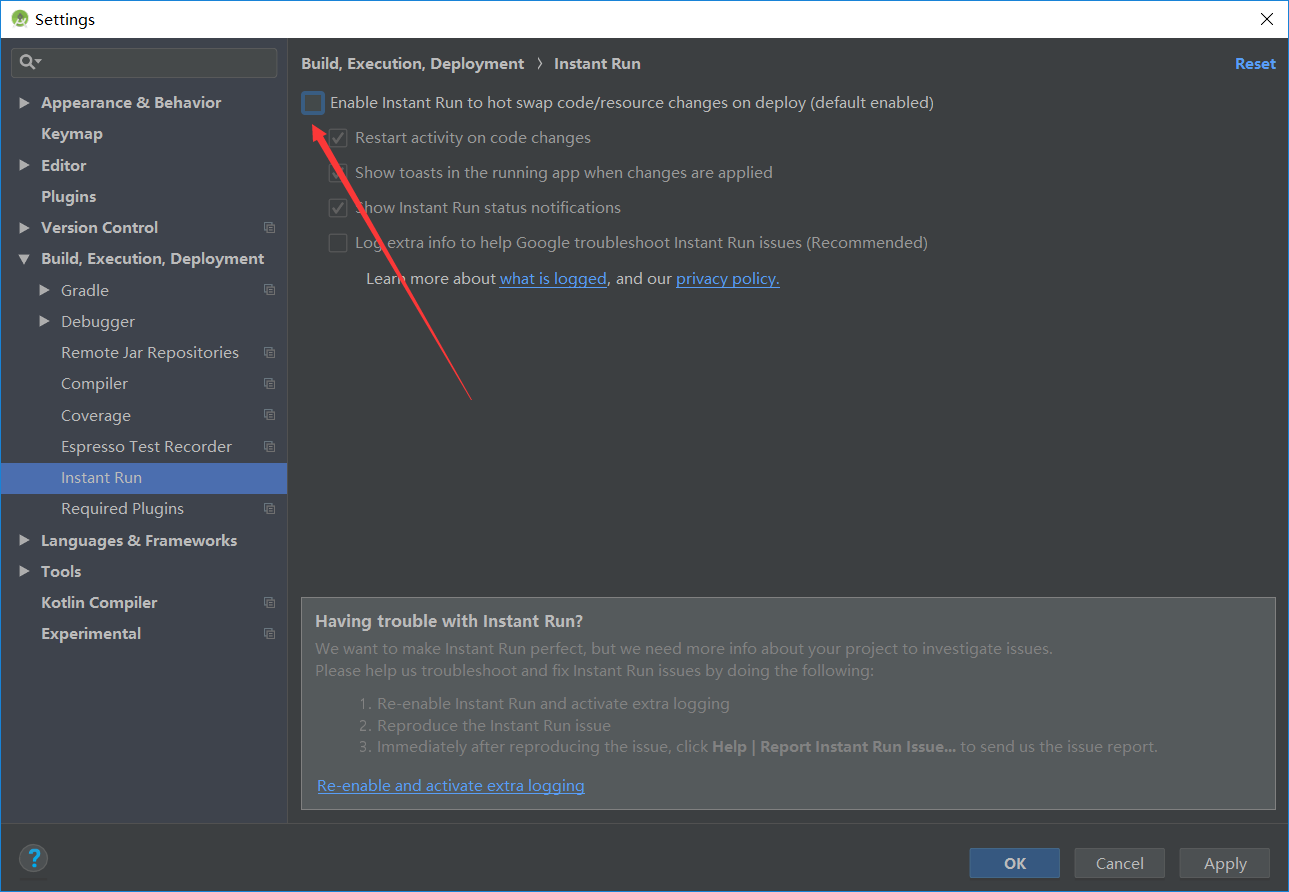
java.lang.RuntimeException: Unable to instantiate application xxx.PaiDanApplication:
 java.lang.ClassNotFoundException: Didn't find class "xxx.PaiDanApplication" on path:
DexPathList[[zip file "/data/app/xx.paidan-1/base.apk"],nativeLibraryDirectories=[/data/app/xx.paidan-1/lib/arm, /vendor/lib, /system/lib]]
原因:运行时无法实例化
解决:关闭AndroidStudio的Install Run
File>settings>Build,Execution,Deployment>Instnt Run>Enable Instant Run to hot swap code..取消勾选
加入一个多图选择库依赖
implementation 'com.github.LuckSiege.PictureSelector:picture_library:v2.2.3'
Sync后出现如下错误
Failed to resolve: com.github.LuckSiege
解决:project的build.gradle下repositories加入:
         maven {
            url "https://jitpack.io"
        }
也就是:
allprojects {
    repositories {
        google()
        jcenter()
        maven {
            url "https://jitpack.io"
        }
    }
}
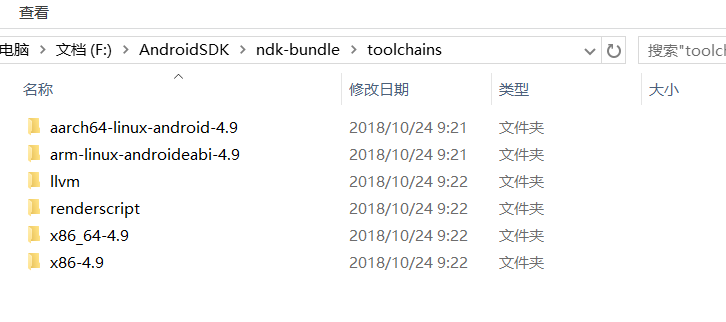
No toolchains found in the NDK toolchains folder for ABI with prefix: mips64el-linux-android
原因:ndk中没有这个东西(as中通过SDK manage下载的ndk,但是不完整)
解决:https://developer.android.google.cn/ndk/downloads/,这里下载ndk,缺什么copy到你ndk的toolchains下
GitHub提交报错:
remote: Permission to ~ denied to user_.
fatal: unable to access '...': The requested URL returned error: 403
原因:由于电脑使用git bash配过SSH,系统已经将指向github.com的用户设置为了之前的用户,每次push操作的时候,默认读取保存在本地的用户。所以push到一个新账号的项目时报错。
解决:删除本地保存的GitHub账号凭据,控制面板-->用户账号-->凭据管理器,删除即可

android打包release时发生错误:
Lint found fatal errors while assembling a release target.
To proceed, either fix the issues identified by lint, or modify your build script as follows:
...
android {
lintOptions {
checkReleaseBuilds false
// Or, if you prefer, you can continue to check for errors in release builds,
// but continue the build even when errors are found:
abortOnError false
}
}
...
解决:按它说的,build.gradle android标签下加入
    lintOptions {
        checkReleaseBuilds false
        abortOnError false
    }
ERROR: No toolchains found in the NDK toolchains folder for ABI with prefix: mipsel-linux-android
原因:新版本的NDK与3.0及以前旧版的Android Gradle plugin插件不兼容
解决:将gradle版本改为3.1及以上,build.gradle下修改:
    dependencies {
        classpath 'com.android.tools.build:gradle:3.3.1'

        // NOTE: Do not place your application dependencies here; they belong
        // in the individual module build.gradle files
    }
Error: null, Cannot fit requested classes in a single dex file (# methods: 72024 > 65536)
原因:当Android App中的方法数超过65535时,如果往下兼容到低版本设备时,就会报编译错误(Android系统定义总方法数是一个short int,short int 最大值为65536)
解决方法:
在Android的模块gradle文件的defaultConfig默认配置里面增加:
multiDexEnabled true
git clone 到非空目录提示:
fatal: destination path 'OrderFoodAPP' already exists and is not an empty directory.
解决:
1. 进入非空目录,假设是 F:/VSProjects/OrderFoodAPP/
2. git clone --no-checkout https://git.oschina.net/NextApp/platform.git tmp
3. mv tmp/.git . //将 tmp 目录下的 .git 目录移到当前目录
4. rmdir tmp
5. git reset --hard HEAD
ListView的item点击事件和内部控件点击事件冲突
解决:item的xml文件根节点加入:android:descendantFocusability="blocksDescendants",内部控件加入:android:focusable="false"
svn: E230001: Server SSL certificate verification failed: certificate issued
原因:证书问题
解决:忽略证书,Android Studio Terminal中输入如下命令
svn ls svn地址,然后输入p即可
ERROR: The specified Gradle distribution 'https://services.gradle.org/distributions/gradle-4.6-all.zip
解决:将gradle-->wrapper文件夹下的gradle-wrapper.properties里面的 distributionUrl 修改为你其他项目能运行的版本。
distributionUrl=https://services.gradle.org/distributions/gradle-5.4.1-all.zip
java.lang.NoSuchMethodError: No static method getFont(Landroid/content/Context;ILandroid/util/TypedV...
解决:编译版本和build下的版本号要一致,比如我用的27
    compileSdkVersion 27
    defaultConfig {
        targetSdkVersion 27
    }

    implementation 'com.android.support:appcompat-v7:27.1.1'