一:怎么引用依赖
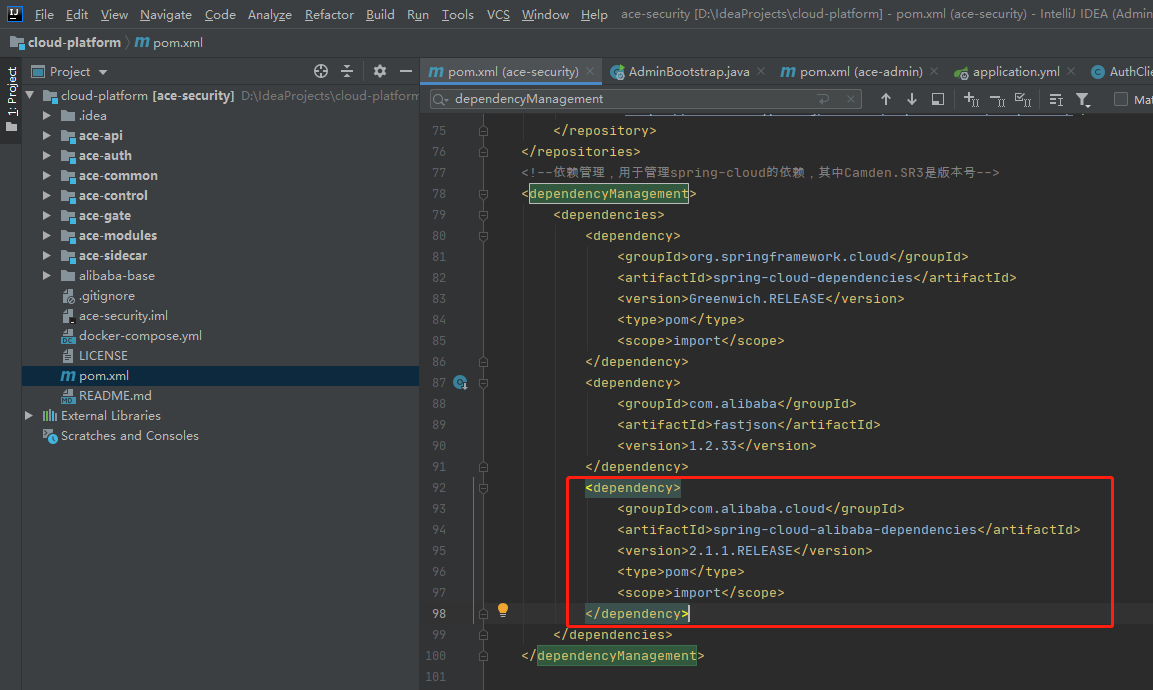
dependencyManagement:spring cloud alibaba 的版本,由于spring cloud alibaba 还未纳入spring cloud 的主版本管理中,所以需要自己加入。
我们在Parent 项目中引入Spring Cloud:
Spring Cloud Alibaba 项目都是基于 Spring Cloud,而 Spring Cloud 项目又是基于 Spring Boot 进行开发,并且都是使用 Maven 做项目管理工具。在实际开发中,我们一般都会创建一个依赖管理项目作为 Maven 的 Parent 项目使用,这样做可以极大的方便我们对 Jar 包版本的统一管理。
具体的版本介绍请下如下配置:
Spring Cloud Finchley 是较老一个版本,对应springboot 2.0.x
最开始这样加载依赖:
<dependency>
    <groupId>org.springframework.cloud</groupId>
    <artifactId>spring-cloud-alibaba-dependencies</artifactId>
    <version>0.2.2.RELEASE</version>
    <type>pom</type>
    <scope>import</scope>
</dependency>
升级后:
<dependency>
    <groupId>com.alibaba.cloud</groupId>
    <artifactId>spring-cloud-alibaba-dependencies</artifactId>
    <version>2.0.0.RELEASE</version>
    <type>pom</type>
    <scope>import</scope>
</dependency>
Spring Cloud Greenwich 是较新一个版本,对应对应springboot 2.1.x
最开始这样加载依赖:
<dependency>
    <groupId>org.springframework.cloud</groupId>
    <artifactId>spring-cloud-alibaba-dependencies</artifactId>
    <version>0.9.0.RELEASE</version>
    <type>pom</type>
    <scope>import</scope>
</dependency>
升级后:
<dependency>
    <groupId>com.alibaba.cloud</groupId>
    <artifactId>spring-cloud-alibaba-dependencies</artifactId>
    <version>2.1.0.RELEASE</version>
    <type>pom</type>
    <scope>import</scope>
</dependency>
dependencies:当前应用要使用的依赖内容。这里主要新加入了 Nacos 的服务注册与发现模块:spring-cloud-starter-alibaba-nacos-discovery。由于 dependencyManagement 中已经引入了版本,这里就不用指定具体版本了。
服务提供者,添加如下依赖:
       <dependency>
            <groupId>com.alibaba.cloud</groupId>
            <artifactId>spring-cloud-starter-alibaba-nacos-discovery</artifactId>
       </dependency>
nacos的配置中心,添加如下依赖:
<dependency>
   <groupId>com.alibaba.cloud</groupId>
   <artifactId>spring-cloud-starter-alibaba-nacos-config</artifactId>
</dependency>
配置:
Spring Boot 配置文件的加载顺序,其中 bootstrap.properties 配置为最高优先级:
依次为 bootstrap.properties -> bootstrap.yml -> application.properties -> application.yml
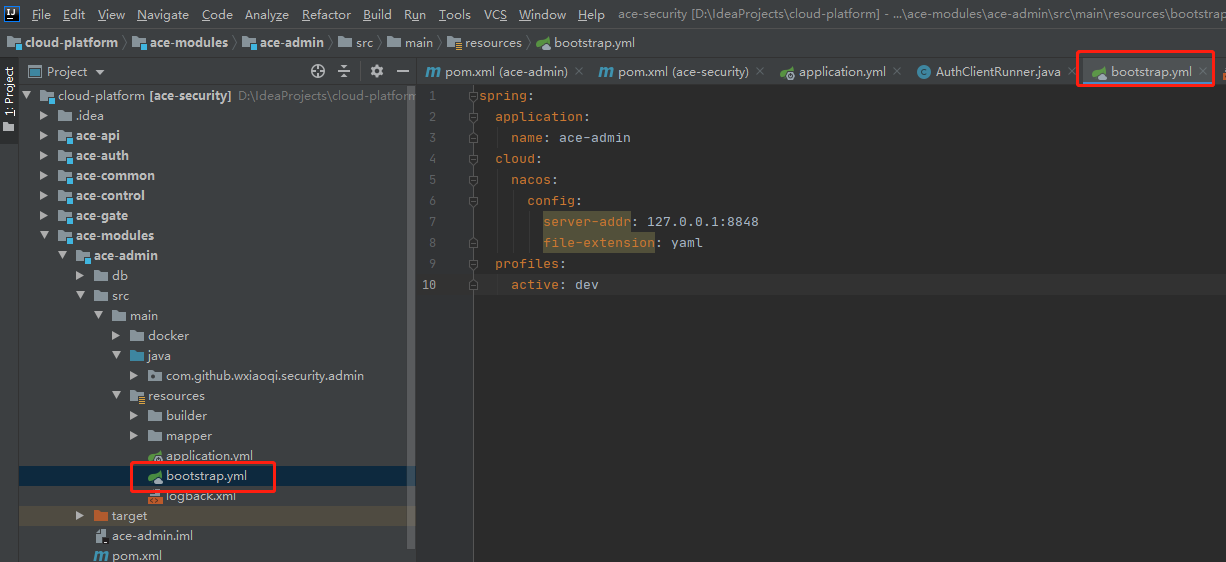
首先在 bootstrap.yml 文件里,进行nacos的配置拉取:
示例:
spring:
  application:
    name: ace-admin
  cloud:
    nacos:
      config:
        server-addr: 127.0.0.1:8848
        file-extension: yaml
  profiles:
    active: dev
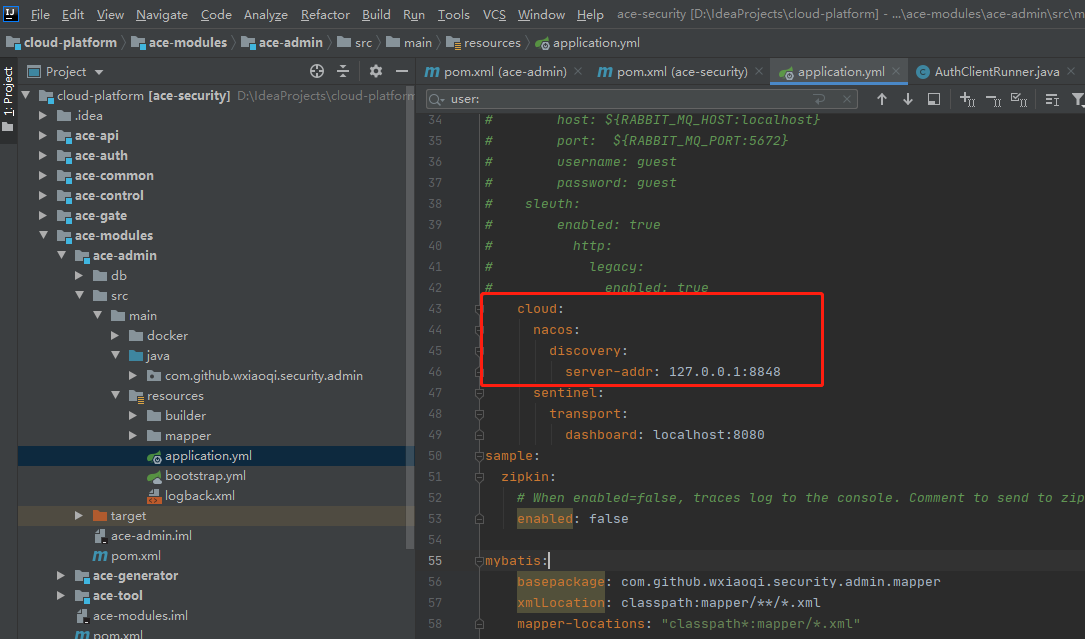
服务注册地址:
spring:
 application:
   name: nacos-provider
 cloud:
   nacos:
     discovery:
       server-addr: 192.168.233.150:8848

server:
 port: 8082

management:
 endpoints:
   web:
     exposure:
       include: "*"
user:
   name: caps
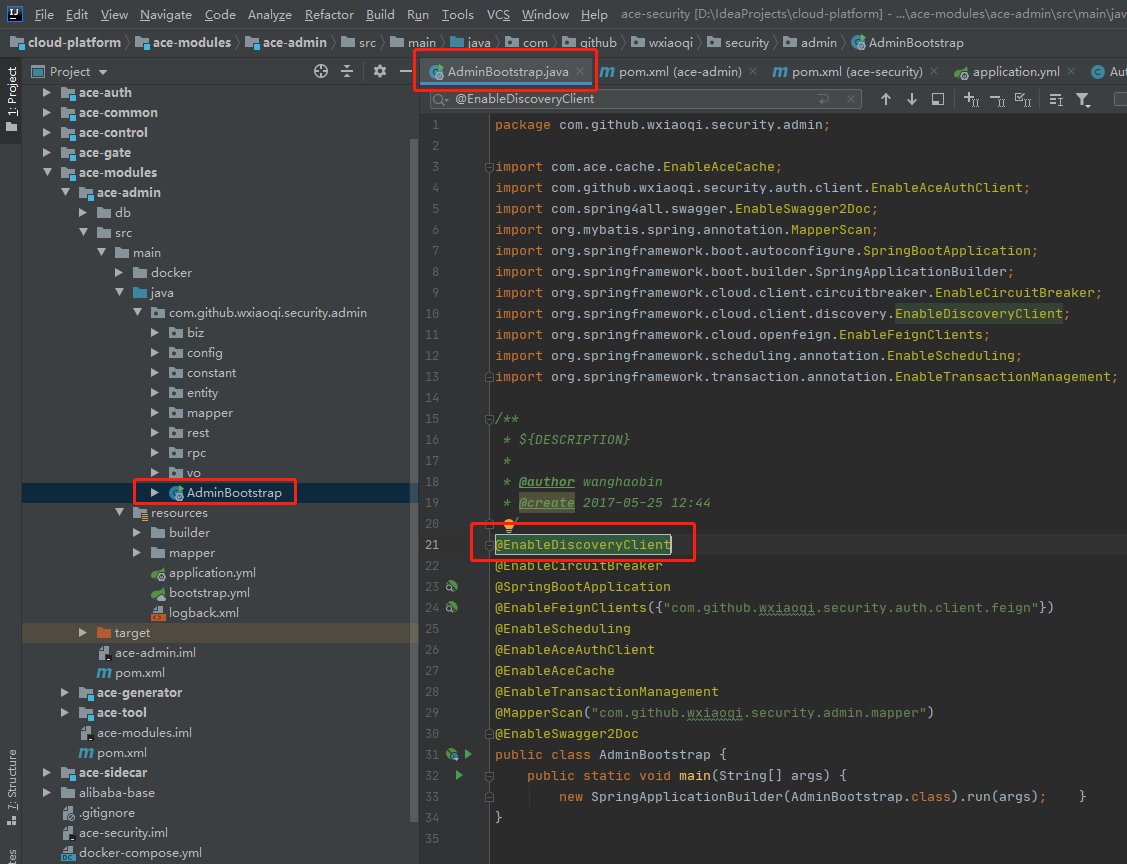
入口函数添加注解:@EnableDiscoveryClient
在项目中找一个 Controller ,增加一个请求方法,测试配置更新效果
// 注入配置文件上下文
@Autowired
private ConfigurableApplicationContext applicationContext;

// 从上下文中读取配置
@GetMapping(value = "/hi")
public String sayHi() {
    return "Hello " + applicationContext.getEnvironment().getProperty("user.name");
}
使用 FeignClient 优化调用服务
首先在pom.xml中添加FeignClient引用
<dependency>
    <groupId>org.springframework.cloud</groupId>
    <artifactId>spring-cloud-starter-openfeign</artifactId>
    <version>2.1.3.RELEASE</version>
</dependency>

通过 Spring Cloud 原生注解 @EnableFeignClients 开启

编写远程服务调用接口
package com.ichochy.nacos.service;

import org.springframework.cloud.openfeign.FeignClient;
import org.springframework.web.bind.annotation.PathVariable;
import org.springframework.web.bind.annotation.RequestMapping;

@FeignClient(value = "service-provider")
public interface ServiceInterface {

    @RequestMapping("/service/echo/{name}")
    public String echo(@PathVariable String name);

}
远程调用服务
package com.ichochy.nacos.controller;

import com.ichochy.nacos.service.ServiceInterface;
import org.springframework.beans.factory.annotation.Autowired;
import org.springframework.web.bind.annotation.PathVariable;
import org.springframework.web.bind.annotation.RequestMapping;
import org.springframework.web.bind.annotation.RestController;
import org.springframework.web.client.RestTemplate;

@RestController
@RequestMapping("/result")
public class ResultController {

    @Autowired
    private ServiceInterface serviceInterface;

    @RequestMapping("feignClient/{name}")
    public String feignClient(@PathVariable String name){
        return serviceInterface.echo(name);
    }

}
访问地址:http://127.0.0.1:8080/result/feignClient/ichochy
参考资料: