一、配置服务器
1.安装管理服务
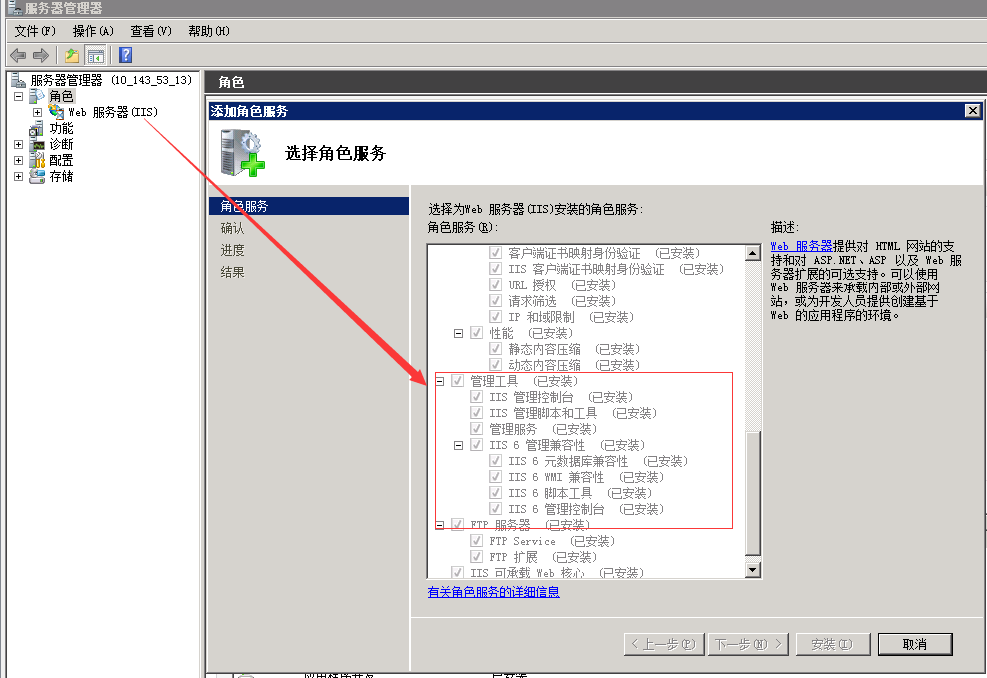
2.点击管理服务进行配置

二.安装WebDeploy
2.1通过离线安装包方式安装:
离线包没有WebDeploy3.6版本的,不过影响不大
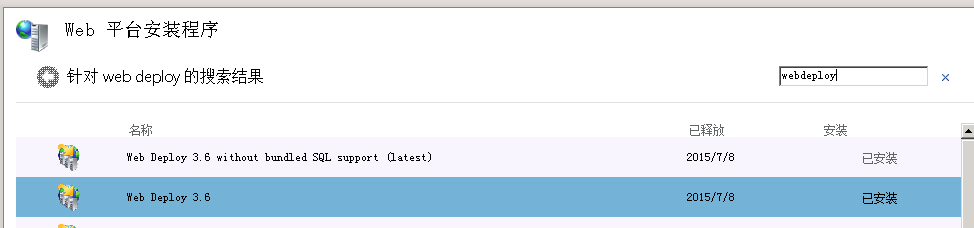
2.2通过Web平台安装程序安装:
我当时服务器没有Web平台安装程序,可以通过链接下载
2.3配置WebDeploy的专用账户
1.一般情况下,WebDeploy 安装好的时候,会创建两个本地账户
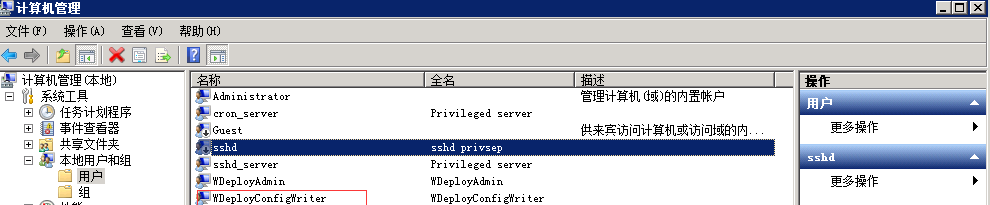
很可惜,我这里是二般情况
我重新创建了WDeployAdmin 和 WDeployConfigWriter 这两个账户
具体操作参考:
接下来添加WebDeploy专用账户,后面发布要用
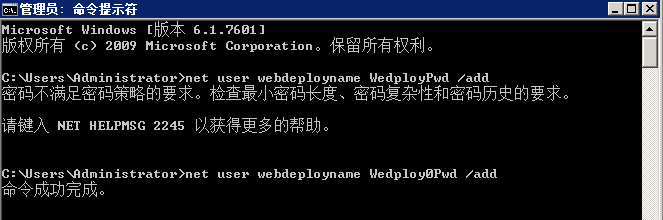
net user 用户名 密码 /add。这样就能创建一个非管理员的普通账户。
2 给账户添加Web站点权限


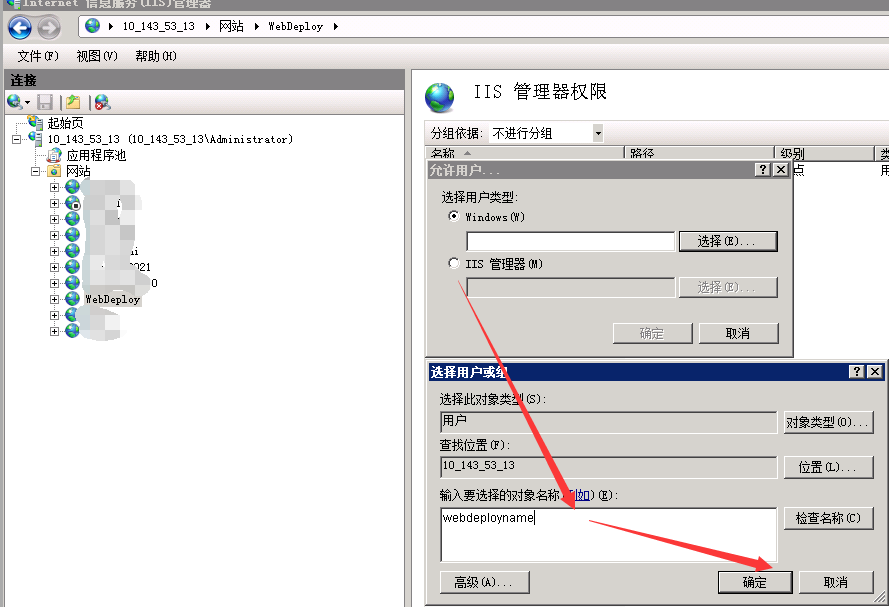
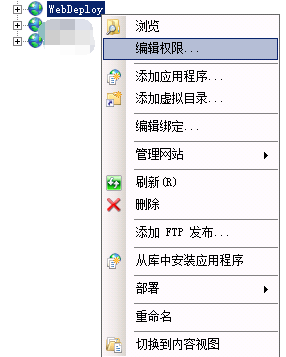
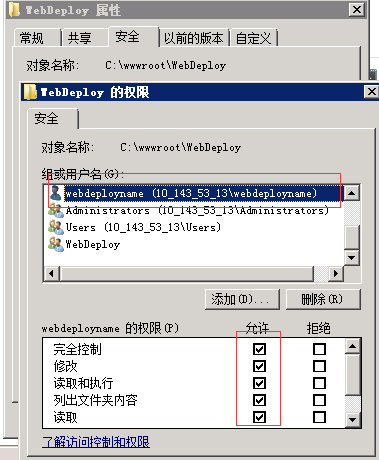
给WebDeploy专用账户添加操作权限

重要事项:测试管理服务是否可用
一个需要关注的事情是你的服务器上是否启用了防火墙,或你的服务器在集群中的位置。
管理服务默认使用HTTPS协议运行在8172这个端口。这个端口可能默认被你主机的设置关闭了。
这样的话,要么你需要在防火墙/或宿主上打开它—要么选择一个允许的端口号。
要测试管理服务是否可用,只需要打开浏览器并访问类似https://yourservername:8172/MsDeploy.axd 的链接就可以—如果你被要求提供用户名/密码,那说明它没有被防火墙阻挡。如果是超时则说明防火墙禁用了端口。
三、配置VS发布文件
VS 点击发布采用WebDeploy方式

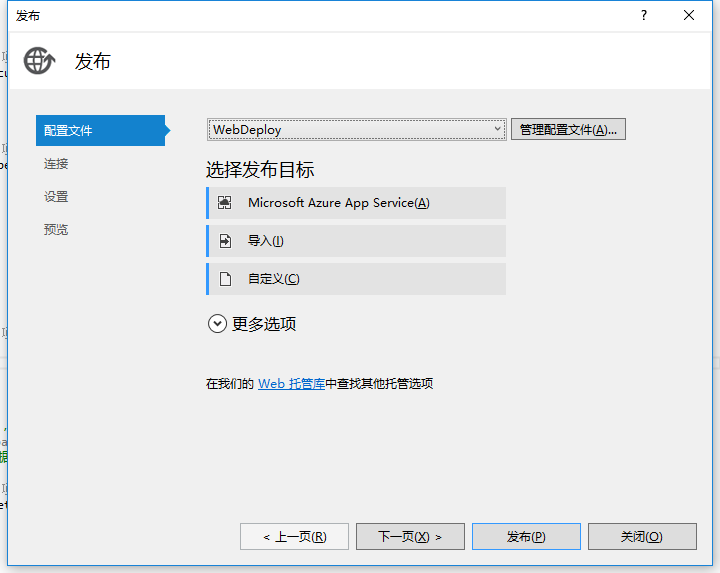
【发布方法(M)】选择Web Deploy =>
【服务器(E):】填写服务器的IP地址 =>
【站点名称(T):】填写IIS中网站的名称 =>
【用户名(N):】填写windows 服务器的远程登录账号 =>
【密码(W):】填写windows 服务器的远程登录密码 =>
【目标URL(L):】填写网站的URL例如 http://xxx.xxxxxx.xxx =>
点击 【验证连接(V)】按钮 =>证书出错点击【接受】按钮 =>【下一步】


发布成功

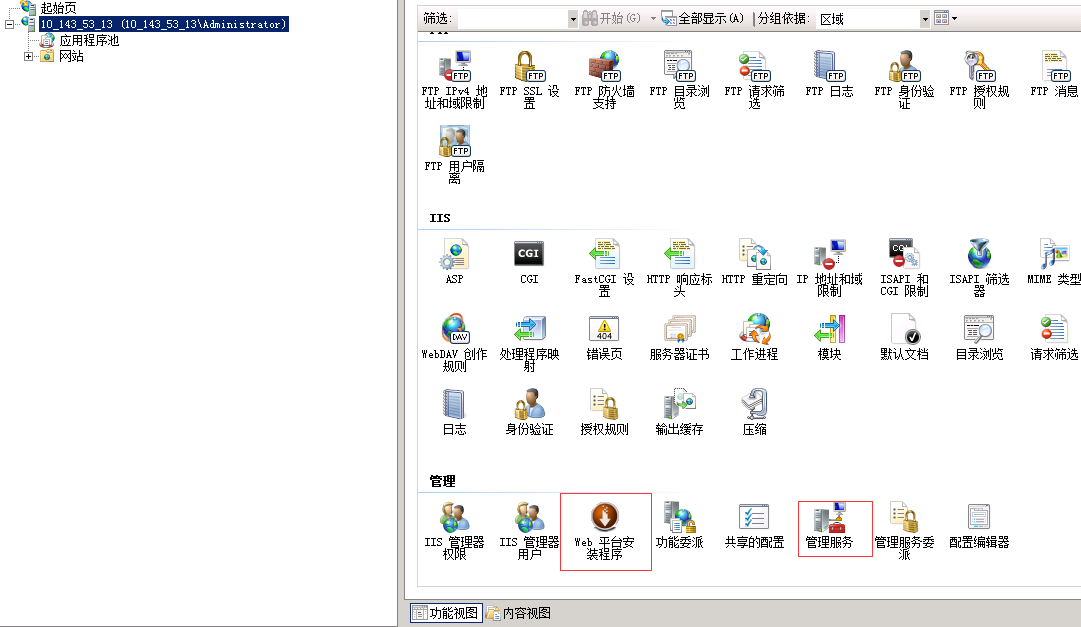
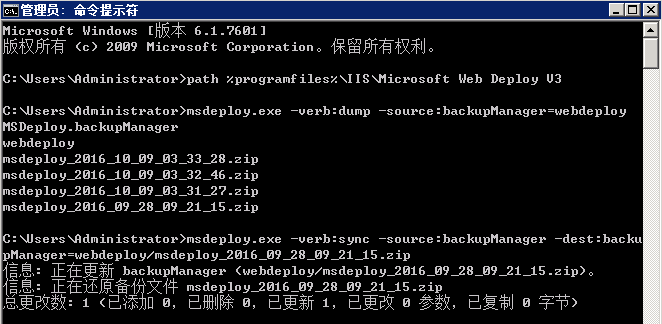
四、配置WebDeploy
进入WebDeploly
path %programfiles%IISMicrosoft Web Deploy V3
查看备份
msdeploy.exe -verb:dump -source:backupManager=网站名
恢复备份
msdeploy.exe -verb:sync -source:backupManager -dest:backupManager=webdeploy/备份的名字
参考:
https://msdn.microsoft.com/zh-cn/magazine/gg185703.aspx
http://www.cnblogs.com/zhaozhengyan/p/win2008R2_webdeploy.html