springmvc的文件上传
1.导入jar包
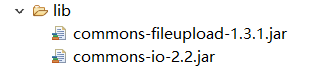
下载地址:https://github.com/suyirulan/putao/tree/master/fileupload_jar
jsp页面:
<%@ page language="java" contentType="text/html; charset=UTF-8" pageEncoding="UTF-8"%>
<!DOCTYPE html PUBLIC "-//W3C//DTD HTML 4.01 Transitional//EN" "http://www.w3.org/TR/html4/loose.dtd">
<html>
<head>
<meta http-equiv="Content-Type" content="text/html; charset=UTF-8">
<title>Insert title here</title>
</head>
<body>
    <form action="addStudent" method="post" enctype="multipart/form-data">
        姓名:<input type="text" name="name" /><br>
        年龄:<input type="text" name="age" /><br>
        头像:<input type="file" name="photo" /><br>
        <input type="submit" value="上传" />
    </form>
</body>
</html>
注意:表单form标签的属性method="post" 必须是post提交;enctype="multipart/form-data"是必须写的,并且文件的name=" "也是必须写的
2.在springmvc配置文件中上传解析器
    <!-- 配置文件上传解析器 -->
    <bean id="multipartResolver" class="org.springframework.web.multipart.commons.CommonsMultipartResolver">
    <property name="maxUploadSize" value="209715200"></property>
    </bean>
注意:value中的单位是字节;字节计算:1M=1024k=1024*1024=1048576字节
3.在Controller控制层处理代码
package com.zhiyou100.xg.controller;

import java.io.File;
import java.io.IOException;

import javax.servlet.http.HttpServletRequest;

import org.apache.commons.io.FileUtils;
import org.springframework.stereotype.Controller;
import org.springframework.ui.Model;
import org.springframework.web.bind.annotation.RequestMapping;
import org.springframework.web.multipart.MultipartFile;

import com.zhiyou100.xg.bean.Student;

@Controller
public class StudentController {
    //文件上传
    @RequestMapping("addStudent")
    public String addStudent(Student stu,MultipartFile photo,HttpServletRequest request,Model model) {
        String path = request.getServletContext().getRealPath("/photo");
        File file = new File(path);
        if(!file.exists()) {
            file.mkdirs();
        }

        String filename = System.currentTimeMillis()+ photo.getOriginalFilename();
        stu.setPhotos("photo/"+filename);

        File targetfile = new File(path+"/"+filename);
        try {
            FileUtils.writeByteArrayToFile(targetfile, photo.getBytes());
        } catch (IOException e) {
            // TODO Auto-generated catch block
            e.printStackTrace();
        }
        model.addAttribute("stu", stu);
        return "index";
    }
}
2.springmvc的拦截器
1.创建一个类,实现接口Handlerinterceptor
2.重写接口中的方法
1 public class MyInterceptor implements HandlerInterceptor{
 2
 3     @Override
 4     public void afterCompletion(HttpServletRequest arg0, HttpServletResponse arg1, Object arg2, Exception arg3)
 5             throws Exception {
 6         // TODO Auto-generated method stub
 7
 8     }
 9
10     @Override
11     public void postHandle(HttpServletRequest arg0, HttpServletResponse arg1, Object arg2, ModelAndView arg3)
12             throws Exception {
13         // TODO Auto-generated method stub
14
15     }
16
17     @Override
18     public boolean preHandle(HttpServletRequest request, HttpServletResponse response, Object arg2) throws Exception {
19         Object name = request.getSession().getAttribute("name");
20         if(name!=null) {
21             return true;
22         }else {
23             System.out.println("拦截器");
24             return false;
25         }
26     }
27
28 }
3.在springmvc配置文件中配置拦截器
    <!-- 配置拦截器 -->
    <mvc:interceptors>
        <mvc:interceptor>
            <mvc:mapping path="/user/**"/>
            <mvc:exclude-mapping path="/user/tologin"/><!-- 不过滤login页面  -->
            <mvc:exclude-mapping path="/user/login"/>
            <mvc:exclude-mapping path="/user/register"/>
            <bean class="com.zhiyou100.xg.interceptor.MyInterceptor"></bean>
        </mvc:interceptor>
    </mvc:interceptors>
4.在Controller控制层处理代码
package com.zhiyou100.xg.controller;


import org.springframework.stereotype.Controller;
import org.springframework.ui.Model;

import org.springframework.web.bind.annotation.RequestMapping;
import org.springframework.web.bind.annotation.SessionAttributes;


@Controller
@RequestMapping("/user")
@SessionAttributes(names= {"name","address"})//键名叫:name保存的作用域为session
public class UsersController {

    @RequestMapping("tologin")
    public String tologin(){
        return "login";
    }


    @RequestMapping("login")
    public String login(String name,String password ,Model model) {
        if("admin".equals(name)&&"admin".equals(password)) {
            model.addAttribute("name", name);
            return "list";
        }else{
            return "login";
        }

    }

    @RequestMapping("register")
    public String register() {
        return "register";
    }


    @RequestMapping("list") //如果没有登陆,那么访问该请求地址是被返回到登录页面
    public String list() {
        System.out.println("查询所有用户信息");
        return "list";
    }


}
需求:index.jsp;register.jsp;login.jsp不要过滤而list页面需要登陆成功才能看见
jsp页面放置位置
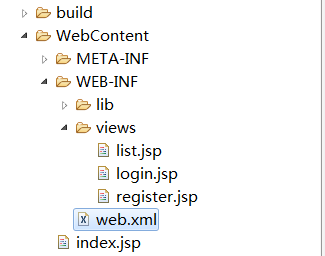
1.index.jsp页面
<%@ page language="java" contentType="text/html; charset=UTF-8" pageEncoding="UTF-8"%>

<!DOCTYPE html PUBLIC "-//W3C//DTD HTML 4.01 Transitional//EN" "http://www.w3.org/TR/html4/loose.dtd">
<html>
<head>
<meta http-equiv="Content-Type" content="text/html; charset=UTF-8">
<title>Insert title here</title>
</head>
<body>
<a href="user/tologin">登录</a>
<a href="user/register">注册</a>
<a href="user/list">查询</a>
<a href="user/delete">删除</a>

</body>
</html>
2.login.jsp页面
<%@ page language="java" contentType="text/html; charset=UTF-8" pageEncoding="UTF-8"%>

<!DOCTYPE html PUBLIC "-//W3C//DTD HTML 4.01 Transitional//EN" "http://www.w3.org/TR/html4/loose.dtd">
<html>
<head>
<meta http-equiv="Content-Type" content="text/html; charset=UTF-8">
<title>Insert title here</title>
</head>
<body>
    <form action="login" method="post">
        用户名:<input type="text" name="name"/><br>
        密码:<input type="text" name="password"/><br>
        <input type="submit" value="登录">
    </form>
</body>
</html>
3.register.jsp页面
<%@ page language="java" contentType="text/html; charset=UTF-8" pageEncoding="UTF-8"%>

<!DOCTYPE html PUBLIC "-//W3C//DTD HTML 4.01 Transitional//EN" "http://www.w3.org/TR/html4/loose.dtd">
<html>
<head>
<meta http-equiv="Content-Type" content="text/html; charset=UTF-8">
<title>Insert title here</title>
</head>
<body>
    <form action="users/register" method="post">
    姓名:<input type="text" name="unames"/><br>
    密码:<input type="text" name="password"/><br>
    手机:<input type="text" name="phone"/><br>

    <input type="submit" value="提交"/>
    </form>
</body>
</html>
4.list.jsp页面
<%@ page language="java" contentType="text/html; charset=UTF-8" pageEncoding="UTF-8"%>
<!DOCTYPE html PUBLIC "-//W3C//DTD HTML 4.01 Transitional//EN" "http://www.w3.org/TR/html4/loose.dtd">
<html>
<head>
<meta http-equiv="Content-Type" content="text/html; charset=UTF-8">
<title>Insert title here</title>
</head>
<body>
==========list============
</body>
</html>
3.springmvc后台校验
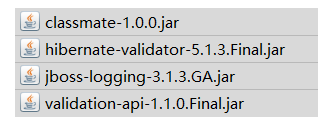
1.引入jar包
2.在相应的实体类中加入注解
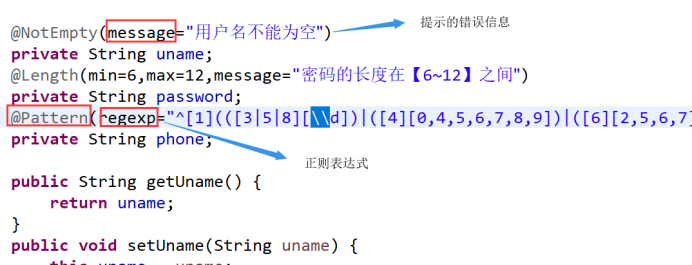
详细注解:

3.在控制层接受参数时
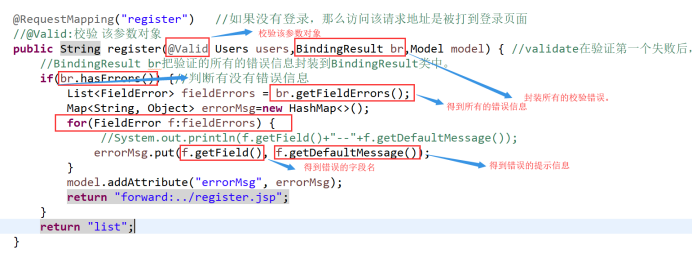
4.jsp页面
