此博客主要实现通过github创建个人定制的博客的功能,主要参考如下两篇文章,再次感谢。
【说明】:使用本文的正确方式是参考上述两篇文档,遇到问题时到这里找解决办法。
本文通过自己亲自实践可行,过程中遇到了一些问题,下文融合了两篇文章,也提供了自己遇到的问题的解决办法,建议大家主要参考上述两篇文章,然后走不通的时候再看看该博客有没有解决你遇到的问题。

解决办法:
通过git shell。进行"初始化操作"(这里这样称呼),命令如下:
git config --global user.email "你的邮箱"
git config --global user.name "你的账户名"
然后登录成功

Git操作:git - 简易指南
step1:Shell克隆到本地仓库Clone the repository
git clone https://github.com/username/username.github.io
step2:Hello World:Enter the project folder and add an index.html file:
cd username.github.io
echo "Hello World" > index.html
step3:Push it Add, commit, and push your changes:
git add --all
git commit -m "Initial commit"
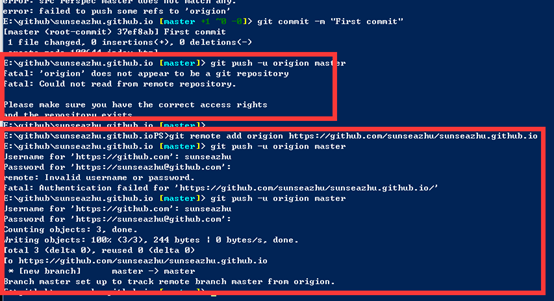
    git push -u origin master
 出现以下错误
Fatal:'region'does not apprear to be a git repository
Fatal:Could not read from remote access right
此时要添加origin的网址
git add origion https://github.com/sunseazhu/sunseazhu.github.io.git

此时通过网址就可以访问了sunseazhu.github.io
然后其实就相当于美化,如果自己创建的网站其实就可以直接放在上面了。通过git就可以。但是也可以通过github自带的一些工具,实现简单的样式CSS。
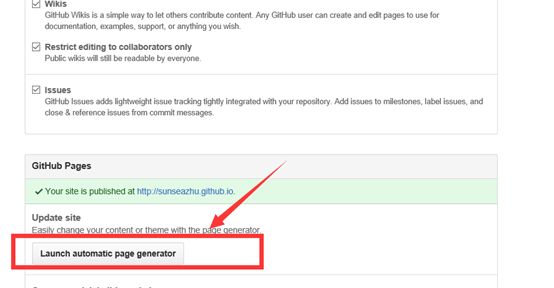
step1:点击setting

step2:点击launch automatic page generator
step3:个性化定制,然后点击最下面的continue to layout

step4:选择样式

【OK】效果如图
