下载第三方模块
导入模块social-auth-app-django 和geetest 提前去官网下载gt.js或者引入http://static.geetest.com/static/tools/gt.js
pip install social-auth-app-django
pip install geetest
在django引用
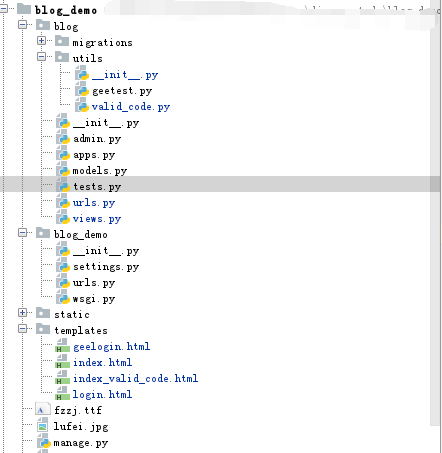
1.目录结构
2.html层
<!DOCTYPE html> <html lang="en"> <head> <meta charset="UTF-8"> <title>login</title> <link rel="stylesheet" href="/static/bootstrap/css/bootstrap.css"> <style> .error{ color: red; } </style> </head> <body> <h3>登录</h3> <!-- 为使用方便,直接使用jquery.js库,如您代码中不需要,可以去掉 --> <script type="text/javascript" src="/static/bootstrap/js/jquery-3.3.1.js"></script> <script type="text/javascript" src="/static/bootstrap/js/bootstrap.js"></script> <!-- 引入封装了failback的接口--initGeetest --> <script src="http://static.geetest.com/static/tools/gt.js"></script> <div class="container"> <div class="row"> <div class="col-md-6 col-md-offset-3"> <div class="panel panel-default login"> <div class="panel-heading"> <p class="h3">登录 博客账号</p> <p>请在下面的输入框中输入您的用户名和密码</p> </div> <div class="panel-body"> <div> {% csrf_token %} <div class="form-group"> <input type="text" class="form-control input-lg" id="user" placeholder="用户名"> </div> <div class="form-group"> <input type="password" class="form-control input-lg" id="pwd" placeholder="密码"> </div> <div class="form-group popup-div"> <!-- 放置极验的滑动验证码 --> <div id="popup-captcha"></div> </div> <div class="form-group"> <button class="btn btn-block btn-primary btn-lg" id="login-button" >登录</button> </div> <span id="error" class="pull-right"></span> </div> </div> </div> </div> </div> </div> <script> //发送数据 var handlerPopup = function (captchaObj) { // 成功的回调 captchaObj.onSuccess(function () { var validate = captchaObj.getValidate(); var username = $("#user").val(); var password = $("#pwd").val(); $.ajax({ url: "/blog/geelogin/", // 进行二次验证 type: "post", dataType: "json", data: { username: username, password: password, csrfmiddlewaretoken: $("[name='csrfmiddlewaretoken']").val(), geetest_challenge: validate.geetest_challenge, geetest_validate: validate.geetest_validate, geetest_seccode: validate.geetest_seccode }, success: function (data) { if(data.status){ $('#error').text(data.msg).css({'margin-left':'10px','color':'red'}) }else{ location.href = data.msg; } } }); }); //绑定事件显示滑动验证码 $("#login-button").click(function () { captchaObj.show(); }); // 将验证码加到id为captcha的元素里 captchaObj.appendTo("#popup-captcha"); // 更多接口参考:http://www.geetest.com/install/sections/idx-client-sdk.html }; // 验证开始需要向网站主后台获取id,challenge,success(是否启用failback) $.ajax({ url: "/blog/pc-geetest/register?t=" + (new Date()).getTime(), // 加随机数防止缓存 type: "get", dataType: "json", success: function (data) { // 使用initGeetest接口 // 参数1:配置参数 // 参数2:回调,回调的第一个参数验证码对象,之后可以使用它做appendTo之类的事件 initGeetest({ gt: data.gt, challenge: data.challenge, product: "popup", // 产品形式,包括:float,embed,popup。注意只对PC版验证码有效 offline: !data.success // 表示用户后台检测极验服务器是否宕机,一般不需要关注 // 更多配置参数请参见:http://www.geetest.com/install/sections/idx-client-sdk.html#config }, handlerPopup); } }); </script> </body> </html>
3.urls.py
from django.contrib import admin
from django.urls import path
from django.urls import re_path,include

from blog import views

urlpatterns = [
    # path('admin/', admin.site.urls),
    # re_path(r"blog/", include(('blog.urls', 'blog'))),  # 分发
    path('login/',views.login),
    path('get_valid_img/',views.get_validCode_img),
    path('index/',views.index),
    path('geeindex/', views.geeindex),
    re_path(r"^pc-geetest/register",views.get_geetest),
    # re_path(r'^pc-geetest/validate$',views.pcvalidate),
    # re_path(r'^pc-geetest/ajax_validate', views.pcajax_validate),
    path('geelogin/',views.geelogin),

]
4.views.py
from django.shortcuts import render,HttpResponse

# Create your views here.
from django.http import JsonResponse
from django.contrib import auth

pc_geetest_id = "b46d1900d0a894591916ea94ea91bd2c"
pc_geetest_key = "36fc3fe98530eea08dfc6ce76e3d24c4"


def geelogin(request):
    """
    登录
    :param request:
    :return:
    """
    if request.method == 'POST':
        ret = {
            'status': None,
            'msg': '',
        }

        username = request.POST.get("username")
        password = request.POST.get("password")

        gt = GeetestLib(pc_geetest_id, pc_geetest_key)
        challenge = request.POST.get(gt.FN_CHALLENGE, '')
        validate = request.POST.get(gt.FN_VALIDATE, '')
        seccode = request.POST.get(gt.FN_SECCODE, '')
        status = request.session[gt.GT_STATUS_SESSION_KEY]
        user_id = request.session["user_id"]

        if status:
            result = gt.success_validate(challenge, validate, seccode, user_id)
        else:
            result = gt.failback_validate(challenge, validate, seccode)

        if result:
            # 验证码正确

            # 利用auth模块做用户名和密码的校验
            user = auth.authenticate(username=username, password=password)
            if user:
                # 用户名密码正确
                # 给用户做登录
                auth.login(request, user)  # 将登录用户赋值给 request.user
                ret["msg"] = "/blog/index/"
            else:
                # 用户名密码错误
                ret["status"] = 1
                ret["msg"] = "用户名或密码错误!"
        else:
            ret["status"] = 1
            ret["msg"] = "验证码错误"

        return JsonResponse(ret)

    else:
        return render(request,'geelogin.html')

def index(request):
    return render(request, 'index.html')


from geetest import GeetestLib


# 处理极验 获取验证码的视图
def get_geetest(request):
    user_id = 'test'
    gt = GeetestLib(pc_geetest_id, pc_geetest_key)
    status = gt.pre_process(user_id)
    request.session[gt.GT_STATUS_SESSION_KEY] = status
    request.session["user_id"] = user_id
    response_str = gt.get_response_str()
    return HttpResponse(response_str)
5.index.html
<!DOCTYPE html>
<html lang="en">
<head>
    <meta charset="UTF-8">
    <title>index</title>
</head>
<body>
<h3>首页{{ request.user }}</h3>
</body>
</html>