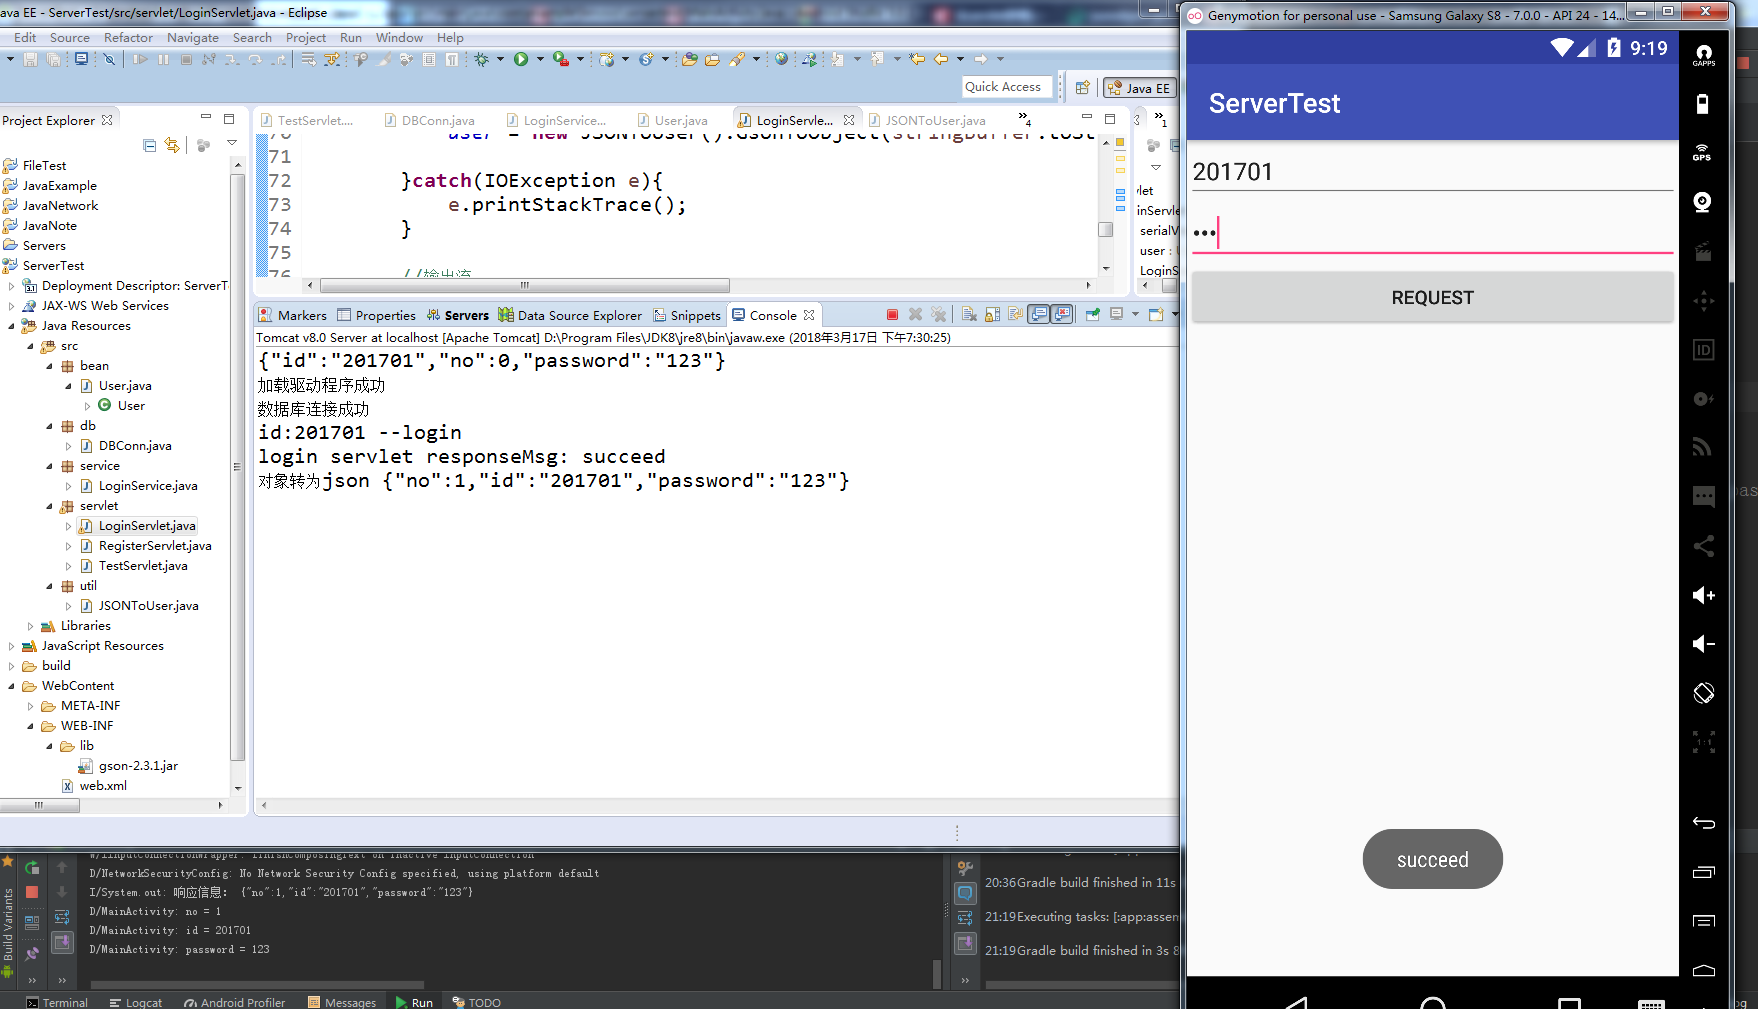
1.主要过程:Android端发送json数据,servlet接收后解析json数据,通过连接数据库比较并返回json数据到Android端。整个效果:
2.Android端网络连接使用OKHttp开源库,json与对象格式之间的转换使用GSON开源库。在app文件夹下的build.gradle文件中添加开源库的依赖。

3.新建一个网络请求类HttpConnection,并定义sendOkHttpRequest()方法使用OKHttp进行网络连接。

HttpConnection.java
package com.example.lenovo.servertest;

import com.google.gson.Gson;

import java.io.BufferedReader;
import java.io.IOException;
import java.io.InputStream;
import java.io.InputStreamReader;import okhttp3.MediaType;
import okhttp3.OkHttpClient;
import okhttp3.Request;
import okhttp3.RequestBody;

/**
 * Created by lenovo on 2018/3/16.
 */

public class HttpConnection {

    /*address为请求servlet的地址address="http://192.168.43.87:8080/ServerTest/LoginServlet"
    192.168.43.87为测试服务器的IP
      user为请求实体类
      okhttp3.Callback callback是OkHttp库中自带的回调接口,OkHttp在enqueue()方法内部开了子线程,
      在子线程中进行Http请求,并将返回结果回调到okhttp3.Callback当中。
    * */
    public static void sendOkHttpRequest(String address, User user, okhttp3.Callback callback){
        OkHttpClient client = new OkHttpClient();
        //使用Ggon将user对象转为json
        String params = new Gson().toJson(user);
        MediaType JSON = MediaType.parse("application/json; charset=utf-8");
        RequestBody requestBody = RequestBody.create(JSON, params);
        Request request = new Request.Builder().url(address).post(requestBody).build();
        client.newCall(request).enqueue(callback);
    }

}
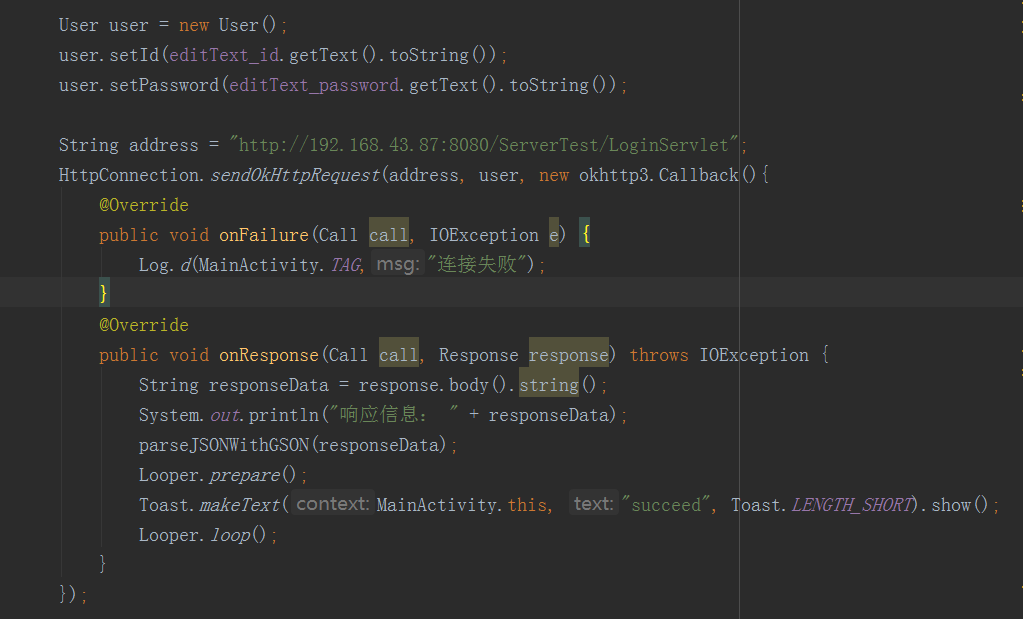
4. 新建User类,将id和password赋值,调用HTTPConnection中的sendOkHttpRequest方法,调用后必须重写okhttp3.Callback()接口中的两个方法,onFailure()和onResponse()。
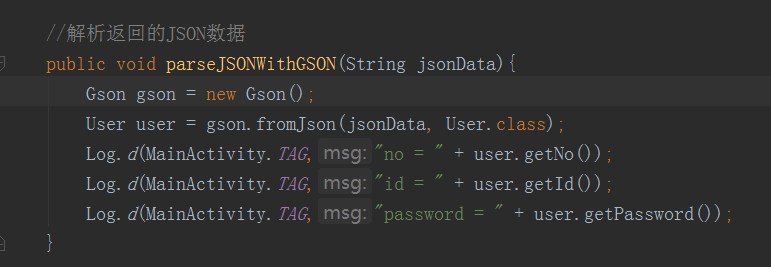
5.解析json
MainActivity.java
package com.example.lenovo.servertest;

import android.app.Dialog;
import android.content.Context;
import android.net.ConnectivityManager;
import android.net.NetworkInfo;
import android.os.Handler;
import android.os.Looper;
import android.os.Message;
import android.support.v7.app.AppCompatActivity;
import android.os.Bundle;
import android.util.Log;
import android.view.View;
import android.widget.Button;
import android.widget.EditText;
import android.widget.Toast;

import com.google.gson.Gson;
import com.google.gson.reflect.TypeToken;

import java.io.IOException;
import java.lang.ref.WeakReference;
import java.util.HashMap;
import java.util.List;
import java.util.Map;

import okhttp3.Call;
import okhttp3.Response;

public class MainActivity extends AppCompatActivity {

    private Button button_request;
    private EditText editText_id, editText_password;
    private MyHandler myhandler = new MyHandler(this);
    public static final String TAG="MainActivity";
    @Override
    protected void onCreate(Bundle savedInstanceState) {
        super.onCreate(savedInstanceState);
        setContentView(R.layout.activity_main);
        InitView();
    }

    //弱引用,防止内存泄露
    private static class MyHandler extends Handler {
        private final WeakReference<MainActivity> mActivity;

        public MyHandler(MainActivity activity) {
            mActivity = new WeakReference<MainActivity>(activity);
        }

        @Override
        public void handleMessage(Message msg) {
            System.out.println(msg);
            if (mActivity.get() == null) {
                return;
            }
            mActivity.get().updateUIThread(msg);
        }
    }

    //配合子线程更新UI线程
    private void updateUIThread(Message msg){
        Bundle bundle = msg.getData();
        String result = bundle.getString("result");
        Toast.makeText(MainActivity.this, result, Toast.LENGTH_SHORT).show();
    }

    void InitView(){
        button_request = (Button) findViewById(R.id.button_request);
        editText_id = (EditText) findViewById(R.id.editText_id);
        editText_password = (EditText) findViewById(R.id.editText_password);

        button_request.setOnClickListener(new View.OnClickListener() {
            @Override
            public void onClick(View view) {
                if (isConnectingToInternet()){
                    if (editText_id.toString().isEmpty()||editText_password.toString().isEmpty()) {
                        System.out.println("学号或密码不能为空");
                    }
                    else{
                        //开启访问数据库线程
                        new Thread(new Runnable() {
                            @Override
                            public void run() {

                                User user = new User();
                                user.setId(editText_id.getText().toString());
                                user.setPassword(editText_password.getText().toString());

                                String address = "http://192.168.43.87:8080/ServerTest/LoginServlet";
                                HttpConnection.sendOkHttpRequest(address, user, new okhttp3.Callback(){
                                    @Override
                                    public void onFailure(Call call, IOException e) {
                                        Log.d(MainActivity.TAG,"连接失败");
                                    }
                                    @Override
                                    public void onResponse(Call call, Response response) throws IOException {
                                        String responseData = response.body().string();
                                        System.out.println("响应信息: " + responseData);
                                        parseJSONWithGSON(responseData);
                                        Looper.prepare();
                                        Toast.makeText(MainActivity.this, "succeed", Toast.LENGTH_SHORT).show();
                                        Looper.loop();
                                    }
                                });

                            }
                        }).start();
                    }
                }else{
                    System.out.println("网络未连接");
                }

            }
        });
    }

    //解析返回的JSON数据
    public void parseJSONWithGSON(String jsonData){
        Gson gson = new Gson();
        User user = gson.fromJson(jsonData, User.class);
        Log.d(MainActivity.TAG,"no = " + user.getNo());
        Log.d(MainActivity.TAG,"id = " + user.getId());
        Log.d(MainActivity.TAG,"password = " + user.getPassword());
    }

    // 检测网络状态
    public boolean isConnectingToInternet() {
        ConnectivityManager connectivity = (ConnectivityManager)getSystemService(Context.CONNECTIVITY_SERVICE);
        if (connectivity != null) {
            NetworkInfo[] info = connectivity.getAllNetworkInfo();
            if (info != null)
                for (int i = 0; i < info.length; i++)
                    if (info[i].getState() == NetworkInfo.State.CONNECTED)
                    {
                        return true;
                    }
        }
        return false;
    }

}
activity_main.xml
<?xml version="1.0" encoding="utf-8"?>
<LinearLayout xmlns:android="http://schemas.android.com/apk/res/android"
    xmlns:tools="http://schemas.android.com/tools"
    android:orientation="vertical"
    android:layout_width="match_parent"
    android:layout_height="match_parent"
    tools:context="com.example.lenovo.servertest.MainActivity">

    <EditText
        android:id="@+id/editText_id"
        android:layout_width="match_parent"
        android:layout_height="wrap_content" />

    <EditText
        android:id="@+id/editText_password"
        android:inputType="textPassword"
        android:layout_width="match_parent"
        android:layout_height="wrap_content" />

    <Button
        android:id="@+id/button_request"
        android:layout_width="match_parent"
        android:layout_height="wrap_content"
        android:text="request"
        />

</LinearLayout>
6.服务端:新建User类
package bean;

public class User {
    private int no;
    private String id;
    private String password;

    public int getNo() {
        return no;
    }

    public void setNo(int no) {
        this.no = no;
    }

    public String getId() {
        return id;
    }

    public void setId(String id) {
        this.id = id;
    }

    public String getPassword() {
        return password;
    }

    public void setPassword(String password) {
        this.password = password;
    }

}
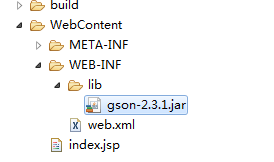
7.将Gson使用的jar包放在WEB-INF下的lib文件夹下,放其他处会出错。
8.MySQL连接所使用的jar包放在了Tomcat安装目录的lib文件夹下,加入Tomcat自动添加mysql-connector-java-5.1.30-bin.jar

9.新建数据库连接类DBConn.java
package db;

import java.sql.Connection;
import java.sql.DriverManager;
import java.sql.SQLException;

/*数据库连接*/
public class DBConn {
    private static final String driver = "com.mysql.jdbc.Driver";
    private static final String url = "jdbc:mysql://127.0.0.1:3306/computer_base";
    private static final String user = "root";
    private static final String password = "123";

    private static Boolean connectSQL = true;

    public static Connection getConnection(){
        Connection conn = null;

        try {
            //1 加载驱动程序
            Class.forName(driver);
            System.out.println("加载驱动程序成功");

            conn = DriverManager.getConnection(url, user, password);
            System.out.println("数据库连接成功");
        } catch (ClassNotFoundException e) {
            e.printStackTrace();
            System.out.println("加载驱动程序失败");
        }catch (SQLException e) {
            e.printStackTrace();
            connectSQL = false;
            System.out.println("数据库连接失败异常");
        }

        return conn;
    }

    //返回连接状态
    public Boolean getConnectSQL(){
        return connectSQL;
    }

}
10.json和对象User之间的转换JSONToUser.java
package util;

import com.google.gson.Gson;

import bean.User;

public class JSONToUser {

    //json转为对象
    public User GsonToObject(String stringGson){
        Gson gson = new Gson();
        User user = gson.fromJson(stringGson, User.class);

        return user;
    }
    //对象转为json
    public String ObjectToGson(User user){
        Gson gson = new Gson();
        String str = gson.toJson(user);

        return str;
    }
}
11.登录LoginService.java
package service;

import java.sql.Connection;
import java.sql.PreparedStatement;
import java.sql.ResultSet;

import bean.User;
import db.DBConn;

public class LoginService {
    static PreparedStatement preparedStatement = null;
    static ResultSet resultSet = null;
    static int login_failed = 0;
    static int login_succeed = 1;
    static User user = new User();

    public static User login(String id, String password){

        String sql = "select * from user where u_id ='" + id + "'";

        try{
            Connection conn = DBConn.getConnection();
            preparedStatement = conn.prepareStatement(sql);

            resultSet = preparedStatement.executeQuery();
            if(resultSet.next()){
                if(resultSet.getString(3).equals(password)){

                    System.out.println("id:" +
                             resultSet.getString(2)
                            + " --login");

                    user.setNo(resultSet.getInt(1));
                    user.setId(resultSet.getString(2));
                    user.setPassword(resultSet.getString(3));

                }
            }

            preparedStatement.close();
            conn.close();

        }catch(Exception e){
            e.printStackTrace();
        }

        return user;
    }
}
12.登录LoginServlet.java
package servlet;

import java.io.BufferedReader;
import java.io.IOException;
import java.io.PrintWriter;
import java.io.Writer;

import javax.servlet.ServletException;
import javax.servlet.annotation.WebServlet;
import javax.servlet.http.HttpServlet;
import javax.servlet.http.HttpServletRequest;
import javax.servlet.http.HttpServletResponse;

import bean.User;
import net.sf.json.JSONObject;
import service.LoginService;
import util.JSONToUser;

/**
 * Servlet implementation class LoginServlet
 */
@WebServlet("/LoginServlet")
public class LoginServlet extends HttpServlet {
    private static final long serialVersionUID = 1L;

    static User user = new User();
    /**
     * @see HttpServlet#HttpServlet()
     */
    public LoginServlet() {
        super();
        // TODO Auto-generated constructor stub
    }

    /**
     * @see HttpServlet#doGet(HttpServletRequest request, HttpServletResponse response)
     */
    protected void doGet(HttpServletRequest request, HttpServletResponse response) throws ServletException, IOException {
        // TODO Auto-generated method stub
        doPost(request, response);
        response.getWriter().append("Served at: ").append(request.getContextPath());
    }

    /**
     * @see HttpServlet#doPost(HttpServletRequest request, HttpServletResponse response)
     */
    protected void doPost(HttpServletRequest request, HttpServletResponse response) throws ServletException, IOException {
        // TODO Auto-generated method stub
        /*doGet(request, response);*/

        //定义StringBuffer变量,StringBuffer比String更加灵活
        StringBuffer stringBuffer = new StringBuffer();
        //line保存读取请求信息的当前一行,responseMessage为响应信息,返回信息
        String line = null, responseMessage = null;

        //读取信息时会发生IO异常
        try{
            //BufferedReader为缓冲读取流
            BufferedReader bufferedReader = request.getReader();
            while((line = bufferedReader.readLine()) != null){
                stringBuffer.append(line);
            }

            System.out.println(stringBuffer);
            //使用新建类的方法将json数据转为对象
            user = new JSONToUser().GsonToObject(stringBuffer.toString());

        }catch(IOException e){
            e.printStackTrace();
        }

        //输出流
        PrintWriter out = response.getWriter();
        //设置返回数据格式和编码
        response.setContentType("application/json;charset=utf-8");

        //调用LoginService类中login方法访问数据库,并返回查询结果
        user = LoginService.login(user.getId(), user.getPassword());

        if(user != null){
            //将查询到的结果对象转为json数据格式
            responseMessage = new JSONToUser().ObjectToGson(user);
            System.out.println("login servlet responseMsg: succeed");
        }

        System.out.println("对象转为json " + responseMessage);
        //输出流将信息返回
        out.print(responseMessage);

    }

}
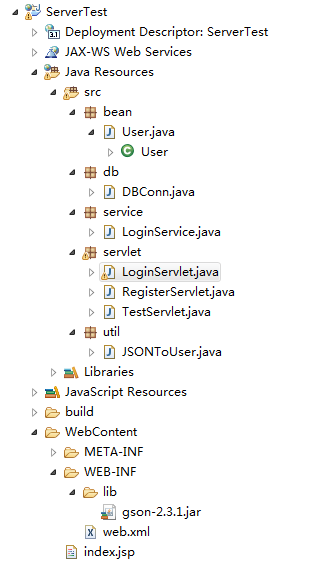
13.服务端整个文件目录