最近一直在学springboot和Cloud,互联网公司现在也更倾向于微服务这一块,前景是一篇光明的,特别是在springboot上开发的Cloud的部分,是一套分布式的整体解决方案,学好这一块至少这几年都很吃香;
既然学习很久,落地实践一下为好;
项目git网址:https://github.com/David-BIQI/manage.git(项目使用比较新的springboot2.0 还有jdk8 )
参照的代码规范:https://github.com/xwjie/PLMCodeTemplate.git (这个是一套能够落地的代码规范,跟着风哥学习很多)
公司现在是前后端分离的
pom架包
        <!--swagger 文档注释-->
    	<dependency>
			<groupId>io.springfox</groupId>
			<artifactId>springfox-swagger2</artifactId>
			<version>2.7.0</version>
		</dependency>
		<dependency>
			<groupId>io.springfox</groupId>
			<artifactId>springfox-swagger-ui</artifactId>
			<version>2.7.0</version>
		</dependency>
		<!--swagger-->
添加config
其中可以再swagger上设置请求参数,可以加入token等
package com.config;

import org.springframework.context.annotation.Bean;
import org.springframework.context.annotation.Configuration;
import org.springframework.web.bind.annotation.RestController;
import springfox.documentation.builders.ApiInfoBuilder;
import springfox.documentation.builders.ParameterBuilder;
import springfox.documentation.builders.PathSelectors;
import springfox.documentation.builders.RequestHandlerSelectors;
import springfox.documentation.schema.ModelRef;
import springfox.documentation.service.ApiInfo;
import springfox.documentation.service.Parameter;
import springfox.documentation.spi.DocumentationType;
import springfox.documentation.spring.web.plugins.Docket;
import springfox.documentation.swagger2.annotations.EnableSwagger2;

import java.util.ArrayList;
import java.util.List;

//参考:http://blog.csdn.net/catoop/article/details/50668896
/**
 * @author xiebq
 *
 */
@Configuration
@EnableSwagger2
public class Swagger2Config {

    @Bean
    public Docket createRestApi() {
        List<Parameter> pars = new ArrayList<Parameter>();
        return new Docket(DocumentationType.SWAGGER_2)
                .apiInfo(apiInfo())
                .select()
                .apis(RequestHandlerSelectors.withClassAnnotation(RestController.class))
                .paths(PathSelectors.any())
                .build()
                .globalOperationParameters(pars)
                .apiInfo(apiInfo());
    }

    private ApiInfo apiInfo() {
        return new ApiInfoBuilder()
                .title("拾花酿春 RESTful API")
                .description("展示先做基础功能,后面再添加业务")
                .termsOfServiceUrl("https://www.cnblogs.com/xiebq/")
                .version("1.0")
                .build();
    }

}
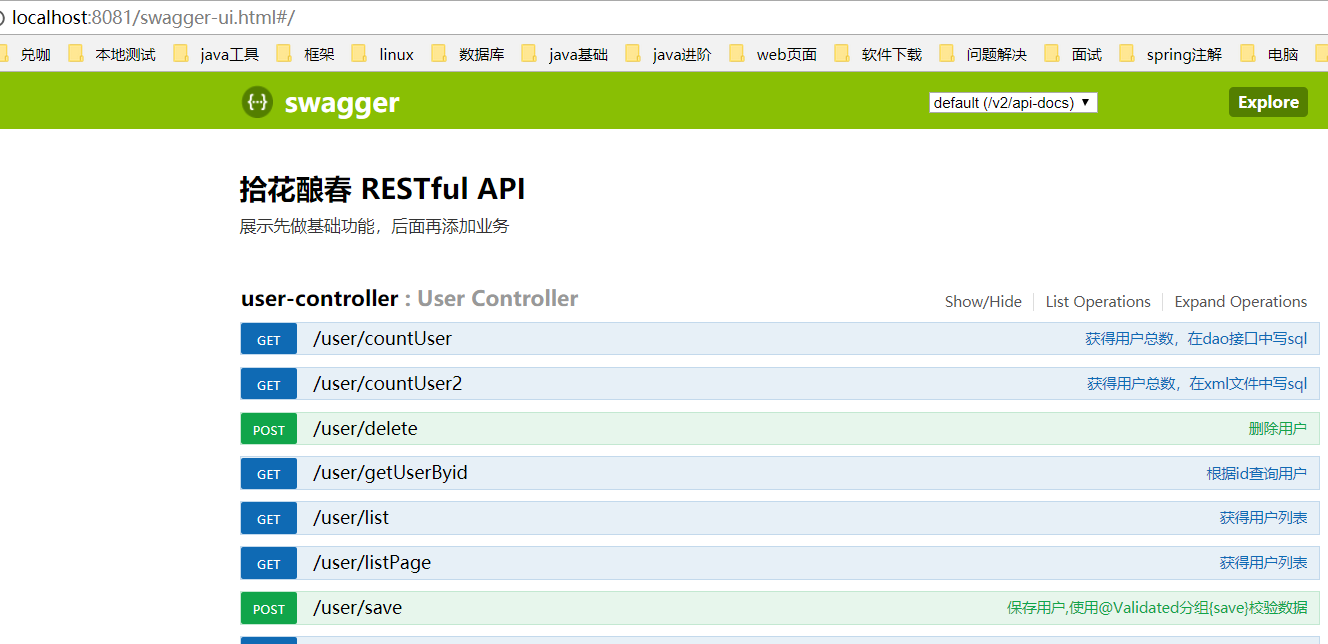
http://localhost:端口号/swagger-ui.html#! 启动项目数据网址就能点开,我这里是http://localhost:8081/swagger-ui.html#!
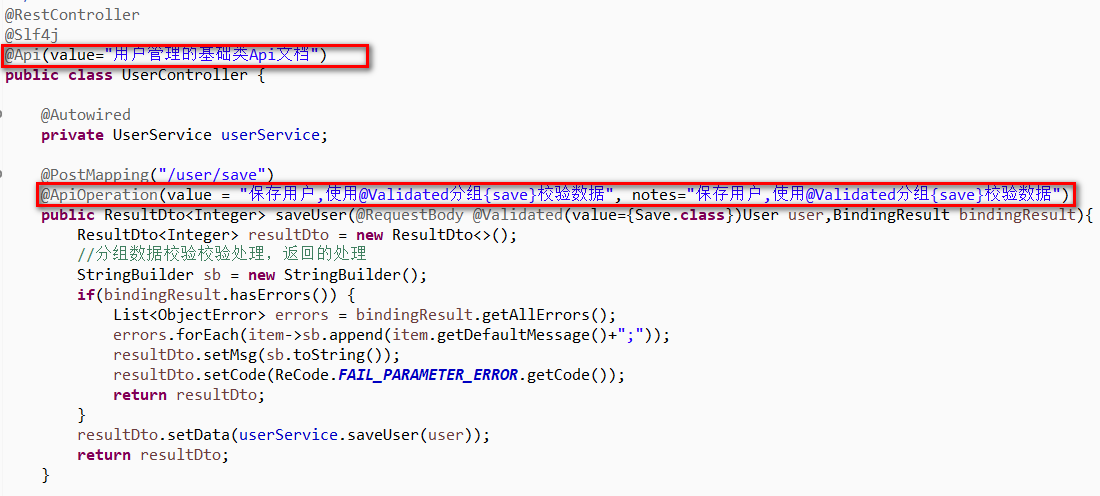
请求中添加注释
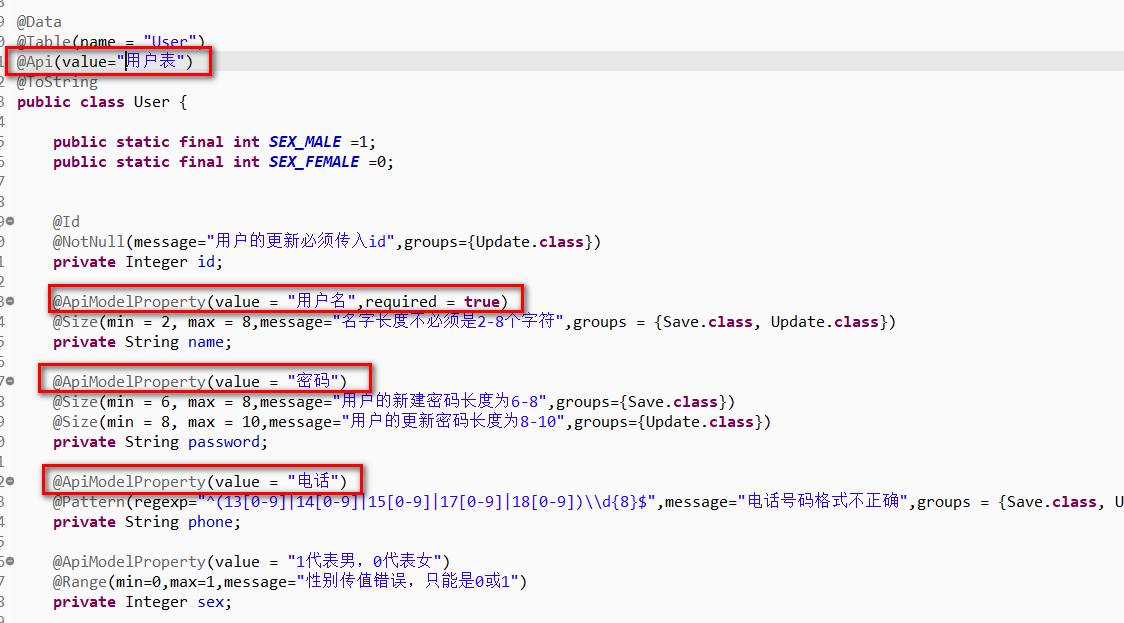
在传入的对象中添加注释
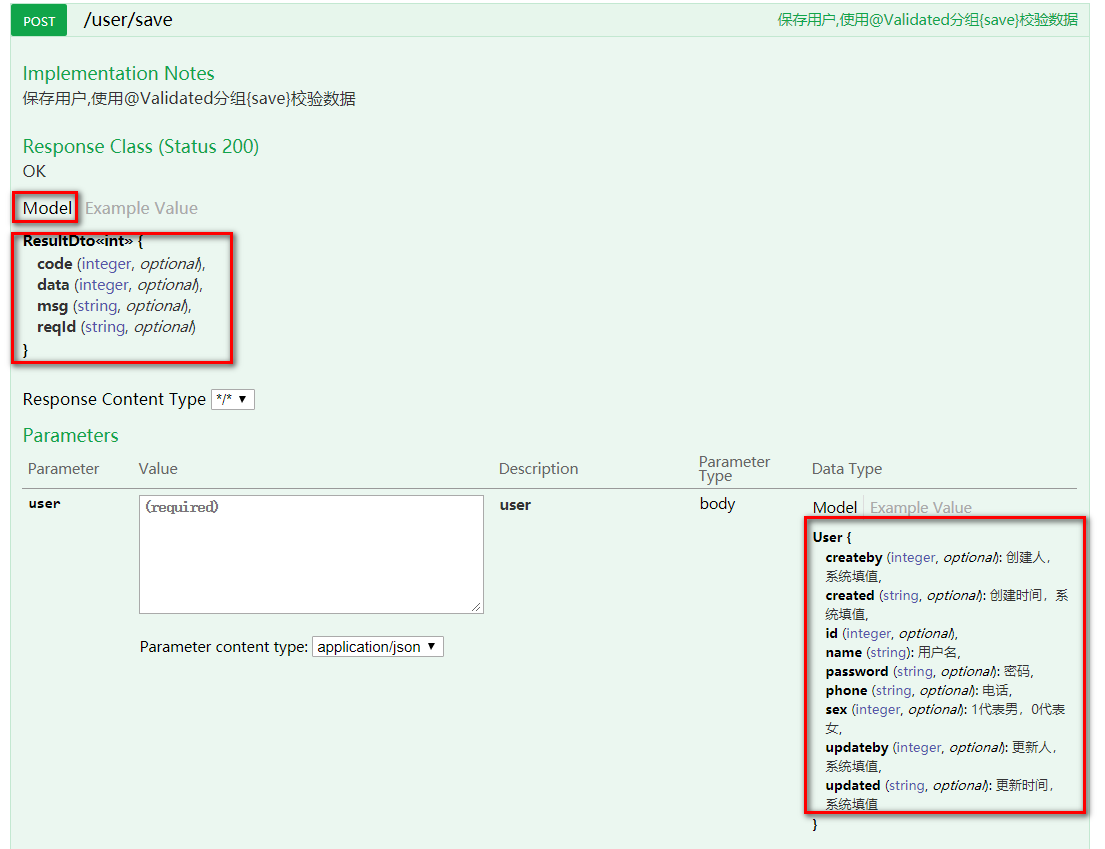
点开请求,就能看请求的具体情况,也可进行try it测试
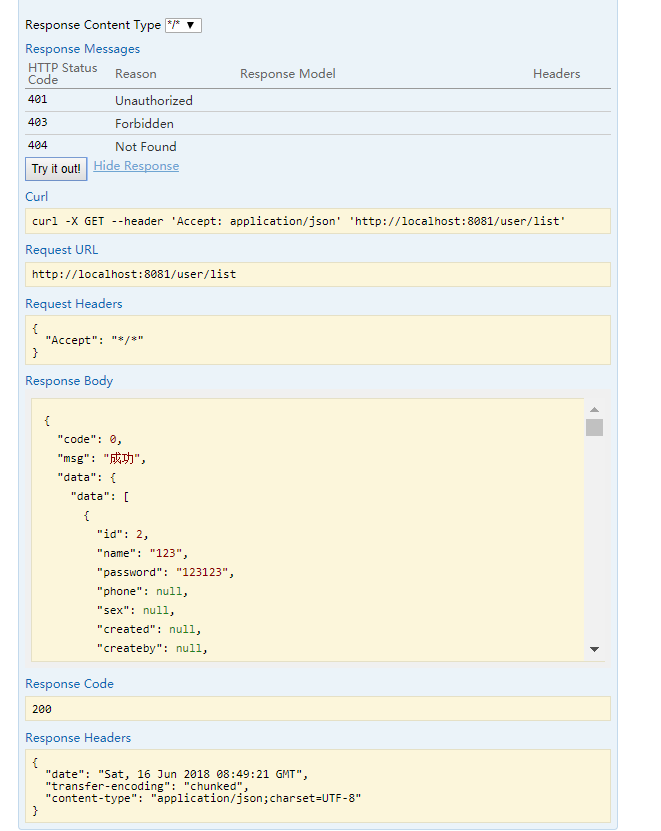
添加swagger文档,适合点后端分离,开发人员应熟悉response code 各个代表什么
1xx(临时响应)
2xx (成功)
3xx (重定向)
4xx(请求错误)
5xx(服务器错误)
还有就是项目中自定义的返回码等
至此,swagger使用基本OK,项目源码已经在Git上,可以下载运行。