本系列分三篇,记录了 Rails+Puma+Nginx+HTTPS(SSL) 网站服务搭建的全部过程
(一):Ubuntu 下 Ruby on rails 环境搭建及测试
(二):nginx 安装及配置,及 puma+nginx 运行 rails app
(三):SSL(HTTPS) 证书申请及 nginx 配置
申请 SSL 证书
为了在网站上启用 HTTPS,需要从证书颁发机构(CA)获取证书(一种文件)。此处我们从 Let’s Encrypt 处申请这种证书。Let’s Encrypt 是一个证书颁发机构(CA)。要从 Let’s Encrypt 获取您网站域名的证书,需要对域名有实际控制权。有些托管服务提供商提供 Let’s Encrypt 支持,可以帮助申请免费证书,安装并配置自动续期。此处我们使用手动方式说明如何在 Let’s Encrypt 使用 Certbot 申请 SSL 证书。
- Let’s Encrypt 中文官网:https://letsencrypt.org/zh-cn/
- Certbot 官网:https://certbot.eff.org/
上述官网中有 SSL 证书在不同系统,不同web服务器下申请的流程,下面仅为在 ubuntu 下的申请流程。
基本步骤
1. SSH 登陆到服务器
SSH 登陆到服务器,使用带有sudo权限的用户运行 HTTP 网站
2. 安装 snapd
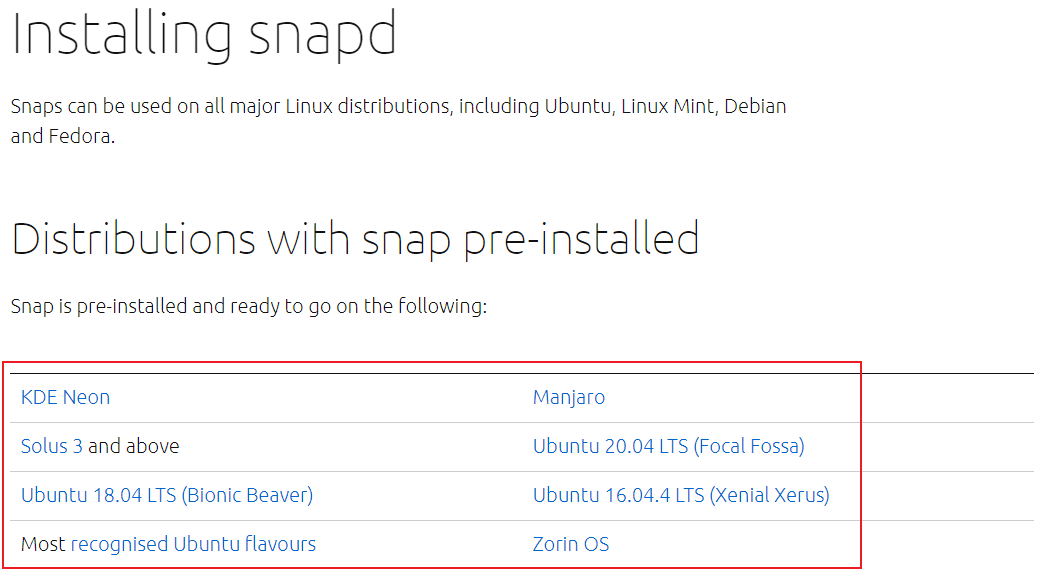
有些系统默认已经预安装好了 snap,可不用安装,如下图所示。如需安装,可参考 https://snapcraft.io/docs/installing-snapd 进行安装。

3. 移除所有 Certbot OS 包
如果当前系统存在通过系统包管理软件(如 apt,dnf,yum等)安装的 cerbot 包,那么在使用 snap 安装之前需要首先移除他们来确保之后使用 certbot 命令时,用的是 snap 而不是系统自带的 cerbot。具体操作据系统而定,如
# Ubuntu
sudo apt-get remove certbot
# Fedora
sudo dnf remove certbot
# CentOS
sudo yum remove certbot
4. 安装 Certbor
在命令行中可使用以下命令安装
sudo snap install --classic certbot
5. 运行 Certbot ,获取证书
停止当前运行的网站服务,通过以下命令获得证书。在申请过程中,Certbot 会临时在当前机器启动一个网络服务器。注意:申请 HTTPS 证书的域名需被解析到当前服务器的 IP 地址才可完成认证。
sudo certbot certonly --standalone
之后按照提示操作即可。默认会生成以下两个文件:
- 证书链(certificate and chain):
/etc/letsencrypt/live/your_url.com/fullchain.pem - 密钥文件(key file):
/etc/letsencrypt/live/your_url.com/privkey.pem
并会提示过期时间,一般有效期为3个月。
6. 安装证书
需要通过修改web服务器的配置文件进行安装,不同的 web 服务器安装方式有所不同,此处我们使用 nginx 进行安装,具体可参考下一节。
7. 测试证书的自动更新
Certbot 会自动在证书快要过期时进行更新,如果没有修改证书的设置,不需要每次都手动运行 certbot。可通过以下命令测试证书的自动刷新
sudo certbot renew --dry-run
注意,证书更新需要开放服务器的 80 和 443 端口,如果更新失败,可先尝试暂停 nginx 服务后再手动更新。
8. 确认 certbot 正常运行
使用 HTTPS 访问自己的网站,如 https://yourwebsite.com/ ,如果在浏览器 url 栏左侧出现了小锁的标志,说明已经安装成功。
nginx 配置 SSL 访问
此处对 nginx 配置 SSL 访问,并将所有 HTTP 和 www 请求重定向到不带 www 的 HTTPS 站点上。
修改之前的 nginx 配置文件 /etc/nginx/sites-available/my_app.conf 如下即可,具体每项功能见注释:
upstream my_app {	# 定义 upstream,告诉 nginx 将请求代理解析到哪里
  server unix:///var/run/my_app.sock;
}

server {	# 将来自 www.my_app.com 和 my_app.com 的 http 请求301重定向到 https 的 my_app.com (no-www)
  listen 80 default_server;
  listen [::]:80 default_server;

  server_name www.my_app.com my_app.com;

  return 301 https://my_app.com$request_uri;
}

server {
  listen 443 ssl http2;
  listen [::]:443 ssl http2;

  if ($host = www.my_app.com) {	# 将来自 www.my_app.com 的 https 请求301重定向到 my_app.com (no-www)
    return 301 https://my_app.com$request_uri;
  }

  server_name my_app.com;
  root /var/www/my_app/public;

  # SSL configuration
  ssl_certificate /etc/letsencrypt/live/my_app.com/fullchain.pem;
  ssl_certificate_key /etc/letsencrypt/live/my_app.com/privkey.pem;
  ssl_protocols TLSv1 TLSv1.1 TLSv1.2;
  ssl_ciphers HIGH:!aNULL:!MD5;

  # Other configurations
  location / {
    proxy_pass http://my_app; # match the name of upstream directive which is defined above
    proxy_set_header Host $host;
    proxy_set_header X-Forwarded-For $proxy_add_x_forwarded_for;
  }

  location ~* ^/assets/ {
    # Per RFC2616 - 1 year maximum expiry
    expires 1y;
    add_header Cache-Control public;

    # Some browsers still send conditional-GET requests if there's a
    # Last-Modified header or an ETag header even if they haven't
    # reached the expiry date sent in the Expires header.
    add_header Last-Modified "";
    add_header ETag "";
    break;
  }
}
此时,来自以下四个域名的请求:
- http://my_app.com
- http://www.my_app.com
- https://my_app.com
- https://www.my_app.com
都将被301重定向到 https://my_app.com,且这种方式,比在 nginx 中配置 rewrite 会更加高效。
至此,Rails+Puma+Nginx+HTTPS(SSL) 网站服务搭建过程全部记录于此。