一、首页轮播图
1、elementUI走马灯
elementUI中 Carousel 走马灯,可以在有限空间内,循环播放同一类型的图片、文字等内容。
这里使用指示器样式,可以将指示器的显示位置设置在容器外部:
<template>
  <el-carousel indicator-position="outside">
    <el-carousel-item v-for="item in 4" :key="item">
      <h3>{{ item }}</h3>
    </el-carousel-item>
  </el-carousel>
</template>
indicator-position 属性定义了指示器的位置。默认情况下,会显示在走马灯内部,设置为 outside 则会显示在外部;设置为 none 则不会显示指示器。
2、首页引入指示器样式
编写 src/components/Home/Home.vue 文件如下所示:
<template>
  <el-carousel indicator-position="outside" height="600px">
    <el-carousel-item v-for="item in lunboImgs" :key="item.id">
      <img :src="item.imgSrc" alt="">
    </el-carousel-item>
  </el-carousel>
</template>

<script>
  export default {
    name: "Home",
    data() {
      return {
        lunboImgs: [
          {
            id: 1,
            imgSrc: 'https://hcdn1.luffycity.com/static/frontend/index/banner1(4)_1539945492.0492468.png'
          },
          {
            id:2,
            imgSrc:'https://hcdn1.luffycity.com/static/frontend/index/骑士(1)_1539945488.713867.png'
          },
          {
            id:3,
            imgSrc:'https://hcdn1.luffycity.com/static/frontend/index/banner11_1538122470.2779157.png'
          },
          {
            id:4,
            imgSrc:'https://hcdn1.luffycity.com/static/frontend/index/home-banner4_1535545832.4715614.png'
          }
        ]
      };
    },
    created() {
      console.log(localStorage);
    }
  };
</script>

<style lang="css" scoped>
img{
   100%;
  height: 100%;
}
</style>
显示效果如下所示:

二、免费课程页面
1、引入和使用Axios
由于需要使用Ajax发送请求,因此需要引入Axios。
Axios 是一个基于 promise 的 HTTP 库,可以用在浏览器和 node.js 中。首先下载Axios:
$ npm install axios -S
安装其他插件的时候,可以直接在 main.js 中引入并 Vue.use(),但是 axios 不能use ,只能在每个需要发送请求的组件中即时引入。
2、在main.js中引入axios
要解决要在每个组件即时引入 axios 的问题,有两种开发思路:一是需要在引入 axios后修改原型链;二是结合Vuex,封装一个action。
这里使用引入axios后修改原型链的方法,在 main.js 中导入和挂载 Axios 到原型实例上:
import Vue from 'vue'
import App from './App'
import router from './router'
// elementUI导入
import ElementUI from 'element-ui'
// 注意样式文件需要单独引入
import 'element-ui/lib/theme-chalk/index.css'
import '../static/global/global.css'
// 导入axios
import Axios from 'axios'
Vue.prototype.$http = Axios;  // 挂载在原型上,后面可以在任意组件使用
Axios.defaults.baseURL = 'https://www.luffycity.com/api/v1/';   // 设置公共url

// 调用插件
Vue.use(ElementUI);

Vue.config.productionTip = false;

/* eslint-disable no-new */
new Vue({
  el: '#app',
  router,
  components: { App },
  template: '<App/>'
});
在main.js中添加这两行红色代码后,就能直接在组件的 methods 中使用 $http 命令了。
3、免费课程列表实现
编写 src/components/Course/Course.vue 文件如下所示:
<template>
  <div class="course">
    <div class="container clearfix">
      <!-- 课程分类 -->
      <ul class="coursebox">
        <li v-for="(category,index) in categoryList" :key="category.id">
          {{category.name}}
        </li>
        <li>
          Python
        </li>
      </ul>
      <div class="courseList">
        <div class="detail">
          <div class="head">
            <img src="" alt="" class="backImg">
            <b class="mask"></b>
            <p>Python开发21天入门</p>
          </div>
          <div class="content">
            <p>Python以其简洁、优雅、高效的特点,称为目前最流行的4大主流开发语言</p>
            <div class="content-detail">
              <div>
                <img src="data:image/svg+xml;base64,PD9...4K" alt="">
                <span>1836</span>
                <span>初级</span>
                <span class="span3">
                  <span class="s">¥99.0</span>
                  <span  class="t">免费</span>
                </span>
                <span class="span4"></span>
              </div>
            </div>
          </div>
        </div>
      </div>
    </div>
  </div>
</template>

<script>
  export default {
    name: "Course",
    data() {
      return {
        categoryList: [], // 课程分类列表
      };
    },
    // 生命周期 在created方法发起ajax请求
    created () {
      console.log(this.$http);   // Axios对象
      this.$http.get('course_sub/category/list/')    // 发送get请求
        .then(res=>{   // 请求之后对应的结果
          console.log(res);
          console.log(res.data.data);   // 获取列表中数组
          if (!res.data.error_no) {
            this.categoryList = res.data.data;
          }
        })
        .catch(err=>{
          console.log(err);
        })
    }
  };
</script>
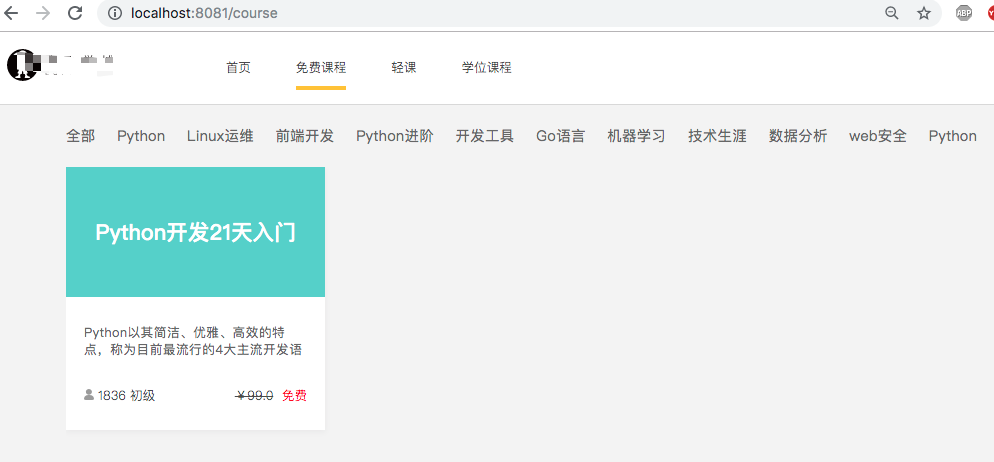
(1)课程列表显示效果
样式略,显示效果如下所示:
(2)在created方法发送get请求
// 生命周期 在created方法发起ajax请求
created () {
  console.log(this.$http);   // Axios对象
  this.$http.get('course_sub/category/list/')    // 发送get请求
  .then(res=>{   // 请求之后对应的结果
    console.log(res);
    console.log(res.data.data);   // 获取列表中数组
    if (!res.data.error_no) {
      this.categoryList = res.data.data;
    }
  })
  .catch(err=>{
    console.log(err);
  })
}
完整的请求应包括 .then 和 .catch。当请求成功时,会执行 .then,否则执行 .catch。
4、axios模块封装
在vue项目中,与后台交互获取数据通常是使用的 axios 库。使用axios发起一个请求是比较简单的事,但是如果axios没有进行封装复用,项目越来越大时,会引起代码冗余 ,使代码变得难以维护。因此需要对 axios 进行二次封装,使项目中各个组件能够复用请求,让代码更加容易维护。
(1)封装要点
- 统一 url 配置;
- 统一 api 请求;
- request(请求)拦截器,例如:带上token等,设置请求头
- response(响应)拦截器,例如:统一错误处理,页面重定向等
- 根据需求,结合Vuex做全局的loading动画或错误处理
- 将axios封装成Vue插件使用
(2)axios组件准备
在项目的src目录中,新建 restful 文件夹,在这里是创建 api.js 文件来封装axios。
// src/restful/api.js
// 导入axios
import Axios from 'axios'

Axios.defaults.baseURL = 'https://www.luffycity.com/api/v1/';   // 设置公共url

// 分类列表 api
// export const categoryList = function function_name(argument) {
export const categoryList = () => {   // 匿名函数改为箭头函数
  return Axios.get('course_sub/category/list/').then(res=>{
    return res.data;   // 可以简写为.then(res=>res.data);
  })
};
(3)修改main.js文件引入api.js
import Vue from 'vue'
import App from './App'
import router from './router'
// elementUI导入
import ElementUI from 'element-ui'
// 注意样式文件需要单独引入
import 'element-ui/lib/theme-chalk/index.css'
import '../static/global/global.css'

// 调用插件
Vue.use(ElementUI);

import * as api from './restful/api'
console.log(api);
Vue.prototype.$http = api;   // 可以在各个组件中使用this.$http方法

Vue.config.productionTip = false;

/* eslint-disable no-new */
new Vue({
  el: '#app',
  router,
  components: { App },
  template: '<App/>'
});
JavaScript 对象都会从一个 prototype(原型对象)中继承属性和方法,绑定给原型对象后,就可以在各个组件中使用this.$http方法了。
(4)Course组件使用新封装的axios
在Couse.vue中,可以通过this.$http获取 Axios对象,使用封装好的接口来发送get请求。
<script>
  export default {
    name: "Course",
    data() {
      return {
        categoryList: [], // 课程分类列表
      };
    },
    // 生命周期 在created方法发起ajax请求
    created () {
      console.log(this.$http);   // Axios对象
      // this.$http.get('course_sub/category/list/')    // 发送get请求
      this.$http.categoryList()
      .then(res=>{   // 请求之后对应的结果
        console.log(res);
        if (!res.error_no) {
          this.categoryList = res.data;
        }
      })
      .catch(err=>{
        console.log(err);
      })
    }
  };
</script>
5、分类列表实现
在Couse.vue中,添加课程分类对象到课程分类列表中:
<script>
  export default {
    name: "Course",
    data() {
      return {
        categoryList: [], // 课程分类列表
      };
    },
    // 生命周期 在created方法发起ajax请求
    created () {
      console.log(this.$http);   // Axios对象
      // this.$http.get('course_sub/category/list/')    // 发送get请求
      this.$http.categoryList()
      .then(res=>{   // 请求之后对应的结果
        console.log(res);
        if (!res.error_no) {
          this.categoryList = res.data;
          let category = {   // 课程分类对象
            id: 0,
            category: 0,
            name: "全部"
          };
          this.categoryList.unshift(category);   // unshift() 方法可向数组的开头添加一个或更多元素,并返回新的长度
        }
      })
      .catch(err=>{
        console.log(err);
      })
    }
  };
</script>
(1)Javascript unshift()方法
unshift() 方法可向数组的开头添加一个或更多元素,并返回新的长度。返回值:数组对象的新长度。
如果要把一个或多个元素添加到数组的尾部,需使用 push() 方法。
unshift() 方法将把它的参数插入 arrayObject 的头部,并将已经存在的元素顺次地移到较高的下标处,以便留出空间。该方法的第一个参数将成为数组的新元素 0,如果还有第二个参数,它将成为新的元素 1,以此类推。
请注意,unshift() 方法不创建新的创建,而是直接修改原有的数组。
(2)显示效果如下所示
6、分类列表样式
对给激活的列表样式设置特殊样式,并实现分类列表点击跳转:
(1)设置激活中的分类列表样式
这里使用 v-bind 绑定 class,类名 active 依赖于 "index===currentIndex" 的判断结果。
<template>
  <div class="course">
    <div class="container clearfix">
      <!-- 课程分类 -->
      <ul class="coursebox">
        <li v-for="(category,index) in categoryList" :key="category.id"
          :class="{active:index===currentIndex}">
          {{category.name}}
        </li>
      </ul>
      <!-- 代码省略 -->
    </div>
  </div>
</template>

<script>
  export default {
    name: "Course",
    data() {
      return {
        categoryList: [], // 课程分类列表
        currentIndex: 0   // 分类列表选中
      };
    },
    // 代码省略
  };
</script>

<style lang="css" scoped>
  ul li{
    float: left;
    margin-right: 24px;
    cursor: pointer;
  }
  ul li.active{
    color: #00b4e4;
  }
</style>
显示效果:
(2)分类列表点击样式切换
在课程分类的li 标签中绑定点击事件,并编写方法处理点击事件:
<template>
  <div class="course">
    <div class="container clearfix">
      <!-- 课程分类 -->
      <ul class="coursebox">
        <li v-for="(category,index) in categoryList" :key="category.id"
          :class="{active:index===currentIndex}" @click="categoryClick(index)">
          {{category.name}}
        </li>
      </ul>
      <!-- 代码省略 -->
    </div>
  </div>
</template>

<script>
  export default {
    name: "Course",
    data() {
      return {
        categoryList: [], // 课程分类列表
        currentIndex: 0   // 分类列表选中
      };
    },
    methods: {
      categoryClick(index) {
        this.currentIndex = index;    // 修改分类列表的样式
      }
    },
    // 生命周期 在created方法发起ajax请求
    created () {
      // 代码省略
    }
  };
</script>
显示效果:
三、免费课程——全部课程实现
1、准备全部课程API
将 src/restful/api.js 文件修改如下:
// 导入axios
import Axios from 'axios'

Axios.defaults.baseURL = 'https://www.luffycity.com/api/v1/';   // 设置公共url

// 分类列表 api
// export const categoryList = function function_name(argument) {
export const categoryList = () => {   // 匿名函数改为箭头函数
  return Axios.get('course_sub/category/list/').then(res=>{
    return res.data;   // 可以简写为.then(res=>res.data);
  })
};

export const allCategoryList = (categoryId) => {
  return Axios.get(`courses/?sub_category=${categoryId}`).then(res=>res.data);
};
ES6中提供了模版字符串,用`(反引号)标识,用${}将变量括起来。这样可以简化操作,不需要再使用大量的""和+来拼接字符串和变量。
2、get请求获取全部课程信息
改写Course.vue组件,使用 created 钩子调用 methods 中的方法来实现axios请求发送。
<script>
  export default {
    name: "Course",
    data() {
      return {
        categoryList: [], // 课程分类列表
        currentIndex: 0,  // 分类列表选中
        categoryId: 0,    // 获取所有的课程列表的id
      };
    },
    methods: {
      categoryClick(index) {
        this.currentIndex = index;    // 修改分类列表的样式
      },
      // 获取分类列表
      getCategoryList() {
        // this.$http.get('course_sub/category/list/')    // 发送get请求
        this.$http.categoryList()
          .then(res=>{   // 请求之后对应的结果
            console.log(res);
            if (!res.error_no) {
              this.categoryList = res.data;
              let category = {   // 课程分类对象
                id: 0,
                category: 0,
                name: "全部"
              };
              this.categoryList.unshift(category);   // unshift() 方法可向数组的开头添加一个或更多元素,并返回新的长度
            }
          })
          .catch(err=>{
            console.log(err);
          })
      },
      // 获取全部的课程列表
      getAllCategoryList() {
        this.$http.allCategoryList(this.categoryId)
          .then(res=>{
            console.log(res);
          })
          .catch(err=>{
            console.log(err);
          })
      }
    },
    // 生命周期 在created方法发起ajax请求
    created () {
      // console.log(this.$http);   // Axios对象
      this.getCategoryList();
      this.getAllCategoryList();
    }
  };
</script>
在console中查看请求返回的数据:
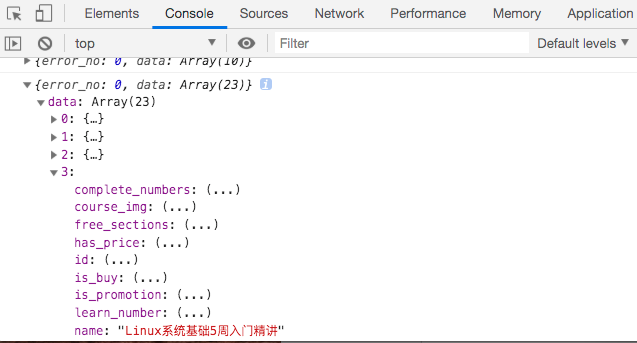
3、 全部课程列表详情数据
在获取全部课程列表时,可以看到返回的json中包含data: Array(23),这是一个数组,数组中有一个个课程对象,包含课程详情数据。
<script>
  export default {
    name: "Course",
    data() {
      return {
        categoryList: [], // 课程分类列表
        currentIndex: 0,  // 分类列表选中
        categoryId: 0,    // 获取所有的课程列表的id
        courseDetail: []  // 课程列表详情数据
      };
    },
    methods: {
      categoryClick(index) {
        this.currentIndex = index;    // 修改分类列表的样式
      },
      // 获取分类列表
      getCategoryList() {
        // 代码省略
      },
      // 获取全部的课程列表
      getAllCategoryList() {
        this.$http.allCategoryList(this.categoryId)
          .then(res=>{
            console.log(res);
            if (!res.error_no) {   // 如果没有错误
              this.courseDetail = res.data;
            }
          })
          .catch(err=>{
            console.log(err);
          })
      }
    },
    // 生命周期 在created方法发起ajax请求
    created () {
      // console.log(this.$http);   // Axios对象
      this.getCategoryList();
      this.getAllCategoryList();
    }
  };
</script>
将返回结果中的data数组赋给 this.courseDetail。
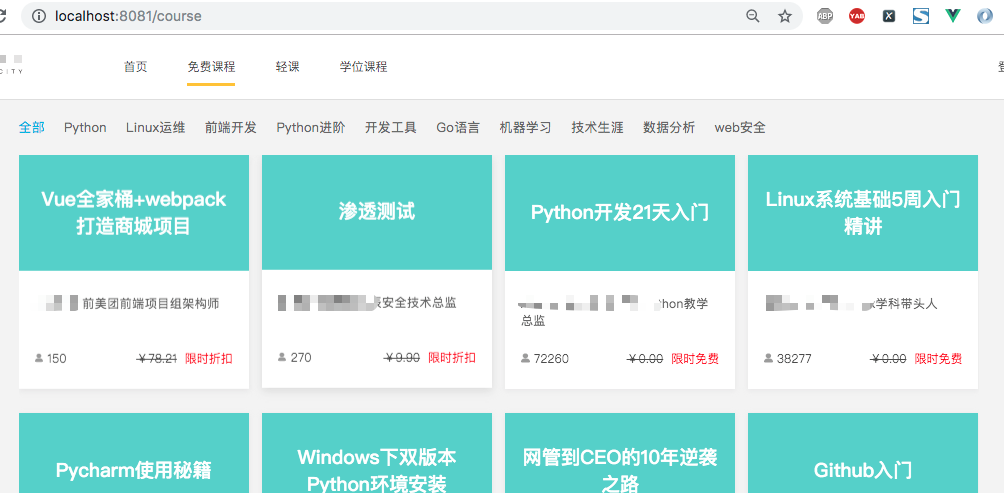
4、全部课程中数据渲染
v-for 循环data 数组,获取其中的课程对象,通过模板语法绑到页面中。
<template>
  <div class="course">
    <div class="container clearfix">
      <!-- 课程分类 -->
      <ul class="coursebox">
        <li v-for="(category,index) in categoryList" :key="category.id"
          :class="{active:index===currentIndex}" @click="categoryClick(index)">
          {{category.name}}
        </li>
      </ul>
      <div class="courseList">
        <div class="detail" v-for="(course, index) in courseDetail" :key="course.id">
          <div class="head">
            <img src="" alt="" class="backImg">
            <b class="mask"></b>
            <p>{{ course.name }}</p>
          </div>
          <div class="content">
            <p>{{ course.teacher_description }}</p>
            <div class="content-detail">
              <div>
                <img src="data:image/svg+xml;base64,PD...Zz4K" alt="">
                <span>{{course.learn_number}}</span>
                <span class="span3" v-if="course.promotion_price">
                  <span class="s">¥{{course.promotion_price}}</span>
                  <span  class="t">{{course.promotion_name}}</span>
                </span>
                <span class="span4" v-else>¥{{course.price}}</span>
              </div>
            </div>
          </div>
        </div>
      </div>
    </div>
  </div>
</template>
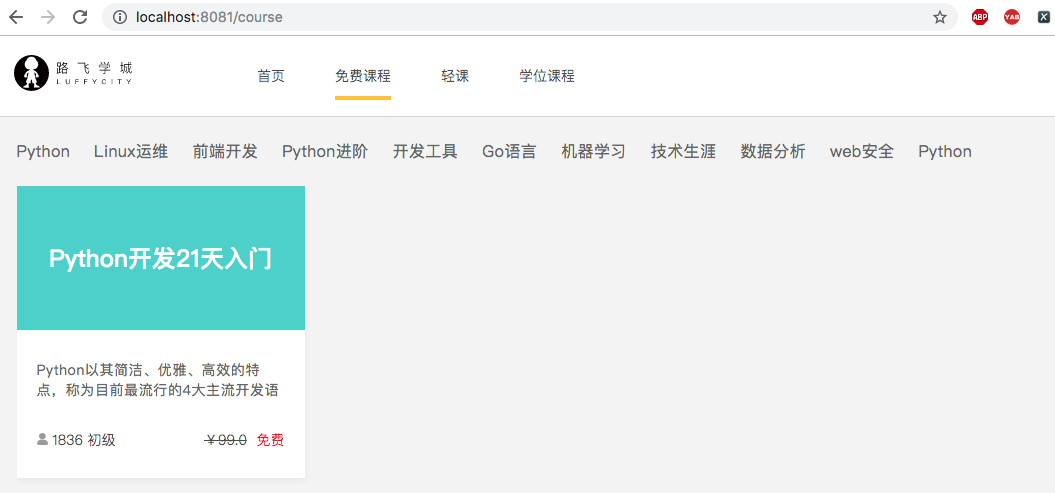
绑定数据后显示效果如下所示:
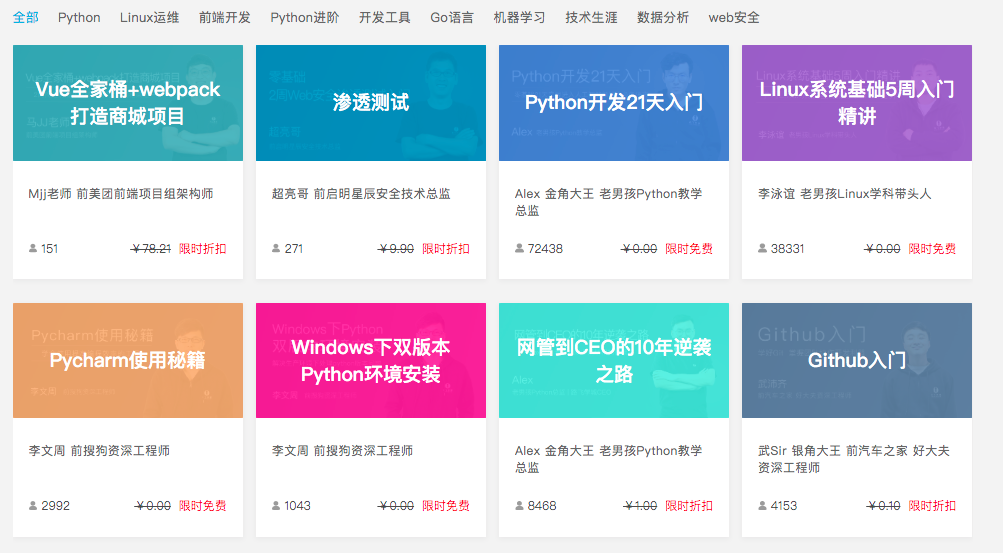
5、课程背景色变化渲染
使用 forEach 方法调用数组的每个元素,并将元素传递给回调函数。注意:forEach() 对于空数组是不会执行回调函数的。
基于 forEach 方法来实现背景色变化渲染:
<template>
  <div class="course">
    <div class="container clearfix">
      <!-- 课程分类 -->
      <ul class="coursebox">
        <li v-for="(category,index) in categoryList" :key="category.id"
          :class="{active:index===currentIndex}" @click="categoryClick(index)">
          {{category.name}}
        </li>
      </ul>
      <div class="courseList">
        <div class="detail" v-for="(course, index) in courseDetail" :key="course.id">
          <div class="head">
            <img :src="course.course_img" alt="" class="backImg">
            <!-- 背景色:行内样式优先显示 -->
            <b class="mask" :style="{background: course.bgColor}"></b>
            <p>{{ course.name }}</p>
          </div>
          <!-- 代码省略-->
      </div>
    </div>
  </div>
</template>

<script>
  export default {
    name: "Course",
    data() {
      return {
        categoryList: [], // 课程分类列表
        currentIndex: 0,  // 分类列表选中
        categoryId: 0,    // 获取所有的课程列表的id
        courseDetail: [],  // 课程列表详情数据
        bgColors: ['#4AB2BF','#1895C6','#4C87E0','#A361D9','#F7AE6A','#FF14A0', '#61F0E1',
          '#6282A7','#27998E','#3C74CC','#A463DA','#F0A257','#DD4B7A', '#59C6BD','#617FA1',
          '#1B92C3','#30A297','#3B73CB','#9E57CA','#A463DA','#1895C6','#A361D9','#FF14A0']
      };
    },
    methods: {
      // 代码省略
      // 获取全部的课程列表
      getAllCategoryList() {
        this.$http.allCategoryList(this.categoryId)
          .then(res=>{
            console.log(res);
            if (!res.error_no) {   // 如果没有错误
              this.courseDetail = res.data;
              // 添加背景色
              this.courseDetail.forEach((item, index)=>{   // 遍历数组中对象
                this.bgColors.forEach((bgColor, i)=>{      // 遍历数组中颜色
                  if (i===index) {
                    item.bgColor = bgColor
                  }
                })
              });
              console.log(this.courseDetail);
            }
          })
          .catch(err=>{
            console.log(err);
          })
      }
    },
    // 生命周期 在created方法发起ajax请求
    created () {
      // console.log(this.$http);   // Axios对象
      this.getCategoryList();
      this.getAllCategoryList();
    }
  };
</script>
给背景色绑定为行内样式,优先显示。同时绑定上背景图片,优化显示效果,效果如下所示:
四、分类列表切换课程
在categoryId=0时,调用getAllCategoryList方法时,默认获取所有课程列表的数据。
要实现分类列表切换,显示对应课程信息,需要在点击事件中添加对应课程分类的categoryId信息。
1、修改分类列表点击事件传参
<template>
  <div class="course">
    <div class="container clearfix">
      <!-- 课程分类 -->
      <ul class="coursebox">
        <li v-for="(category,index) in categoryList" :key="category.id"
          :class="{active:index===currentIndex}" @click="categoryClick(index, category.id)">
          {{category.name}}
        </li>
      </ul>
      <!-- 代码略 -->
</template>
在点击事件中除了传递index外,还传递了category.id信息。
2、修改分类列表点击事件
categoryClick事件点击触发后,除了获取到对应的传参外,还应执行getAllCategoryList函数,获取对应分类的所有课程。
需要注意,getAllCategoryList() 方法中的 this.categoryId 已经修改为对应的传参值,无需修改方法传参。
methods: {
    categoryClick(index, id) {
        this.currentIndex = index;    // 修改分类列表的样式
        this.categoryId = id;         // 赋值课程列表对应id
        this.getAllCategoryList()
    },
    // 获取全部的课程列表
    getAllCategoryList() {
        console.log(this.categoryId);
        // 代码略
}
在 getAllCategoryList() 方法中打印 this.categoryId,确定它的值:
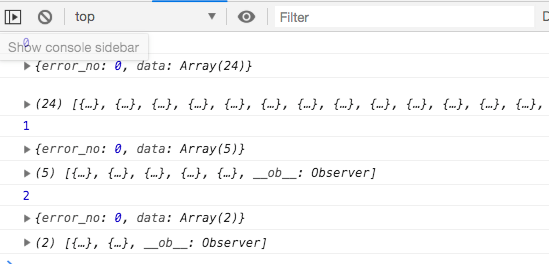
点击全部打印0,点击Python打印1,点击Linux运维打印2。
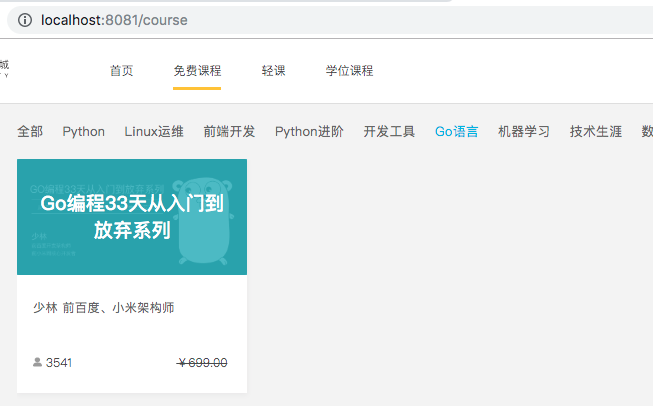
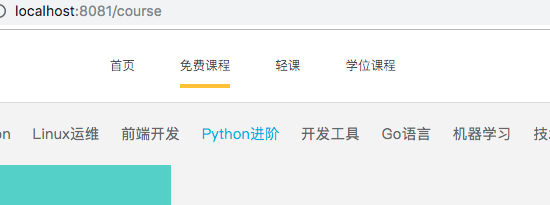
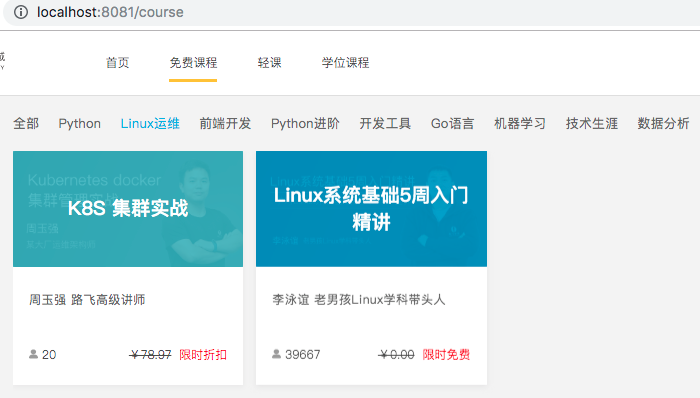
3、显示效果
点击Linux运维显示如下:
点击Go语言显示如下: