接上一节。
本节实现如何通过基于xml文件的方式,而不是基于注解的方式来配置事务。
1.将相应文件中的注解全部去掉
2.为这三个属性加上getters和setters方法。
private JdbcTemplate jdbcTemplate;
private BookShopDao bookShopDao;
private BookShopService bookShopService;
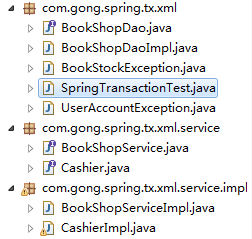
3.将目录调整为如下结构:
4.在applicationContext-tx.xml文件中进行配置
<?xml version="1.0" encoding="UTF-8"?>
<beans xmlns="http://www.springframework.org/schema/beans"
    xmlns:xsi="http://www.w3.org/2001/XMLSchema-instance"
    xmlns:context="http://www.springframework.org/schema/context"
    xmlns:tx="http://www.springframework.org/schema/tx"
    xmlns:aop="http://www.springframework.org/schema/aop"
    xsi:schemaLocation="http://www.springframework.org/schema/beans http://www.springframework.org/schema/beans/spring-beans.xsd
        http://www.springframework.org/schema/context http://www.springframework.org/schema/context/spring-context-4.0.xsd
        http://www.springframework.org/schema/aop http://www.springframework.org/schema/aop/spring-aop-4.3.xsd
        http://www.springframework.org/schema/tx http://www.springframework.org/schema/tx/spring-tx-4.0.xsd">

    <!-- 导入资源文件 -->
    <context:property-placeholder location="classpath:db.properties"/>

    <!-- 配置 C3P0 数据源 -->
    <bean id="dataSource"
        class="com.mchange.v2.c3p0.ComboPooledDataSource">
        <property name="user" value="${jdbc.user}"></property>
        <property name="password" value="${jdbc.password}"></property>
        <property name="jdbcUrl" value="${jdbc.jdbcUrl}"></property>
        <property name="driverClass" value="${jdbc.driverClass}"></property>

        <property name="initialPoolSize" value="${jdbc.initPoolSize}"></property>
        <property name="maxPoolSize" value="${jdbc.maxPoolSize}"></property>
    </bean>

    <!-- 配置 Spirng 的 JdbcTemplate -->
    <bean id="jdbcTemplate"
        class="org.springframework.jdbc.core.JdbcTemplate">
        <property name="dataSource" ref="dataSource"></property>
    </bean>

    <bean id="bookShopDao" class="com.gong.spring.tx.xml.BookShopDaoImpl">
        <property name="jdbcTemplate" ref="jdbcTemplate"></property>
    </bean>

    <bean id="bookShopService" class="com.gong.spring.tx.xml.service.impl.BookShopServiceImpl">
        <property name="bookShopDao" ref="bookShopDao"></property>
    </bean>

    <bean id="cashier" class="com.gong.spring.tx.xml.service.impl.CashierImpl">
        <property name="bookShopService" ref="bookShopService"></property>
    </bean>

    <!-- 1.配置事务管理器 -->
    <bean id="transactionManager"
        class="org.springframework.jdbc.datasource.DataSourceTransactionManager">
        <property name="dataSource" ref="dataSource"></property>
    </bean>

    <!-- 2.配置事务属性 -->
    <tx:advice id="txAdice" transaction-manager="transactionManager">
        <tx:attributes>
            <tx:method name="purchase" propagation="REQUIRES_NEW"/>
            <tx:method name="*"/>
        </tx:attributes>
    </tx:advice>

    <!-- 3.配置事务切入点 ,并将切入点和事务属性关联起来 -->
    <aop:config>
        <aop:pointcut expression="execution(* com.gong.spring.tx.xml.service.*.*(..))"
        id="txPointCut"/>
        <aop:advisor advice-ref="txAdice" pointcut-ref="txPointCut"/>
    </aop:config>
</beans>
基于xml文件配置的方式配置事务有三个步骤:
(1)配置事务管理器
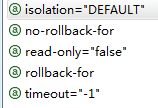
(2)配置事务属性
(3)配置事务切入点,将切入点和事务属性关联起来。
expression="execution(* com.gong.spring.tx.xml.service.*.*(..))是将service下的所有实现类的所有方法都加入到切入点。然后切入点和事务属性关联起来,
最后的结果与基于注解的配置方式是一致的。