目前目录:
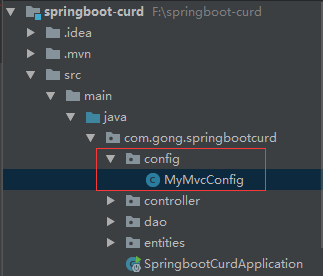
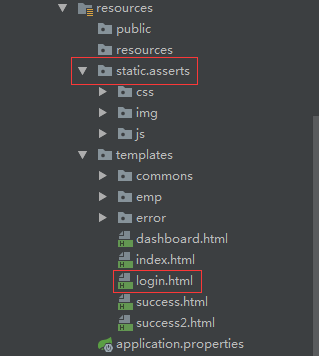
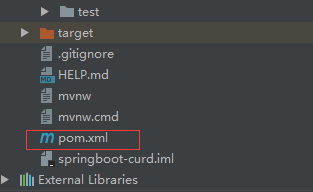
我们要关注的地方用红框标记出来了。
1、首先要在pom.xml中引入相应的静态资源jar
<?xml version="1.0" encoding="UTF-8"?>
<project xmlns="http://maven.apache.org/POM/4.0.0" xmlns:xsi="http://www.w3.org/2001/XMLSchema-instance"
    xsi:schemaLocation="http://maven.apache.org/POM/4.0.0 https://maven.apache.org/xsd/maven-4.0.0.xsd">
    <modelVersion>4.0.0</modelVersion>
    <parent>
        <groupId>org.springframework.boot</groupId>
        <artifactId>spring-boot-starter-parent</artifactId>
        <version>2.2.4.RELEASE</version>
        <relativePath/> <!-- lookup parent from repository -->
    </parent>
    <groupId>com.gong</groupId>
    <artifactId>springboot-curd</artifactId>
    <version>0.0.1-SNAPSHOT</version>
    <name>springboot-curd</name>
    <description>Demo project for Spring Boot</description>

    <properties>
        <java.version>1.8</java.version>
    </properties>

    <dependencies>
        <dependency>
            <groupId>org.springframework.boot</groupId>
            <artifactId>spring-boot-starter-web</artifactId>
        </dependency>
        <dependency>
            <groupId>org.springframework.boot</groupId>
            <artifactId>spring-boot-starter-thymeleaf</artifactId>
        </dependency>

        <dependency>
            <groupId>org.webjars</groupId>
            <artifactId>bootstrap</artifactId>
            <version>4.1.2</version>
        </dependency>

        <dependency>
            <groupId>org.springframework.boot</groupId>
            <artifactId>spring-boot-starter-test</artifactId>
            <scope>test</scope>
            <exclusions>
                <exclusion>
                    <groupId>org.junit.vintage</groupId>
                    <artifactId>junit-vintage-engine</artifactId>
                </exclusion>
            </exclusions>
        </dependency>
    </dependencies>

    <build>
        <plugins>
            <plugin>
                <groupId>org.springframework.boot</groupId>
                <artifactId>spring-boot-maven-plugin</artifactId>
            </plugin>
        </plugins>
    </build>

</project>
我们可以在External Libraries下找相应的jar,并查看里面的目录结构:比如

在/resources/webjars/bootstrap/4.1.2/ css下有bootstrap.css,这为我们以后在html文件中引入静态资源提供了基础。
2、配置自己定义的springmvc配置
在config/MyMvcConfig.java中
package com.gong.springbootcurd.config;

import org.springframework.context.annotation.Bean;
import org.springframework.context.annotation.Configuration;
import org.springframework.web.servlet.config.annotation.EnableWebMvc;
import org.springframework.web.servlet.config.annotation.ViewControllerRegistry;
import org.springframework.web.servlet.config.annotation.WebMvcConfigurer;

//@EnableWebMvc 接管springmvc
@Configuration
public class MyMvcConfig implements WebMvcConfigurer{
    @Override
    public void addViewControllers(ViewControllerRegistry registry) {
        //浏览器发送gong请求会跳转到/templates/success.html页面
        //测试用的
        registry.addViewController("gong").setViewName("success");
    }
    //所有的WebMvcConfigurer会一起起作用
    //将组件注册到容器中
    @Bean
    public WebMvcConfigurer webMvcConfigurer() {
        WebMvcConfigurer webMvcConfigurer = new WebMvcConfigurer(){
            public void addViewControllers(ViewControllerRegistry registry) {
                registry.addViewController("/").setViewName("login");
                registry.addViewController("/login.html").setViewName("login");
            }
        };
        return webMvcConfigurer;
    }

}
当服务器启动或发送login.html请求时跳转到/templates/login.html页面
3、在主配置文件中定义项目的名称
server.servlet.context-path=/curd
这样启动后,在浏览器访问请求时就需要带上这个名称。
4、login.html
<!DOCTYPE html>
<html lang="en"  xmlns:th="http://www.thymeleaf.org">
    <head>
        <meta http-equiv="Content-Type" content="text/html; charset=UTF-8">
        <meta name="viewport" content="width=device-width, initial-scale=1, shrink-to-fit=no">
        <meta name="description" content="">
        <meta name="author" content="">
        <title>Signin Template for Bootstrap</title>
        <!-- Bootstrap core CSS -->
        <link href="asserts/css/bootstrap.min.css" th:href="@{/webjars/bootstrap/4.1.2/css/bootstrap.css}" rel="stylesheet">
        <!-- Custom styles for this template -->
        <link href="asserts/css/signin.css" th:href="@{/asserts/css/signin.css}" rel="stylesheet">
    </head>
    <body class="text-center">
        <form class="form-signin" action="dashboard.html" th:action="@{/user/login}" method="post">
            <img class="mb-4" th:src="@{/asserts/img/bootstrap-solid.svg}" src="asserts/img/bootstrap-solid.svg" alt="" width="72" height="72">
            <h1 class="h3 mb-3 font-weight-normal" >Please sign in</h1>
            <label class="sr-only" >Username</label>
            <input type="text"  name="username" class="form-control" placeholder="Username"required="" autofocus="">
            <label class="sr-only" >Password</label>
            <input type="password" name="password" class="form-control" placeholder="Password" required="">
            <div class="checkbox mb-3">
                <label>
                      <input type="checkbox" value="remember-me"/> Remember me
                </label>
            </div>
            <button class="btn btn-lg btn-primary btn-block" type="submit" >Sign in</button>
            <p class="mt-5 mb-3 text-muted">© 2017-2018</p>
            <a class="btn btn-sm" th:href="@{/index.html(l='zh_CN')}">中文</a>
            <a class="btn btn-sm" th:href="@{/index.html(l='en_US')}">English</a>
        </form>
    </body>
</html>
我们就可以使用thymeleaf的th:href="@{}"来引用jar格式的和文本格式的静态资源了。具体css就不展示了。
5、启动服务器,输入localhost:8080/curd/

成功跳转到login.html页面。