安装环境准备
操作系统版本:CentOS Linux release 7.7.1908 (Core)
elasticsearch-7.5.0-x86_64.rpm #官网下载
logstash-7.5.1.rpm #官网下载
kibana-7.5.1-x86_64.rpm #官网下载
jdk-8u202-linux-x64.rpm #需要java环境,https://mirror.its.sfu.ca/mirror/CentOS-Third-Party/RCG/common/x86_64/ 可免oracle账号下载
下载完后,全部上传至Centos server操作系统.
[root@localhost opt]# ls
elasticsearch-7.5.0-x86_64.rpm jdk-8u202-linux-x64.rpm kibana-7.5.1-x86_64.rpm logstash-7.5.1.rpm
安装前,编辑/etc/sysconfig/selinux关闭 selinux
[root@localhost opt]# cat /etc/sysconfig/selinux

# This file controls the state of SELinux on the system.
# SELINUX= can take one of these three values:
#     enforcing - SELinux security policy is enforced.
#     permissive - SELinux prints warnings instead of enforcing.
#     disabled - No SELinux policy is loaded.
SELINUX=disabled
# SELINUXTYPE= can take one of three values:
#     targeted - Targeted processes are protected,
#     minimum - Modification of targeted policy. Only selected processes are protected.
#     mls - Multi Level Security protection.
SELINUXTYPE=targeted
安装jdk
[root@localhost opt]# rpm -ivh jdk-8u202-linux-x64.rpm
warning: jdk-8u202-linux-x64.rpm: Header V3 RSA/SHA256 Signature, key ID ec551f03: NOKEY
Preparing...                          ################################# [100%]
Updating / installing...
   1:jdk1.8-2000:1.8.0_202-fcs        ################################# [100%]
Unpacking JAR files...
        tools.jar...
        plugin.jar...
        javaws.jar...
        deploy.jar...
        rt.jar...
        jsse.jar...
        charsets.jar...
        localedata.jar...
[root@localhost opt]# java -version
java version "1.8.0_202"
Java(TM) SE Runtime Environment (build 1.8.0_202-b08)
Java HotSpot(TM) 64-Bit Server VM (build 25.202-b08, mixed mode)
安装Elasticsearch
[root@localhost opt]# rpm --import https://artifacts.elastic.co/GPG-KEY-elasticsearch                      # 导入elastic GPG Key
[root@localhost opt]# rpm -ivh elasticsearch-7.5.0-x86_64.rpm
Preparing...                          ################################# [100%]
Creating elasticsearch group... OK
Creating elasticsearch user... OK
Updating / installing...
   1:elasticsearch-0:7.5.0-1          ################################# [100%]
### NOT starting on installation, please execute the following statements to configure elasticsearch service to start automatically using systemd
 sudo systemctl daemon-reload
 sudo systemctl enable elasticsearch.service
### You can start elasticsearch service by executing
 sudo systemctl start elasticsearch.service
Created elasticsearch keystore in /etc/elasticsearch
编辑/etc/elasticsearch/elasticsearch.yml,取消下面两行的注释
bootstrap.memory_lock: true
http.port: 9200
[root@localhost opt]# systemctl daemon-reload
[root@localhost opt]# systemctl start elasticsearch
[root@localhost opt]# systemctl enable elasticsearch
Created symlink from /etc/systemd/system/multi-user.target.wants/elasticsearch.service to /usr/lib/systemd/system/elasticsearch.service.
[root@localhost opt]# netstat -tnlp      # tcp 9200端口已启用,验证elasticsearch服务已启动。
Active Internet connections (only servers)
Proto Recv-Q Send-Q Local Address           Foreign Address         State       PID/Program name
tcp        0      0 127.0.0.1:25            0.0.0.0:*               LISTEN      1359/master
tcp        0      0 0.0.0.0:22              0.0.0.0:*               LISTEN      1144/sshd
tcp6       0      0 ::1:25                  :::*                    LISTEN      1359/master
tcp6       0      0 127.0.0.1:9200          :::*                    LISTEN      2567/java
tcp6       0      0 ::1:9200                :::*                    LISTEN      2567/java
tcp6       0      0 127.0.0.1:9300          :::*                    LISTEN      2567/java
tcp6       0      0 ::1:9300                :::*                    LISTEN      2567/java
tcp6       0      0 :::22                   :::*                    LISTEN      1144/sshd
安装配置Nginx
[root@localhost opt]# yum install nginx httpd-tools -y
安装完毕编辑 /etc/nginx/nginx.conf,删除默认server配置
这里把位于36、59行之间的Server块删掉,在 /etc/nginx/conf.d/*.conf中新增需要的配置文件。 # vi 第一步,:set number显示行数, 第二步,确认行号之后,:37,58d 删除第37至58行。
36 include /etc/nginx/conf.d/*.conf;
Server { }
59# Settings for a TLS enabled server.
新建kibana.conf
[root@localhost opt]# vi /etc/nginx/conf.d/kibana.conf
粘贴下面内容,主机名 elk.demo,使用http-basic认证,location部分,当Nginx监听到servername:80的请求时,会转发给本地5601端口的进程,这个进程就是将要安装的kibana
server {
listen 80;

server_name elk.demo;

auth_basic "Restricted Access";
auth_basic_user_file /etc/nginx/.kibana-user;

location / {
    proxy_pass http://localhost:5601;
    proxy_http_version 1.1;
    proxy_set_header Upgrade $http_upgrade;
    proxy_set_header Connection 'upgrade';
    proxy_set_header Host $host;
    proxy_cache_bypass $http_upgrade;
} }
新建elasticsearch.conf,粘贴如下内容:
server {
listen 81;

server_name elk.demo;

location / {
    proxy_pass http://localhost:9200;
    proxy_http_version 1.1;
    proxy_set_header Upgrade $http_upgrade;
    proxy_set_header Connection 'upgrade';
    proxy_set_header Host $host;
    proxy_cache_bypass $http_upgrade;
} }
添加认证用户:
[root@localhost opt]# htpasswd -c /etc/nginx/.kibana-user admin
New password:
Re-type new password:
Adding password for user admin
nginx -t检查配置文件,无误则启动nginx,有错误则按提示检查刚才编辑的配置文件
[root@localhost ~]# systemctl enable nginx
[root@localhost ~]# systemctl start nginx
安装Kibana
[root@localhost opt]# rpm -ivh kibana-7.5.1-x86_64.rpm
Preparing...                          ################################# [100%]
Updating / installing...
   1:kibana-7.5.1-1                   ################################# [100%]
编辑/etc/kibana/kibana.yml,去掉如下几行的注释:
server.port: 5601
server.host: "localhost"
elasticsearch.hosts: ["http://localhost:9200"]
启动Kibana
[root@localhost opt]# systemctl enable kibana
Created symlink from /etc/systemd/system/multi-user.target.wants/kibana.service to /etc/systemd/system/kibana.service.
[root@localhost opt]# systemctl start kibana
[root@localhost opt]# netstat -tln
Active Internet connections (only servers)
Proto Recv-Q Send-Q Local Address           Foreign Address         State
tcp        0      0 127.0.0.1:25            0.0.0.0:*               LISTEN
tcp        0      0 127.0.0.1:5601          0.0.0.0:*               LISTEN
tcp        0      0 0.0.0.0:80              0.0.0.0:*               LISTEN
tcp        0      0 0.0.0.0:81              0.0.0.0:*               LISTEN
tcp        0      0 0.0.0.0:22              0.0.0.0:*               LISTEN
tcp6       0      0 ::1:25                  :::*                    LISTEN
tcp6       0      0 127.0.0.1:9200          :::*                    LISTEN
tcp6       0      0 ::1:9200                :::*                    LISTEN
tcp6       0      0 127.0.0.1:9300          :::*                    LISTEN
tcp6       0      0 ::1:9300                :::*                    LISTEN
tcp6       0      0 :::22                   :::*                    LISTEN
安装Logstash
[root@localhost opt]# rpm -ivh logstash-7.5.1.rpm
Preparing...                          ################################# [100%]
Updating / installing...
   1:logstash-1:7.5.1-1               ################################# [100%]
Using provided startup.options file: /etc/logstash/startup.options
/usr/share/logstash/vendor/bundle/jruby/2.5.0/gems/pleaserun-0.0.30/lib/pleaserun/platform/base.rb:112: warning: constant ::Fixnum is deprecated
Successfully created system startup script for Logstash
[root@localhost opt]# systemctl enable logstash
Created symlink from /etc/systemd/system/multi-user.target.wants/logstash.service to /etc/systemd/system/logstash.service.
[root@localhost opt]# systemctl start logstash
开启防火墙端口
[root@localhost opt]# firewall-cmd --zone='public' --add-port=80/tcp --add-port=81/tcp --permanent
success
[root@localhost opt]# firewall-cmd --reload
success
客户端修改hosts文件,增加elk.demo解析为服务器IP的记录。
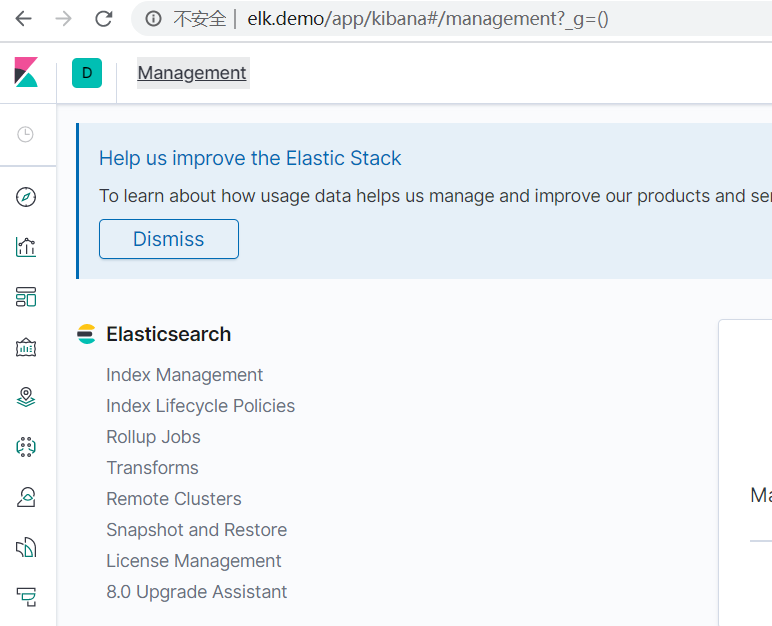
访问 http://elk.demo ,输入之前创建的admin账号和密码,
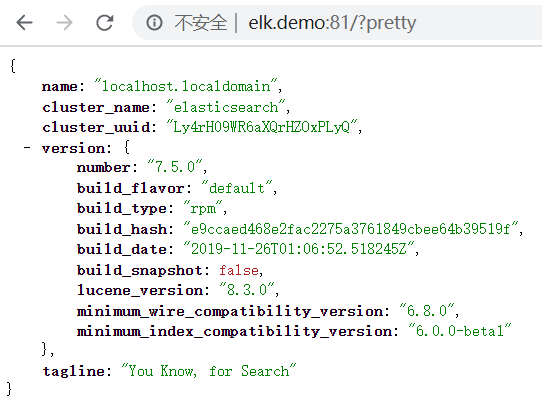
访问http://elk.demo:81/?pretty
安装完成,慢慢学习吧,感觉这个系统玩起来老复杂了。