Electron读取本地文件并显示,也就是暴露一个读取本地特定文件内容的接口给渲染进程调用。
主要参考:https://stackoverflow.com/questions/44391448/electron-require-is-not-defined
基于官方的快速教程示例代码进行修改,原始代码如下:


// main.js

// Modules to control application life and create native browser window
const { app, BrowserWindow } = require('electron')
const path = require('path')

function createWindow () {
  // Create the browser window.
  const mainWindow = new BrowserWindow({
     800,
    height: 600,
    webPreferences: {
      preload: path.join(__dirname, 'preload.js')
    }
  })

  // and load the index.html of the app.
  mainWindow.loadFile('index.html')

  // Open the DevTools.
  // mainWindow.webContents.openDevTools()
}

// This method will be called when Electron has finished
// initialization and is ready to create browser windows.
// Some APIs can only be used after this event occurs.
app.whenReady().then(() => {
  createWindow()

  app.on('activate', function () {
    // On macOS it's common to re-create a window in the app when the
    // dock icon is clicked and there are no other windows open.
    if (BrowserWindow.getAllWindows().length === 0) createWindow()
  })
})

// Quit when all windows are closed, except on macOS. There, it's common
// for applications and their menu bar to stay active until the user quits
// explicitly with Cmd + Q.
app.on('window-all-closed', function () {
  if (process.platform !== 'darwin') app.quit()
})

// In this file you can include the rest of your app's specific main process
// code. You can also put them in separate files and require them here.
// preload.js

// All of the Node.js APIs are available in the preload process.
// It has the same sandbox as a Chrome extension.
window.addEventListener('DOMContentLoaded', () => {
  const replaceText = (selector, text) => {
    const element = document.getElementById(selector)
    if (element) element.innerText = text
  }

  for (const dependency of ['chrome', 'node', 'electron']) {
    replaceText(`${dependency}-version`, process.versions[dependency])
  }
})
<!--index.html-->

<!DOCTYPE html>
<html>
  <head>
    <meta charset="UTF-8">
    <!-- https://developer.mozilla.org/en-US/docs/Web/HTTP/CSP -->
    <meta http-equiv="Content-Security-Policy" content="default-src 'self'; script-src 'self'">
    <meta http-equiv="X-Content-Security-Policy" content="default-src 'self'; script-src 'self'">
    <title>Hello World!</title>
  </head>
  <body>
    <h1>Hello World!</h1>
    We are using Node.js <span id="node-version"></span>,
    Chromium <span id="chrome-version"></span>,
    and Electron <span id="electron-version"></span>.

    <!-- You can also require other files to run in this process -->
    <script src="./renderer.js"></script>
  </body>
</html>
一、似乎不安全的办法
把nodeIntegration设置为true,contextIsolation设置为false:
  // Create the browser window.
  const mainWindow = new BrowserWindow({
     800,
    height: 600,
    webPreferences: {
      preload: path.join(__dirname, 'preload.js'),
      nodeIntegration: true,
      contextIsolation: false,
    }
  })
这样子就可以直接在渲染器处运行Node.js代码:
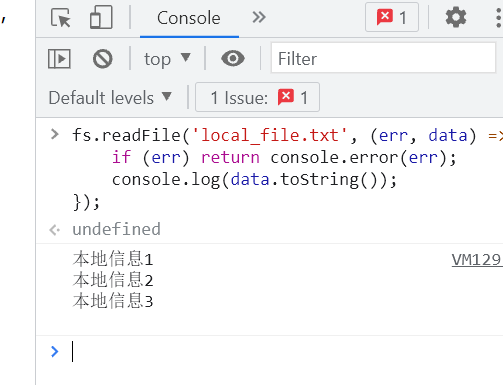
// renderer.js

let fs = require("fs");

fs.readFile('local_file.txt', (err, data) => {
    if (err) return console.error(err);
    console.log(data.toString());
});
但是这样造成的结果是,别人有可能通过Node.js运行环境随便操控本地操作系统的文件,或者造成其它风险:
二、直接写在preload.js中
为啥一定要写在renderer.js里呢?直接写在preload.js里就好了。(新手的疑惑:之所以区分preload.js和renderer.js是一种类似于“前后端分离”的思想吗?有什么东西不能直接写在preload.js ,非得写在renderer.js里的呢?有说法是“通过预加载把用到的api暴露到全局,这样主进程和渲染进程都能用”;有说法是“preload.js是为了把一些原属于electron的代码 通过windows["xxxxx"] 提供给前台js调用的”)
在index.html中添加一个按钮,每按一次从本地读取一次文件:
<button id="btn1">按钮1</button>
修改preload.js:
// preload.js
// All of the Node.js APIs are available in the preload process.
// It has the same sandbox as a Chrome extension.
window.addEventListener('DOMContentLoaded', () => {
省略号
  let readAndDisplay = () => {
    let fs = require("fs");
    fs.readFile('local_file.txt', (err, data) => {
      if (err) return console.error(err);
      console.log(data.toString());
      let myNode = document.createTextNode(data.toString());
      document.body.insertBefore(myNode, document.body.firstChild);
    });
  }

  document.querySelector('#btn1').addEventListener("click", event => {
    readAndDisplay();
  })
省略号
})