在ASP.NET 开发的过程中,最大的问题就在于上传大文件时让开发者尤为的头疼,而且,上传时无法方便的做到多线程的操控和上传进度的显示。笔者在此给大家推荐一款简单易用的上传组件,从而快速便捷得解决了 ASP.NET 中的大文件上传问题。
首先,我们需要下载一个组件。
下载完成之后,两个 dll 文件添加到项目的引用中区,xml 文件也要复制在项目中的 bin 文件夹下,也就是最后三个文件都要存在于 bin 文件夹中。
接着,上传控件还是用 ASP.NET 中自带的 FileUpload 控件,需要添加的就是在 FileUpload 控件旁边加入标签:
1 2 3 | <radU:RadProgressManager ID="Radprogressmanager1" Width="100%" runat="server" />
<radU:RadProgressArea ID="progressArea1" Width="100%" runat="server">
</radU:RadProgressArea>
|
并且在 aspx 文件的起始处添加如下代码:
1 2 | <%@ Register TagPrefix="telerik" Namespace="Telerik.QuickStart" Assembly="Telerik.QuickStart" %>
<%@ Register TagPrefix="radU" Namespace="Telerik.WebControls" Assembly="RadUpload.Net2" %>
|
当然,配置文件的 <system.web> 标签中不能忘记下面这些语句:
1 2 3 4 5 6 7 | <httpRuntime executionTimeout="3600" maxRequestLength="2097151" ></httpRuntime>
<httpModules>
<add name="RadUploadModule" type="Telerik.WebControls.RadUploadHttpModule, RadUpload.Net2"/>
</httpModules>
<httpHandlers>
<add verb="*" path="Telerik.RadUploadProgressHandler.aspx" type="Telerik.WebControls.RadUploadProgressHandler, RadUpload.Net2"></add>
</httpHandlers>
|
现在,外部的轮廓都已经布好了,接下来就是点击上传之后服务器端所需的操作:
当然,做这些操作之前,我们先 using 一下 Telerik.WebControls 命名空间。
1 2 3 4 5 6 7 8 9 10 11 12 13 14 15 16 17 | // 检查文件
if (RadUploadContext.Current == null) { return; }
if (RadUploadContext.Current.UploadedFiles.Count <= 0)
{
this.Page.ClientScript.RegisterStartupScript(this.Page.GetType(), "MsgBox", "<script>alert('请选择上传文件 !')</script>");
return;
}
if (RadUploadContext.Current.UploadedFiles[0].ContentLength >= 2147483647)
{
this.Page.ClientScript.RegisterStartupScript(this.Page.GetType(), "MsgBox", "<script>alert('上传的文件不得超过 2GB !')</script>");
return;
}
UploadedFile file = RadUploadContext.Current.UploadedFiles[0];
string fileName = Path.GetFileName(file.FileName);
string virtualPath = System.IO.Path.Combine("~/save", fileName);
string savePath = this.MapPath(virtualPath);
file.SaveAs(savePath, true);
|
至此,文件上传的处理工作已经完成,以上的cs代码是我自己的一些操作处理,大家可以根据自己情况酌情修改,比如也可以放置多个FileUpload 控件,
用foreach (UploadedFile file in RadUploadContext.Current.UploadedFiles){ ... } 这样的方式处理多个文件的上传。
前端效果:
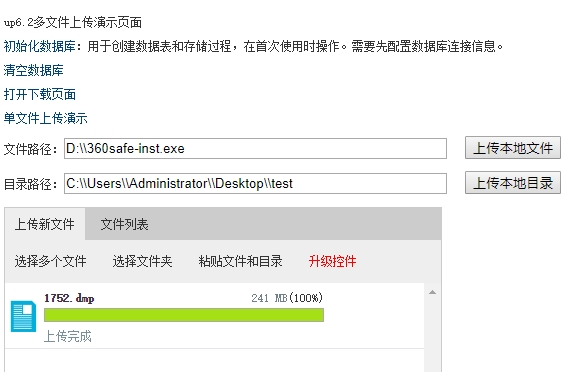
文件上传后存放在存储目录中:F:Gitup6upload2019�427666e5c30c092485989a46c15b54cb2d3

文件完整的上传完成。没有丢失任何数据包。
DEMO下载地址:https://dwz.cn/fgXtRtnu