目录
第十九篇、CSS3的transition-timing-function详解
第二十七篇、CSS3用text-overflow解决文字排版问题
第一篇、用户交互伪类选择器的用法
:hover 鼠标移入
:link 没有交互
:visited 访问过
:active 鼠标按下不放
- <a href="">Pesudo classes</a>
- <a href="">Pesudo classes</a>
- <a href="">Pesudo classes</a>
- <a href="">Pesudo classes</a>
- a:link{color:#ccc}
- a:hover{color:#f00}
- a:visited{color:#0f0}
- a:active{color:#00f}
鼠标移入图片放大
- <div class="demo">
- <img class="demo-img" src="./01.jpg">
- </div>
- .demo-img{
- width:100px;
- height:100px;
- border-radius:50%; /*设置圆角为50%,当宽高一致时,img呈圆形*/
- transition: all .5s; /*设置动画过渡时间为0.5秒*/
- }
- .demo-img:hover{
- transform:scal(1.1); /*图片放大1.1倍*/
- }
第二篇、元素状态选择器
:enabled input标签可输入
:disabled input标签不可输入
- <input type="text" value="可输入">
- <input type="text" disabled value="禁止输入">
- input:enabled{background-color:#f00}
- input:disabled{background-color:#ff0}
第三篇、结构伪类选择器的用法
:first-child 选择某个元素的第一个子元素
:last-child 选择某个元素的最后一个子元素
:nth-child() 选择某个元素的一个或多个特定的子元素
:nth-last-child() 选择某个元素的一个或多个特定的子元素,从这个元素的最后一个元素开始算,倒着数
:nth-of-type() 选择指定的元素(与:nth-child()区别在于这个有标签的限制)
:nth-last-of-type() 选择指定的元素,从这个元素的最后一个元素开始算,倒着数
:first-of-type 选择一个上级元素下的第一个同类子元素
:last-of-type 选择一个上级元素下的最后一个同类子元素
:only-child 匹配到的元素是他父级元素的唯一一个子元素
:only-of-type 匹配到的元素是他父级元素的唯一一个相同类型的子元素
:empty 匹配到的是里面没有任何内容的元素
- <div class="demo">
- <ul>
- <li><a href="">0</a></li>
- <li><a href="">1</a></li>
- <li><a href="">2</a></li>
- <li><a href="">3</a></li>
- <li><a href="">4</a></li>
- <li><a href="">5</a></li>
- <li><a href="">6</a></li>
- <li><a href="">7</a></li>
- </ul>
- </div>
- .demo li:first-child{background-color:#f00} /*第一个子元素 1变为红色*/
-
- .demo li:last-child{background-color:#0f0} /*最后一个子元素 7变为绿色*/
-
- .demo li:nth-child(5){background-color:pink} /*第五个li 5变为粉色*/
- .demo li:nth-child(2n){background-color:#ff0} /*第偶数li 变为黄色*/
- .demo li:nth-child(2n+1){background-color:hotpink} /*第奇数li 变为骚粉色*/
- .demo li:nth-child(n+5){background-color:skyblue} /*从第五个li开始,后面的都变为天蓝色*/
- .demo li:nth-child(4n+1){background-color:skyblue} /*每隔三个li,变一个li为天蓝色*/
-
- .demo li:nth-last-child(5){background-color:pink} /*倒数第五个li 3变为粉色*/
- ...同上
-
- .demo li:nth-of-type(5){background-color:pink} /*第五个li 5变为粉色*/
- /*nth-of-type() 和 nth-child() 区别在于 前者只能匹配限定元素(li) 而后者是匹配所有的子元素*/
-
- .demo li:nth-last-of-type(5){background-color:pink} /*倒数第五个li 3变为粉色*/
- ...同上
-
- .demo li:first-of-type{background-color:#f00} /*第一个li元素 1变为红色*/
- /*凡是有type的,都是限制元素的*/
-
- .demo li:last-of-type{background-color:#f00} /*最后一个li元素 7变为红色*/
- /*凡是有type的,都是限制元素的*/
-
- .demo li:only-child{background-color:#f00} /*父级元素下如果只有一个子元素,则该元素变为红色*/
-
- .demo li:only-of-type{background-color:#f00} /*父级元素下如果只有一个li元素,则该li变为红色*/
-
- .demo li:empty{background-color:#f00} /*匹配到该父级元素下的所有没有内容的li元素*/
第四篇、CSS伪元素的用法
:first-letter 将特殊的样式添加到文本的首字母
:first-line 将特殊的样式添加到文本的首行
:before 在某元素之前插入某些内容
:after 在某元素之后插入某些内容
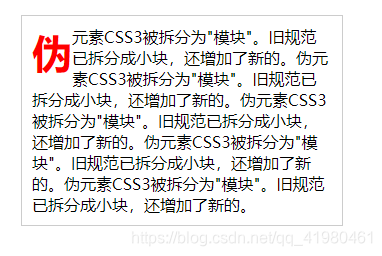
首字下沉效果
- <div class="demo">
- 伪元素CSS3被拆分为"模块"。旧规范已拆分成小块,还增加了新的。伪元素CSS3被拆分为"模块"。旧规范已拆分成小块,还增加了新的。伪元素CSS3被拆分为"模块"。旧规范已拆分成小块,还增加了新的。伪元素CSS3被拆分为"模块"。旧规范已拆分成小块,还增加了新的。伪元素CSS3被拆分为"模块"。旧规范已拆分成小块,还增加了新的。
- </div>
- .demo::first-letter{
- font-size:40px;
- font-weight:bold;
- float:left;
- color:#f00;
- }
- /*首行设置颜色*/
- .demo::first-line{color:#0f0}

- /*使用:befor和:after添加图片,必须有content属性*/
- .demo::before{
- content:url(./01.jpg);
- display:block;
- }
- .demo::after{
- content:'';
- display:block;
- }
第五篇、border-radius画圆
<div class="demo"></div>- .demo{
- width:300px;
- height:300px;
- border:1px solid #ccc;
- background-color:#f66;
- border-radius:50%; /*画圆必须先是正方形*/
- }
-
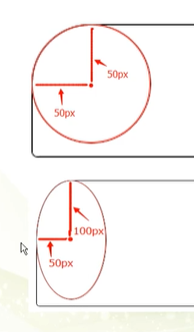
- /*
- border-radius: 左上角 右上角 右下角 左下角
- border-radius: X轴 / Y轴 (详情请看第十篇蛋形)
- border-top-left-radius 左上角
- border-top-right-radius 右上角
- border-bottom-right-radius 右下角
- border-bottom-left-radius 左下角
- border-top-left-radius : X轴 Y轴
- border-top-left-radius :只写一个轴,指的是X轴Y轴一致
- */
-
- /*画半圆*/
- .demo{
- width: 100px;
- height: 200px;
- margin: 50px auto;
- border: 1px solid #ccc;
- background: #f66;
- border-radius: 100px 0 0 100px;
- }
第六篇、画三角形和对话框
自己先动手实现一遍
<div class="demo">Hello Every! I'm Hamy,Nice to meeting!</div>- .demo{
- width: 300px;
- background: #0f0;
- border-radius: 10px;
- margin: 50px auto;
- padding: 10px;
- position: relative;
- }
- .demo::before{
- content: '';
- position: absolute;
- left: -10px;
- top: 50%;
- margin-top: -5px;
- border-top: 10px solid #0f0;
- border-right: 10px solid #0f0;
- border-bottom: 10px solid transparent;
- border-left: 10px solid transparent;
- }

跟着JSPang一起写
html都一样,这里只写CSS,只是修改了三角形角的方向
- .demo{
- width: 300px;
- background: #0f0;
- border-radius: 10px;
- margin: 50px auto;
- padding: 10px;
- position: relative;
- }
- .demo::before{
- content: '';
- position: absolute;
- left: -10px;
- top: 50%;
- margin-top: -10px;
- border-top: 10px solid transparent;
- border-right: 10px solid #0f0;
- border-bottom: 10px solid transparent;
- border-left: 0px solid transparent;
- }

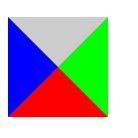
如果不知道三角形怎么画,可以参考如下代码
<div class="sj"></div>- .sj{
- width: 0px;
- height: 0px;
- border-top: 50px solid #ccc;
- border-right: 50px solid #0f0;
- border-bottom: 50px solid #f00;
- border-left: 50px solid #00f;
- }
第七篇、画菱形和平行四边形
画菱形思路其实是画一个正方形,将其旋转45度
画平行四边形其实是画一个长方形,将其X轴和Y轴进行角度变形
transform :rotate(角度) 旋转
skew(角度) 倾斜
translate(像素) 偏移
scale(1.1) 缩放1.1倍
- <!--菱形-->
- <div class="diamond"></div>
-
- <!--平行四边形-->
- <div class="parallel"></div>
- /*菱形*/
- .diamond{
- width: 100px;
- height: 100px;
- background: #0f0;
- margin: 200px auto;
- transform:rotate(45deg);
- }
-
- /*平行四边形*/
- .parallel{
- width: 200px;
- height: 100px;
- background: #0f0;
- margin: 100px auto;
- transform: skew(0deg,10deg)
- }

第八篇、画五角星和六角形
首先画图之前先将图形拆解
五角星的拆解图如下:

<div class="star"></div>- .star{
- width: 0px;
- height: 0px;
- border-bottom: 70px solid red;
- border-left: 100px solid transparent;
- border-right: 100px solid transparent;
- margin: 150px auto;
- transform: rotate(35deg);
- position: relative;
- }
- .star::before{
- content:'';
- width: 0px;
- height: 0px;
- border-bottom: 80px solid red;
- border-left: 30px solid transparent;
- border-right: 30px solid transparent;
- transform: rotate(-35deg);
- position: absolute;
- top: -45px;
- left: -65px;
- }
- .star::after{
- content: '';
- border-bottom:70px solid red;
- border-left:100px solid transparent;
- border-right:100px solid transparent;
- transform: rotate(-70deg);
- position: absolute;
- top: 3px;
- left: -105px;
- }
效果如图:

六角星的拆解图如下:
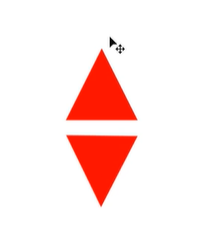
<div class="star-6"></div>- .star-6{
- width: 0px;
- height: 0px;
- border-bottom: 100px solid red;
- border-left: 60px solid transparent;
- border-right: 60px solid transparent;
- position: relative;
- }
- .star-6::before{
- content: '';
- width: 0px;
- height: 0px;
- border-top: 100px solid red;
- border-left: 60px solid transparent;
- border-right: 60px solid transparent;
- position: absolute;
- top: 30px;
- left: -60px;
- }

第九篇、CSS画五边形和六边形
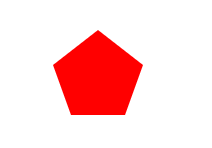
首先分解五边形

<div class="side-5"></div>- /*三角形*/
- .side-5{
- width: 54px;
- border-top: 50px solid #f00;
- border-left: 18px solid transparent;
- border-right: 18px solid transparent;
- position: relative;
- margin: 100px auto;
- }
- /*梯形*/
- .side-5::after{
- content: '';
- position: absolute;
- width: 0px;
- height: 0px;
- border-bottom: 35px solid #f00;
- border-left: 45px solid transparent;
- border-right: 45px solid transparent;
- top: -85px;
- left: -18px;
- }
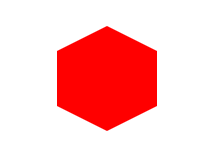
分解六边形
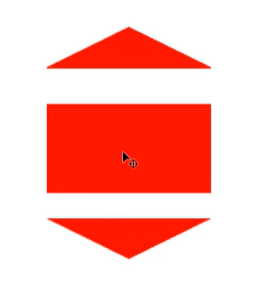
<div class="side-6"></div>- /*长方形*/
- .side-6{
- width: 100px;
- height: 55px;
- background-color:red;
- margin: 100px auto;
- position: relative;
- }
- /*上三角形*/
- .side-6::before{
- content: '';
- width: 0px;
- height: 0px;
- border-bottom: 25px solid red;
- border-left: 50px solid transparent;
- border-right: 50px solid transparent;
- position: absolute;
- top: -25px;
- }
- /*下三角形*/
- .side-6::after{
- content: '';
- width: 0px;
- height: 0px;
- border-top: 25px solid red;
- border-left: 50px solid transparent;
- border-right: 50px solid transparent;
- position: absolute;
- bottom: -25px;
- }
第十篇、挑战心形和蛋形
心形的分解

自己先实现
<div class="heart"></div>- .heart{
- width: 200px;
- height: 300px;
- background-color: red;
- border-radius: 200px 200px 0 0;
- margin: 100px auto;
- transform: rotate(-45deg);
- position: relative;
- }
- .heart::before{
- content: '';
- width: 200px;
- height: 300px;
- background-color: red;
- border-radius: 200px 200px 0 0;
- margin: 100px auto;
- transform: rotate(90deg);
- position: absolute;
- top: -50px;
- left:50px;
- }

跟随JSPang实现
- /*占位*/
- .heart{
- width: 100px;
- height: 90px;
- position: relative;
- margin: 100px auto;
- }
- /*左半心*/
- .heart::before{
- content: '';
- position: absolute;
- width: 50px;
- height: 80px;
- background-color: #f00;
- border-radius: 50px 40px 0 0;
- transform-origin: 0 100%; /*旋转基点*/
- transform: rotate(-45deg);
- left: 50px;
- }
- /*右半心*/
- .heart::after{
- content: '';
- position: absolute;
- width: 50px;
- height: 80px;
- background-color: #f00;
- border-radius: 50px 40px 0 0;
- transform-origin: 100% 100%; /*旋转基点*/
- transform: rotate(45deg);
- right: 50px;
- }

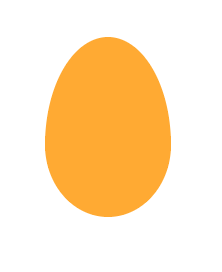
蛋形的分解
蛋形没办法分解,这里就不展示了
<div class="egg"></div>- /*
- * border-radius: 四个角的X轴 / 四个角的Y轴
- */
- .egg{
- width: 126px;
- height: 180px;
- background-color: #fa3;
- margin: 100px auto;
- border-radius: 50% 50% 50% 50% / 60% 60% 40% 40%;
- }
第十一篇、太极图的画法
首先依然先分解太极图

<div class="taiji"></div>- body{
- background-color: #ccc;
- }
- .taiji{
- width: 150px;
- height: 300px;
- margin: 100px auto;
- border-radius: 50%;
- background-color: #fff;
- border-left: 150px solid black;
- position: relative;
- }
- .taiji::before{
- content: '';
- width: 0px;
- height: 0px;
- position: absolute;
- padding: 25px;
- border-radius: 50%;
- border: 50px solid black;
- background-color: white;
- left: -75px;
- top: 0px;
- }
- .taiji::after{
- content: '';
- width: 0px;
- height: 0px;
- position: absolute;
- padding: 25px;
- border-radius: 50%;
- border: 50px solid white;
- background-color: black;
- left: -75px;
- bottom: 0px;
- }

第十二篇、透明背景的实现
- <div class="bg">
- <div class="text">皆さん、こんにちは、滝沢ローラと申します。お会いすることができてとても嬉しいです。</div>
- </div>
- .bg{
- width: 800px;
- height: 600px;
- background-image:url('./bg.jpg');
- margin: 100px auto;
- }
- .text{
- width: 300px;
- background: #0f0;
- opacity: .6; /*透明度*/
- border-radius: 10px;
- margin: 50px auto;
- padding: 10px;
- position: relative;
- right: -230px;
- top: 230px;
- box-shadow: 3px 3px 5px #888; /*盒阴影*/
- }
- .text::before{
- content: '';
- position: absolute;
- left: -10px;
- top: 50%;
- margin-top: -5px;
- border-top: 10px solid #0f0;
- border-right: 10px solid #0f0;
- border-bottom: 10px solid transparent;
- border-left: 10px solid transparent;
- }

第十三篇、CSS的颜色模式
RGBA(R,G,B,A)
R:红色值 正整数|百分数
G:绿色值 正整数|百分数
B:蓝色值 正整数|百分数
A:Alpha透明度 取值0-1
HSLA(H,S,L,A)
H:Hue(色调) 0(360)表示红色,120表示绿色,240表示蓝色,也可以取其他数值表示颜色,取值范围0-360
S:Saturation(饱和度) 取值0.0% - 100.0%
L:Lightness(亮度) 取值0.0% - 100.0%
A:Alpha透明度 取值0-1
Opacity和RGBA的区别在于
父元素设置Opacity透明度,子元素会继承父元素的透明度
父元素设置RGBA透明度,子元素不会继承父元素的透明度
实例:
- <div id="main">
- <ul>
- <li>
- <div class="img"><img src="./01.jpg"></div>
- <div class="goods_title">AMD 锐龙r5 3600/3600X盒装 搭 微星 华硕 B450 CPU主板套装Ryzen</div>
- <div class="price">¥2049</div>
- </li>
- <li>
- <div class="img"><img src="./01.jpg"></div>
- <div class="goods_title">AMD 锐龙r5 3600/3600X盒装 搭 微星 华硕 B450 CPU主板套装Ryzen</div>
- <div class="price">¥2049</div>
- </li>
- </ul>
- </div>
- body{background-color: #ddd;}
- #main{margin: 100px auto;width: 800px;clear: both;}
- #main li{
- float: left;
- background-color: #fff;
- list-style: none;
- width: 240px;
- padding: 1px;
- border: 1px solid rgba(255,0,0,0);
- cursor: pointer;
- margin: 10px;
- }
- #main li:hover{border: 1px solid rgba(255,0,0,1);}
- #main li:hover .img img{opacity: .7;}
- .img img{width: 240px;transition:all .5s;}
- .goods_title{margin: 10px;color: #666;overflow: hidden;}
- .price{color: #f00;margin: 10px;}

第十四篇、CSS3线性渐变
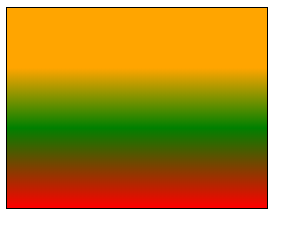
background-image: linear-gradient(angle, color-stop1, color-stop2);angle: to top (0deg)
to bottom (180deg)
to left (270deg)
to right (90deg)
color-stop1: 颜色 位置
<div class="ceng"></div>- .ceng{
- width: 260px;
- height: 200px;
- border: 1px solid #000;
- background-image:linear-gradient(180deg,orange 30%,green 60%,red 100%)
- }
第十五篇、CSS3的径向渐变
径向渐变有两种渐变形式,一种以圆渐变,一种以椭圆渐变
- <div class="ceng circle"></div>
- <div class="ceng ellipse"></div>
- .ceng{
- width: 100px;
- height: 100px;
- border: 1px solid #000;
- border-radius: 50%;
- margin: 10px;
- float: left;
- }
- /*从中间向外渐变*/
- .circle{background-image: radial-gradient(circle at center, orange,green);}
- .ellipse{background-image: radial-gradient(ellipse at center, orange,green);}
- /*从右往左开始渐变*/
- .circle{background-image: radial-gradient(circle at right, orange,green);}
- .ellipse{background-image: radial-gradient(ellipse at right, orange,green);}
- /*从左往右开始渐变*/
- .circle{background-image: radial-gradient(circle at left, orange,green);}
- .ellipse{background-image: radial-gradient(ellipse at left, orange,green);}
- /*从上往下开始渐变*/
- .circle{background-image: radial-gradient(circle at top, orange,green);}
- .ellipse{background-image: radial-gradient(ellipse at top, orange,green);}
- /*从下往上开始渐变*/
- .circle{background-image: radial-gradient(circle at bottom, orange,green);}
- .ellipse{background-image: radial-gradient(ellipse at bottom, orange,green);}
-
- /*从左上角开始渐变*/
- .circle{background-image: radial-gradient(circle at top left, orange,green);}
- .ellipse{background-image: radial-gradient(ellipse at top left, orange,green);}
- /*从左下角开始渐变*/
- .circle{background-image: radial-gradient(circle at bottom left, orange,green);}
- .ellipse{background-image: radial-gradient(ellipse at bottom left, orange,green);}
- /*从右上角开始渐变*/
- .circle{background-image: radial-gradient(circle at top right, orange,green);}
- .ellipse{background-image: radial-gradient(ellipse at top right, orange,green);}
- /*从右下角开始渐变*/
- .circle{background-image: radial-gradient(circle at bottom right, orange,green);}
- .ellipse{background-image: radial-gradient(ellipse at bottom right, orange,green);}
-
- /*从中间向外渐变,如果是正圆,前加像素代表渐变20像素,结束之后全为绿色;如果是椭圆,需要规定X轴和Y轴的像素,类似于线性渐变的色标*/
- .circle{background-image: radial-gradient(20px circle at center, orange,green);}
- .ellipse{background-image: radial-gradient(20px 30px ellipse at center, orange,green);}
-
- /*多颜色渐变*/
- .circle{background-image: radial-gradient(20px circle at center, orange,green,red);}
- .ellipse{background-image: radial-gradient(20px 30px ellipse at center, orange,green,red);}

第十六篇、CSS3的重复性渐变
重复性渐变有两个要点
1.在渐变方法前面加上repeating
2.在渐变的颜色后跟上色标值
- <!--线性渐变-->
- <div class="linear"></div>
- <!--径向渐变-->
- <div class="circle"></div>
- /*线性渐变*/
- .linear{
- width: 300px;
- height: 300px;
- margin: 20px auto;
- background-image: repeating-linear-gradient(red 0px,green 40px,orange 80px);
- }
- /*径向渐变*/
- .circle{
- width: 300px;
- height: 300px;
- margin: 20px auto;
- border-radius: 50%;
- background-image:repeating-radial-gradient(red 0px,green 30px,orange 60px) ;
- }

第十七篇、CSS3盒子阴影效果
box-shadow: h-shadow v-shadow blur spread color insert
h-shadow 必须。水平阴影的位置,允许负值
v-shadow 必须。垂直阴影的位置,允许负值
blur 可选。模糊距离
spread 可选。阴影的尺寸
color 可选。阴影的颜色
inset 可选。将外部阴影(outset)改为内部阴影
- <div class="ceng rotate_left">
- <img src="./bg.jpg" alt="">
- <p>上海的鲜花港的郁金香,花名:Ballade Dream</p>
- </div>
- <div class="ceng rotate_right">
- <img src="./01.jpg" alt="">
- <p>2020年初的中国,宛如噩梦一般</p>
- </div>
- body{background-color: #e9e9e9;}
- .ceng{
- width: 294px;
- padding: 10px 10px 20px 10px;
- border: 1px solid #bfbfbf;
- background-color: #fff;
- box-shadow: 2px 2px 3px #aaa;
- }
- .ceng img{width: 100%;}
- .rotate_left{
- float: left;
- transform: rotate(7deg)
- }
- .rotate_right{
- float: left;
- transform: rotate(-8deg)
- }

第十八篇、CSS3制作缓慢边长的方形
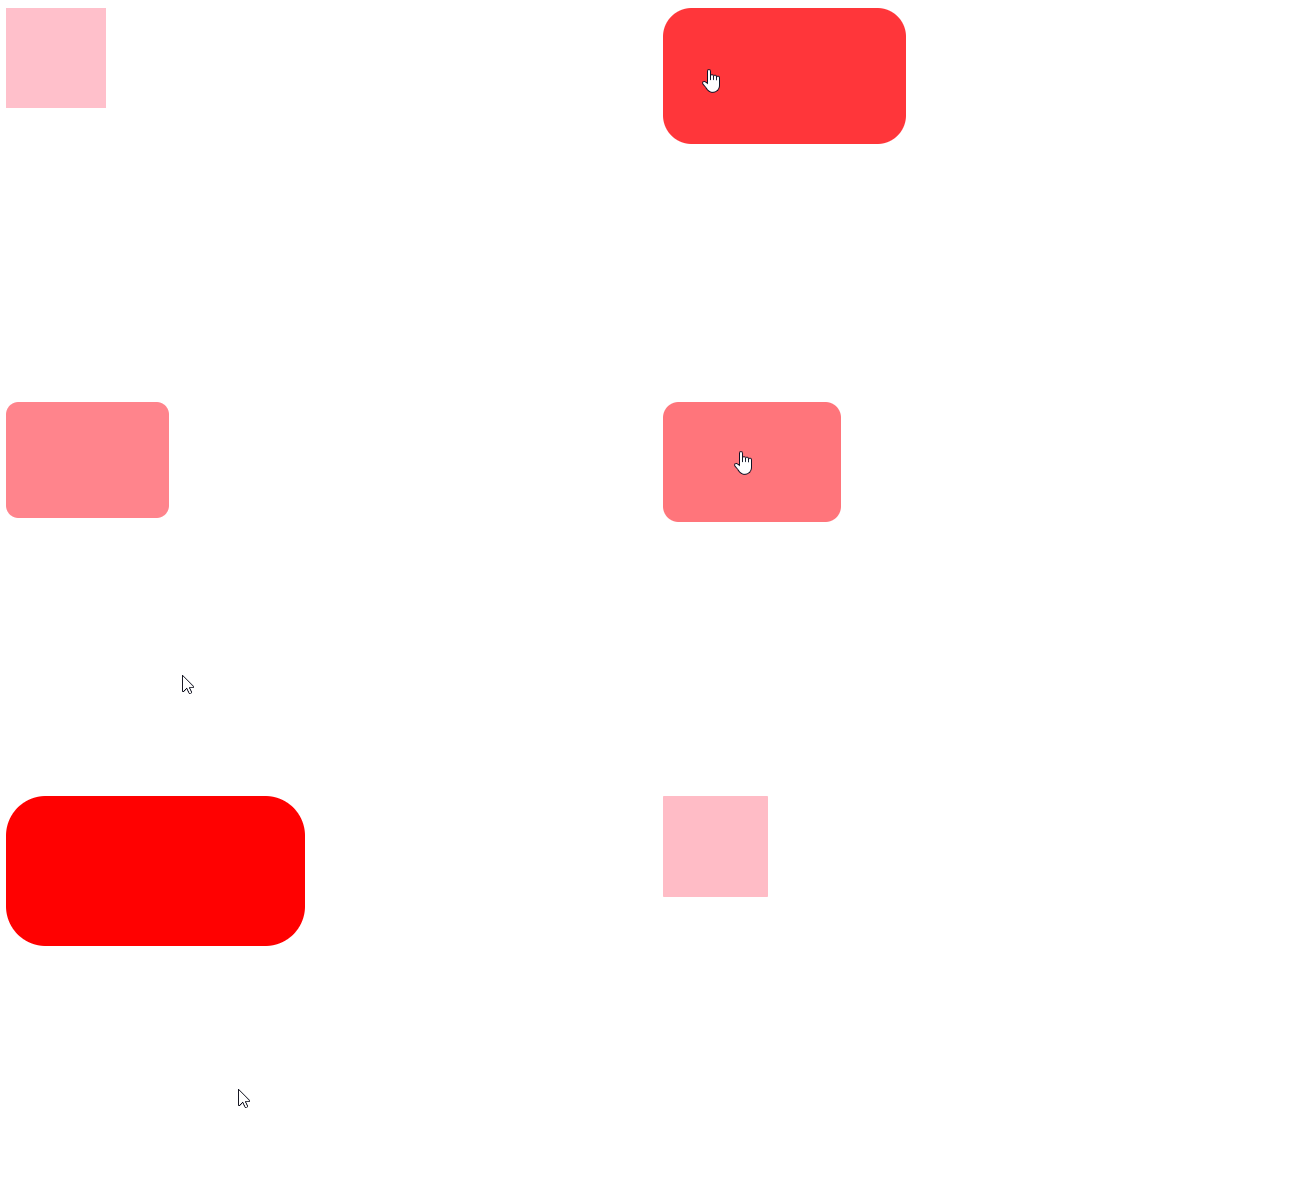
transition-property : 过渡属性(默认值为all)
transition-duration : 过度持续时间(默认值为0秒)
transition-timing-function : 过渡函数(默认值为ease函数)
transition-delay : 过渡延迟时间(默认值为0秒)
<div class="ceng"></div>- .ceng{
- width: 100px;
- height: 100px;
- background-color: pink;
- cursor: pointer;
- transition-duration: 2s;
- transition-property: all;
- transition-delay: .2s;
- transition-timing-function: ease;
- }
- .ceng:hover{
- width: 300px;
- height: 150px;
- background-color: #f00;
- border-radius: 40px;
- }
第十九篇、CSS3的transition-timing-function详解
transition: transition-property transition-duration transition-delay transition-timing-function
transition-timing-function
ease 慢--快--慢
linear 匀速
ease-in 慢--快
ease-out 快--慢
ease-in-out 慢--快--慢
step-start 无过渡效果
step-end 延迟过渡时间直接显示
第二十篇、制作天猫首页的类别展示效果
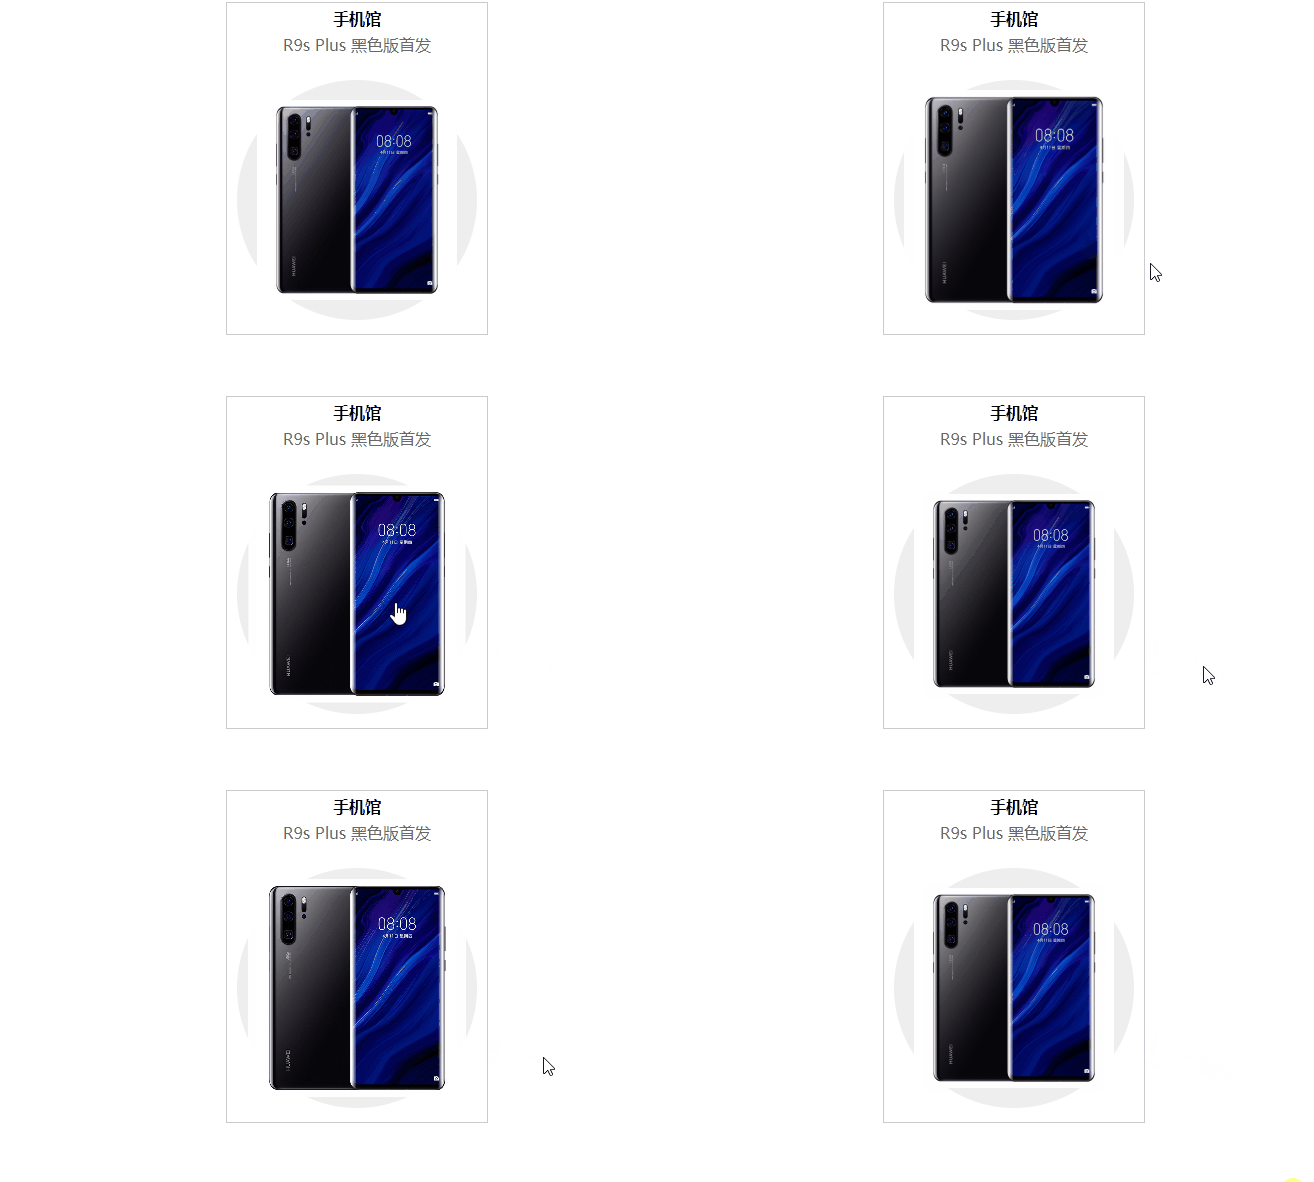
- <div class="main">
- <ul>
- <li>
- <div class="m_title">手机馆</div>
- <div class="m_content">R9s Plus 黑色版首发</div>
- <div class="m_img"><img src="./02.jpg" alt="手机"></div>
- </li>
- </ul>
- </div>
- *{padding: 0px;margin: 0px;font-family: 'Microsoft YaHei';}
- .main{
- margin: 10px auto;
- width: 260px;
- border: 1px solid #ccc;
- text-align: center;
- }
- .main li{
- list-style: none;
- cursor: pointer;
- }
- .m_title{font-style: 20px;font-weight: bold;margin: 5px;}
- .m_content{color: #666;margin-bottom: 15px;}
- .m_img{position: relative;padding: 30px;}
- .m_img img{width: 100%;transform: scale(1);transition: all .5s;}
- .main li:hover .m_img img{
- transform: scale(1.1);
- }
- .m_img::before{
- content: '';
- position: absolute;
- width: 240px;
- height: 240px;
- background-color: #eee;
- border-radius: 50%;
- z-index: -1;
- left: 10px;
- top: 10px;
- }
第二十一篇、仿天猫类别过渡效果
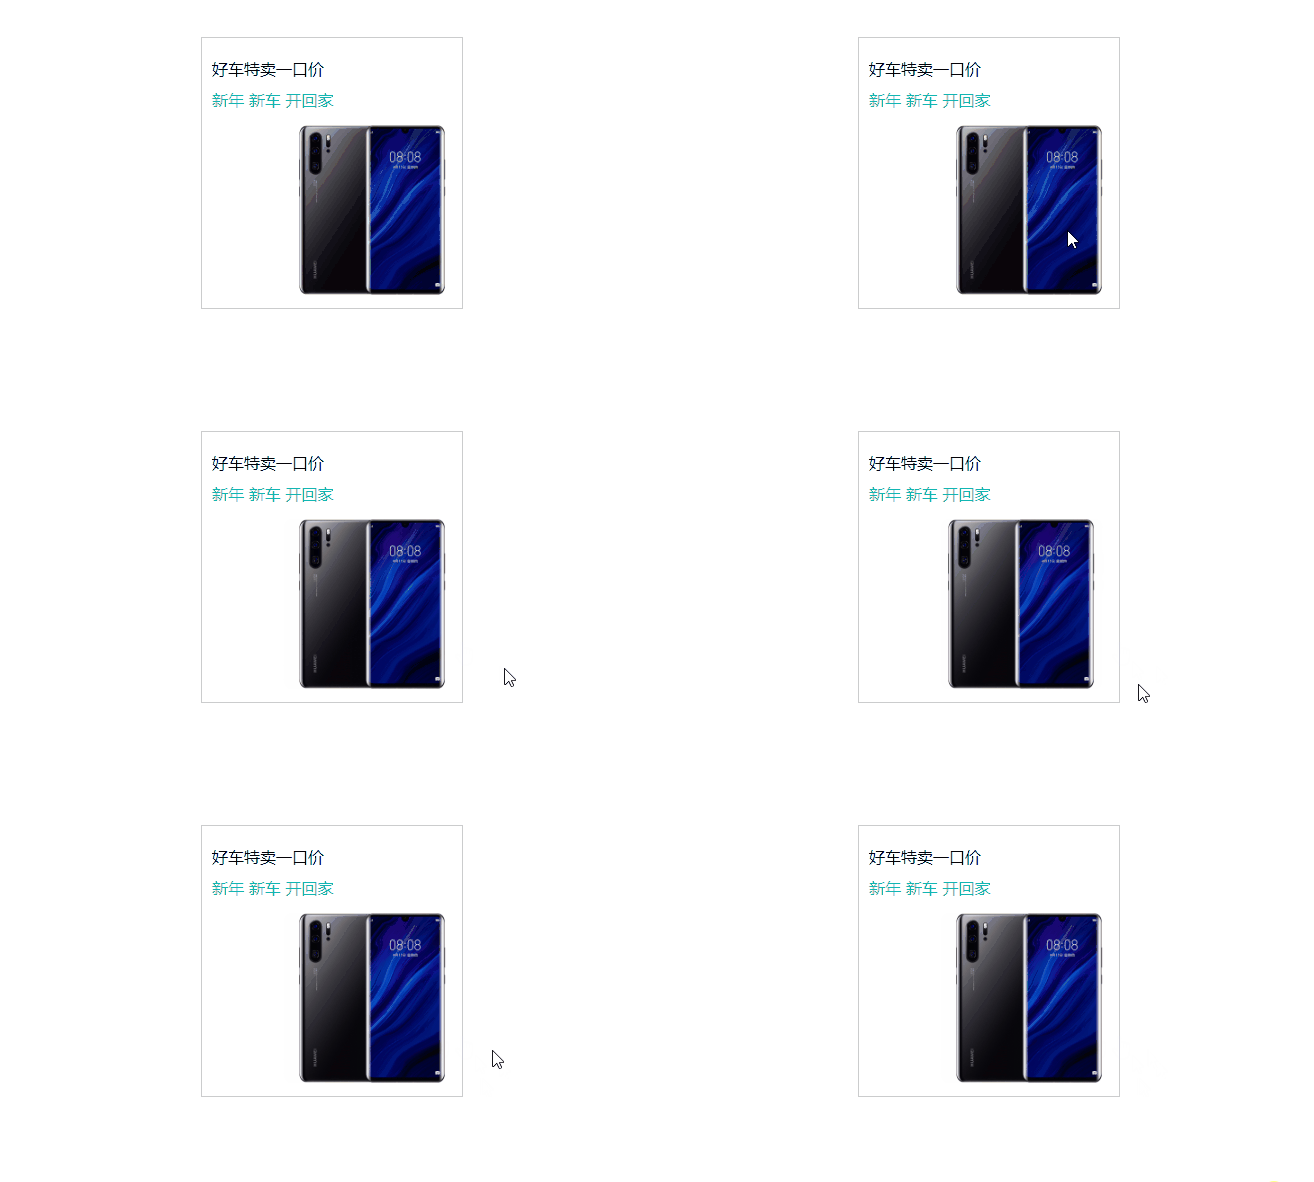
- <div class="main">
- <div class="m_title">好车特卖一口价</div>
- <div class="m_content">新年 新车 开回家</div>
- <div class="m_img"><img src="./02.jpg" alt="手机特卖"></div>
- </div>
- .main{
- width: 260px;
- height: 270px;
- border: 1px solid #ccc;
- margin: 50px auto;
- font-family: 'Microsoft YaHei';
- cursor: pointer;
- }
- .m_title{
- text-align: left;
- font-style: 20px;
- padding: 20px 10px 10px 10px;
- }
- .m_content{
- color: #11ccaa;
- padding: 0px 10px 10px 10px;
- }
- .m_img{
- text-align: right;
- position: relative;
- }
- .m_img img{
- position: absolute;
- width: 180px;
- top: 0px;
- right: 0px;
- transition: all .3s;
- }
- .main:hover img{
- right: 15px;
- }
第二十二篇、CSS3动画中的@keyframes关键帧
@keyframes语法
第一种: @keyframes [动画名] {
from { ... }
to { ... }
}
第二种: @keyframes [动画名] {
0% { ... }
...
100% { ... }
}
给要添加动画的元素加上 animation属性
<div class="rect"></div>- .rect{
- width: 100px;
- height: 100px;
- background-color: red;
- position: fixed;
- animation: mymove 2s infinite;
- }
- @keyframes mymove{
- /* from { top: 0;left: 20%;}
- to { top: 0;left: 80%;} */
- 0% {top: 0;left: 20%;background-color: red;}
- 25% {top: 0;left: 80%;background-color: green;}
- 50% {top: 80%;left: 80%;background-color: blue;}
- 75% {top: 80%;left: 20%;background-color: gray;}
- 100% {top: 0;left: 20%;background-color: yellow;}
- }

第二十三篇、CSS3动画animation复合属性
结合上一篇的animation来讲解
animation : animation-name animation-duration animation-timing-function animation-delay
animation-iteration-count
animation-name : 定义的动画名
animation-duration : 动画持续的时间
animation-timing-function : 动画运行的形式(属性值同第十九篇transition-timing-function)
animation-delay : 动画延迟时间播放
animation-iteration-count : 动画循环播放的次数 infinite(无限循环)
animation-direction : 动画播放的方向
normal 正常方向
alternate 正方向执行一遍完成之后逆方向执行,如此循环
第二十四篇、利用CSS3制作Loading加载动画
- <div class="spinner">
- <div></div>
- <div></div>
- <div></div>
- <div></div>
- <div></div>
- </div>
- .spinner{
- margin: 100px auto;
- width: 60px;
- height: 60px;
- text-align: center;
- font-size: 10px;
- }
- .spinner div{
- background-color: #64cf22;
- height: 100%;
- width: 6px;
- display: inline-block;
- animation: mymove 1.2s infinite ease-in-out;
- }
- .spinner div:nth-child(2){
- animation-delay: -1.1s;
- }
- .spinner div:nth-child(3){
- animation-delay: -1.0s;
- }
- .spinner div:nth-child(4){
- animation-delay: -0.9s;
- }
- .spinner div:nth-child(5){
- animation-delay: -0.8s;
- }
- @keyframes mymove{
- 0%,40%,100% {transform: scaleY(0.4);}
- 20% {transform: scaleY(1);}
- }

第二十五篇、Loading动画效果实例2
- <div class="spinner">
- <div></div>
- <div></div>
- </div>
- .spinner{
- width: 60px;
- height: 60px;
- position: relative;
- margin: 100px auto;
- }
- .spinner div{
- width: 100%;
- height: 100%;
- border-radius: 50%;
- background-color: #67cf22;
- opacity: .6;
- position: absolute;
- top: 0px;
- left: 0px;
- animation: mymove 2.0s infinite ease-in-out;
- }
- .spinner div:nth-child(2){
- animation-delay: -1s;
- }
- @keyframes mymove{
- 0%,100% {transform: scale(0.0);}
- 50% {transform: scale(1.0);}
- }

第二十六篇、CSS3制作发光字、立体字、苹果字体
text-shadow : h-shadow v-shadow blur color
h-shadow : X轴的阴影位置
v-shadow : Y轴的阴影位置
blur : 阴影的模糊距离
color : 阴影的颜色
- <div class="font1">Panda</div>
- <div class="font2">APPLE STYLE</div>
- <div class="font3">3D TEXT EFFECT</div>
- body{
- background-color: #666;
- text-align: center;
- font: bold 55px "Microsoft YaHei";
- }
- .font1{
- color: #fff;
- text-shadow: 0px 0px 20px red;
- }
- .font2{
- color: #000;
- text-shadow: 0px 1px 1px #fff;
- }
- .font3{
- color: #fff;
- text-shadow: 1px 1px rgba(197, 223, 238, 0.8),
- 2px 2px rgba(197, 223, 238, 0.8),
- 3px 3px rgba(197, 223, 238, 0.8),
- 4px 4px rgba(197, 223, 238, 0.8),
- 5px 5px rgba(197, 223, 238, 0.8),
- 6px 6px rgba(197, 223, 238, 0.8);
- }

第二十七篇、CSS3用text-overflow解决文字排版问题
text-overflow : clip | elipsis | string
clip : 剪断
ellipsis : 三个点表示
string : 使用自定义字符(很多情况都是不生效的,一般只用第二个)
- <div class="demo">锄禾日当午,汗滴禾下土,谁之盘中餐,粒粒皆辛苦锄禾日当午,汗滴禾下土,谁之盘中餐,粒粒皆辛苦锄禾日当午,汗滴禾下土,谁之盘中餐,粒粒皆辛苦锄禾日当午,汗滴禾下土,谁之盘中餐,粒粒皆辛苦锄禾日当午,汗滴禾下土,谁之盘中餐,粒粒皆辛苦</div>
- <div class="demo1">锄禾日当午,汗滴禾下土,谁之盘中餐,粒粒皆辛苦锄禾日当午,汗滴禾下土,谁之盘中餐,粒粒皆辛苦锄禾日当午,汗滴禾下土,谁之盘中餐,粒粒皆辛苦锄禾日当午,汗滴禾下土,谁之盘中餐,粒粒皆辛苦锄禾日当午,汗滴禾下土,谁之盘中餐,粒粒皆辛苦</div>
- <div class="demo2">锄禾日当午,汗滴禾下土,谁之盘中餐,粒粒皆辛苦锄禾日当午,汗滴禾下土,谁之盘中餐,粒粒皆辛苦锄禾日当午,汗滴禾下土,谁之盘中餐,粒粒皆辛苦锄禾日当午,汗滴禾下土,谁之盘中餐,粒粒皆辛苦锄禾日当午,汗滴禾下土,谁之盘中餐,粒粒皆辛苦</div>
- .demo{
- margin: 30px auto;
- width: 100px;
- padding: 10px;
- border: 1px solid #ccc;
- height: 50px;
- text-overflow: clip;
- overflow: hidden;
- }
- .demo1{
- margin: 0px auto;
- width: 100px;
- padding: 10px;
- border: 1px solid #ccc;
- height: 50px;
- text-overflow: ellipsis;
- overflow: hidden;
- white-space: nowrap;
- }
- .demo2{
- margin: 0px auto;
- width: 100px;
- padding: 10px;
- border: 1px solid #ccc;
- height: 50px;
- text-overflow: 'ccc';
- overflow: hidden;
- white-space: nowrap;
- }

第二十八篇、CSS3新的字体单位rem
CSS的单位 px em rem
px : 实际的像素大小
em : 依赖于父级
rem : 依赖于html根元素
- <div>Hello Panda!</div>
- <h1>Hello Panda!</h1>
- html{
- /* font-size: 10px; */
- font-size: 62.5%; /*(10/16)*100%*/
- }
- body{
- font-size: 1.4rem;
- }
- h1{
- font-size: 2.4rem;
- }
