昨天内容回顾
1.{{}}模板语法、插值、简单运算
2.指令系统
v-if 真正销毁重建
v-show 更改css的display,用于重复切换出现
v-bind 绑定属性 :
v-on 绑定事件 @
v-for 遍历,优先级相对高
v-html 解析html标签
v-model 只适用于在表单控件 双向数据绑定的一个体现
双向数据绑定=单向数据绑定+UI监听
网站设计一共有23中模式
最常使用使用的三种:
MVC MVVM MTV
MVVM
Model View ViewModel
流程控制
3.computed计算属性
默认值有getter
网页音乐播放
1.用事件控制的写法


<!DOCTYPE html>
<html>
<head>

    <title></title>
    <style>
        *{
            padding: 0;
            /* margin: 0; */
        }
        ul{
            list-style:none;
        }
        li{
            border-bottom: 1px solid gray;
        }
    </style>

</head>
<body>
    <div id="music">
        <audio :src='song' autoplay="" controls="" @ended="next" ></audio>
        <ul>
            <li v-for='(item,index) in songs' @click='huange(index)'>
                <h3>歌名:{{item.name}}</h3>
                <p>歌手:{{item.author}}</p>
            </li>
        </ul>
    </div>

    <script src="vue.js"></script>
    <script>
        var songs = [
            {id:1,src:"./audio/1.mp3",name:"111",author:"111111"},
            {id:2,src:"./audio/2.mp3",name:"112",author:"211111"},
            {id:3,src:"./audio/3.mp3",name:"113",author:"311111"},
            {id:4,src:"./audio/4.mp3",name:"114",author:"411111"}
        ];
        var music=new Vue({
            el:'#music',
            data:{
                song:"./audio/1.mp3",
                songindex:0,
                songs:songs,
            },
            methods:{
                huange(index){
                    this.song=this.songs[index].src;
                },
                next(){
                    this.songindex++;
                    this.song=this.songs[this.songindex].src;
                },
            },
            computed:{

            },
            create(){
                //页面初始化
            }
        })

    </script>

</body>
</html>
2.用计算属性的写法(方便推荐)
<!DOCTYPE html>
<html>
<head>

    <title></title>
    <style>
        *{
            padding: 0;
            /* margin: 0; */
        }
        ul{
            list-style:none;
        }
        li{
            border-bottom: 1px solid gray;
        }
    </style>

</head>
<body>
    <div id="music">
        <audio :src='currSong' autoplay="" controls="" @ended="next" ></audio>
        <ul>
            <li v-for='(item,index) in songs' @click='huange(index)'>
                <h3>歌名:{{item.name}}</h3>
                <p>歌手:{{item.author}}</p>
            </li>
        </ul>
    </div>

    <script src="vue.js"></script>
    <script>
        var songs = [
            {id:1,src:"./audio/1.mp3",name:"111",author:"111111"},
            {id:2,src:"./audio/2.mp3",name:"112",author:"211111"},
            {id:3,src:"./audio/3.mp3",name:"113",author:"311111"},
            {id:4,src:"./audio/4.mp3",name:"114",author:"411111"}
        ];
        var music=new Vue({
            el:'#music',
            data:{

                songindex:0,
                songs:songs,
            },
            methods:{
                huange(index){
                    this.songindex=index;
                },
                next(){
                    this.songindex++;
                    //this.song=this.songs[this.songindex].src;
                },
            },
            computed:{
                currSong(){
                    return this.songs[this.songindex].src;
                }

            },
            create(){
                //页面初始化
            }
        })

    </script>

</body>
</html>
组件创建
<!DOCTYPE html>
<html lang="en">
<head>
    <meta charset="UTF-8">
    <meta name="viewport" content="width=device-width, initial-scale=1.0">
    <meta http-equiv="X-UA-Compatible" content="ie=edge">
    <title>Document</title>
</head>
<body>
    <div id="app">
        <Vheader></Vheader>
        <Vheader></Vheader>
        <Vheader></Vheader>
    </div>

    <script src="vue.js"></script>
    <script>
        //组件的创建
        Vue.component('Vheader',{
            //data一定是函数,必须要有个返回值
            data:function(){
                return{
                    //必须要return一个对象,哪怕是一个空的对象,不然就报错。
                }
            },
            template:`<div class="header">
                        <div class="w">
                            <div class="w-l">
                                <img  src="./mei.jpg"/>
                            </div>
                            <div class="w-r">
                                <button>登录</button><button>注册</button>

                            </div>
                        </div>
                   </div>`
        })


        var app=new Vue({
            el:"#app",
            data:{

            },
            methods:{

            },
            computed:{

            },


        })
    </script>
</body>
</html>
vue-cli项目生成
安装vue-cli
打开cmd,执行cnpm install -g vue-cli
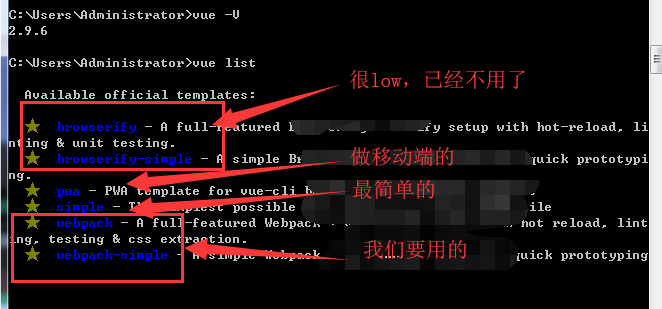
安装完毕后,执行vue -V查看是否安装成功,如果输出版本号则成功。
查看官方模板
在cmd下,执行 vue list
新建项目
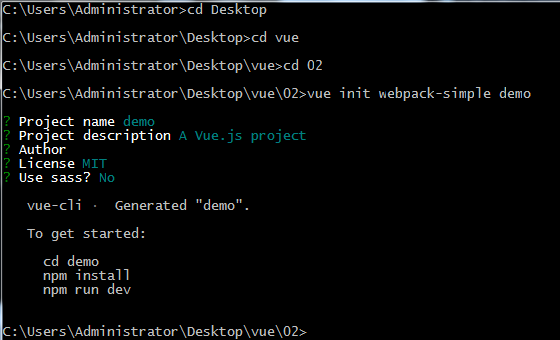
在cmd下切换到指定目录,然后执行 vue init webpack-simple demo(demo是自定义的项目名)
然后按回车,按回车,直到让选是不是user sass?选择N,因为现在还不会sass
然后如图中所提示的执行:
cd demo
npm install
npm run dev
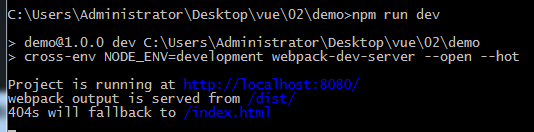
浏览器访问:http://localhost:8080/即可看到vue界面
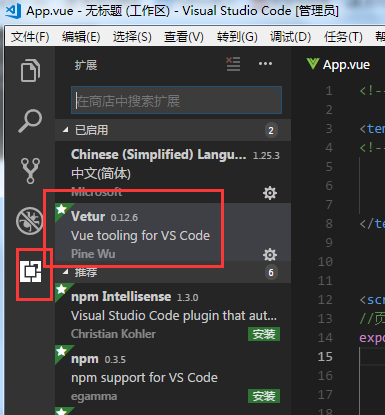
模板中组件的使用1
使用vs-code编辑vue文件,需要安装扩展Vetur,在编辑器左侧中找。
一个vue文件就是一个组件,重写App.vue
<!--一个组件有三个部分组成-->

<template>
<!-- 页面的结构 -->
    <div class="app">
        <h3>{{msg}}</h3>
    </div>
</template>


<script>
//页面的业务逻辑
export default{
    name:'App',
    data(){
        return{
            msg:'hello 组件!'
        }
    }
}
</script>


<style>
</style>
组件的使用2
1.在项目目录下新建组件目录components,在目录下新建三个组件文件:Vheader.vue,Vcontent.vue,Vfooter.vue。
<template>
    <header class="nav">
        我是header
        <h3>头</h3>
    </header>
</template>

<script>
export default {
    name:'Vheader',
    data(){
        return{

        }
    }
}
</script>
<style scoped>
h3{
    color: red;
}
</style>
<template>
    <div class="wrap">
        我是中心内容区域
        <h3>头</h3>
    </div>
</template>

<script>
export default {
    name:'Vcontent',
    data(){
        return{

        }
    }
}
</script>
<style scoped>
h3{
    color: yellow;
}
</style>
<template>
    <footer class="toot">
        我是footer
        <h3>头</h3>
    </footer>
</template>

<script>
export default {
    name:'Vfooter',
    data(){
        return{

        }
    }
}
</script>
<style scoped>
h3{
    color: blue;
}
</style>
2.在App.vue下引用:
<!--一个组件有三个部分组成-->

<template>
<!-- 页面的结构 -->
    <div class="app">
        <h3>{{msg}}</h3>
        <Vheader></Vheader>
        <vcontent></vcontent>
        <vfooter></vfooter>

    </div>
</template>


<script>
//1.先引入子组件
import Vheader from '../components/Vheader.vue'
import Vcontent from '../components/Vcontent'
import Vfooter from '../components/Vfooter'


//页面的业务逻辑
export default{
    name:'App',
    data(){
        return{
            msg:'hello 组件!'
        }
    },
    methodes:{},
    computed:{},
    //2.挂载
    components:{
        Vheader,
        Vcontent,
        Vfooter,
    },
}
</script>


<style>
</style>
总结
webpack+node.js将我们的项目更加方便化。
更有助于开发者快速开发。
创建组件
1.cd 到当前目录下
2.vue init webpack-simple 项目名
3.接下来根据提示操作
4.cd 项目名
5.npm install
6.npm run dev
7.只关心src下的文件夹里面的文件