OpenCV图像处理学习笔记-Day02
目录
- OpenCV图像处理学习笔记-Day02
第13课:基础知识-阈值分割
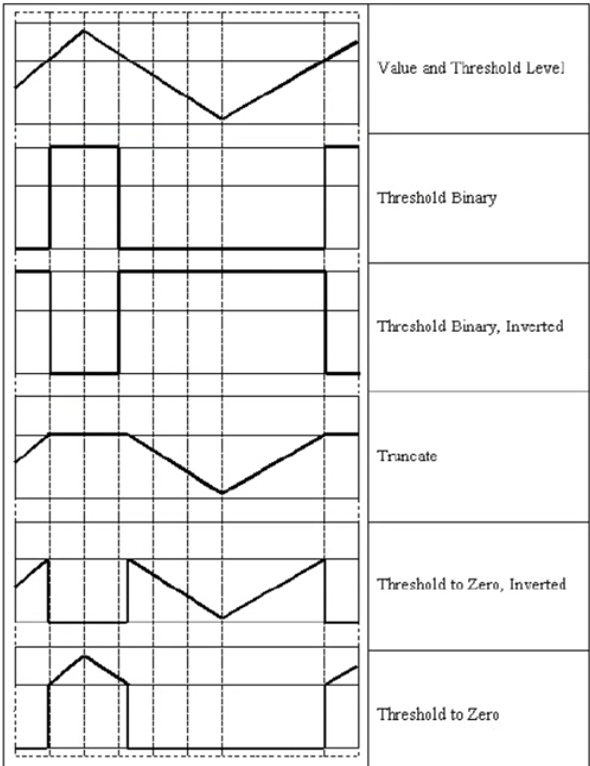
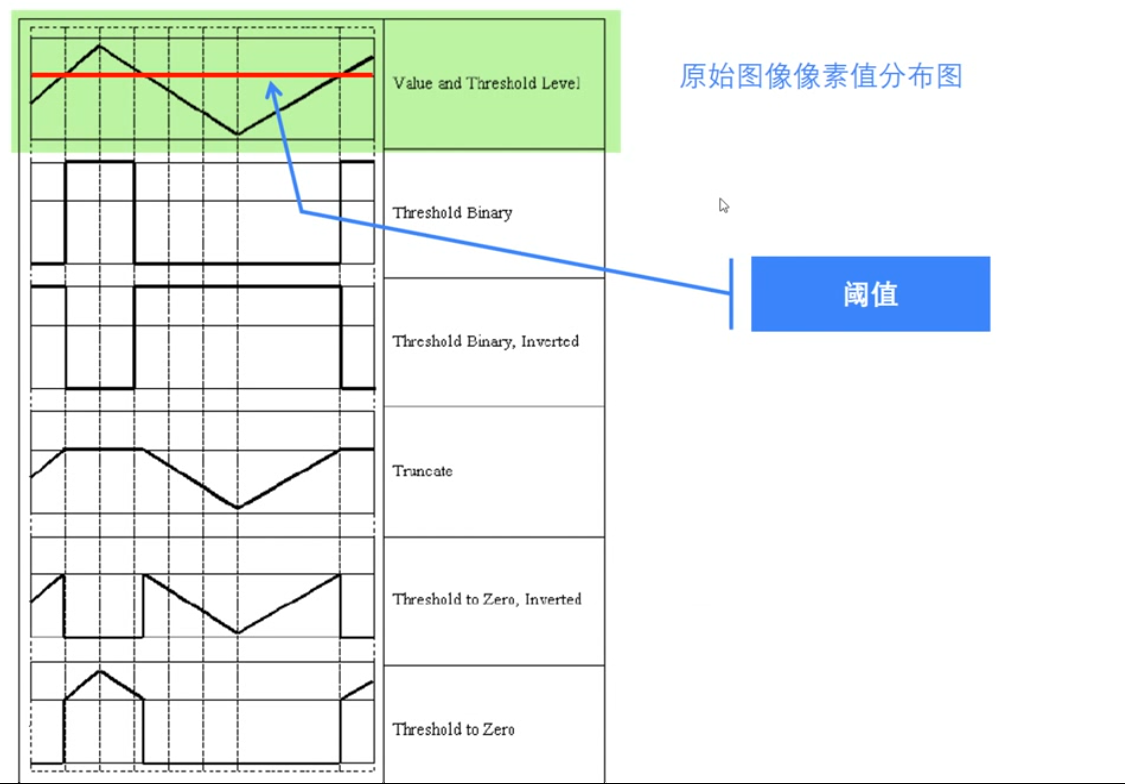
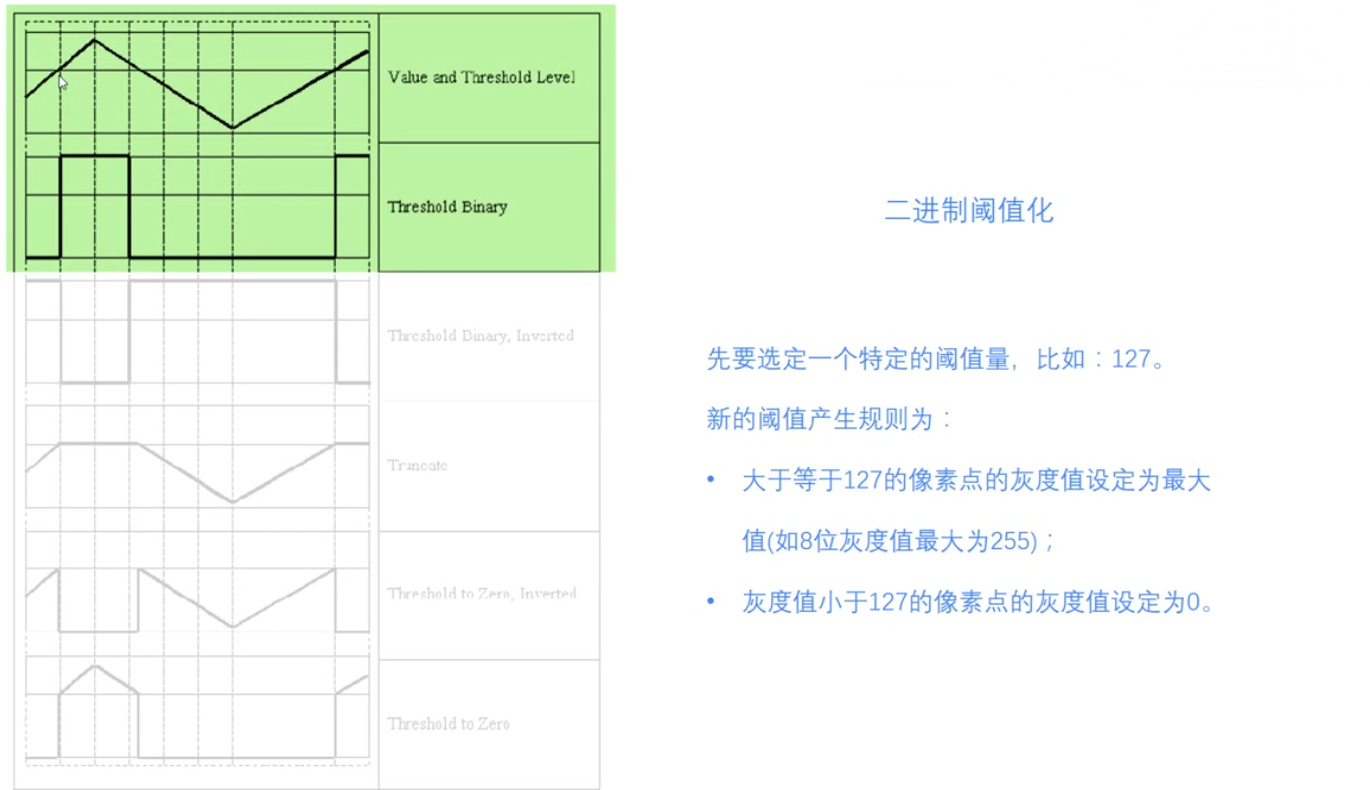
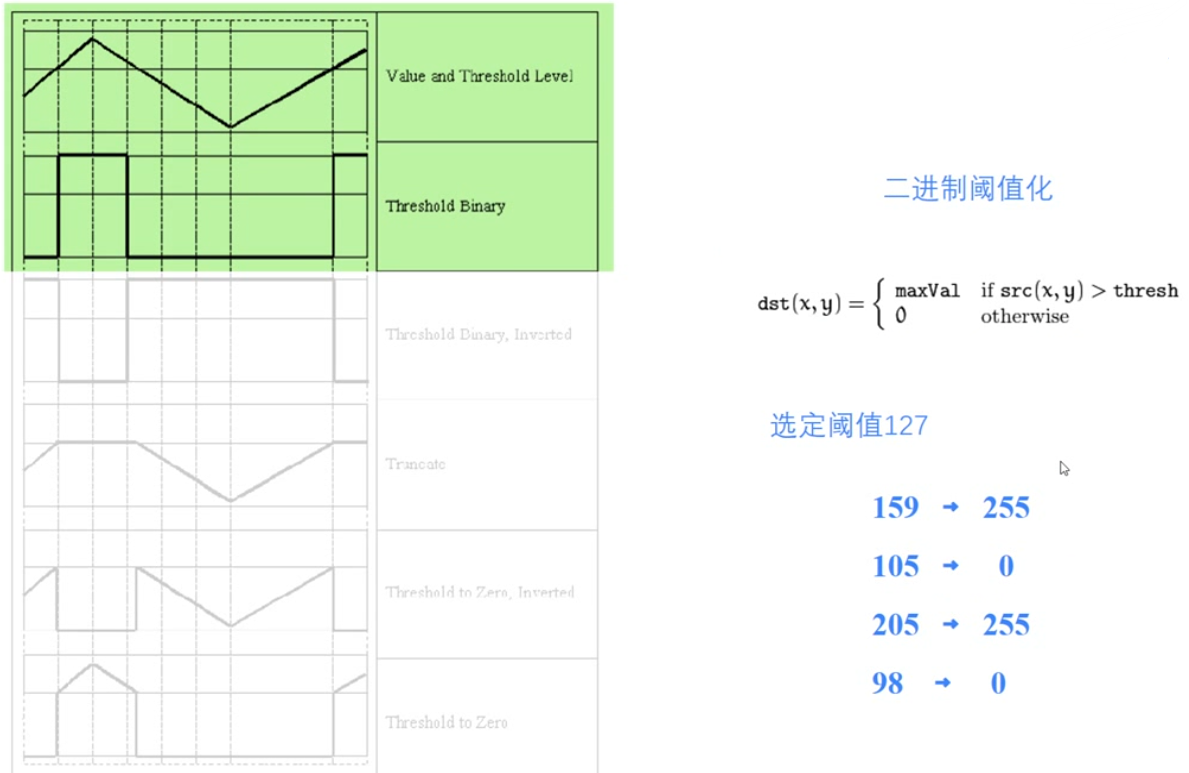
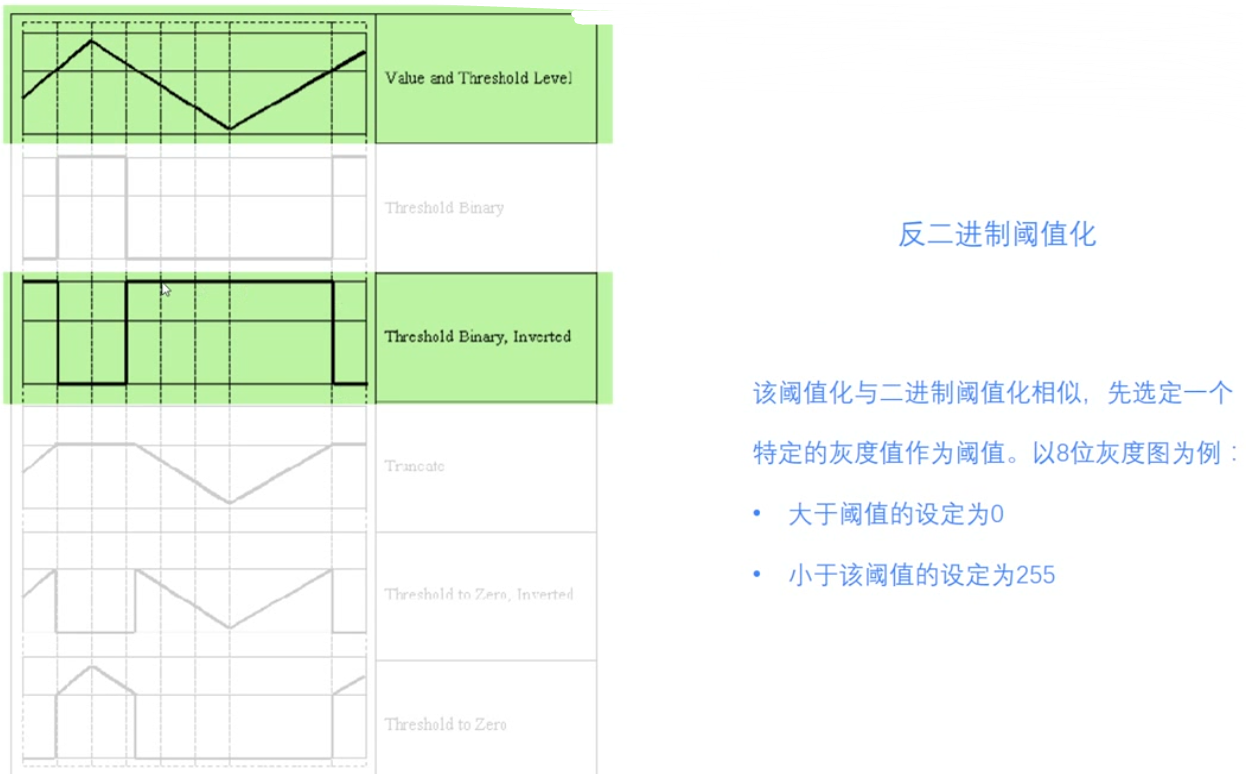
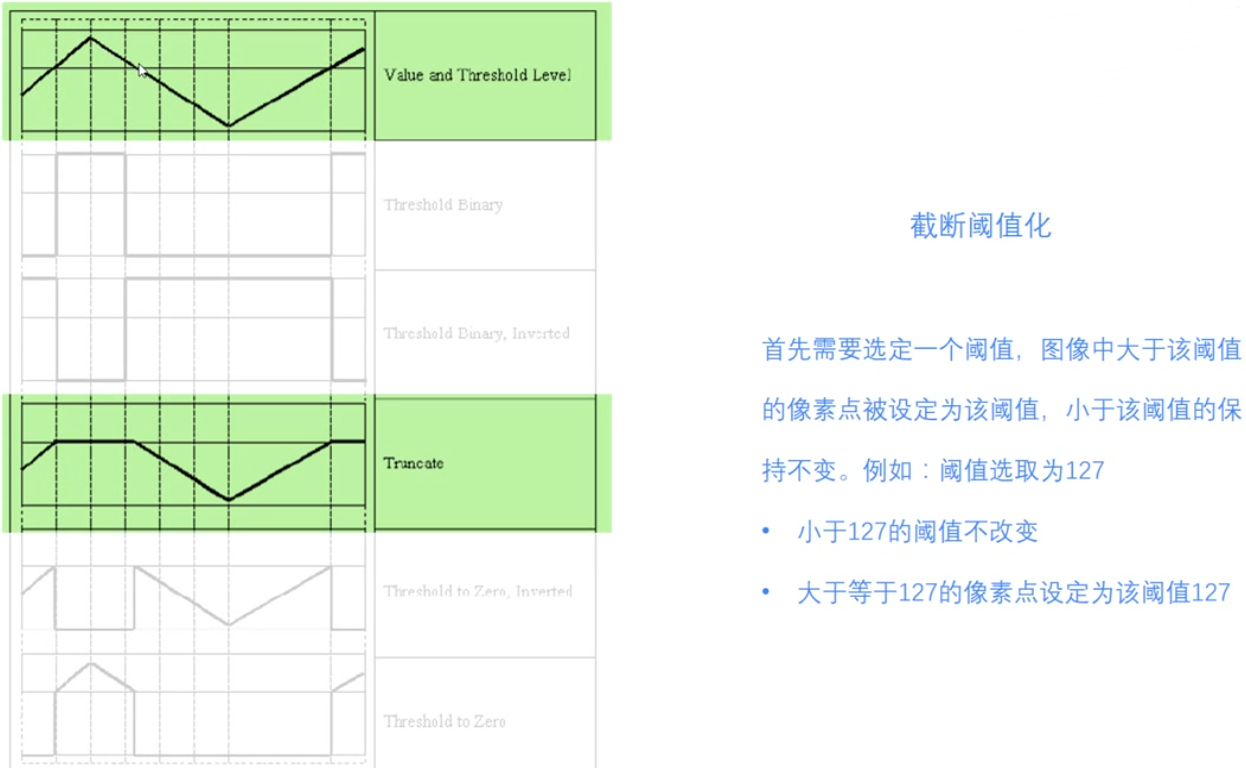
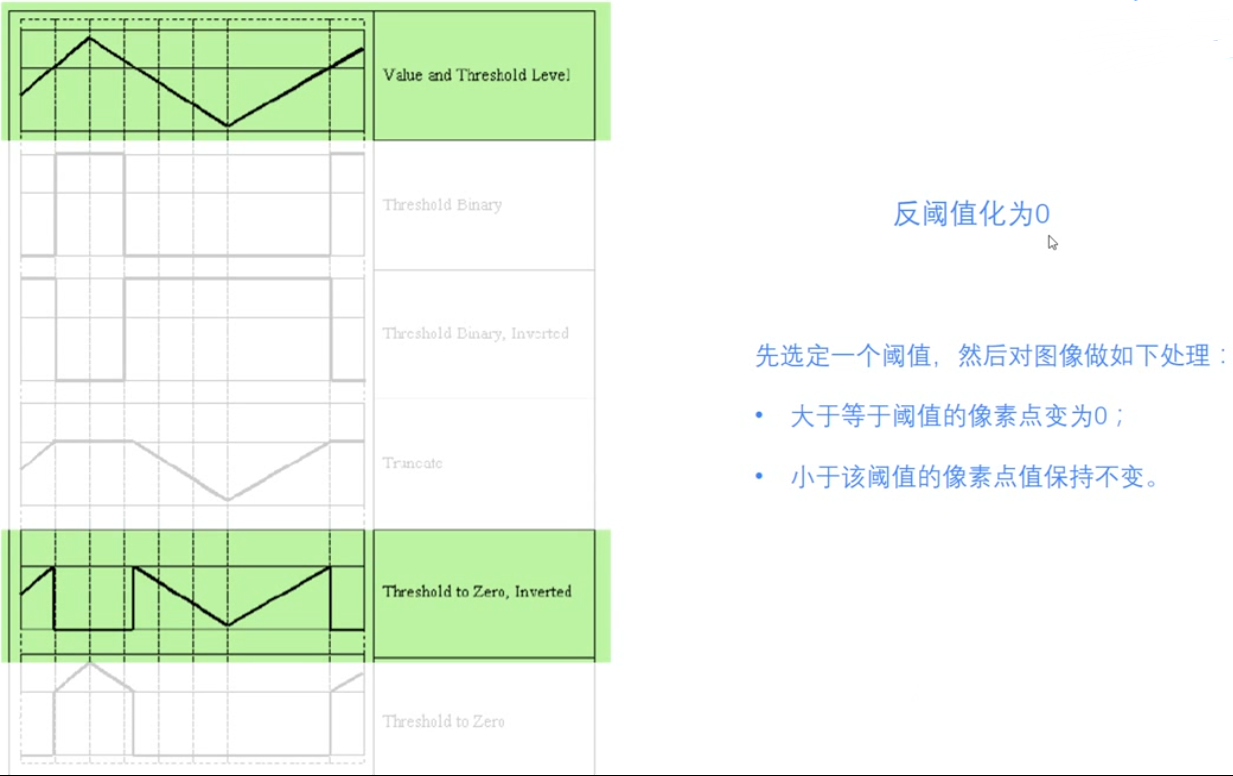
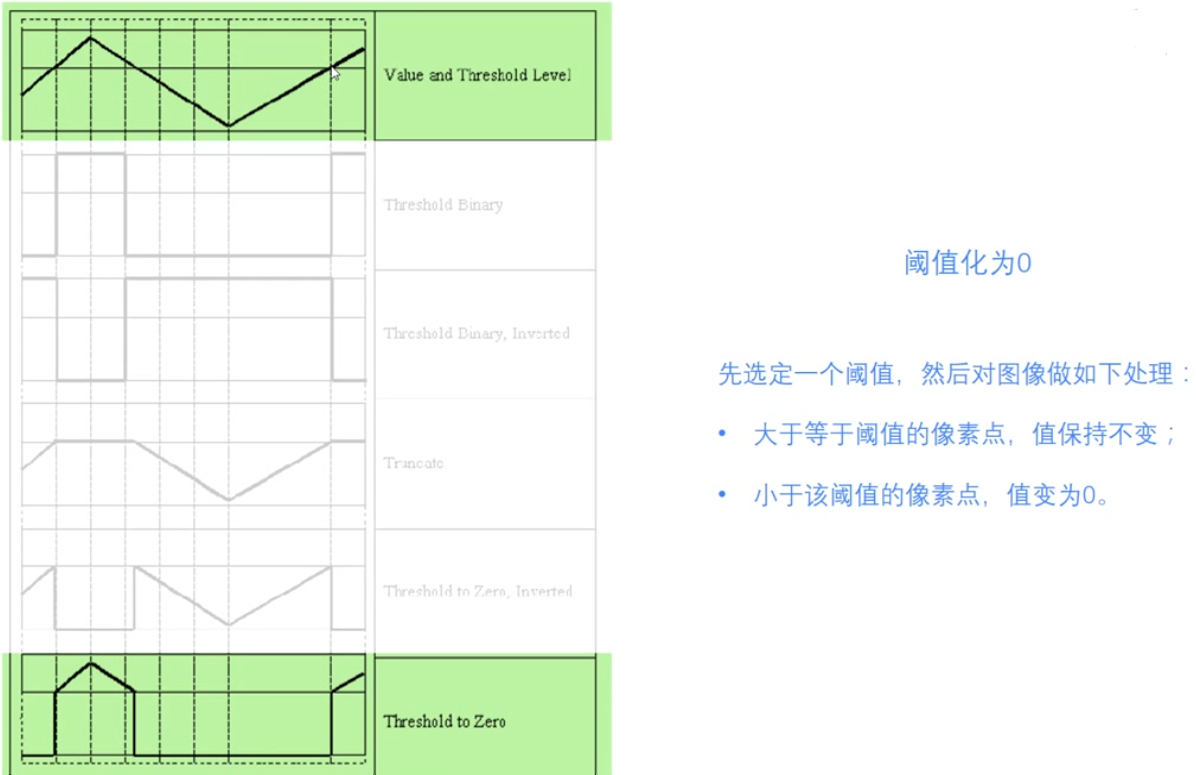
第14课:threshold函数
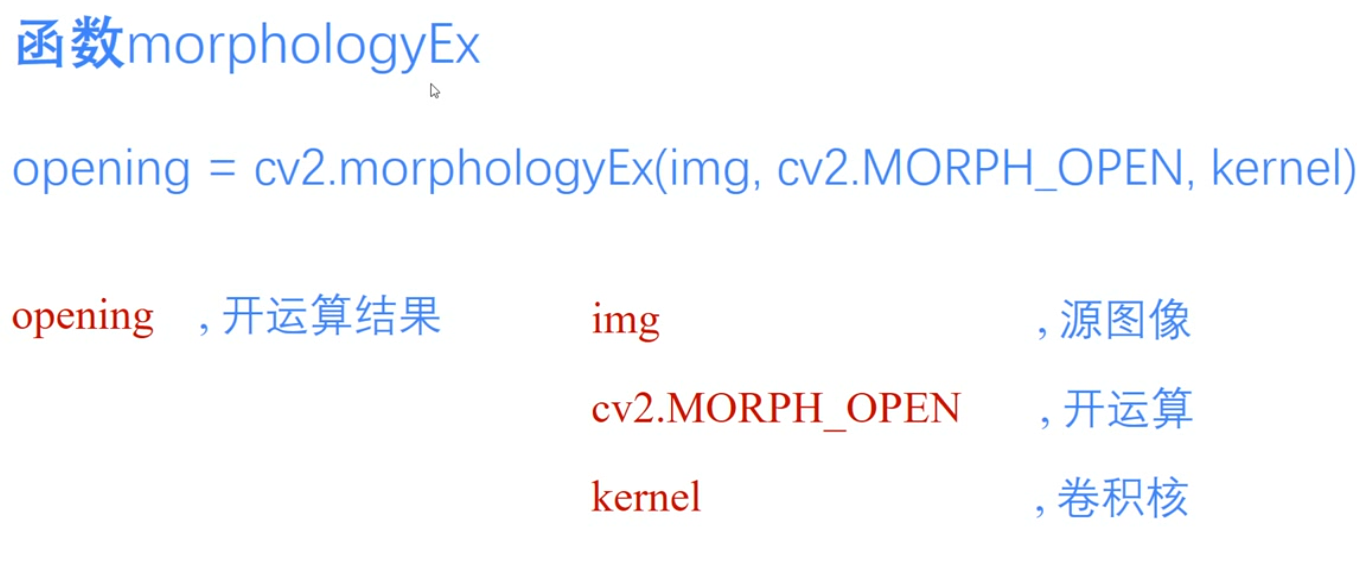
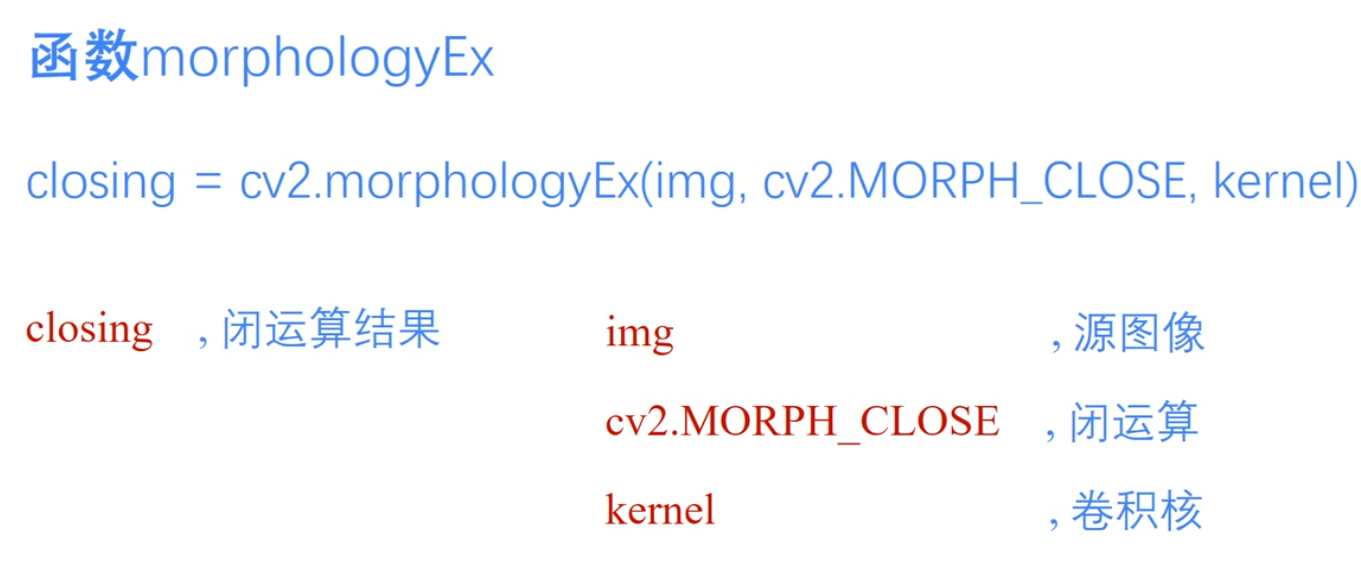
函数threshold
retval, dst = cv2.threshold(src, thresh, maxval, type)
retval: 阈值
dst: 处理结果
src: 原图像
thresh: 阈值
maxval: 最大值
type: 类型
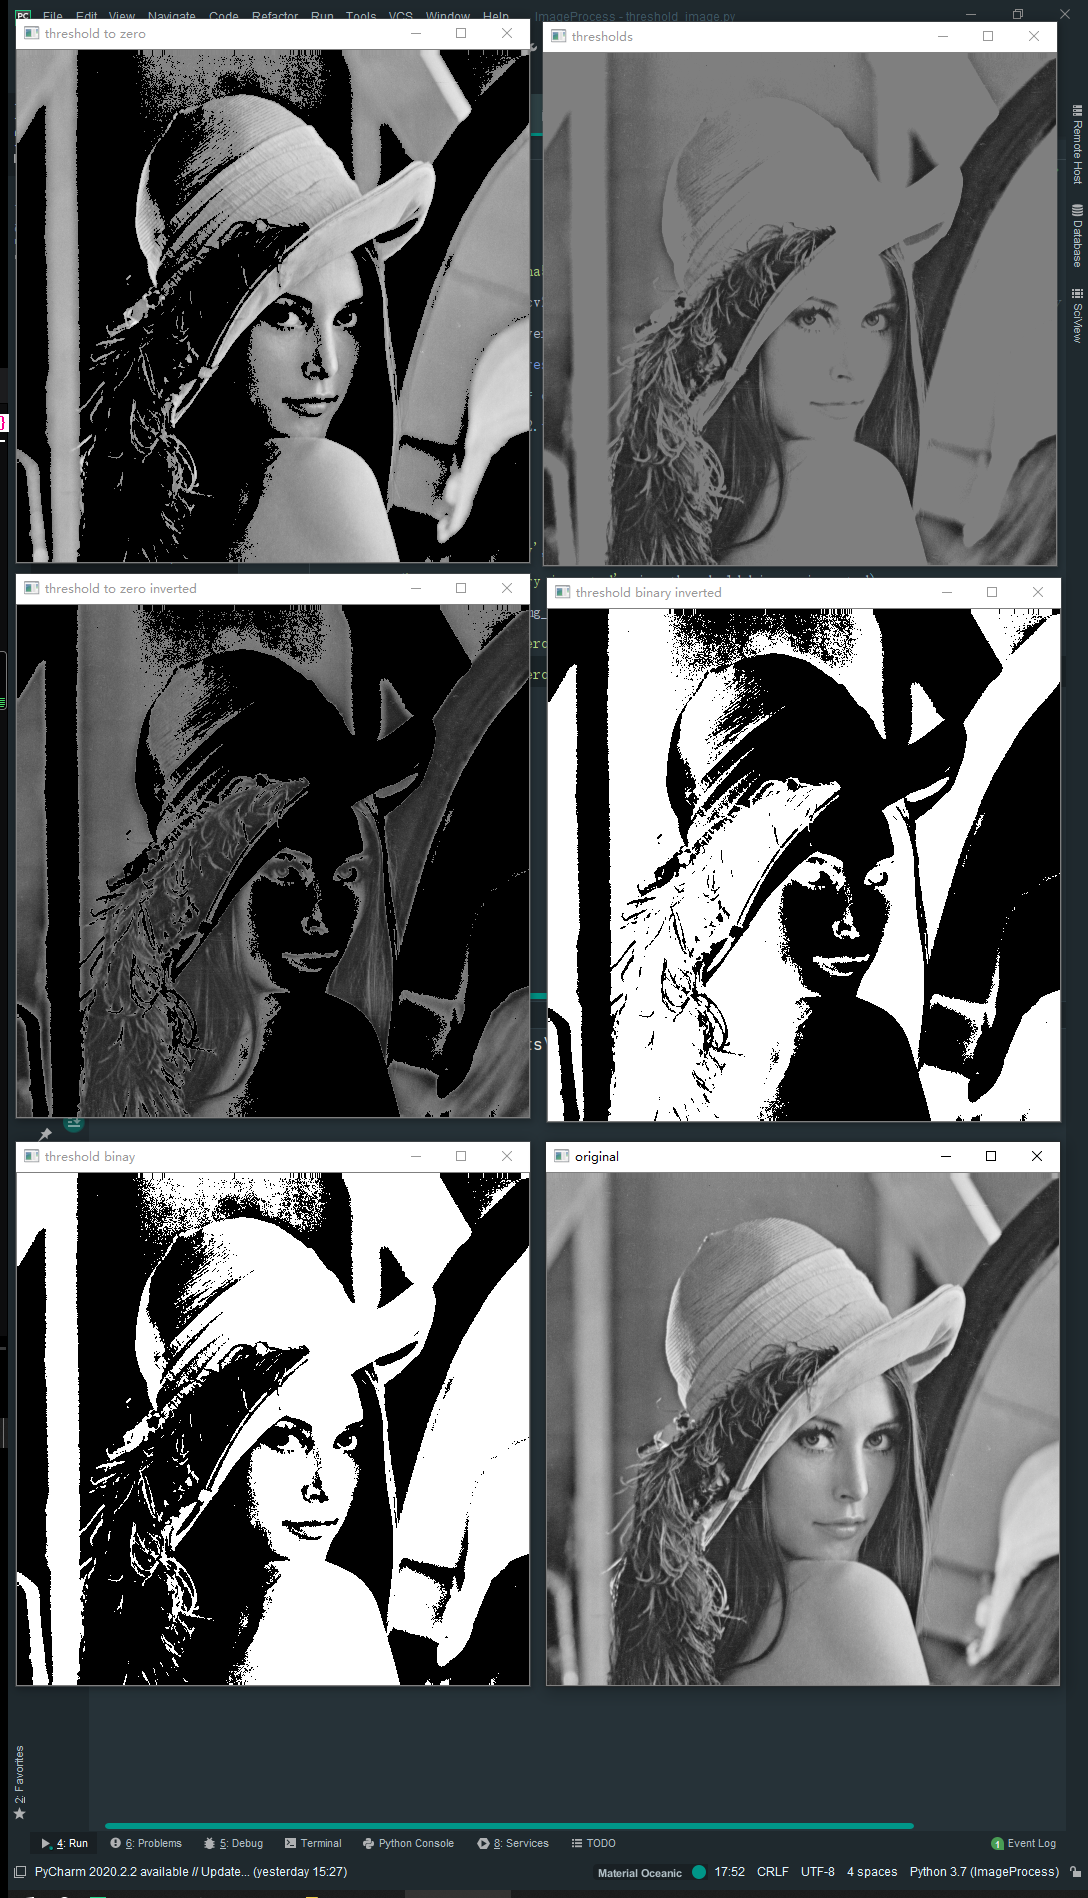
代码实例
import cv2


img = cv2.imread('./img/lena512.bmp')
_, img_threshold_binary = cv2.threshold(img, 127, 255, cv2.THRESH_BINARY)  # Threshold Binary
_, img_threshold_binary_inverted = cv2.threshold(img, 127, 255, cv2.THRESH_BINARY_INV)
_, img_thresholds = cv2.threshold(img, 127, 255, cv2.THRESH_TRUNC)
_, img_threshold2zero_inv = cv2.threshold(img, 127, 255, cv2.THRESH_TOZERO_INV)
_, img_threshold2zero = cv2.threshold(img, 127, 255, cv2.THRESH_TOZERO)


cv2.imshow('original', img)
cv2.imshow('threshold binay', img_threshold_binary)
cv2.imshow('threshold binary inverted', img_threshold_binary_inverted)
cv2.imshow('thresholds', img_thresholds)
cv2.imshow('threshold to zero inverted', img_threshold2zero_inv)
cv2.imshow('threshold to zero', img_threshold2zero)

cv2.waitKey(0)
cv2.destroyAllWindows()
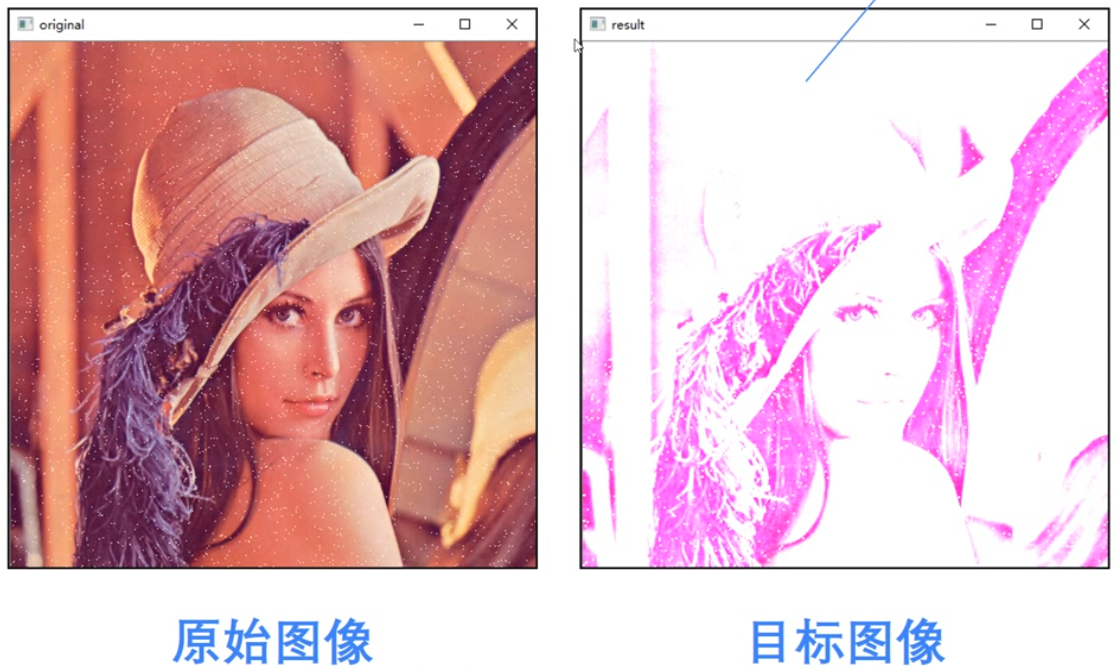
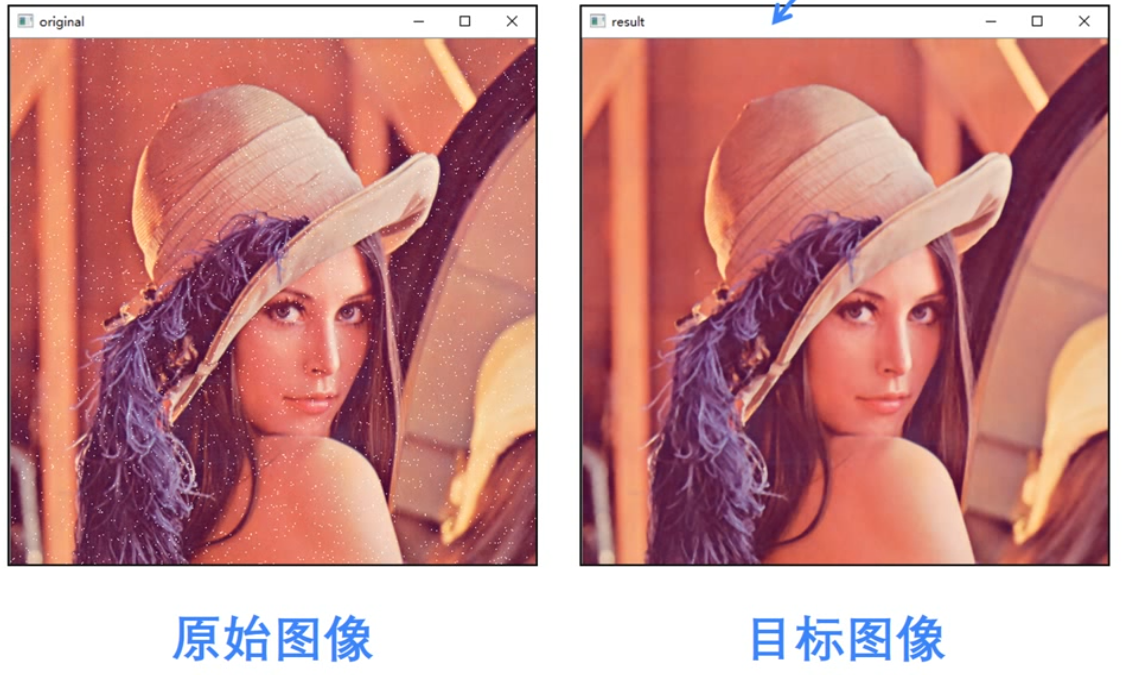
第15课:图像平滑-均值滤波
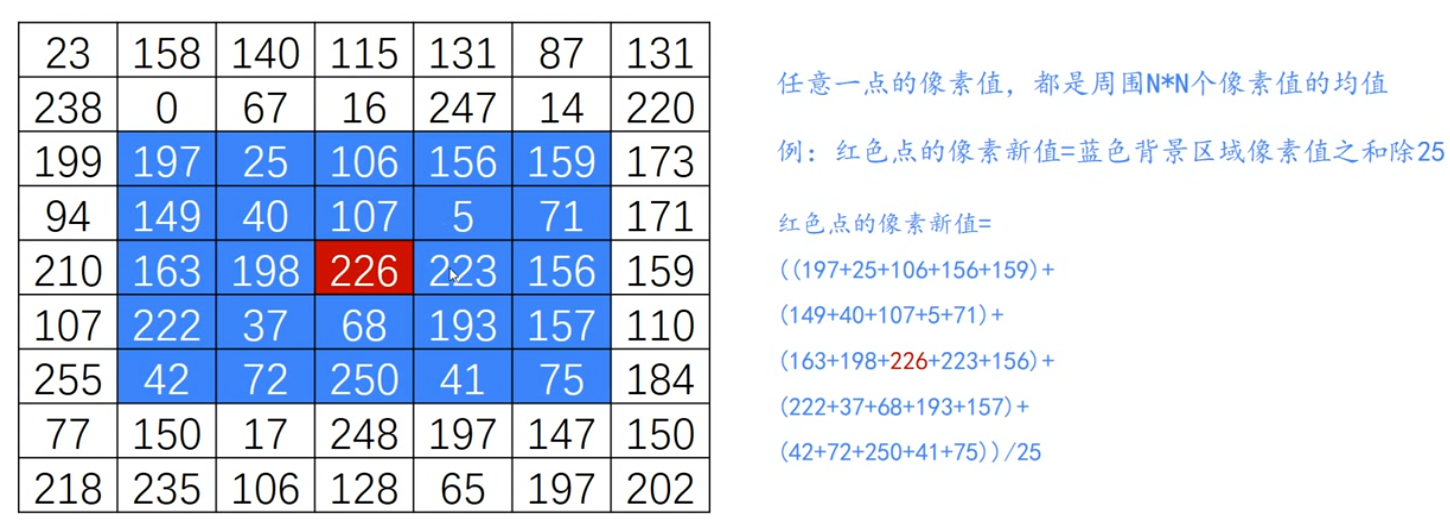
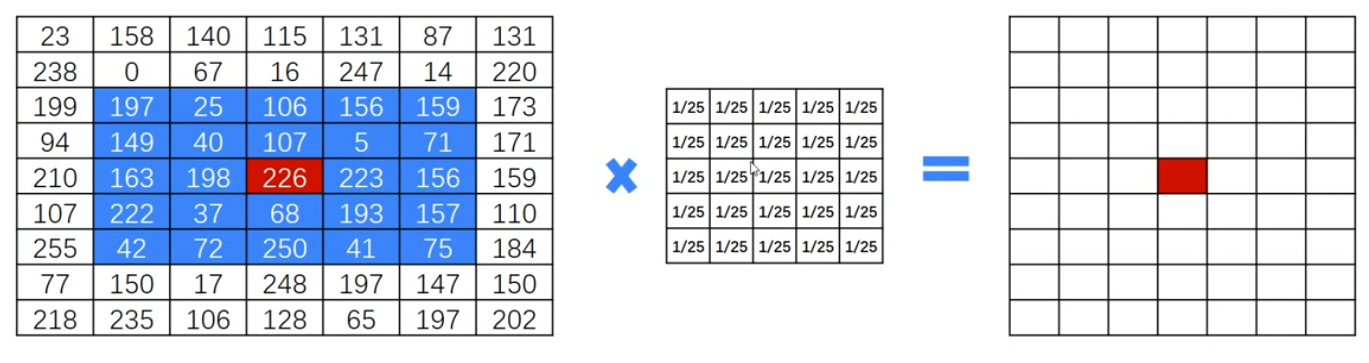
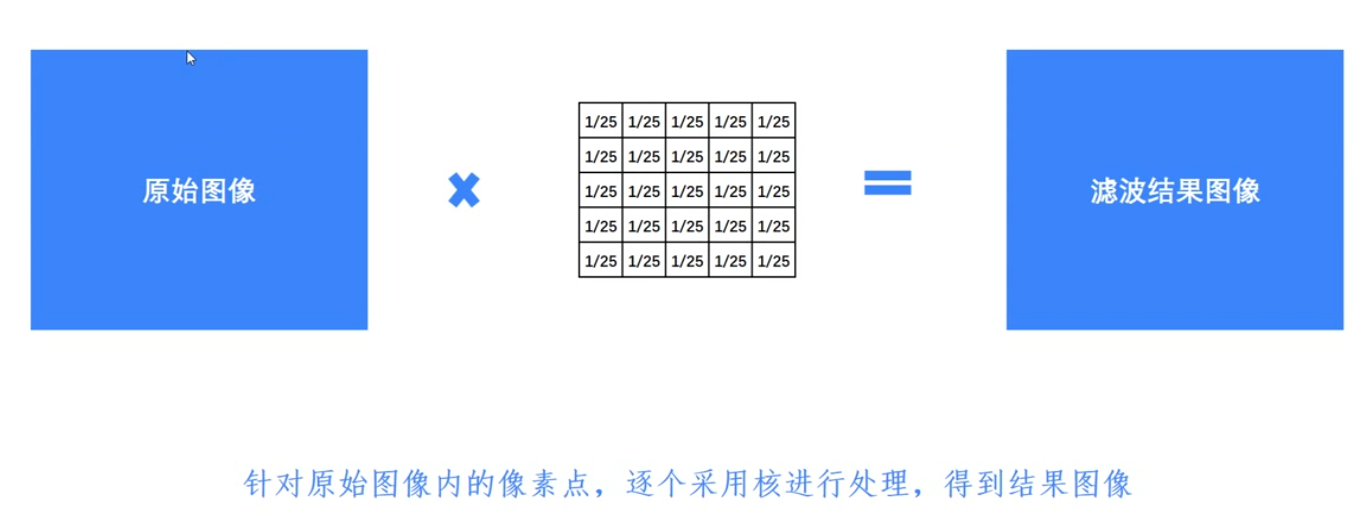
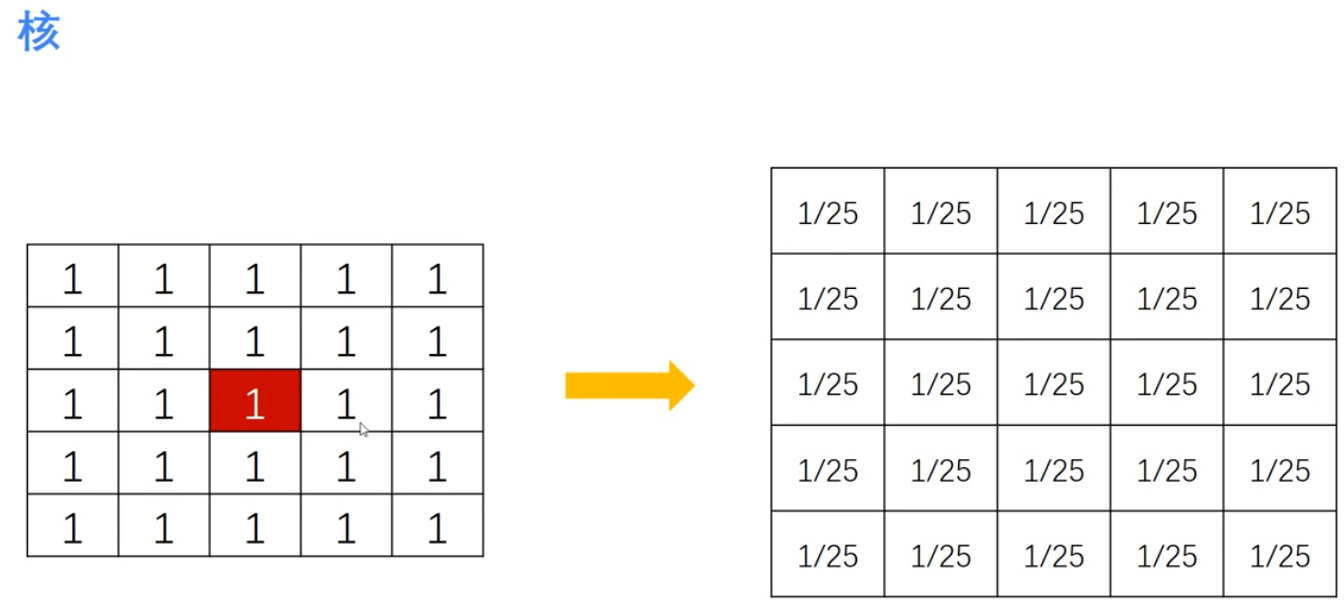
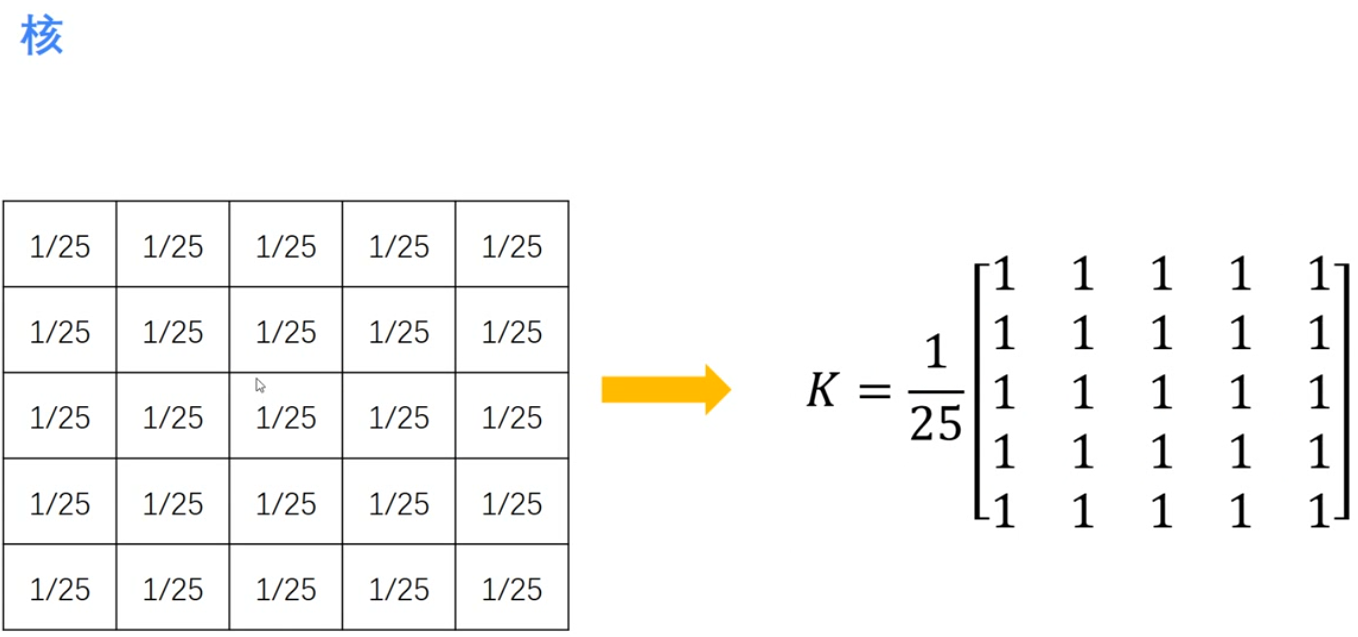
函数blur
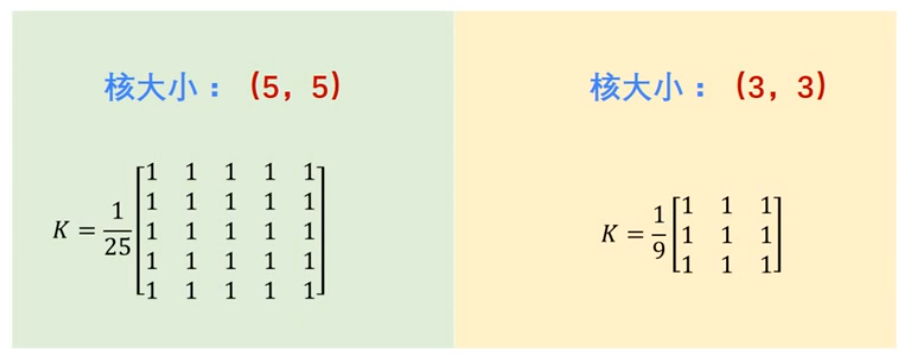
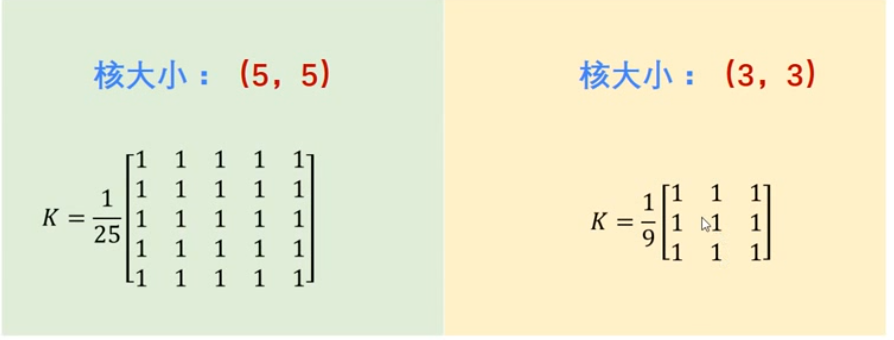
处理结果 = cv2.blur(原始图像, 核大小)
核大小:以(宽度,高度)形式表示的元组
实例代码
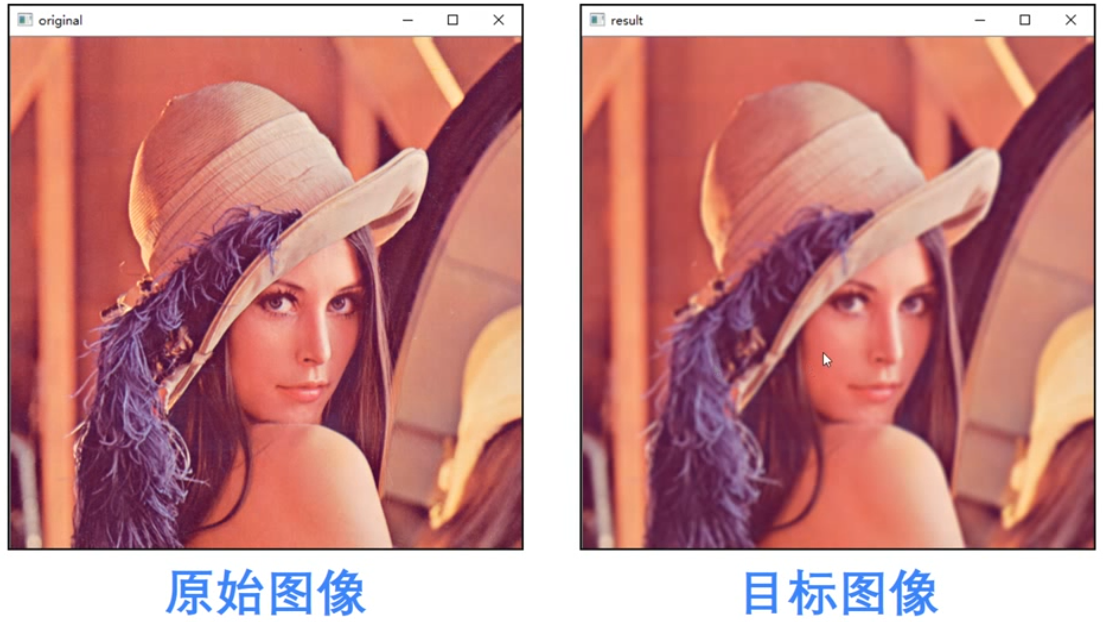
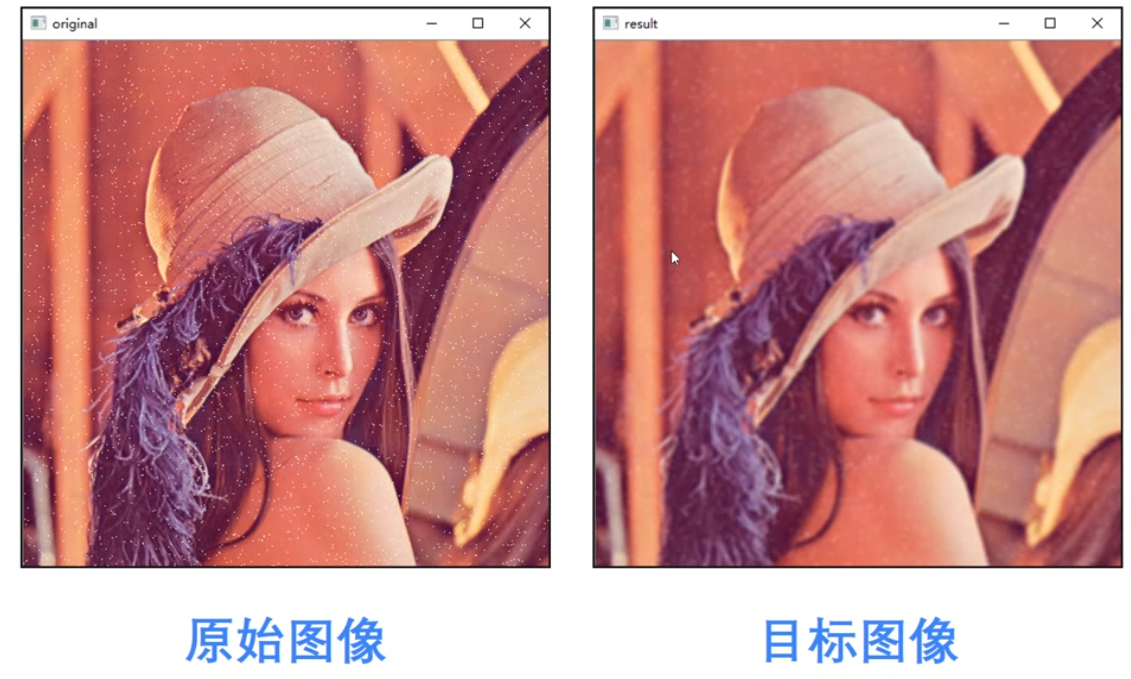
import cv2


img = cv2.imread('image_dir')
img_blur = cv2.blur(img, (5, 5))

cv2.imshow('original', img)
cv2.imshow('result', img_blur)

cv2.waitKey(0)
cv2.destroyAllWindows()
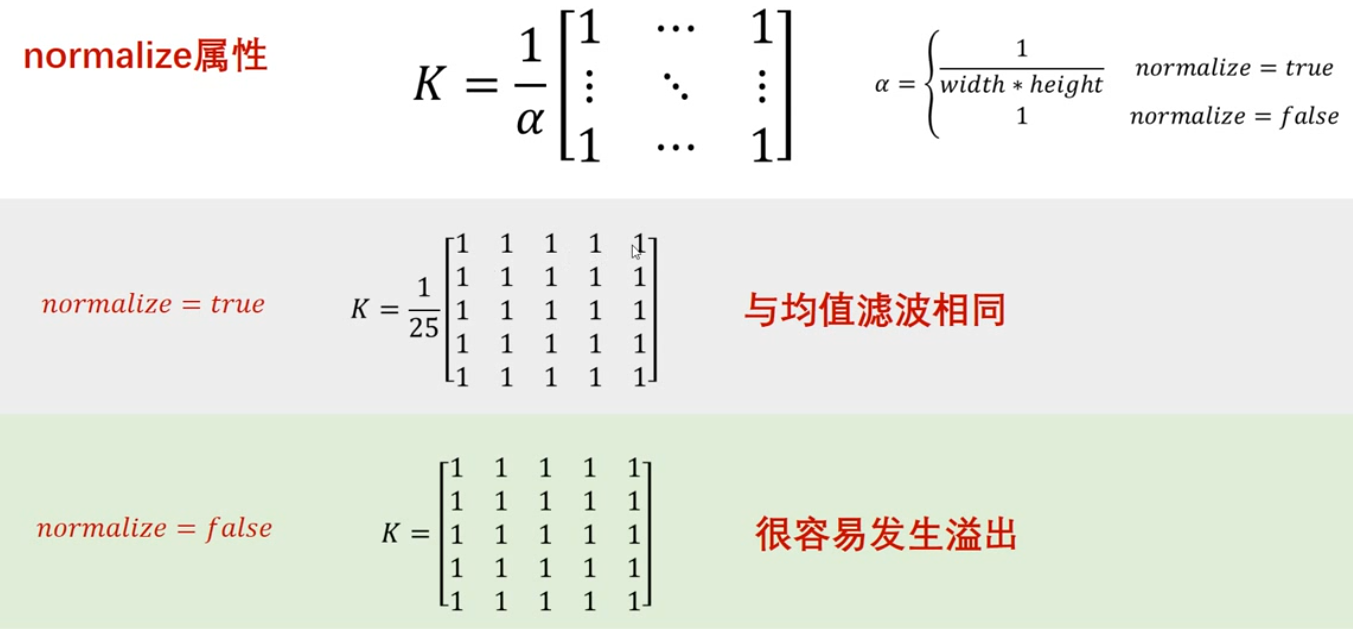
第16课:图像平滑-方框滤波
函数boxFilter
处理结果 = cv2.boxFilter(原始图像, 目标图像深度, 核大小, normalize属性)
目标图像深度: int类型的目标图像深度。通常使用"-1"表示与原始图像一致。
核大小:
normalize属性: 是否对目标图像进行归一化处理。
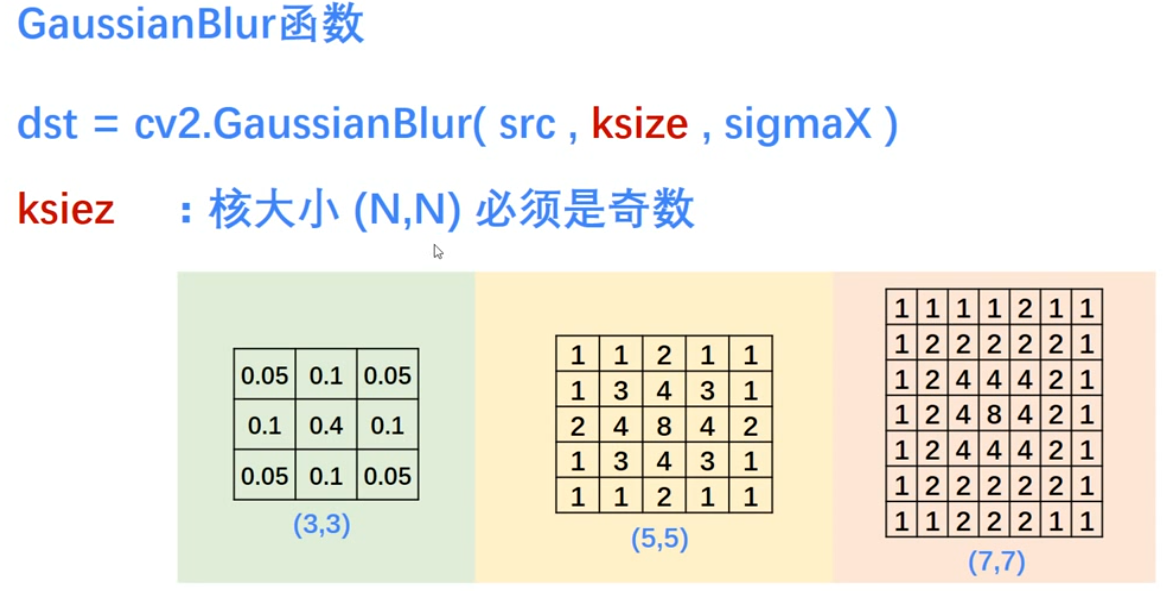
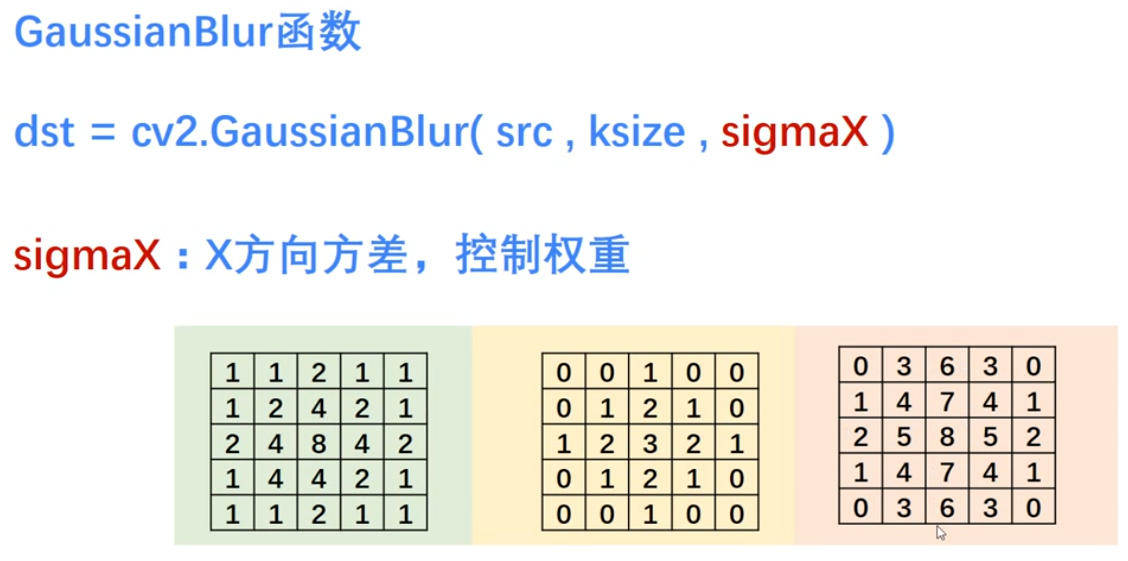
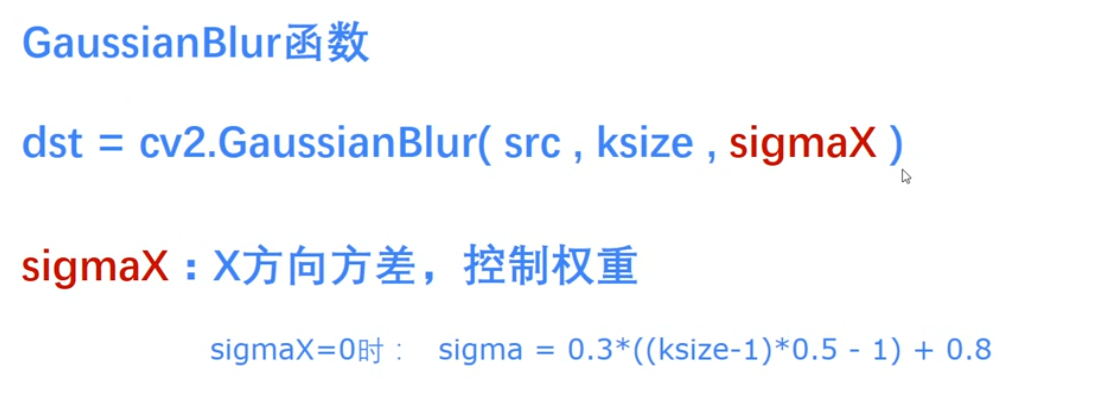
第17课:图像平滑-高斯滤波

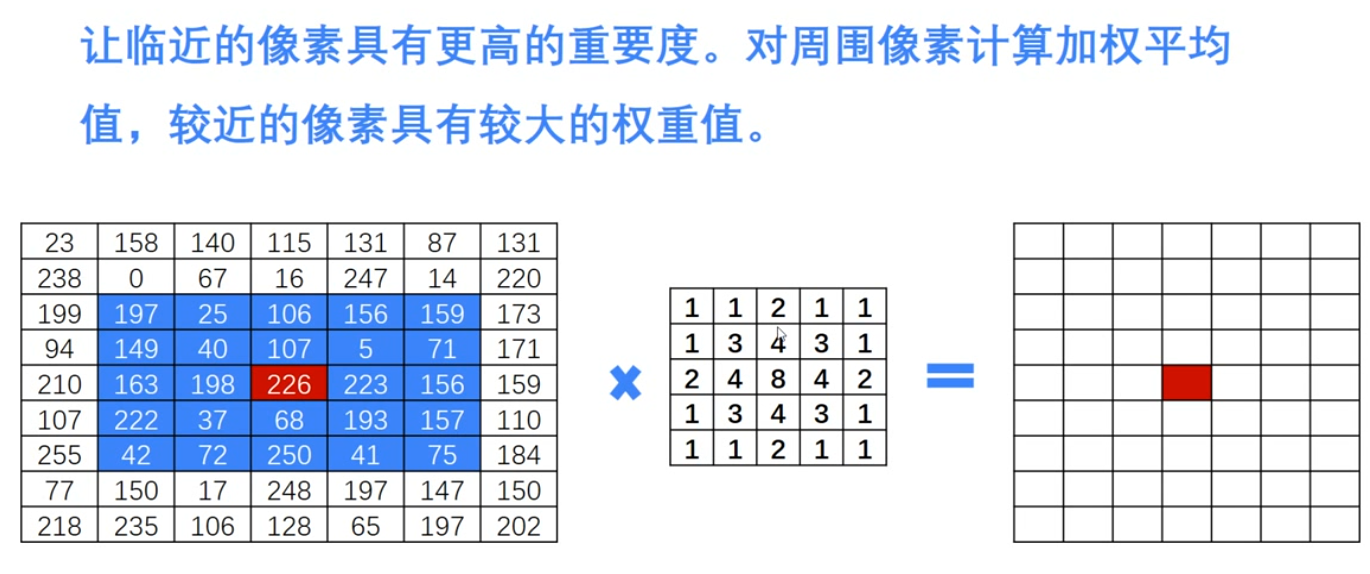
GaussianBlur函数
dst = cv2.GaussianBlur(src, ksize, sigmaX)
src: 原始图像
ksize: 核大小
sigmaX: X的方向方差
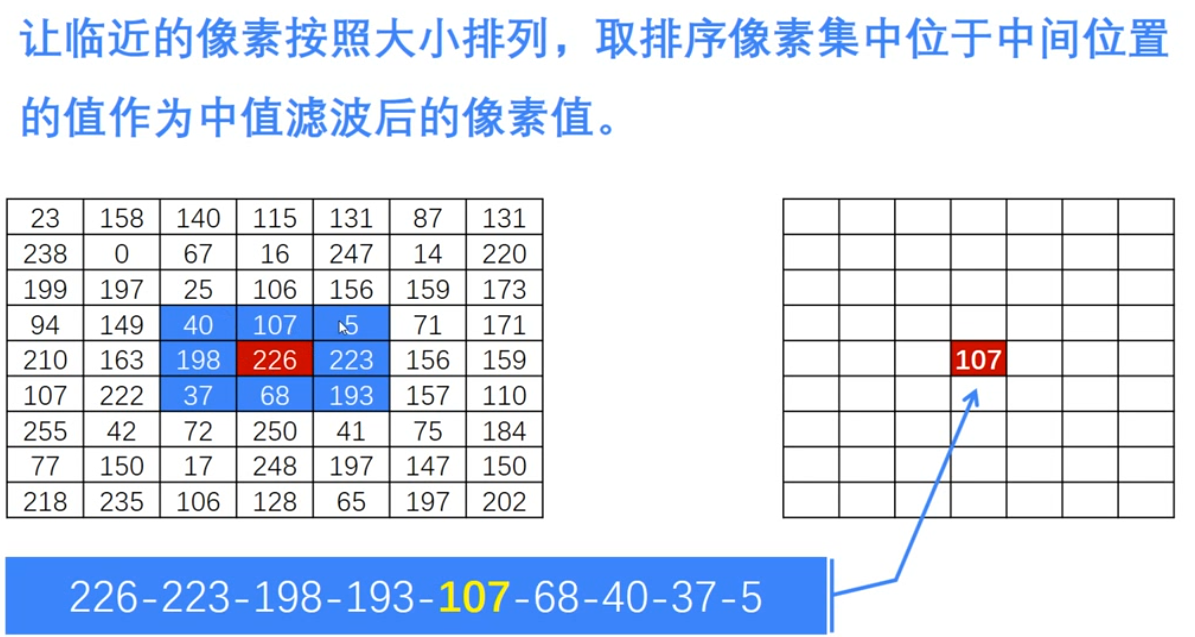
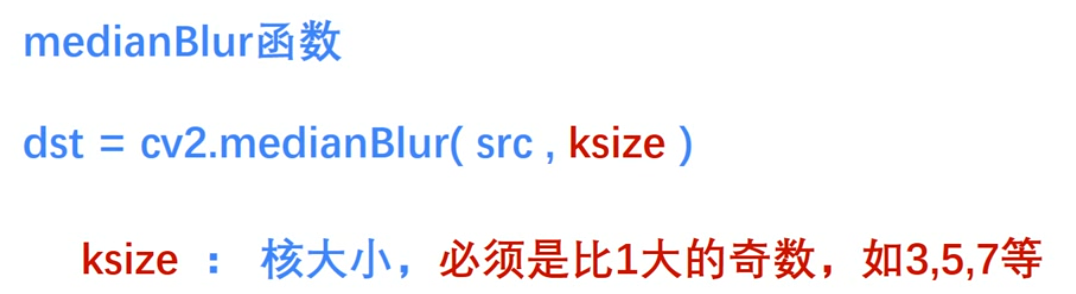
第18课:图像平滑-中值滤波
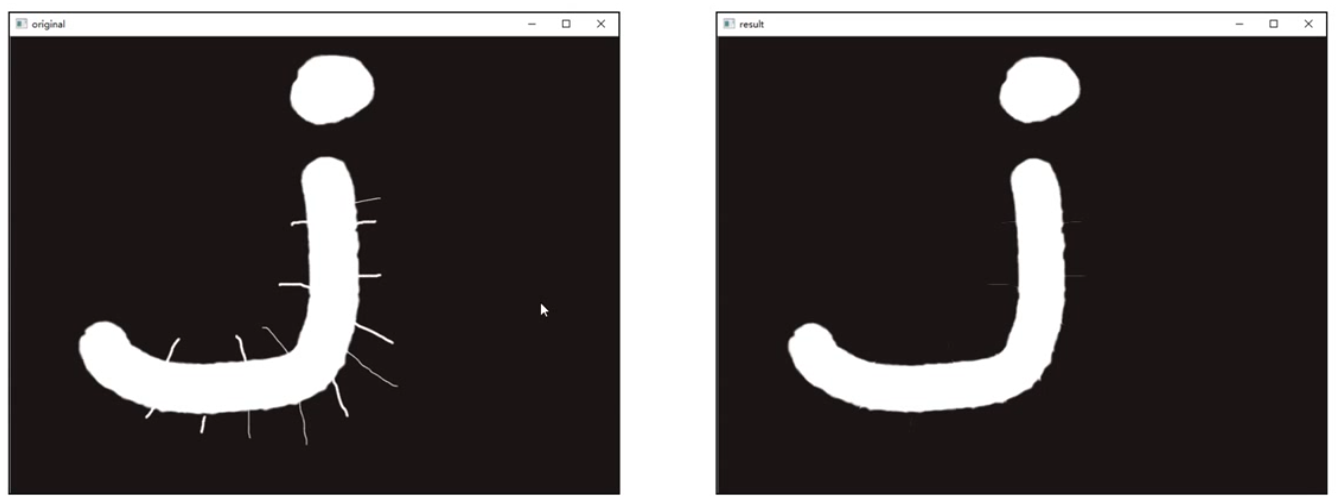
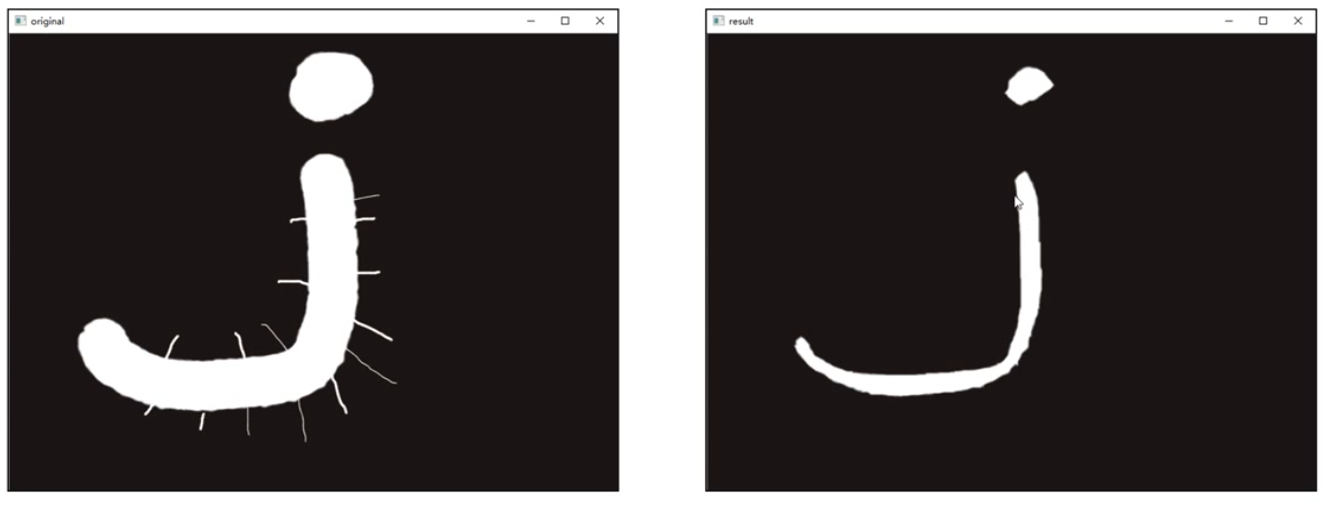
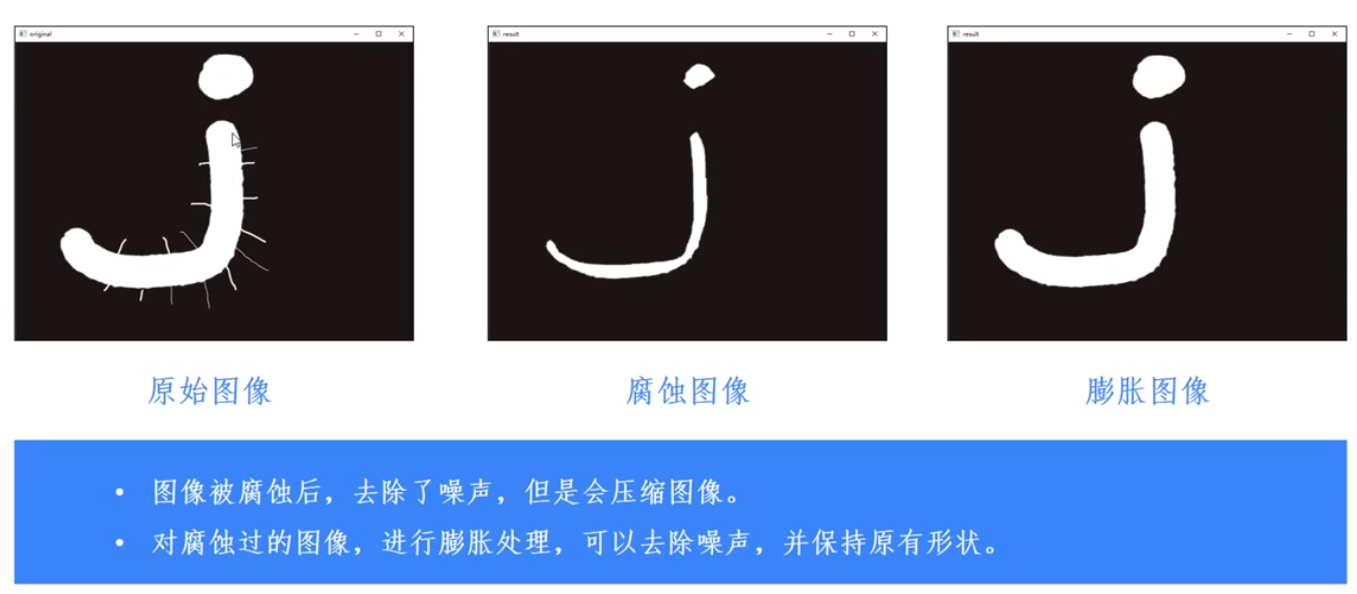
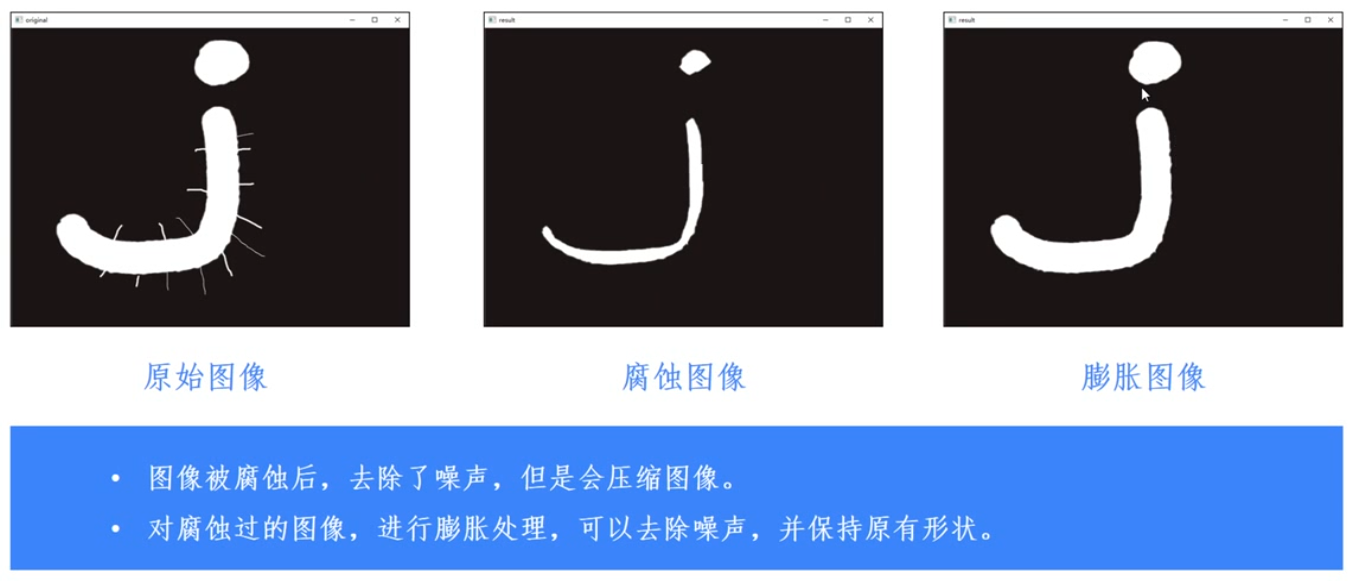
第19课:形态学转换-图像腐蚀
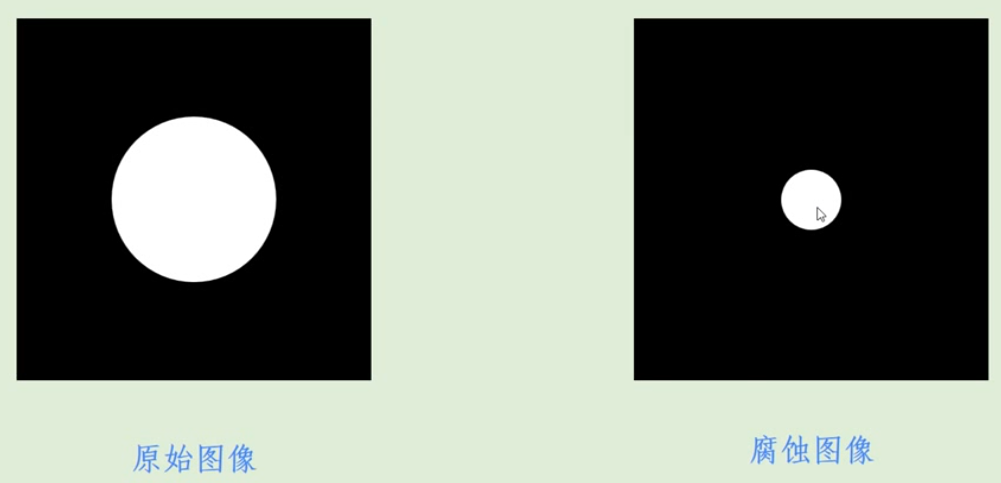
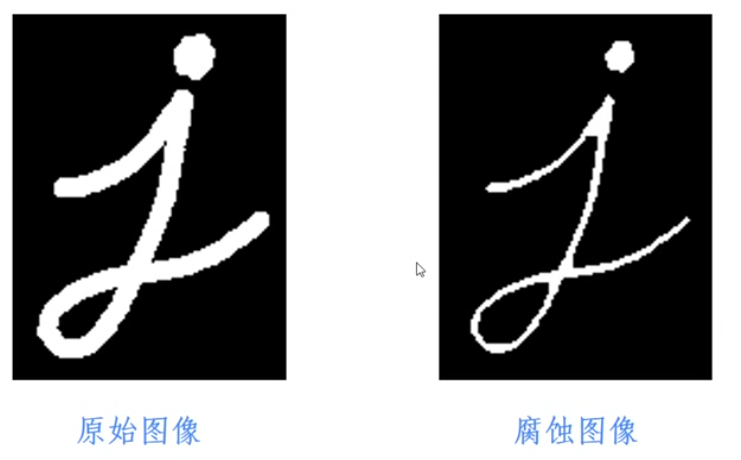
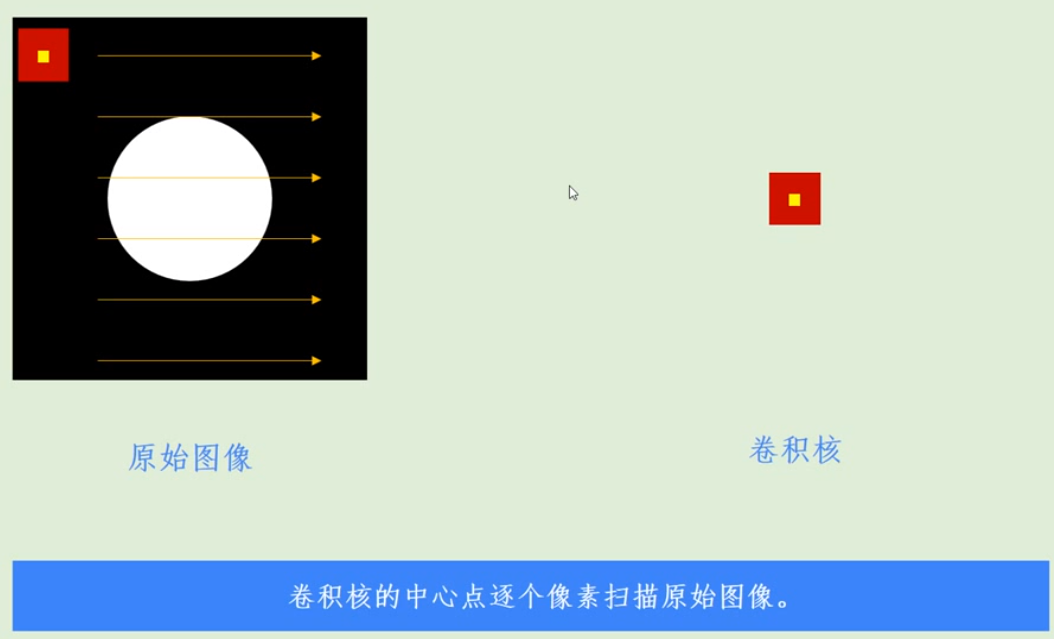
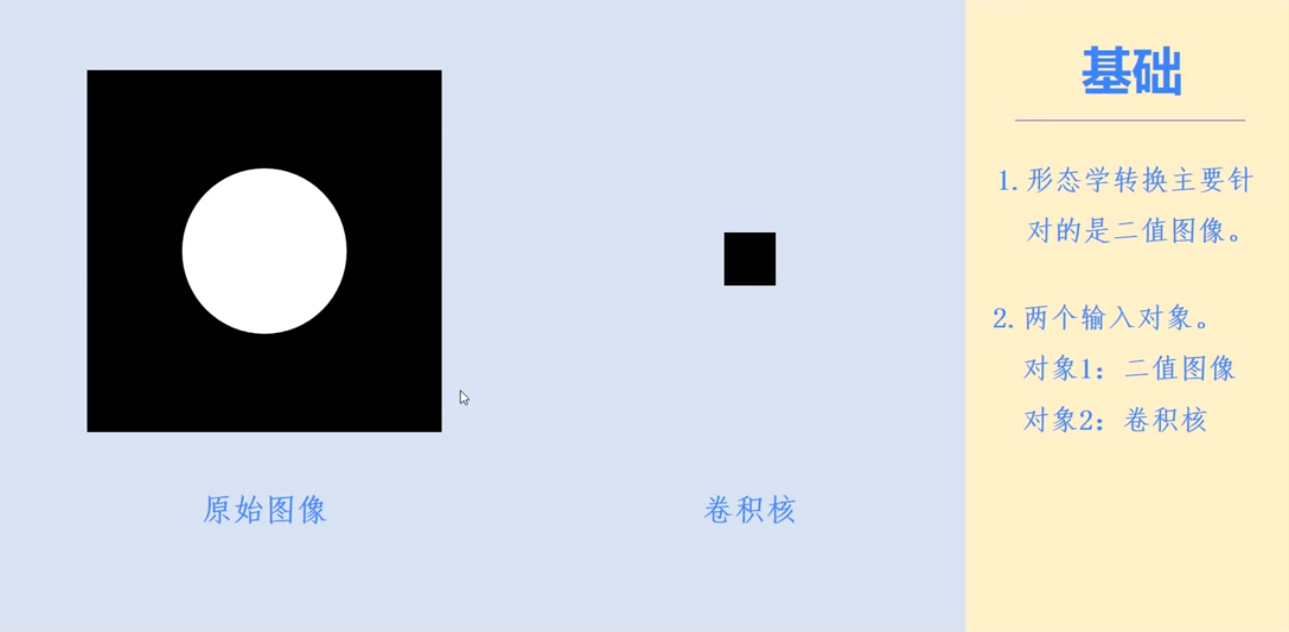
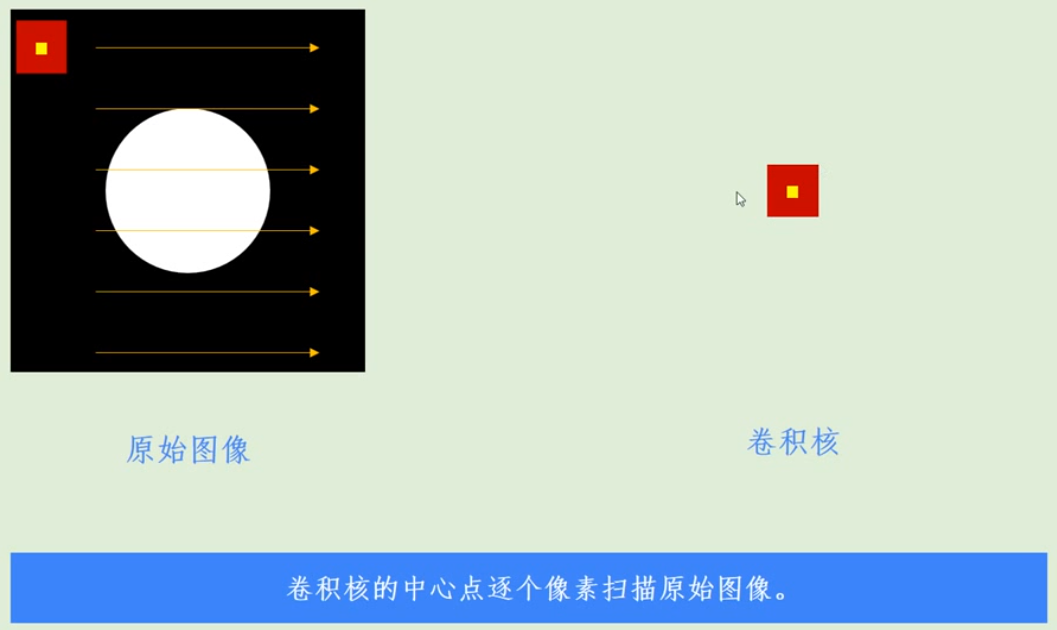
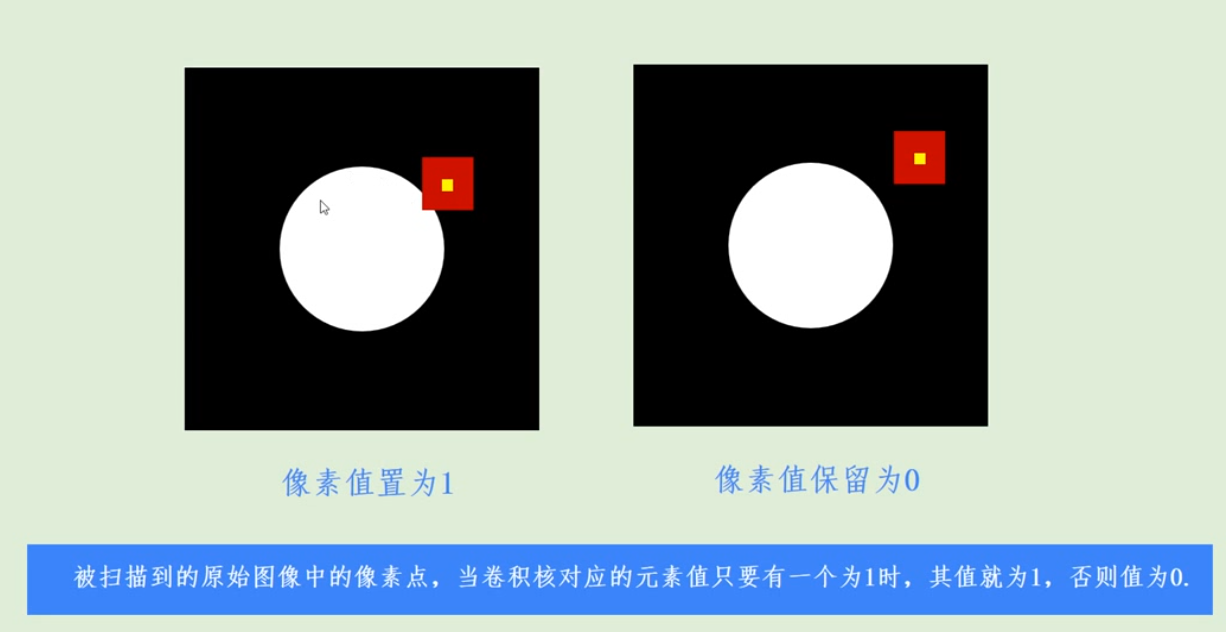
1. 基础
- 形态学转换主要针对的是二值图像。
- 两个输入对象。对象1:二值图像,对象2:卷积核
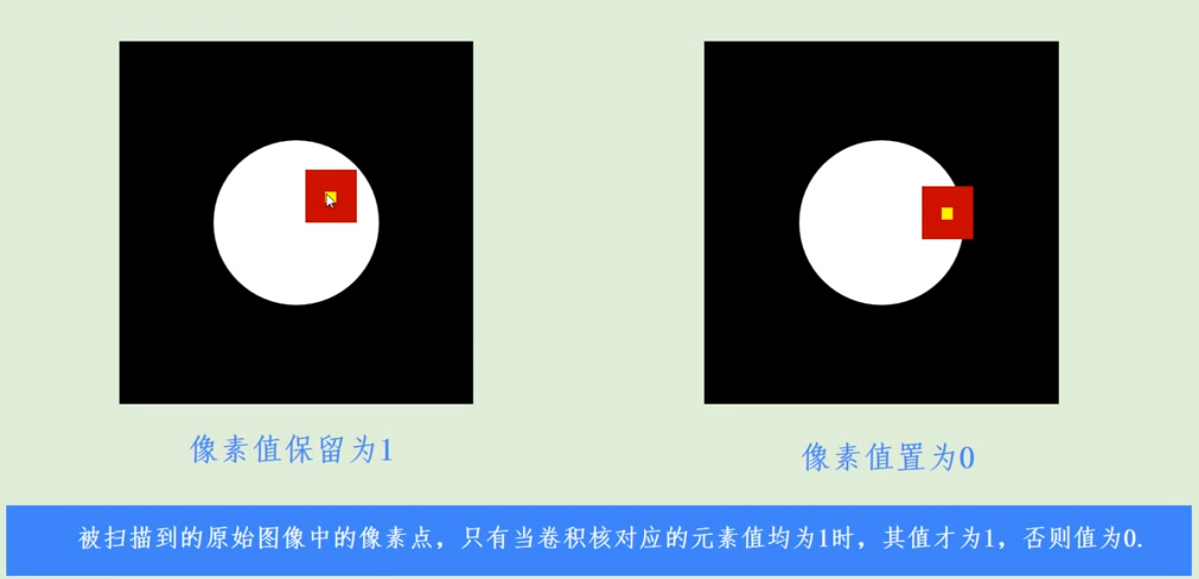
2. 函数erode
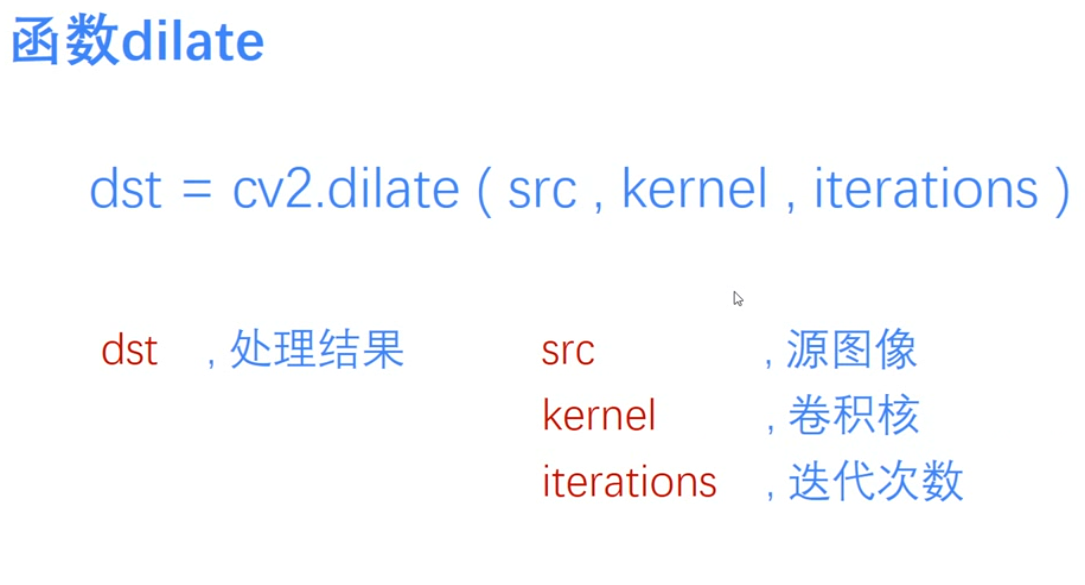
dst = cv2.erode(src, kernel, iterations)
dst: 处理结果
src: 源图像
kernel: 卷积核
iterations: 迭代次数
3. 实例代码
import cv2
import numpy as np


img = cv2.imread('image_dir')

kernel = np.ones((5, 5), np.uint8)
erosion = cv2.erode(img, kernel)
erosion_ = cv2.erode(img, kernel, 9)

cv2.imshow('original', img)
cv2.imshow('erosion', erosion)

cv2.waitKey(0)
cv2.destroyAllWindows()
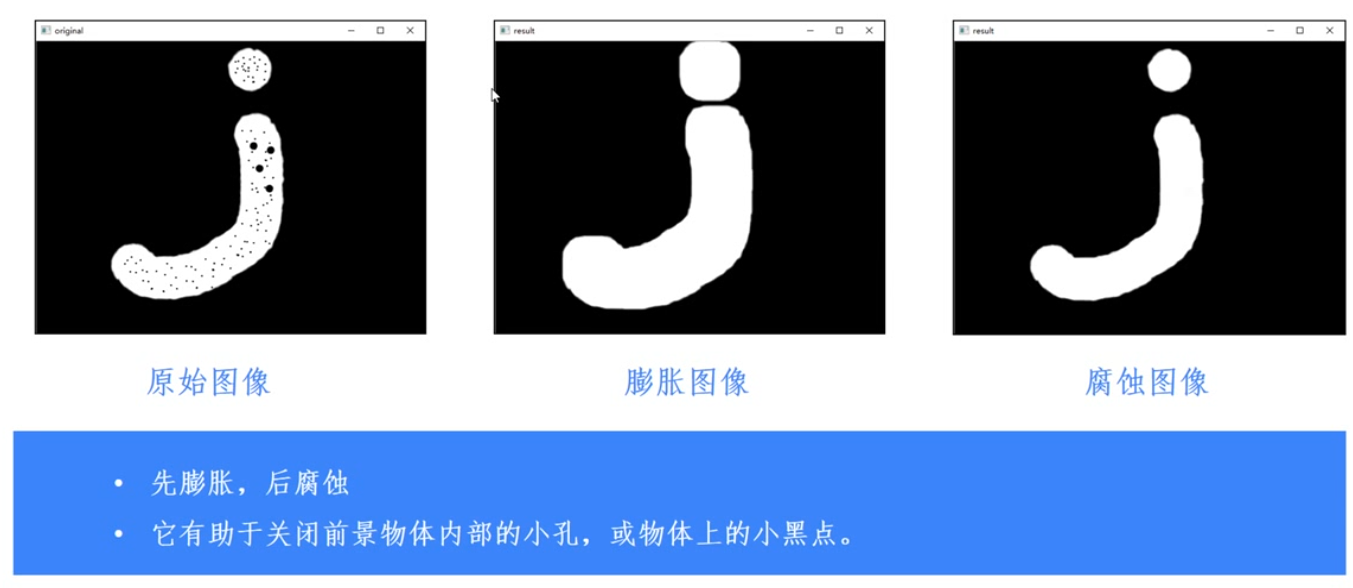
第20课:形态学转换-图像膨胀
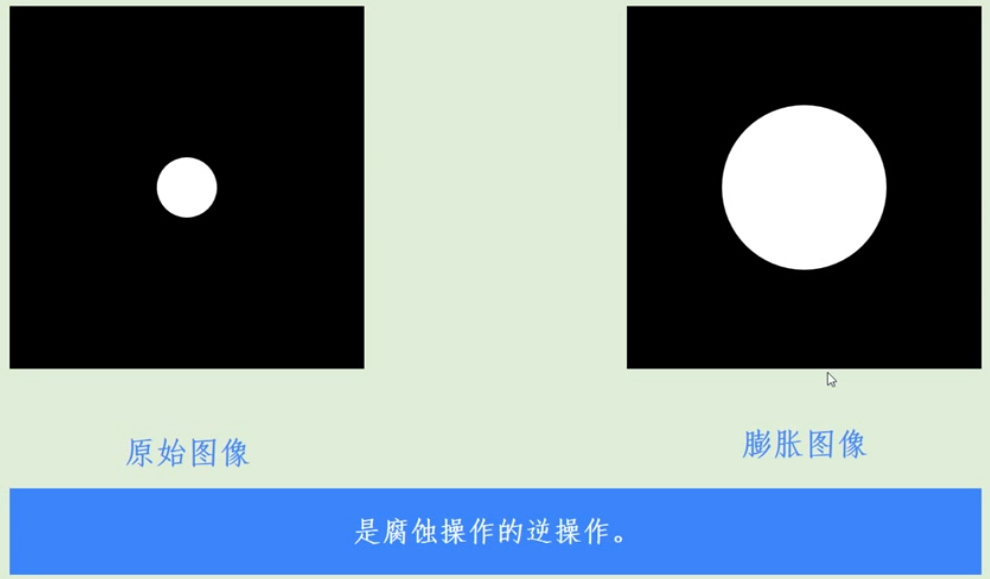
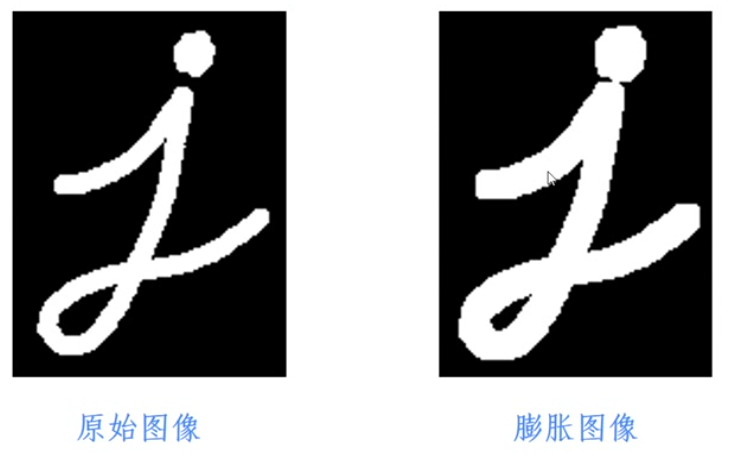
dliate函数
第21课:形态学转换-开运算
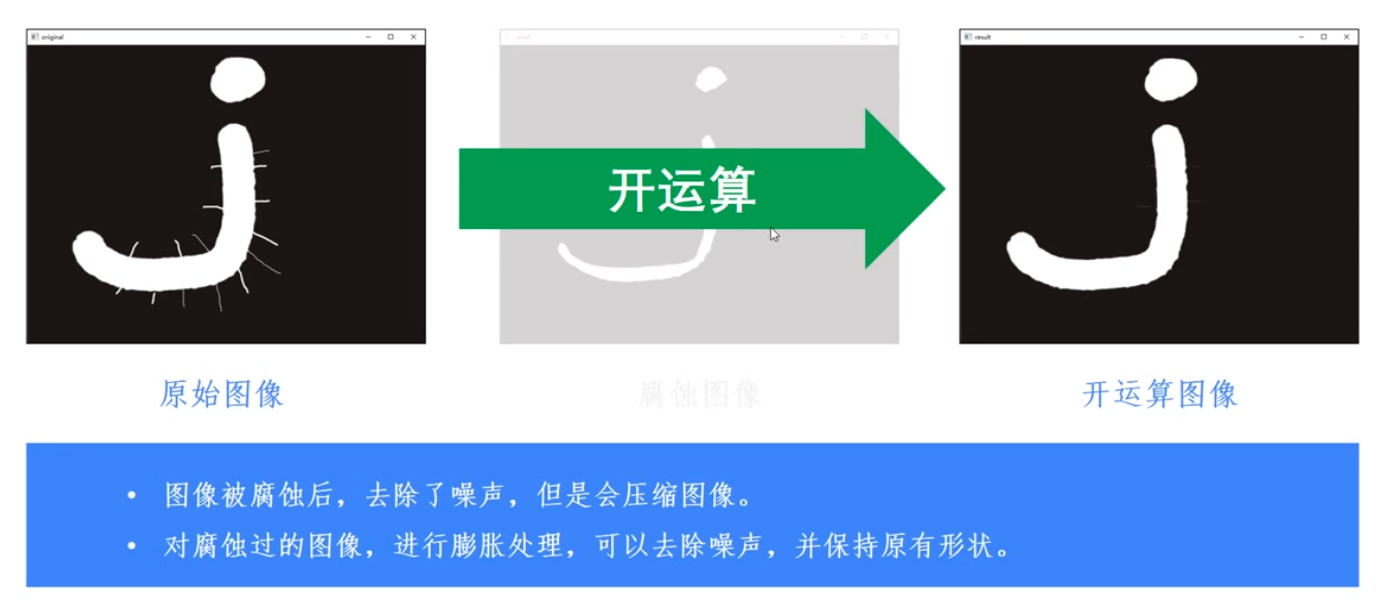
import cv2
import numpy as np


img = cv2.imread('image_dir')
kernel = np.ones((5, 5), np.uint8)  # (10, 10)

img_open = cv2.morphologyEx(img, cv2.MORPH_OPEN, kernel)

cv2.imshow('orginal', img)
cv2.imshow('result', img_open)

cv2.waitKey(0)
cv2.destroyAllWindows()
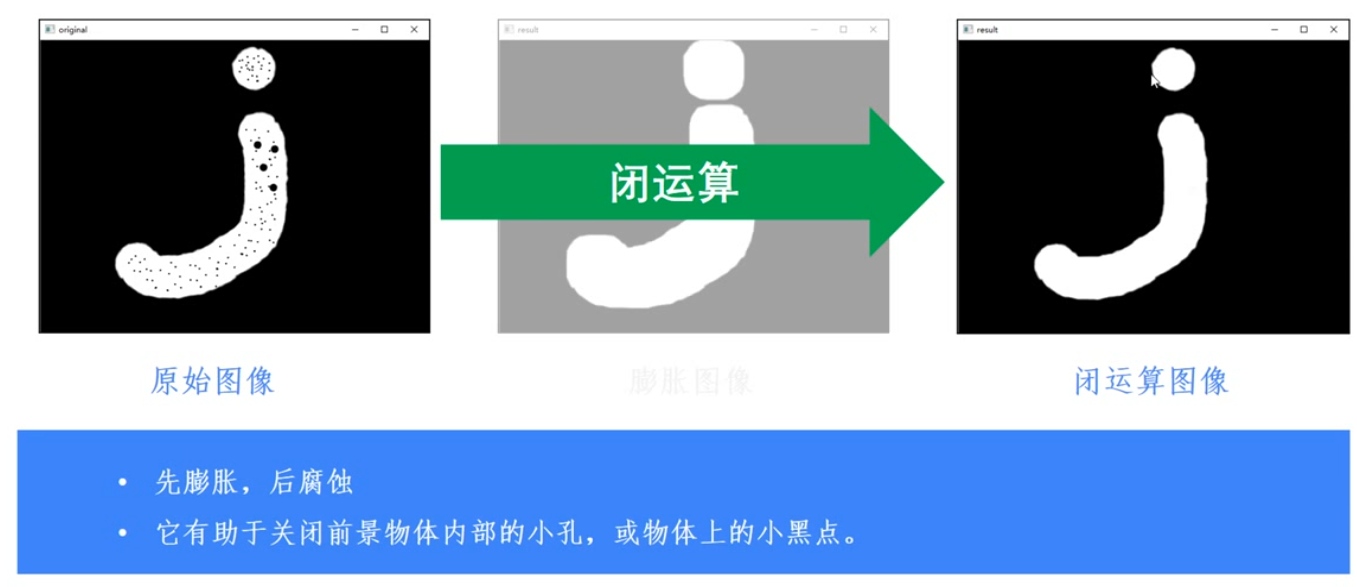
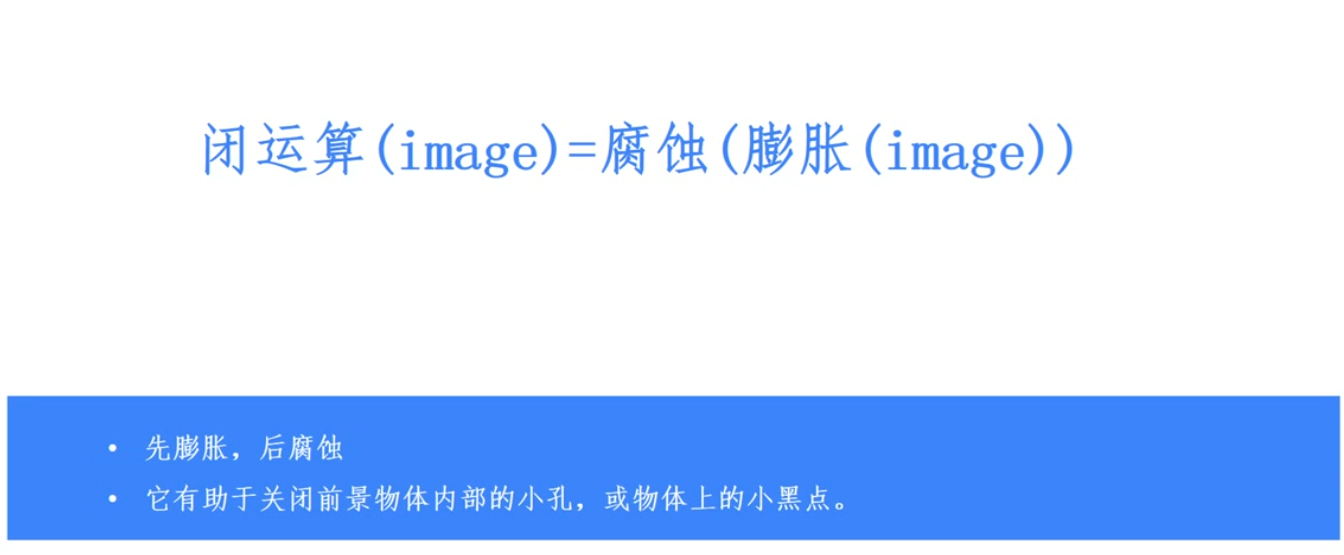
第22课:形态学转换-闭运算
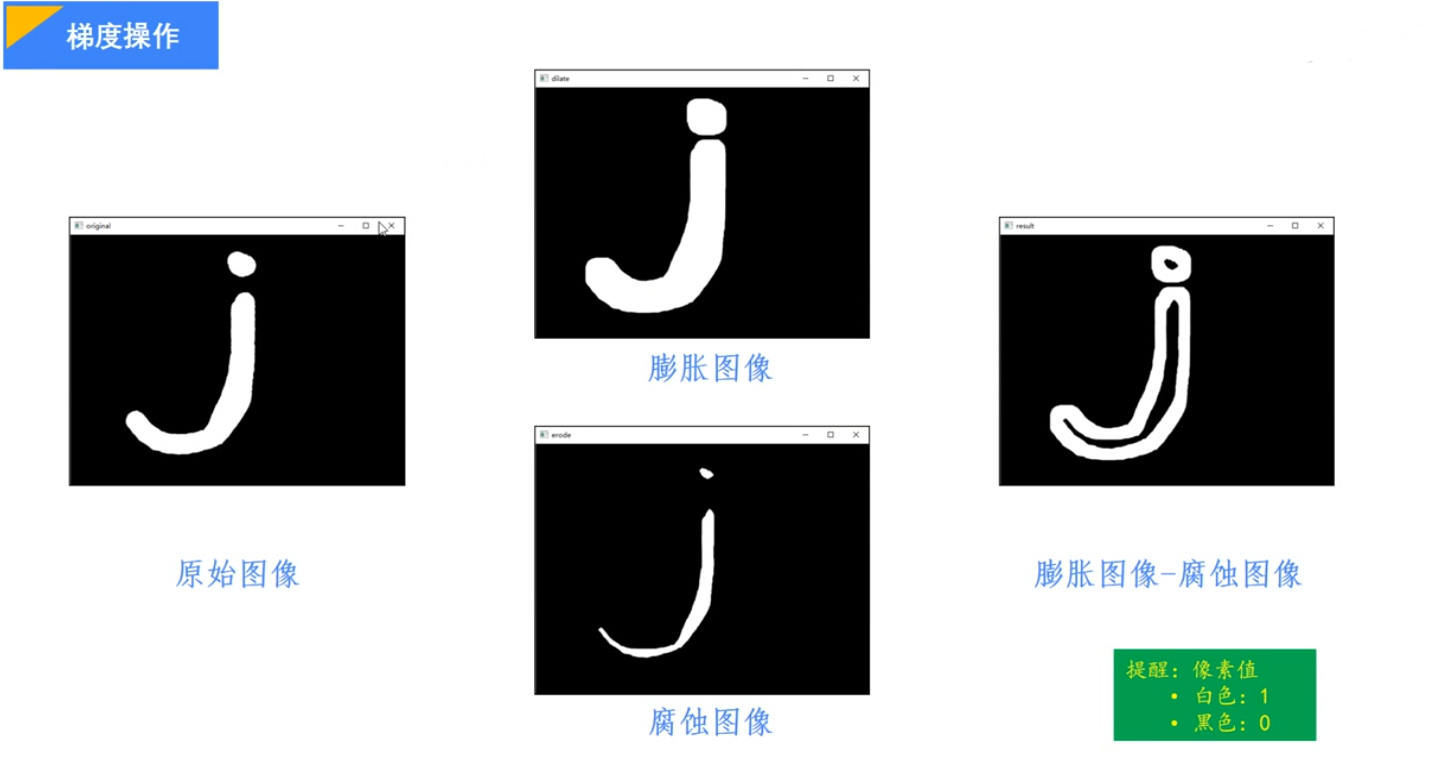
第23课:形态学转换-梯度运算


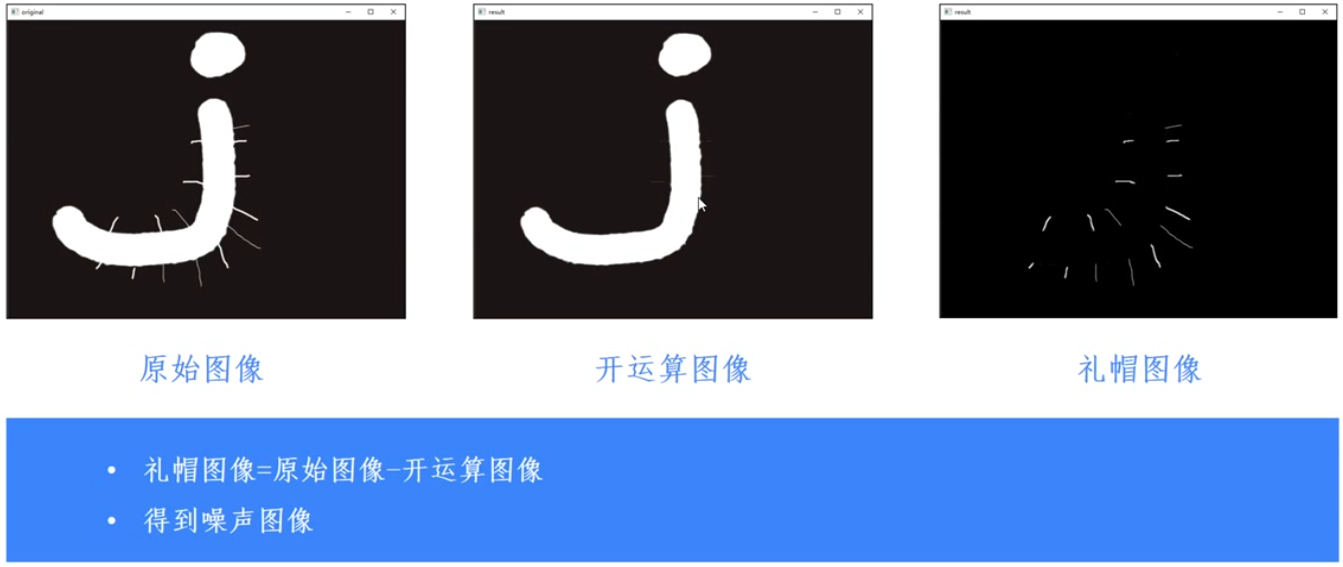
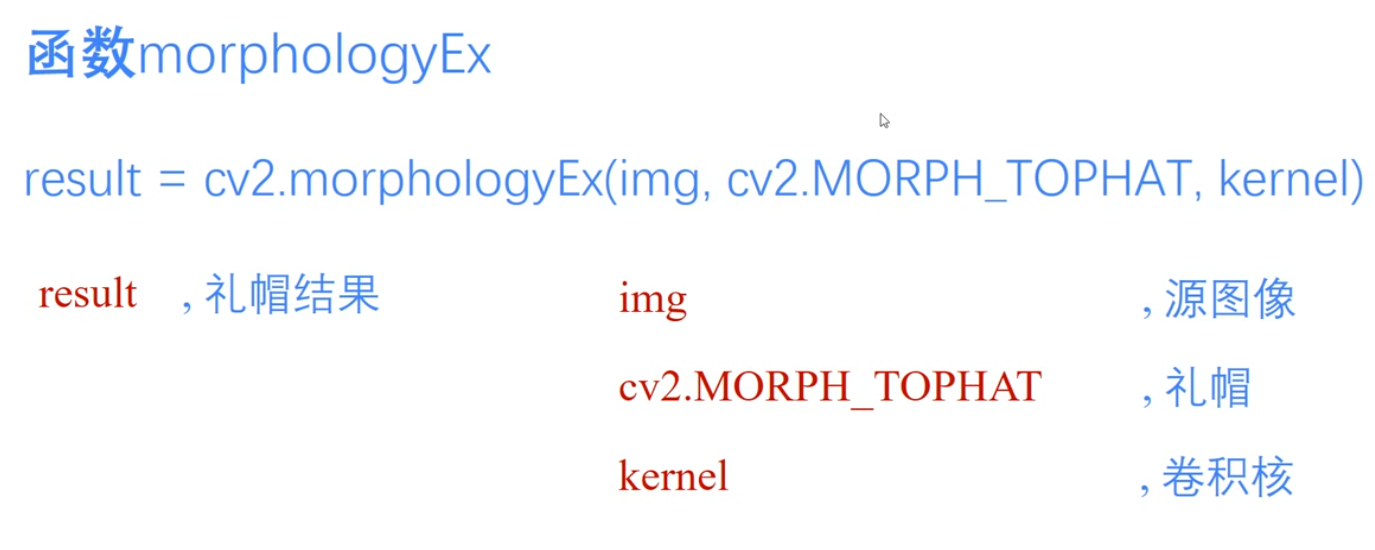
第24课:形态学转换-图像顶帽
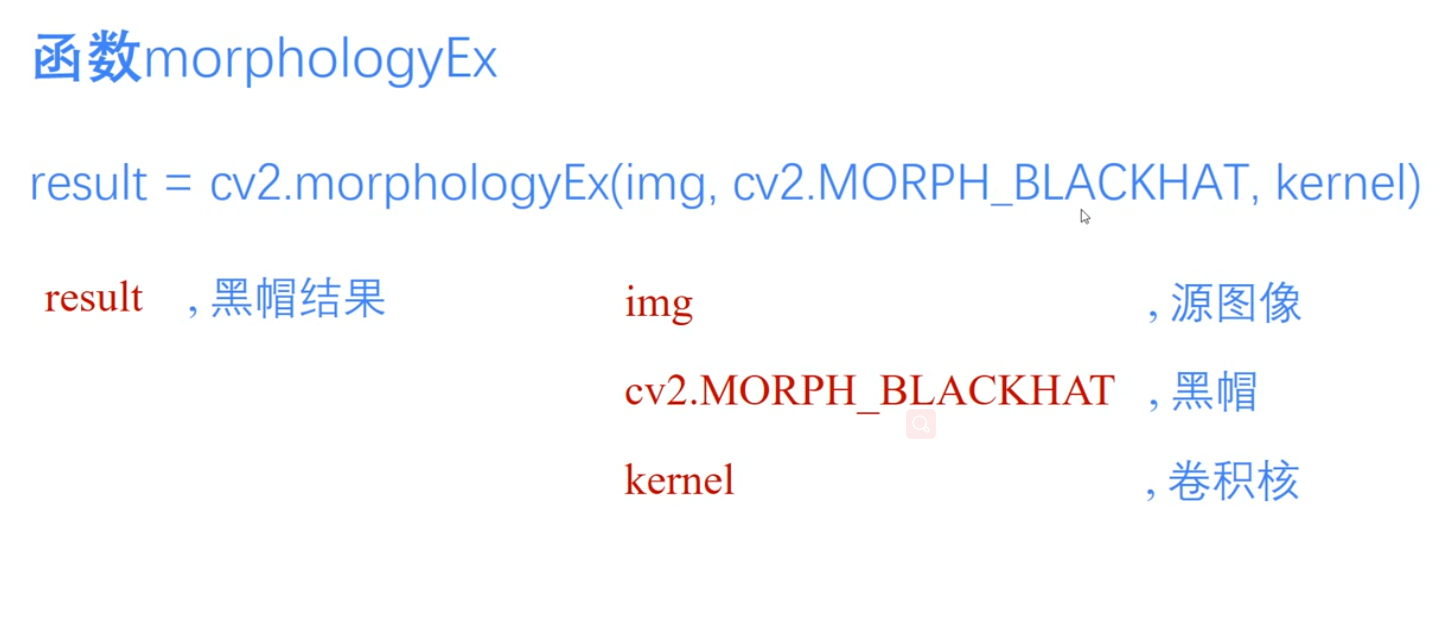
第25课:形态学转换-黑帽操作
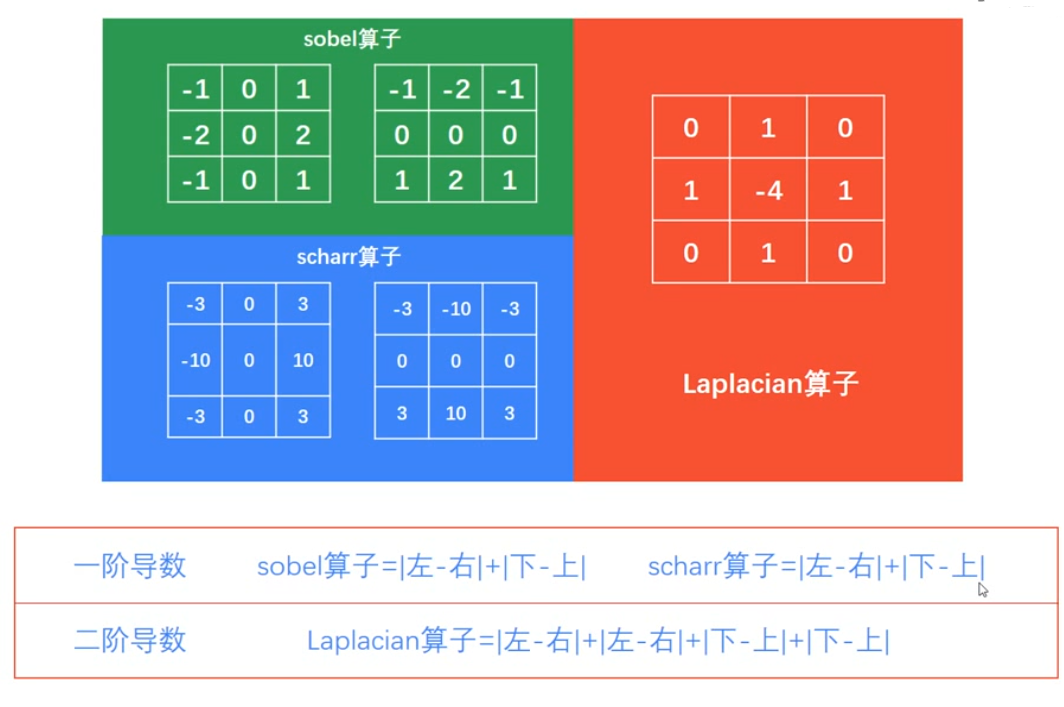
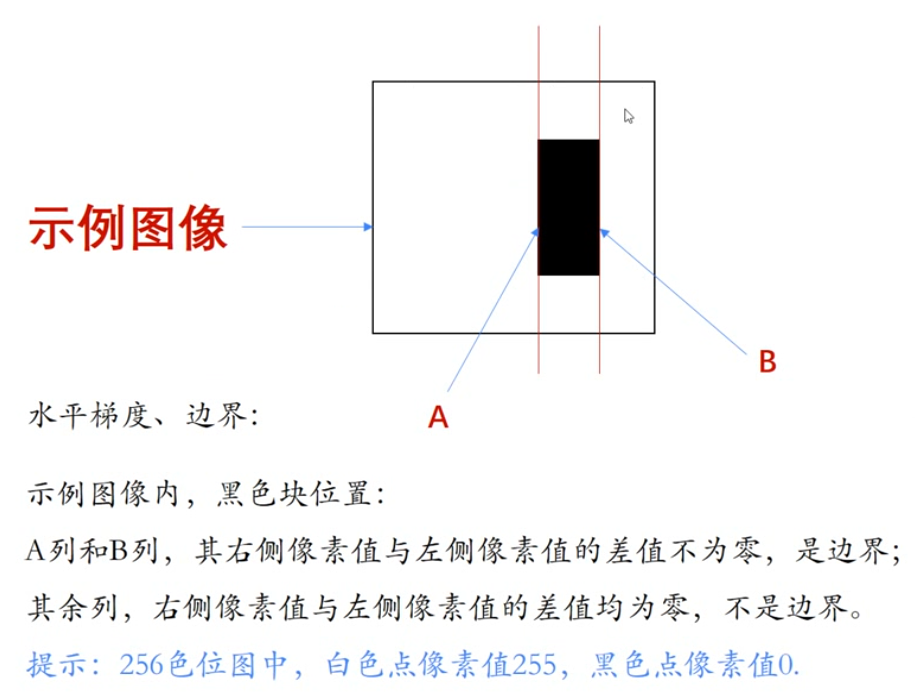
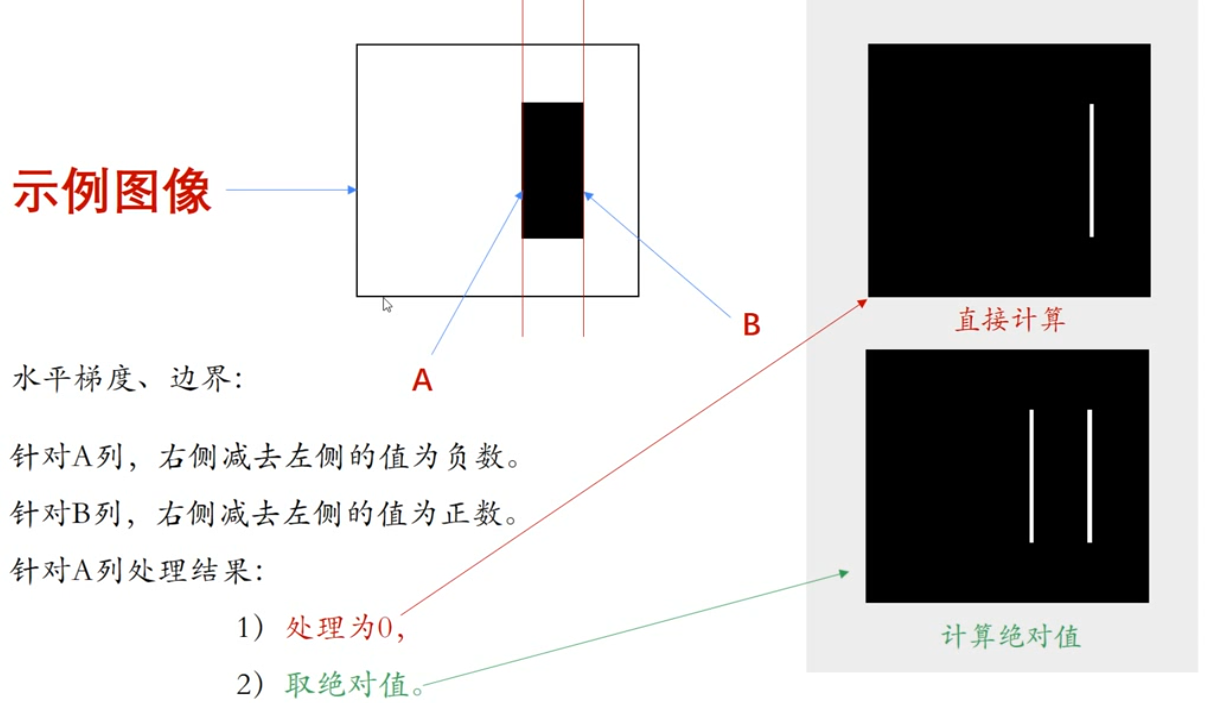
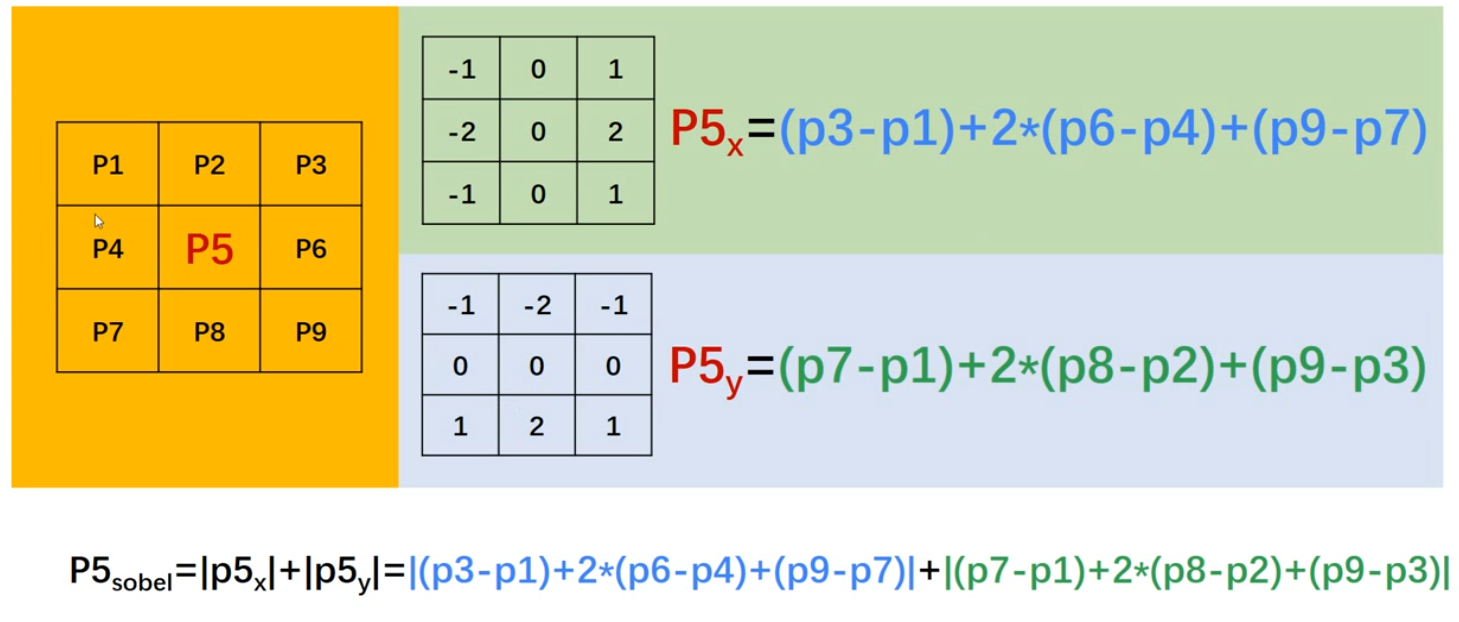
第26课:图像梯度-sobel算子理论
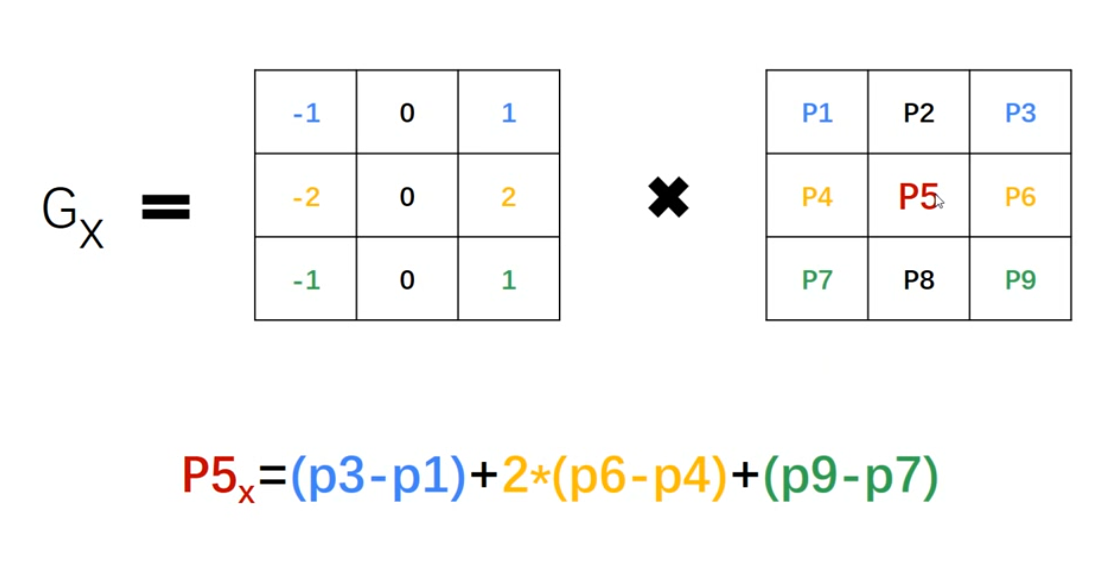
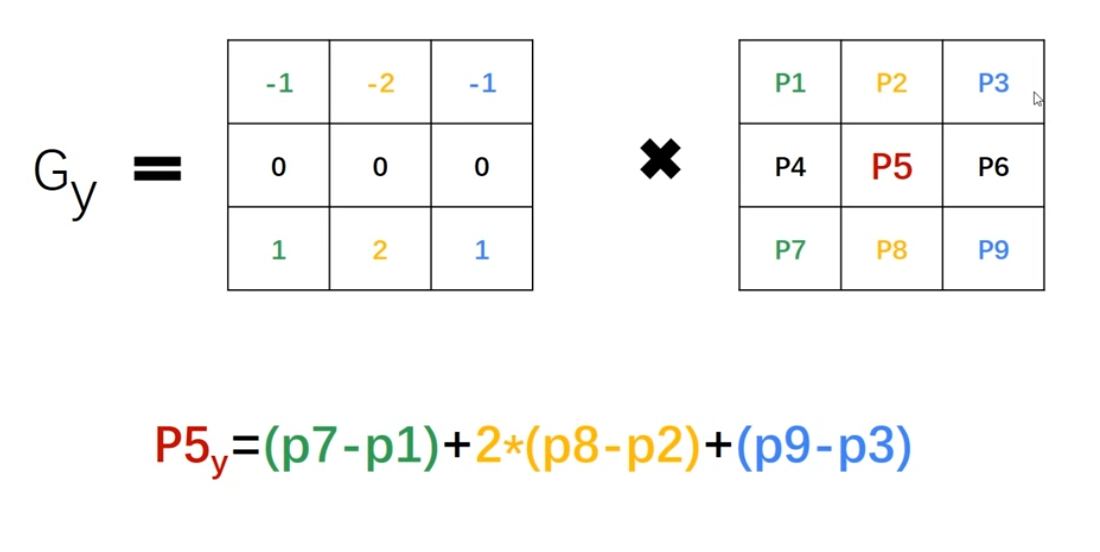
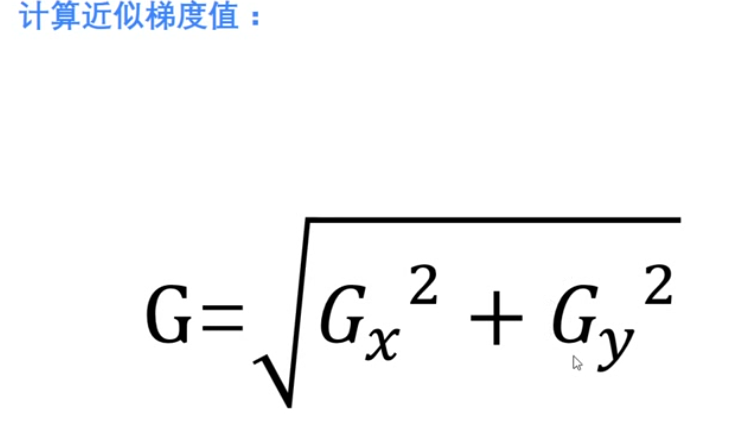
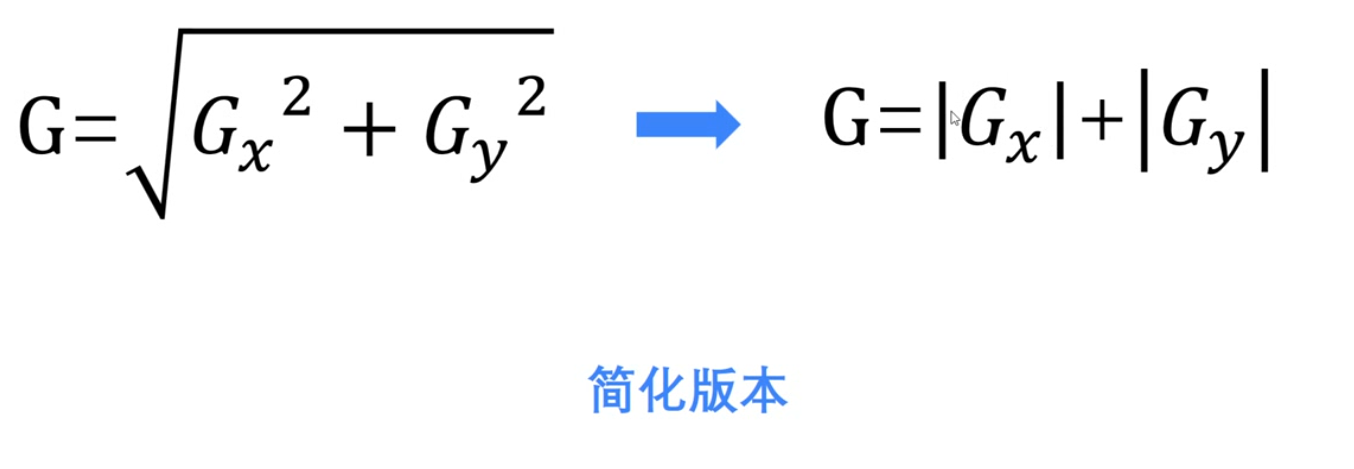
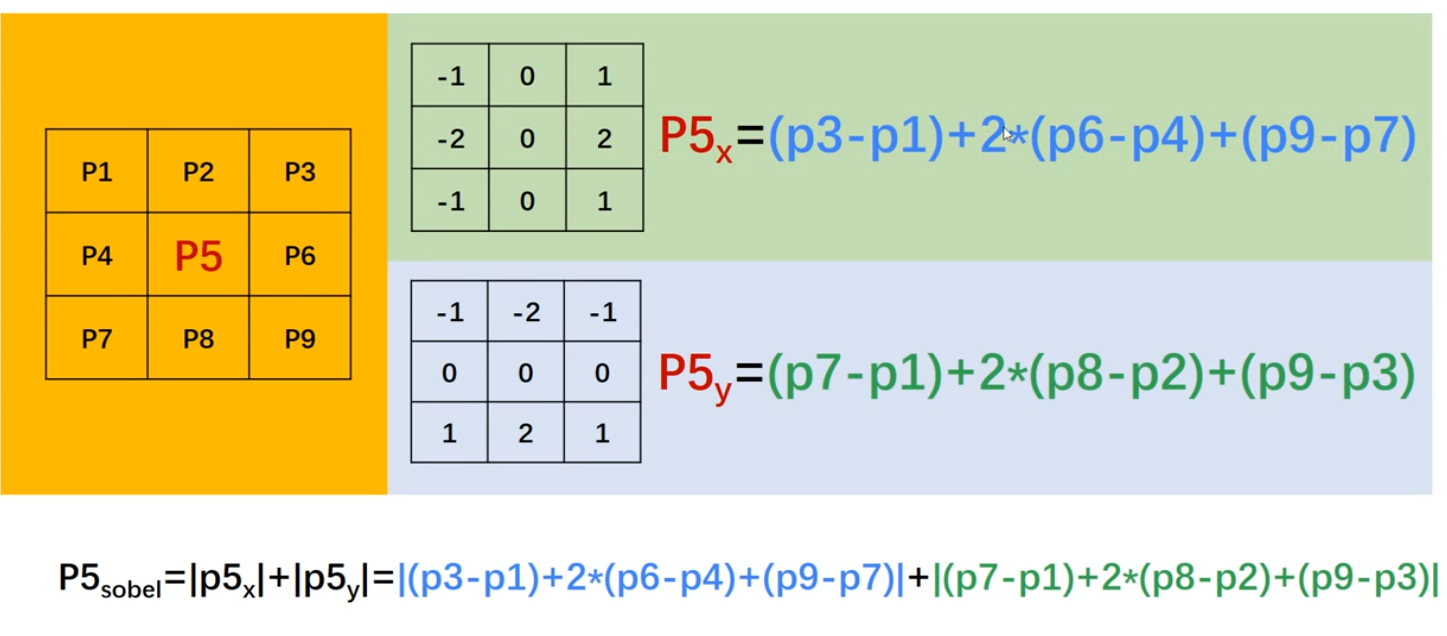
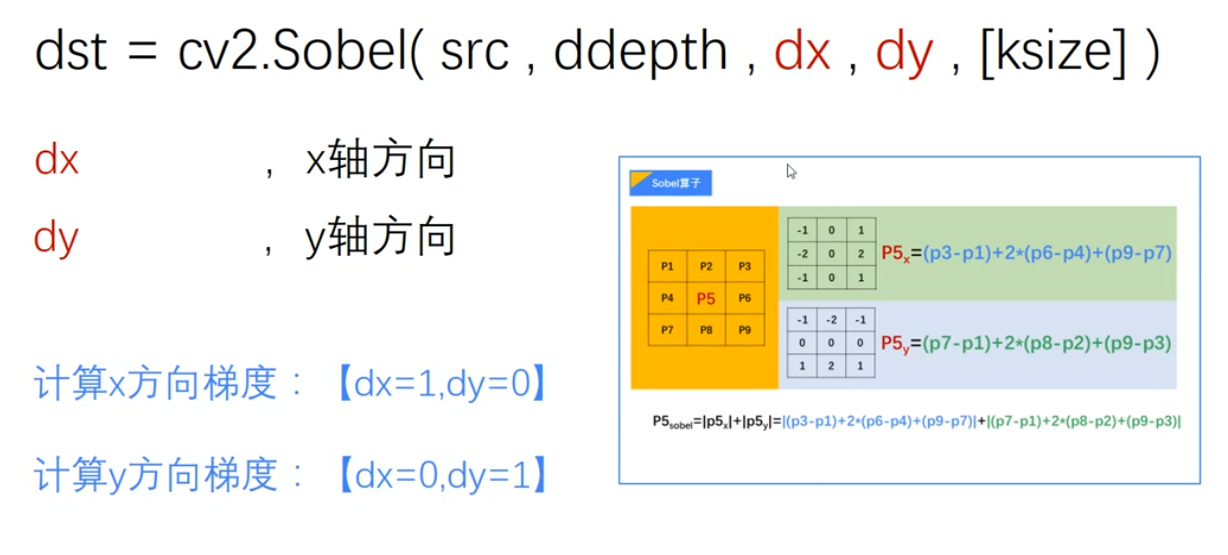
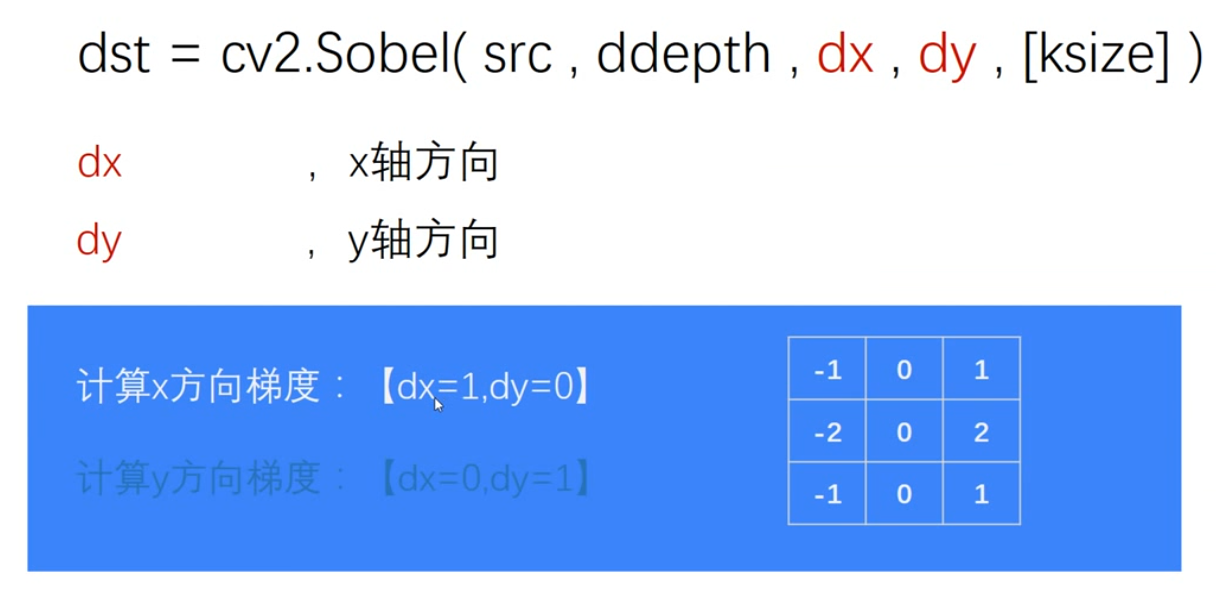
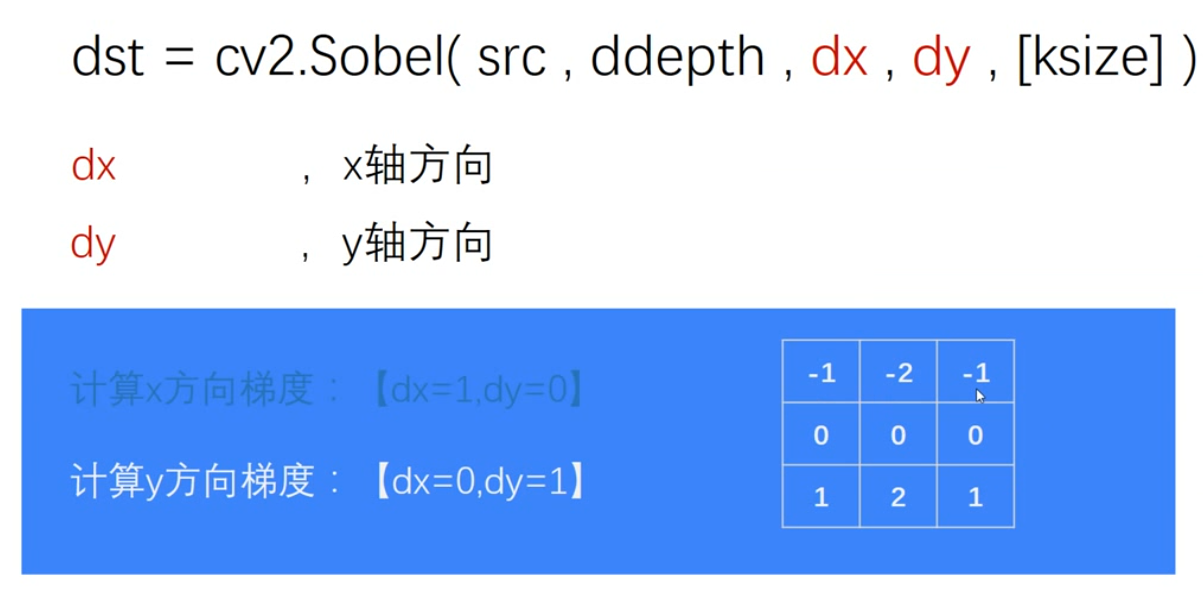
第27课:sobel算子及函数使用
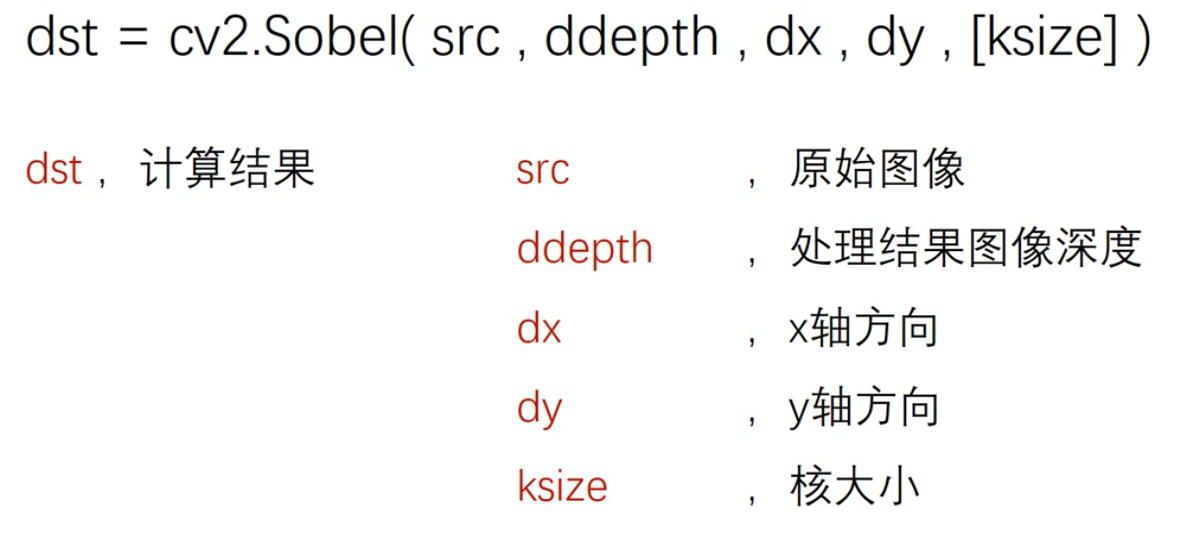
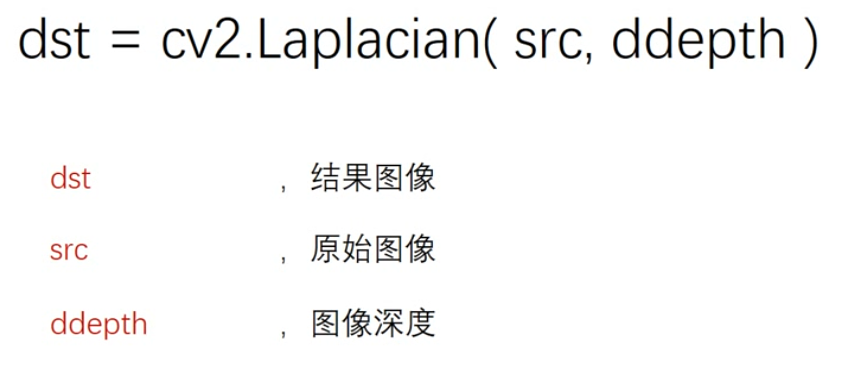
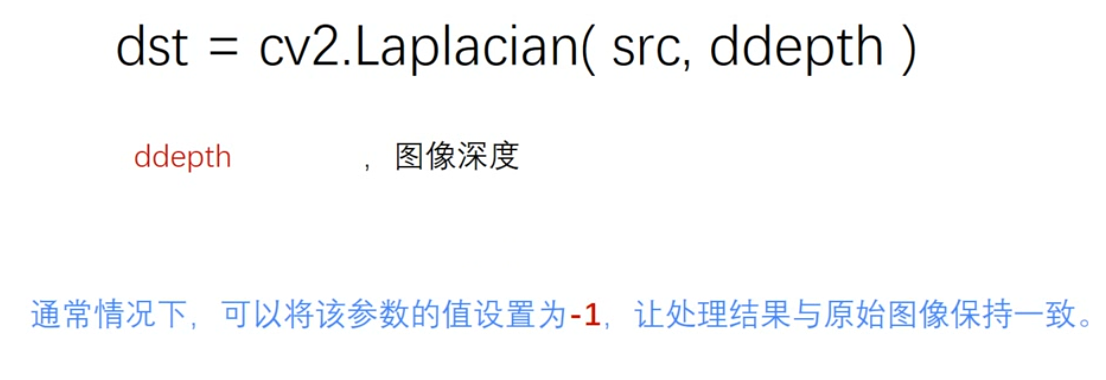
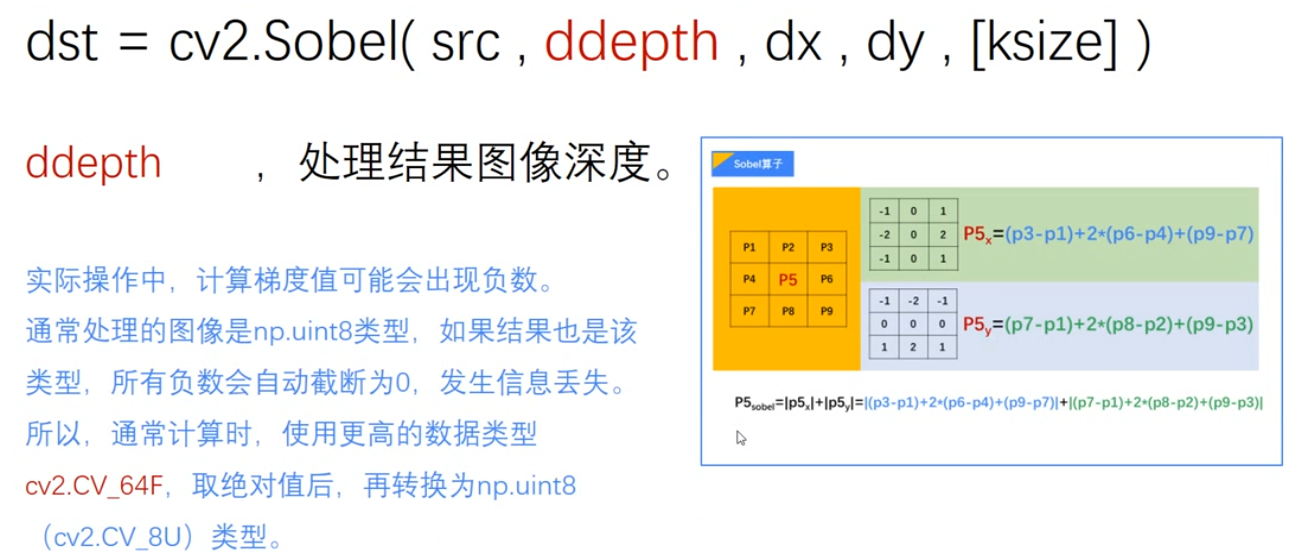
ddepth: 处理结果图像的深度
通常情况下,可以将该参数的值设为-1,让处理结果与原始图像保持一致

import cv2
img = cv2.imread('./img/man.bmp')
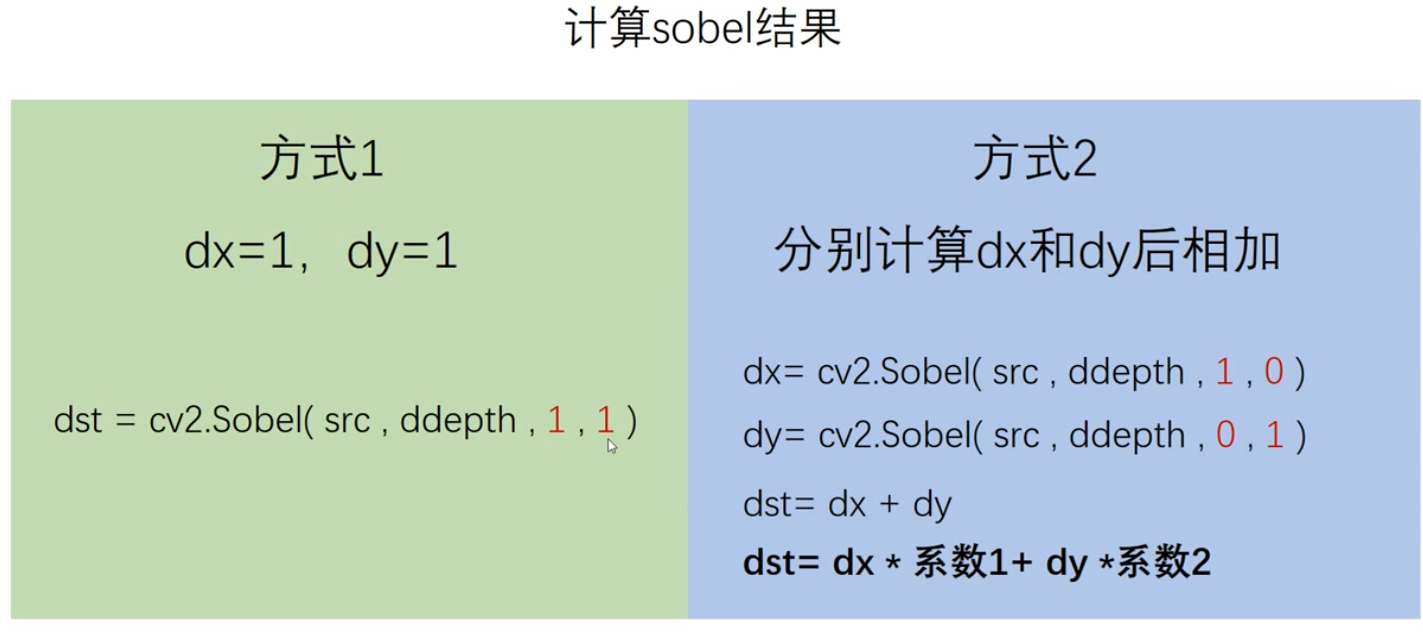
sobelx = cv2.Sobel(img, cv2.CV_64F, 1, 0)
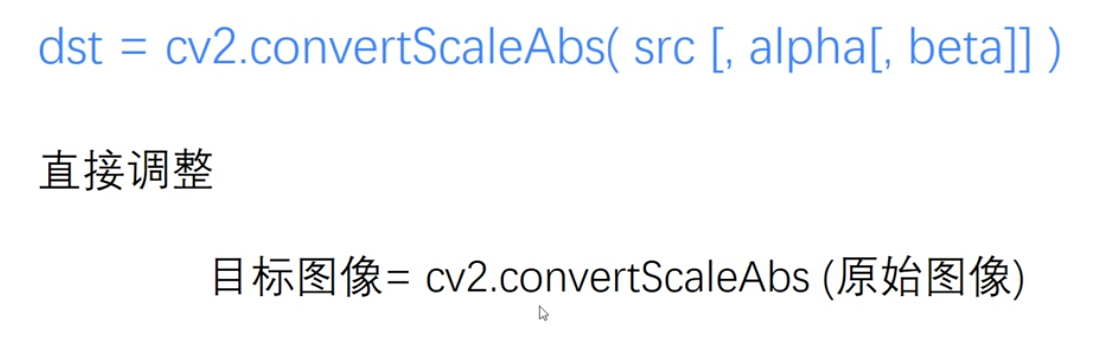
sobelx = cv2.convertScaleAbs(sobelx)
sobely = cv2.Sobel(img, cv2.CV_64F, 0, 1)
sobely = cv2.convertScaleAbs(sobely)
output_img = cv2.addWeighted(sobelx, 0.5, sobely, 0.5, 0)
cv2.imshow('original', img)
cv2.imshow('output image', output_img)
cv2.waitKey()
cv2.destroyAllWindows()
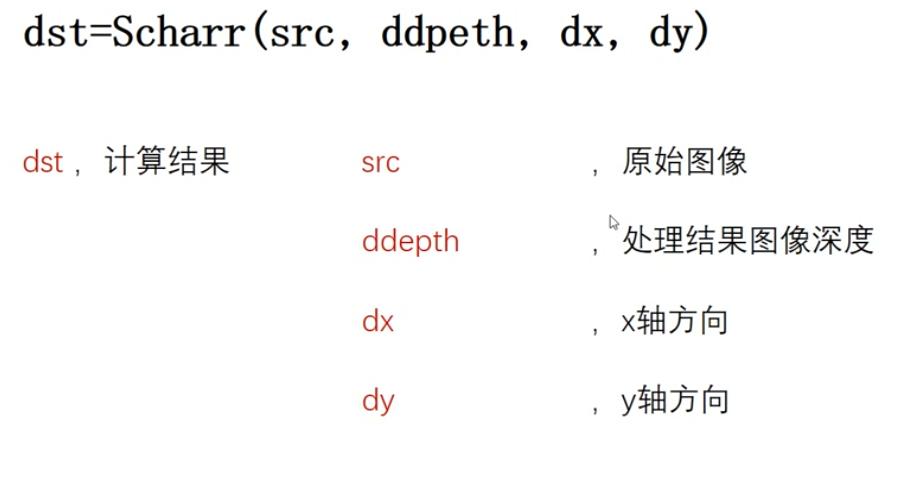
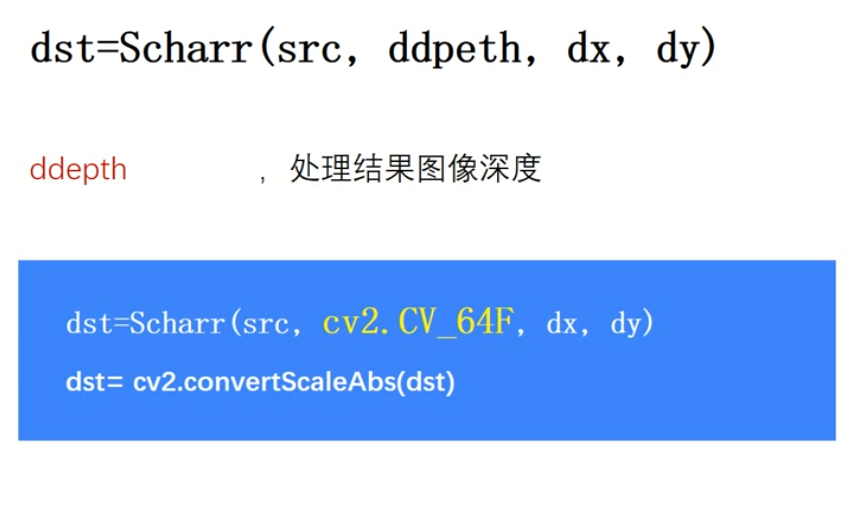
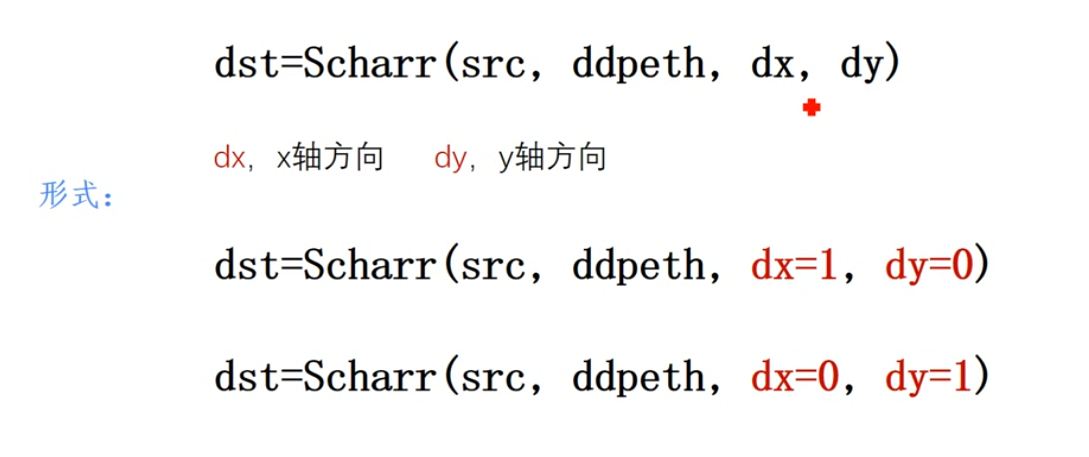
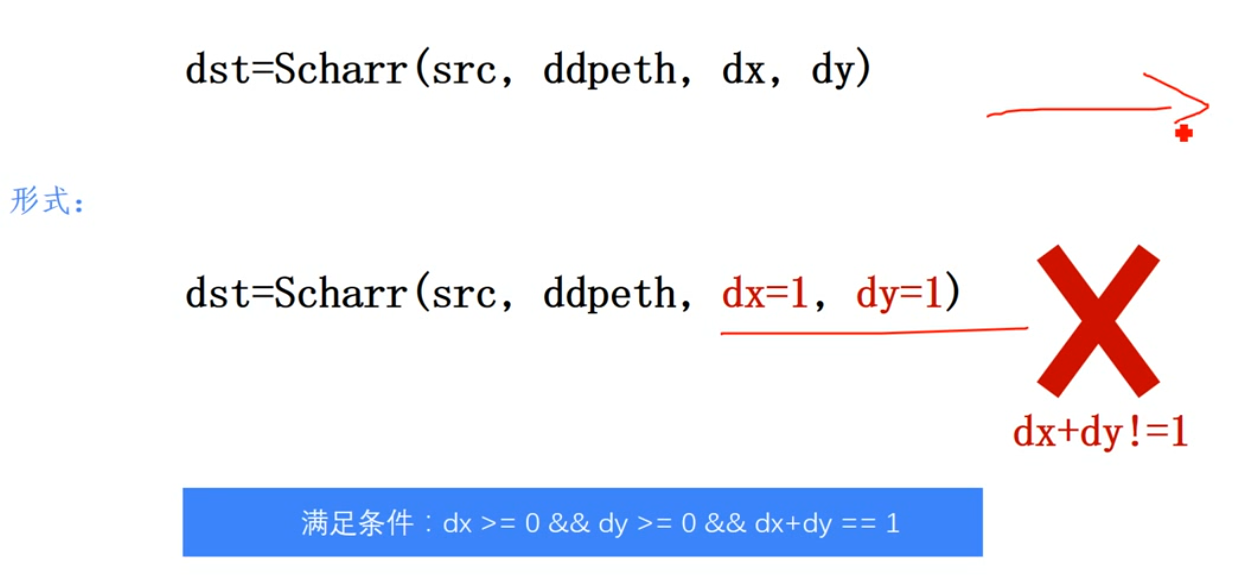
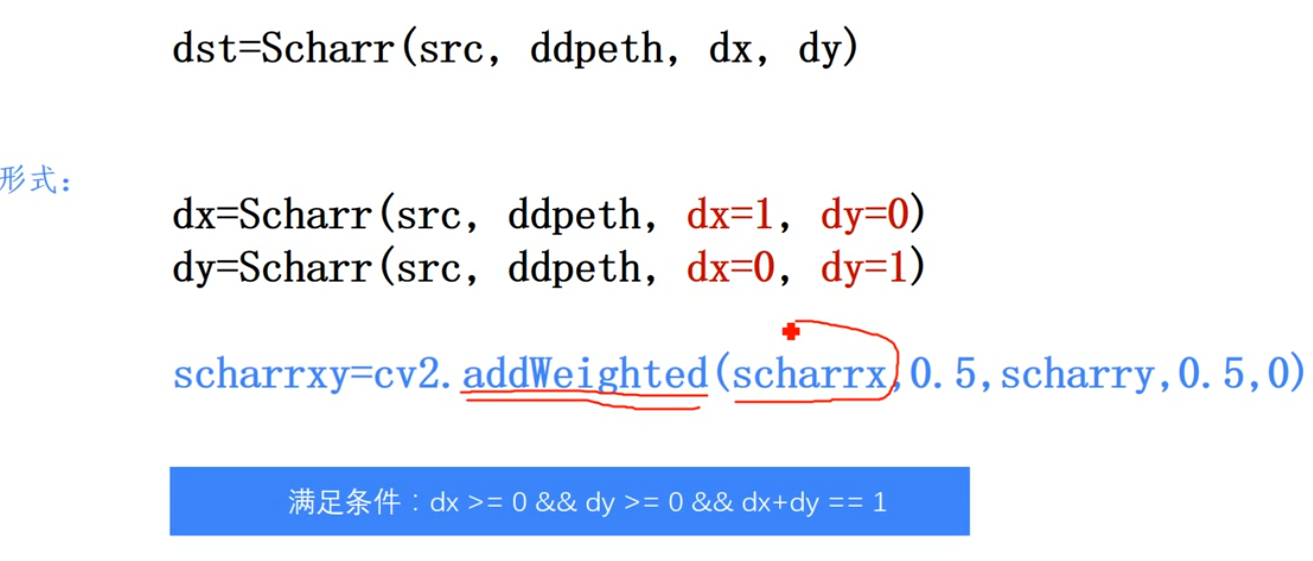
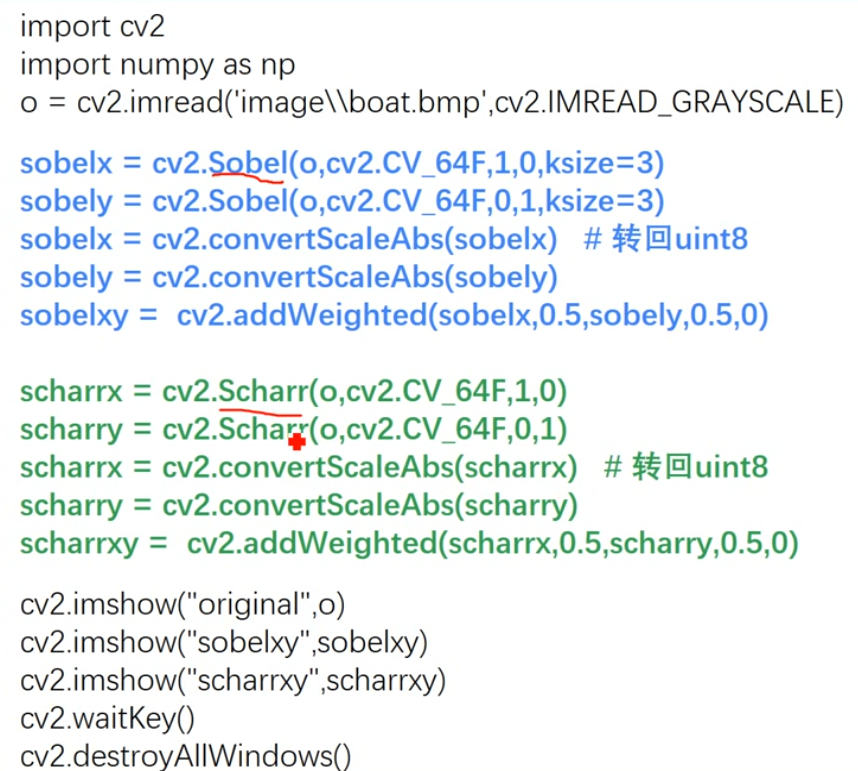
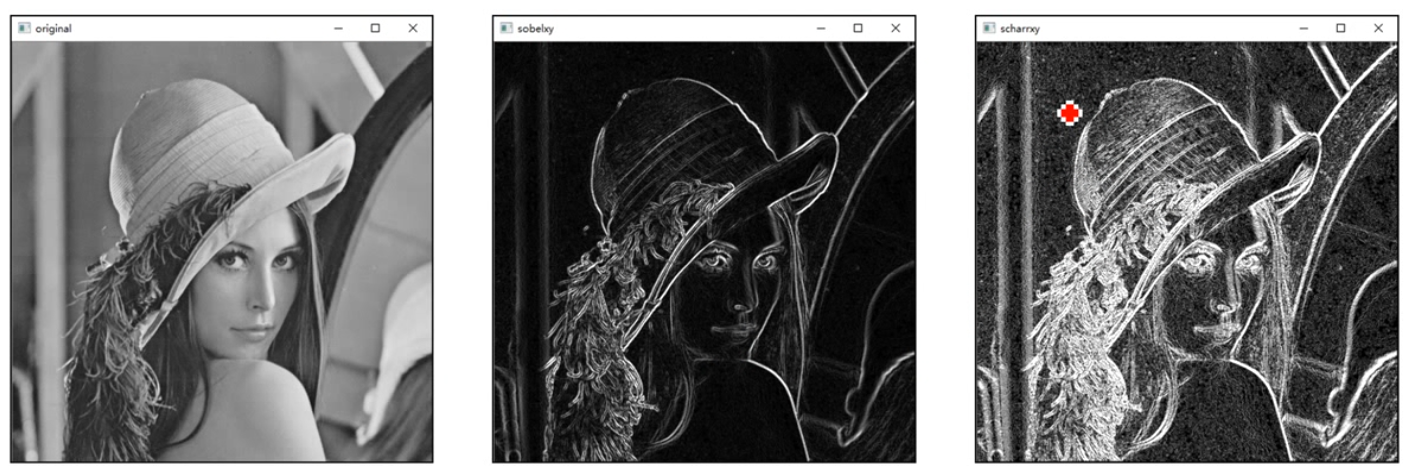
第28课:scharr算子函数及其使用

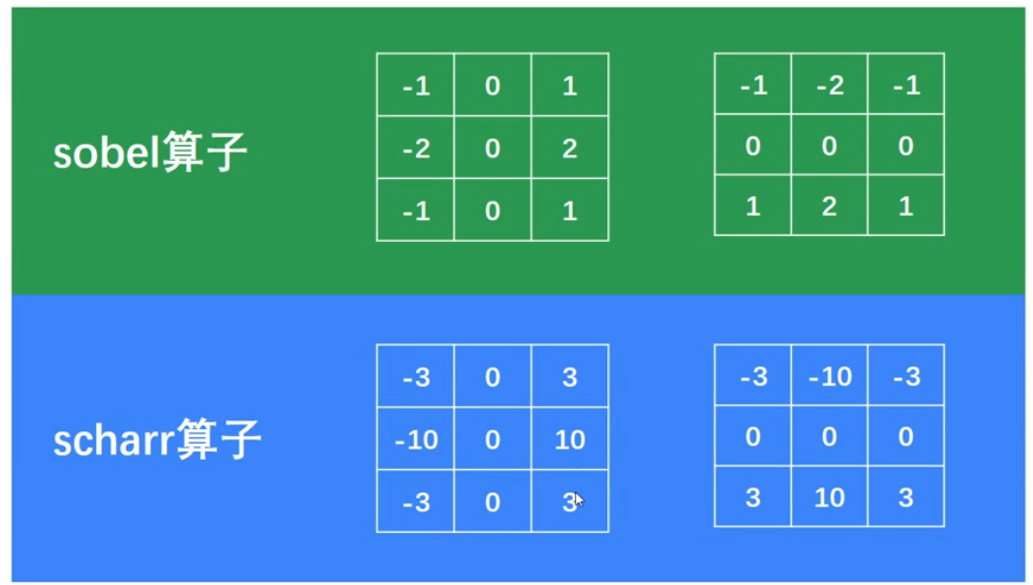
第29课:sobel算子和scharr算子的比较

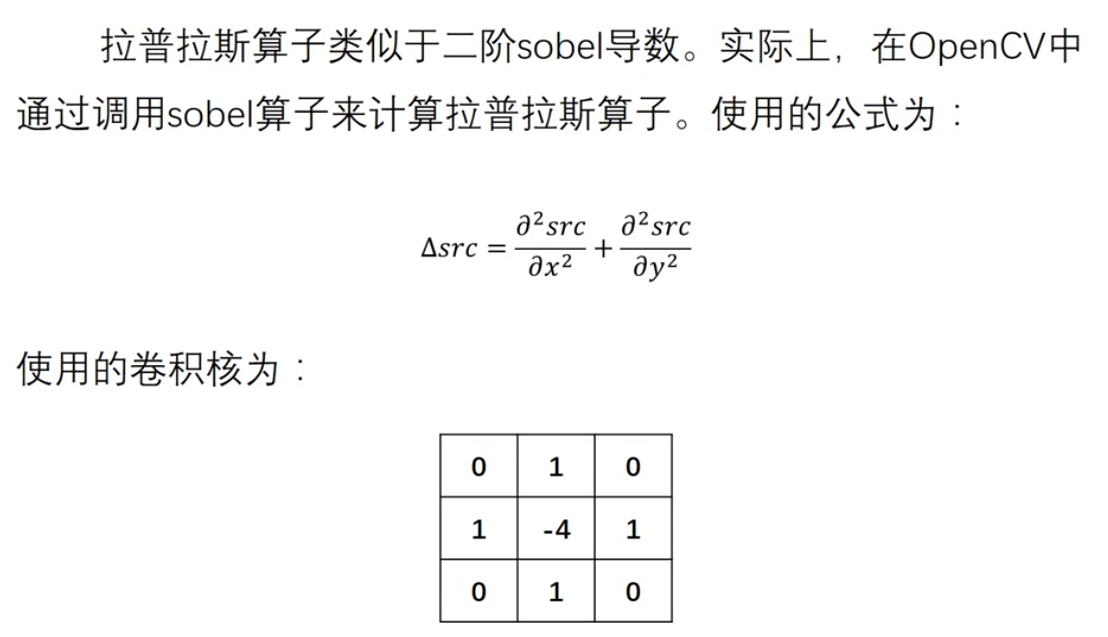
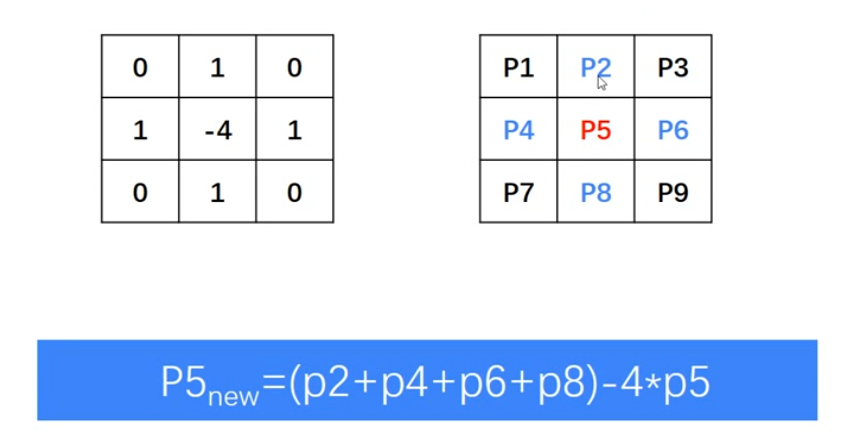
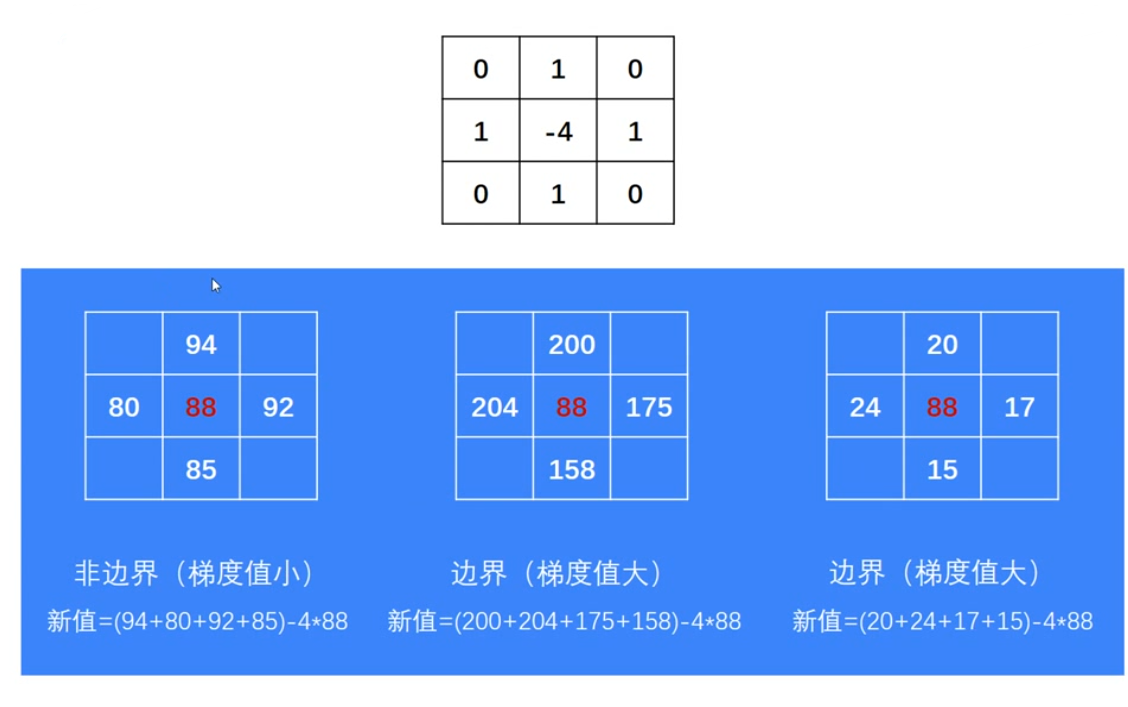
第30课:laplacian算子及使用