指令的封装转自https://blog.csdn.net/sinat_21902709/article/details/86545444
可拖拽dialog应用于很多弹出框,所以需要作用于全局
在插件文件夹中创建一个文件dialogDrag存放公共的指令

import Vue from "vue";

// v-dialogDrag: 弹窗拖拽属性
Vue.directive("dialogDrag", {
  bind(el, binding, vnode, oldVnode) {
    const dialogHeaderEl = el.querySelector(".el-dialog__header");
    const dragDom = el.querySelector(".el-dialog");
    //dialogHeaderEl.style.cursor = 'move';
    dialogHeaderEl.style.cssText += ";cursor:move;";
    dragDom.style.cssText += ";top:0px;";

    // 获取原有属性 ie dom元素.currentStyle 火狐谷歌 window.getComputedStyle(dom元素, null);
    const sty = (function() {
      if (window.document.currentStyle) {
        return (dom, attr) => dom.currentStyle[attr];
      } else {
        return (dom, attr) => getComputedStyle(dom, false)[attr];
      }
    })();

    dialogHeaderEl.onmousedown = e => {
      // 鼠标按下,计算当前元素距离可视区的距离
      const disX = e.clientX - dialogHeaderEl.offsetLeft;
      const disY = e.clientY - dialogHeaderEl.offsetTop;

      const screenWidth = document.body.clientWidth; // body当前宽度
      const screenHeight = document.documentElement.clientHeight; // 可见区域高度(应为body高度,可某些环境下无法获取)

      const dragDomWidth = dragDom.offsetWidth; // 对话框宽度
      const dragDomheight = dragDom.offsetHeight; // 对话框高度

      const minDragDomLeft = dragDom.offsetLeft;
      const maxDragDomLeft = screenWidth - dragDom.offsetLeft - dragDomWidth;

      const minDragDomTop = dragDom.offsetTop;
      const maxDragDomTop = screenHeight - dragDom.offsetTop - dragDomheight;

      // 获取到的值带px 正则匹配替换
      let styL = sty(dragDom, "left");
      let styT = sty(dragDom, "top");

      // 注意在ie中 第一次获取到的值为组件自带50% 移动之后赋值为px
      if (styL.includes("%")) {
        styL = +document.body.clientWidth * (+styL.replace(/\%/g, "") / 100);
        styT = +document.body.clientHeight * (+styT.replace(/\%/g, "") / 100);
      } else {
        styL = +styL.replace(/px/g, "");
        styT = +styT.replace(/px/g, "");
      }

      document.onmousemove = function(e) {
        // 通过事件委托,计算移动的距离
        let left = e.clientX - disX;
        let top = e.clientY - disY;

        // 边界处理
        if (-left > minDragDomLeft) {
          left = -minDragDomLeft;
        } else if (left > maxDragDomLeft) {
          left = maxDragDomLeft;
        }

        if (-top > minDragDomTop) {
          top = -minDragDomTop;
        } else if (top > maxDragDomTop) {
          top = maxDragDomTop;
        }

        // 移动当前元素
        dragDom.style.cssText += `;left:${left + styL}px;top:${top + styT}px;`;
      };

      document.onmouseup = function(e) {
        document.onmousemove = null;
        document.onmouseup = null;
      };
    };
  }
});
在main.js文件中引入公共指令
// 引入自定义指令
import "./plugins/dialogDrag/directives";
然后直接就可以在组件中使用
<!--直接使用 自定义指令  v-dialogDrag-->
<template>
  <div id="addExpressDialog"
       v-show="isShowExpressDialog"
       v-dialogDrag>
    <el-dialog :visible.sync="isShowExpress"
               class="dialog_container"
               center>
      <div slot="title"
           class="dialog-title">
        {{title}}
      </div>
      <div class="dialog_content">
        内容
      </div>
    </el-dialog>

  </div>
</template>
<script>
import Vue from 'vue'
import { Dialog } from 'element-ui'
Vue.use(Dialog)
export default {
  name: 'addExpressDialog',
  props: {
    title: {
      type: String
    },
    isShowExpressDialog: {
      type: Boolean,
      default: false
    },
    dialogType: {
      type: String
    }
  },

  data() {
    return {}
  },
  mounted() {},
  computed: {
    isShowExpress: {
      get() {
        return this.isShowExpressDialog
      },
      set(v) {
        this.$emit('closeExpressDialog', v)
      }
    }
  },

  watch: {},
  methods: {}
}
</script>
<style lang="scss">
.v-modal {
  z-index: 0 !important;
}
#addExpressDialog {
  .el-dialog {
     431px;
    height: 222px;
    position: relative;
    margin: 0 auto;
    margin-top: 0px !important;
    margin-bottom: 0px !important;
    background: url('../../../../assets/images/sysinformation/bg_popup_del.png')
      no-repeat;
    .el-dialog__header {
      padding: 5px 0px 0px 0px;
      .el-dialog__headerbtn {
        top: 5px;
      }
    }
  }
}
</style>
<style lang="scss" scoped>
#addExpressDialog {
  position: fixed;
  height: calc(100% - 80px);
  top: 80px;
  bottom: 0px;
  left: 0px;
  right: 0px;
  z-index: 9999 !important;
  .dialog_container {
    height: calc(100% - 80px);
    top: 80px !important;
    overflow: hidden;
    .dialog-title {
      color: rgba(255, 255, 255, 1);
    }
  }
}
</style>
简单效果图
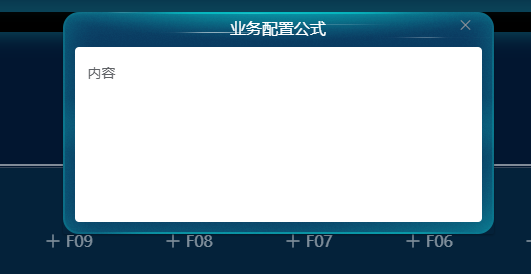
可以拖拽